How to Network Windows 10 and OS X and Share Files

Sharing files between Windows and OS X used to be a headache. Now with Windows 10 and the newest versions of OS X, the process has become much easier.
A decade ago, it was a headache trying to get Windows and OS X to talk to each other. Our previous article showed you how to set up a network between OS X Snow Leopard and Windows 7. Since then, things have gotten easier, especially with Windows 10 and OS X El Capitan. There are many options available, which include file syncing and using external storage mediums. Setting up a peer-to-peer network is also an option. Let’s look at that.
Set up a Network Between OS X El Capitan and Windows 10
Before you begin, check to make sure both operating systems are updated. On OS X, head to the Apple menu > App Store > Updates to ensure it’s up-to-date.
Also, check to make sure your network adapters are functioning correctly. In Windows 10, press Windows key + X then click Device Manager. Expand Network Adapters; if there is no exclamation sign, then you are ready to go.

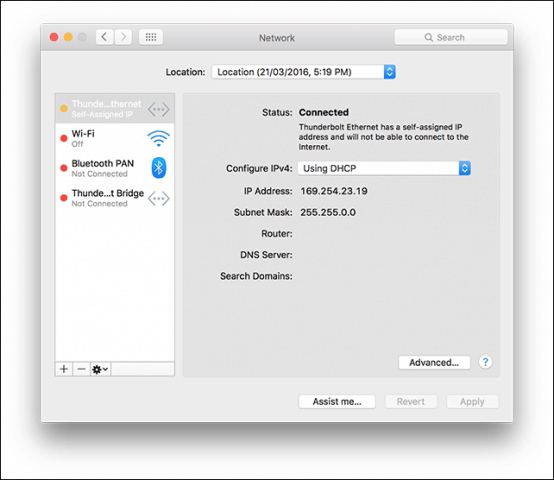
In OS X, launch System Preferences > Network and click your network connection.
Enable File Sharing and Network Discovery
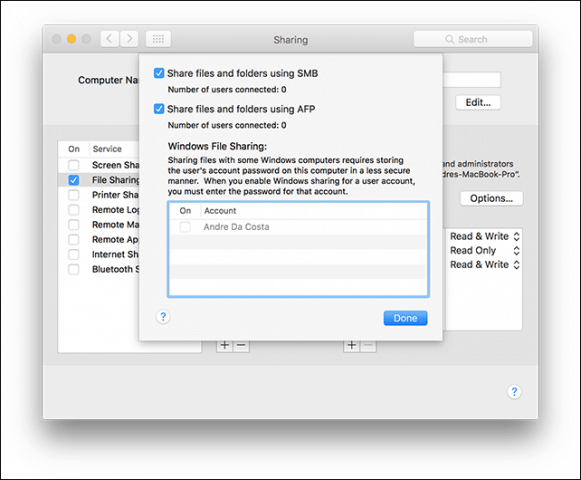
Before you can browse each computer, you’ll need to enable the ability for both Windows 10 and OS X to see each other. In OS X, launch System Preferences > Sharing > check off File Sharing. Click Options, then check off your user account. If you are unable to do this, your iCloud account might be preventing it. See instructions further down in this article on how to troubleshoot this problem.
In Windows 10, click Start > File Explorer then click Network in the Navigation pane. Click Turn on Network Discovery and File Sharing.

Ethernet or Wireless
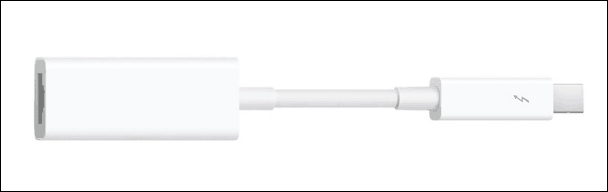
This article assumes you are using an Ethernet Connection which is the best way to enable things to work. All you need is a CAT5 cable to connect both computers. You can also use a basic network switch or router to connect both machines. Depending on the model of Mac you own, you might need to invest in an Apple Thunderbolt to Gigabit Ethernet Adapter; if there is no built-in Ethernet port. Most Windows computers come built-in with an Ethernet port; exceptions include Ultrabooks and a 2-in-1 device such as the Microsoft Surface.
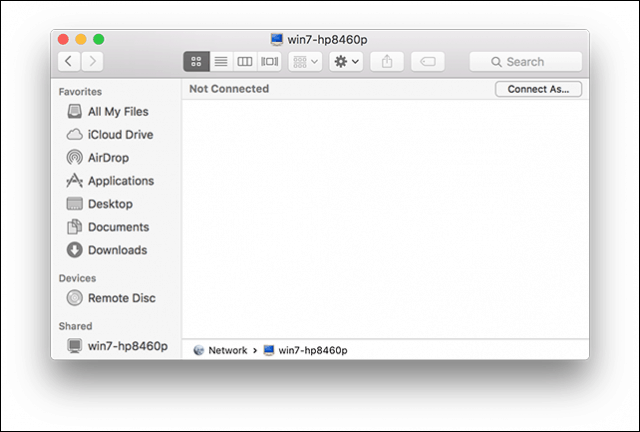
After connecting both systems, launch the Finder or press Shift + Command + K to open the network folder. Your Windows 10 PC should automatically be mounted. Double click it.

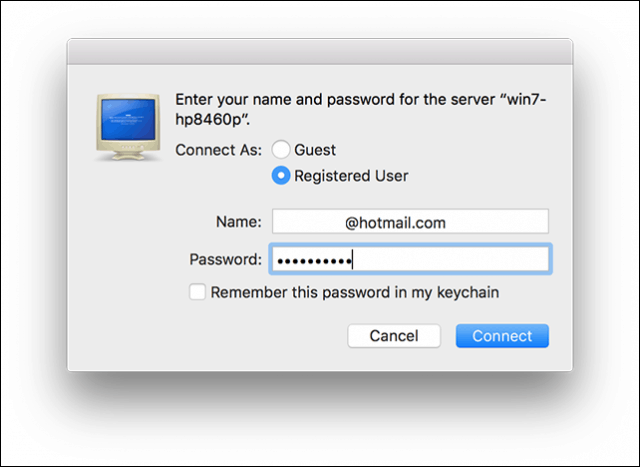
On the next screen, click the Connect As button.
Enter your Microsoft Account and password, then click Connect.
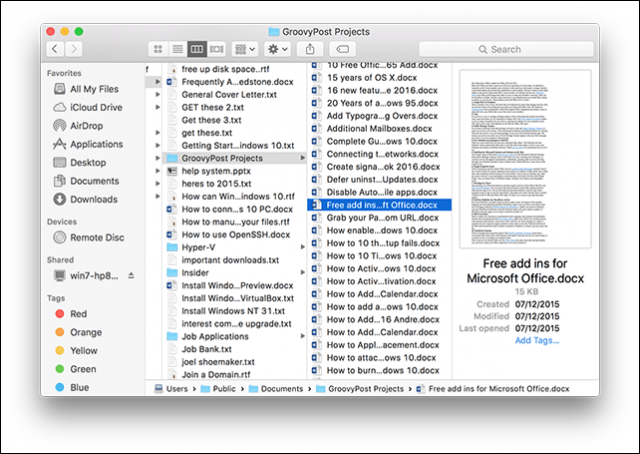
Automatically, your Personal Folders and any other shared folders are mounted in the Finder.

You can proceed to browse and copy files.
Connect to OS X El Capitan from Windows 10
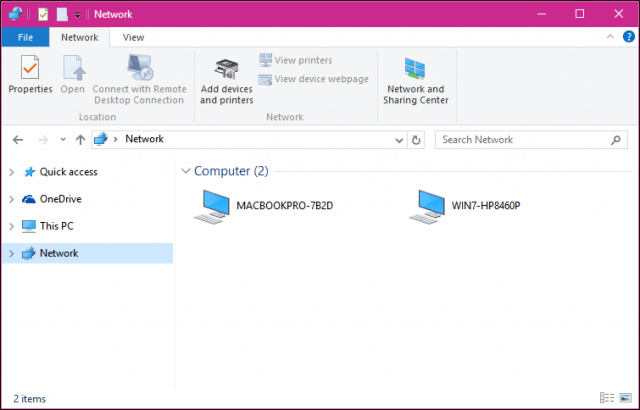
Click Start > File Explorer > Network. Double-click the Mac icon, and then log in.
If you cannot log in, your iCloud account on the Mac might be preventing you from doing so. If you use your iCloud credentials to log into your Mac, it is unfortunately not compatible with Windows File Sharing for security reasons. The workaround for this is to change your account password.
Open System Preferences > Users & Groups > Change Password, click Use Separate Password.
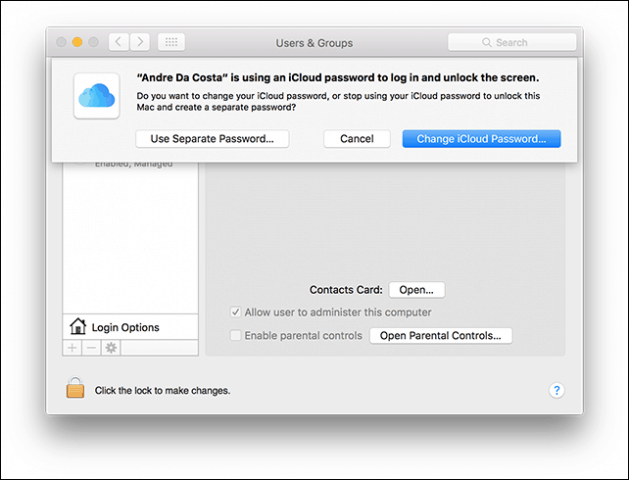
Enter a new password, confirm, restart your Mac and configure Windows File Sharing again. Launch System Preferences > Sharing > check off File Sharing > click Options, then check off the account you want to share files from.
Other Troubleshooting Steps
If you still don’t see the Mac, try connecting manually using the NETBIOS name. You can find this in the Network Preference on the Mac. Launch System Preferences > Network > Advanced > WINS tab.
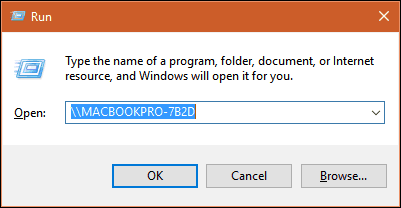
From your Windows PC, press Windows key + R then type the machine name then click OK. Enter your credentials; you should be able to access your resources.
There are still some wrinkles in the network experience between OS X and Windows, but it has certainly gotten better – both from the setup and troubleshooting side. I hope Apple modifies the iCloud password policy in future versions of OS X. I could log into my Windows PC from the Mac using my Microsoft Account credentials, so I don’t see why it can’t be the same for OS X.
Be sure to check out our other articles about file sharing:
- Sync Microsoft Office Documents Among iPad, PC, and Mac
- Connect Windows 10 to Wired, Wireless, and P2P Networks
- How to Map a Network Drive using Windows 10
- How to Join a Windows 10 PC to a Domain
- How to Share Files, Storage, Printers, and Other Items in Windows 10


Fenoy W Butler
March 25, 2016 at 8:34 pm
Tried your steps numerous times and each and every case it would come back with incorrect password. I can see the two computers on both the Windows 10 desktop and on my MBP but nothing is shared due to password failure and yet I know for a fact that the passwords are correct. Tried various workarounds but none were successful although I did not try changing the iCloud password. That became a bridge too far……..
Andre Da Costa
March 26, 2016 at 10:40 am
If you use an iCloud account with OS X, then you will be able to see the OS X machine from Windows, you just won’t be able to sign in.
If switching to a local password is too much, then creating another user account is the best option.
Other options include file syncing, you have many options to choose from which include iCloud, OneDrive or Dropbox.
Are you having problems connecting to the Windows machine from the Mac also? If you are, make sure both computers are in the same workgroup. The previous article about networking OS X Snow Leopard and Windows 7 shows you how to do that.
Fenoy W Butler
March 26, 2016 at 8:18 pm
My main cloud account is a 1TB OneDrive account and those files all synch automatically between my Windows desktop and the MBP as well as my Windows Phone. I also have small accounts with iCloud and Dropbox but I used those on a very limited basis as OneDrive is my primary cloud source.
I just find it really odd that I follow your steps exactly and everything happens just as you state – (shift cmd k) and I can see my desktop. However after double clicking on it when I enter my Microsoft Live password in the dialog box on the MBP to synch the dialog box shakes and nothing transpires. It is almost as if it is looking for a password other than my MS Live password but I haven’t a clue as to what that might be. I’ve made repeated attempts using various approaches but it is a no go and in any case it was just an exercise to try so I’ll not lose any sleep over the issue. I use my desktop as my primary computer and the MBP is just for travel.
In any case thanks for your reply and best wishes.
Andre Da Costa
March 27, 2016 at 6:16 am
Instead of entering your Microsoft Account email address, enter your account name instead. ‘John Dough’ and your password.
Fenoy W Butler
March 27, 2016 at 7:22 am
I’ve tried that on several occasions as well with the same results. In fact that is the way it defaults on the MBP and was what I initially tried. After that failed I then tried adding my email address but the results were the same.
Andre Da Costa
March 27, 2016 at 7:32 am
Do the following on the Windows 10 computer:
Press Windows key + X
Click Computer Management
Expand Local users and groups, click Users
Is the Name the same as the one you are using to authenticate? I noticed mine was Andi, but the full name is Andre Da Costa.
When I entered Andi and the password, I was also able to log in.
Also make sure you have configured Public Folder sharing on the Windows machine in Network and Sharing Center.
See instructions from our previous article:
https://www.groovypost.com/howto/connect-netowrks-windows-10/
Fenoy W Butler
March 27, 2016 at 7:50 am
Under Computer Management there is no “Local users and groups.”
On my system under Computer Management I have:
System Tools
Task Scheduler
Event Viewer
Shared Folders
Performance
Device Manager
Storage
Disk Management
Services and Applications
Services
WMI Control
Andre Da Costa
March 27, 2016 at 5:28 pm
You must be running Windows 10 Home.
Press Windows key + R
Type: control userpasswords2
Hit Enter
Select your user account under ‘Users for this computer’
Click Properties
What is the user name displayed?
Try using that to log in from the Mac.
Mike Casini
June 4, 2019 at 12:50 pm
crazy as it seems, this actually works! The username was what is actually the network password!
I would have never tried this, but it does give me complete access to the win 10 computer —
I cannot, however, see the Mac in all windows 10 computer network views — uncertain as to why.
It is also quite easy to log onto the Mac from boxes running linux–both ubuntu and fedora –
Thanks for the tip I am still working on figuring out the ins and outs of cross OS networking!
Fenoy W Butler
March 27, 2016 at 5:38 pm
I am using Windows 10 Home on the desktop and OS 10.11.3 on the MBP. Running the “control userpasswords2” on the desktop gives me exactly the user name that I am using to log in on the Mac and I am using the correct password that goes with that user name. Mystery!!!
Andre Da Costa
March 27, 2016 at 5:44 pm
The Mac I used to test this was updated to 10.11.4, but I doubt that could be it since networking between the two platforms has been solid for a while.
Check the Advanced File sharing options again in Windows under Network and Sharing Center to make sure Public folder sharing is enabled and File Sharing is enabled.
Also, open System Preferences on the Mac and open Sharing, select File Sharing > Options and make sure SMB and AFP are checked.
You could also try setting up a non-iCloud account just to try and see if it works.
Fenoy W Butler
March 27, 2016 at 6:19 pm
I was not aware that 10.11.4 had been released so I will check on that update although like you I can’t imagine that is the issue. SMB and AFP are checked on the MBP. I’m leery of turning on file and printer sharing in the “public profile.” That is, by default, turned off and I seem to recall reading in some discussion that it should remain off.
I’m unclear as to what you mean by setting up a non-iCloud account to try and see if it works. I have OneDrive and Dropbox accounts.
Fenoy W Butler
March 27, 2016 at 6:21 pm
I should have noted that the Public folder sharing is turned on.
Alex Cap
August 31, 2016 at 1:42 am
I am able to access both computer’s files when using wifi (mobile hotspot), but files transfer at, well, wifi speeds, not Gb speeds. So I turned off mobile hotspot and the LAN gets disconnected. It’s suddenly as if the ethernet cable isn’t even there.
Any ideas?
Jon
October 27, 2016 at 9:41 am
Worked a treat… thanks for sharing… finally can move some 3D rendered animations much more easily ( a quick slap dash network is working a treat).
Christopher
November 30, 2016 at 7:02 am
When trying to log in from the Windows 10 Machine to the mac, I always get “incorrect username and password”. All my network settings on the mac are configured correctly, Windows can “see” the mac device, I can even connect to the mac VPN successfully. But anytime I try to open the drive itself, incorrect username and password. I have tried using a special username made for me on the mac as well as the admin name and password, still nothing. We do not use an icloud account on the mac, and all other windows machines on our network(sans other windwos 10 users) can connect to it just fine.
Thoughts?
Scourge
January 28, 2018 at 8:47 am
Upgraded to OSX HighSierra and my Macmini no longer read my exFat backup drives. Needed files on the drives to be backed up on Mac. Your method worked for connecting HighSierra to Windows 10 via ethernet cable. Thanks a bunch.