How to Change the Time Zone in Microsoft Outlook

If you’re a global traveller, you might want your emails to sync with your current time zone. To change the time zone in Outlook, follow this guide.
If you travel to different locations around the globe, you may want to change the time zone in Microsoft Outlook. It’s a good idea to do this if you need your mail in Outlook to sync with oversea colleagues, too.
Microsoft Outlook on your desktop and Outlook on the web allow you to change your time zone with built-in settings. The process is straightforward and only involves a few changes within your calendar options.
If you want to change the time zone in Microsoft Outlook, follow the steps below.
How to Change the Time Zone in Microsoft Outlook on PC or Mac
First, we’ll look at how to change the time zone in the Microsoft Outlook desktop app. This time management option is helpful when traveling to a new location to ensure easier project management with colleagues. It also helps when communicating with family and friends while traveling abroad.
To change the time zone in the Outlook desktop app:
- Launch the Outlook app on the desktop.
- Click the File tab in the top left corner of the Ribbon.

- Click Options from the bottom of the left sidebar.

- Select the Calendar option from the left sidebar under the Outlook Options screen when it appears.

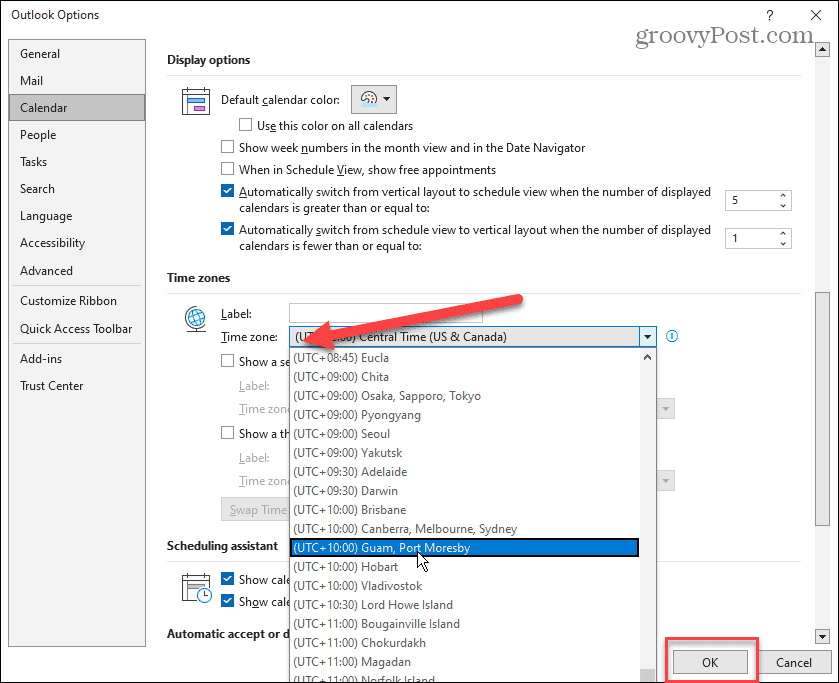
- While still in the Outlook Options window, scroll down to the Time Zones section.
- From the Time zone dropdown menu, select the new time zone you want to use.

- After selecting the new time zone that you want to use, click the OK button at the bottom of the screen to lock it in.


How to Change Time Zone in Outlook Online
If you prefer the web version of Outlook or want to ensure the time zone syncs with the desktop version, you can change it.
To change the time zone in Outlook on the web:
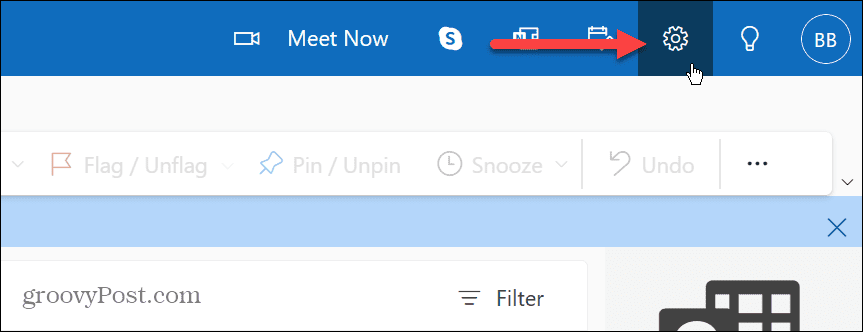
- Open the web version of Outlook and log in with your Microsoft account if you aren’t already.
- Click Settings (the gear icon) in the top right corner of the screen.

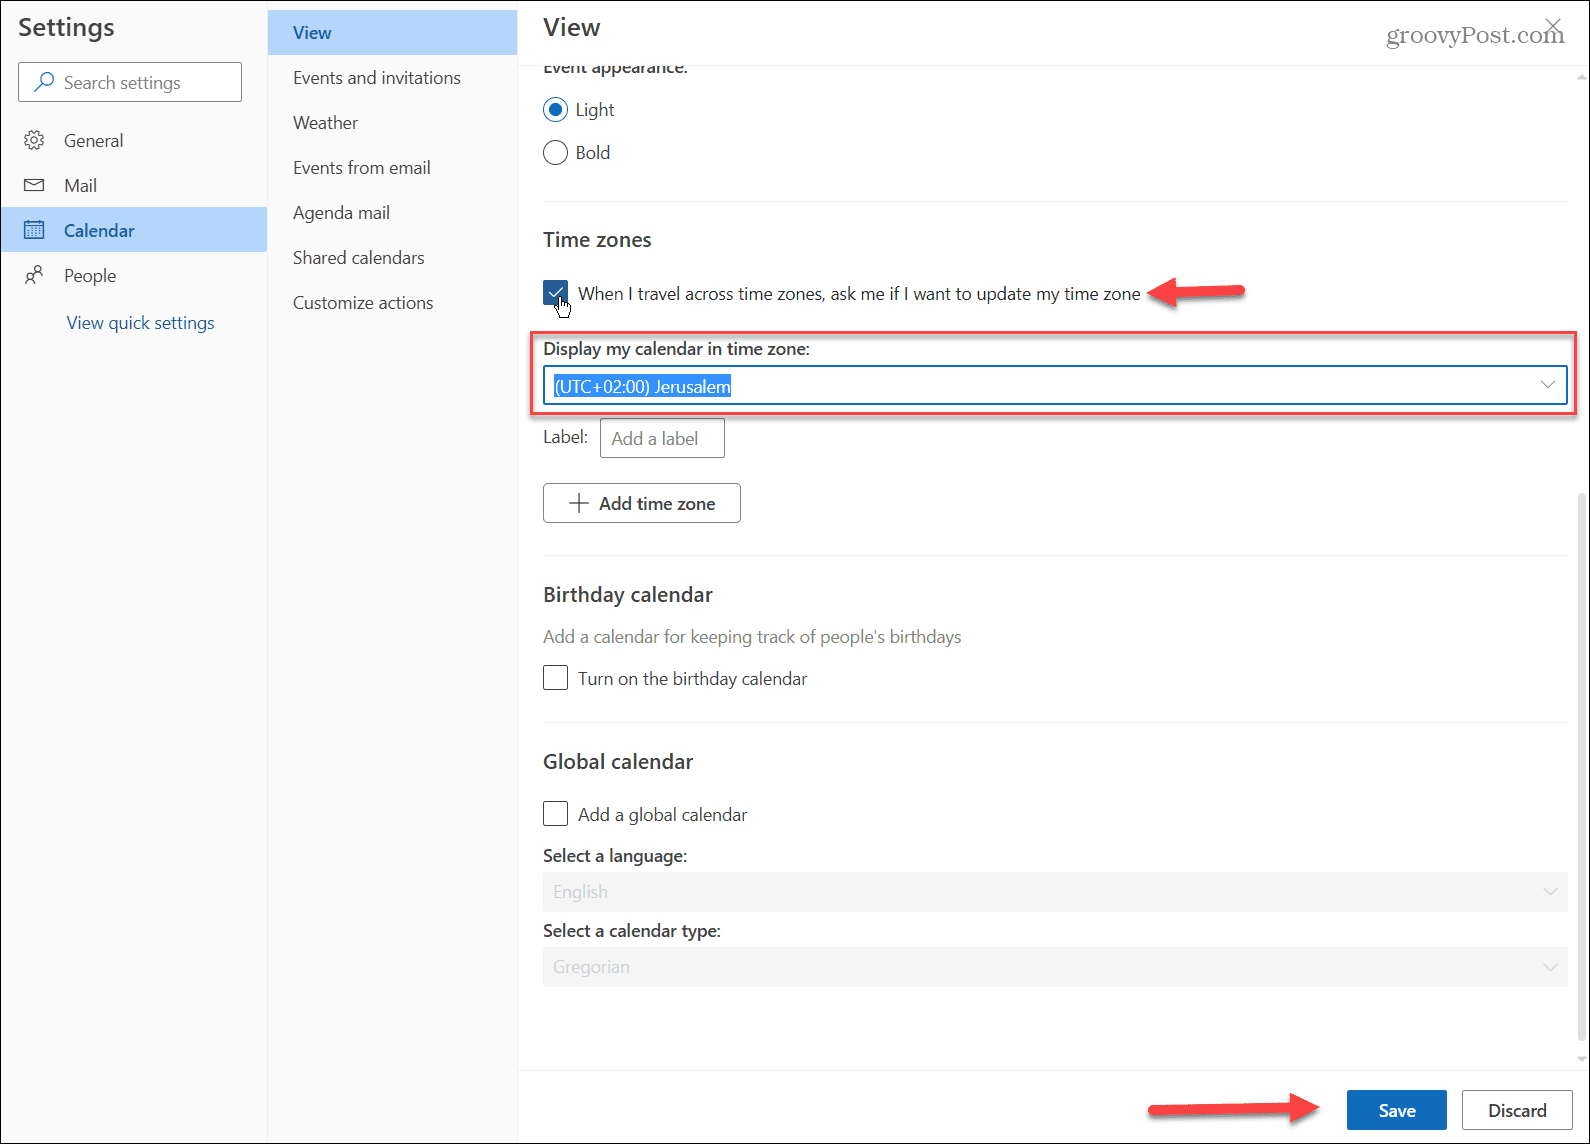
- Scroll down the right sidebar and click the View all Outlook settings link.

- Select Calendar > View from the left sidebar.

- Scroll down the View column on the right. Select the time zone you want from the dropdown menu under the Display my calendar I time zone section.
- If you want Outlook to remind you when you’re traveling across time zones, click the When I travel across time zones, ask me if I want to update my time zone option.
- After you’ve changed the time zone settings for Outlook on the web, make sure that you click the Save button in the bottom right corner.

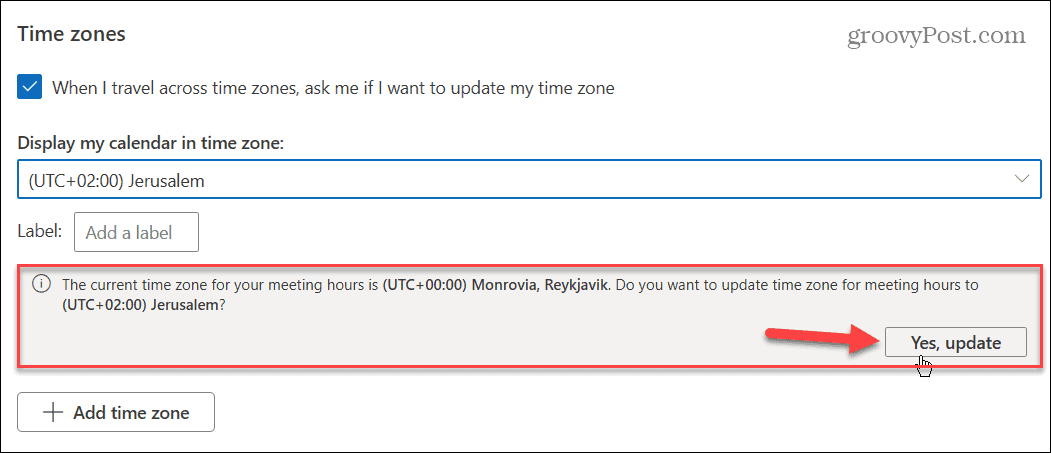
- After clicking the Save button, Outlook will give you a verification message about updating meeting times. Click the Yes, update button if you are sure you want to make the changes.


After following the above steps, Outlook will display your emails, meetings, and calendar events, in the updated time zone you selected.
Staying Productive in Microsoft Outlook
It’s easy to change the time zone in Microsoft Outlook to keep up with global business partners or friends and family members who live abroad. And the better news is you can do it on both the desktop and web versions of Outlook. Just by following the above steps.
For more on managing time zones in Outlook, check out how to add an extra time zone to Outlook Calendar. And if you want to change time zones on other platforms, take a look at changing the time zone on Windows 11 or add extra clocks for different time zones. Or maybe you need to change the time zone on Discord.
If you aren’t on Windows 11 yet, note that you can change the time and date on Windows 10 or switch the time automatically based on location. And if you want the most accurate time possible, switch your system clock to atomic time.


