How to Change the Date and Time Zone on Windows 11

If you’ve just set up Windows 11 and you find that the time and date isn’t correct, here’s a quick look at how to fix it.
If the date and time on your PC is not correct, you can easily adjust it manually. Maybe you just got a new laptop to run Windows 11 and the time is off, or the time zone is not correct or perhaps you can’t reach the Microsoft NTP servers because of network issues. No matter the reason, here’s how to change the date, time, and timezone on Windows 11.
How to Change Windows 11 Date and Time
To adjust the date and time, right-click the clock on the taskbar and then click Adjust date and time.

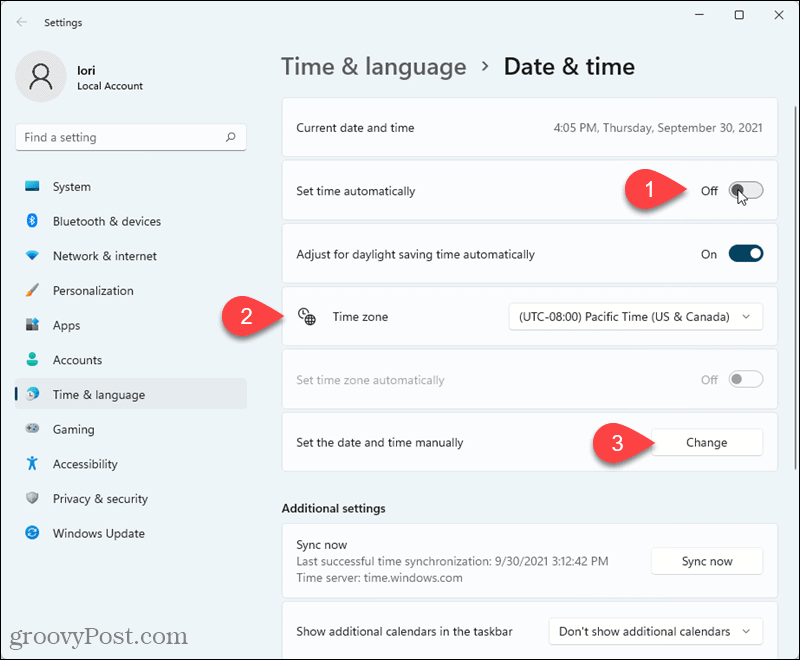
Then, click the Set time automatically slider button to turn it off. This enables other fields that allow you to change the date and time.
Select the Time zone you want from the drop-down list.
Then, click Change next to Set the date and time manually.
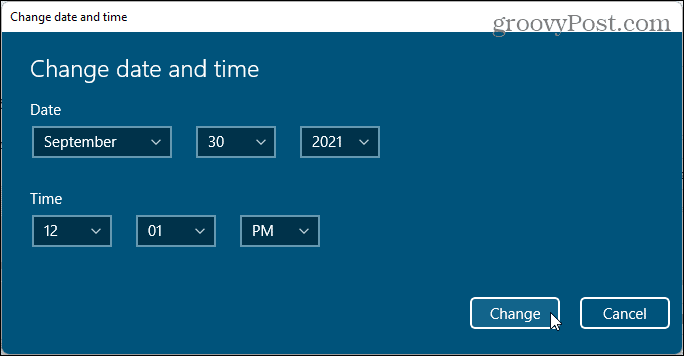
Use the drop-down lists to change each part of the Date and Time and click Change.
If you decide to let Windows set the date and time automatically again, go back into the Date & time settings and turn the Set time automatically slider button on.
Are you not yet running Windows 11? We’ve outlined the steps also for changing the date and time in Windows 10.


