How to Disable or Suspend BitLocker on Windows 11

BitLocker protects data on your drive, but it can also get in the way. Here’s how you can disable or suspend BitLocker on Windows 11.
Windows 11 Pro, Education, and Enterprise versions feature BitLocker encryption that protects your data on local, fixed, and removable drives from unauthorized access.
When you enable BitLocker on Windows 11, your data is protected by powerful AES encryption. While it is a reliable method to protect your data, BitLocker has some caveats.
For example, it can cause issues when updating non-Microsoft apps, updating your Windows version, or updating firmware. Luckily, you can disable or suspend BitLocker on Windows 11 when you need to. So here’s how to do it.
Should You Disable or Suspend BitLocker on Windows 11?
If BitLocker is causing issues, you don’t necessarily need to disable it. However, if multiple tasks you need to complete aren’t working with BitLocker enabled, temporarily disabling it is an option.
Of course, if you no longer need BitLocker encryption to protect your data, you can disable it and leave the drive unencrypted. When you disable BitLocker, it takes a while to decrypt the drive, so suspending it is the way to go for quick tasks. The good news is that the process to disable or suspend BitLocker on Windows 11 is straightforward using the Settings app.
How to Disable BitLocker on Windows 11
First, we’ll look at disabling BitLocker. Once you complete the task you need to do, you can turn BitLocker back on.
To disable BitLocker on Windows 11:
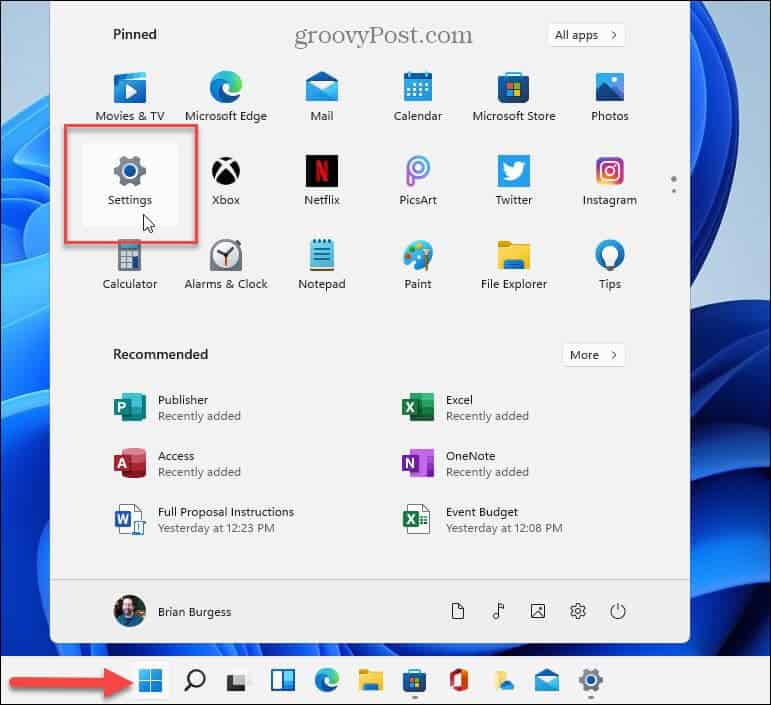
- Press the Windows key or click the Start button and launch Settings.
Note: Alternatively, you can press the Windows key + I keyboard shortcut to launch Settings directly.
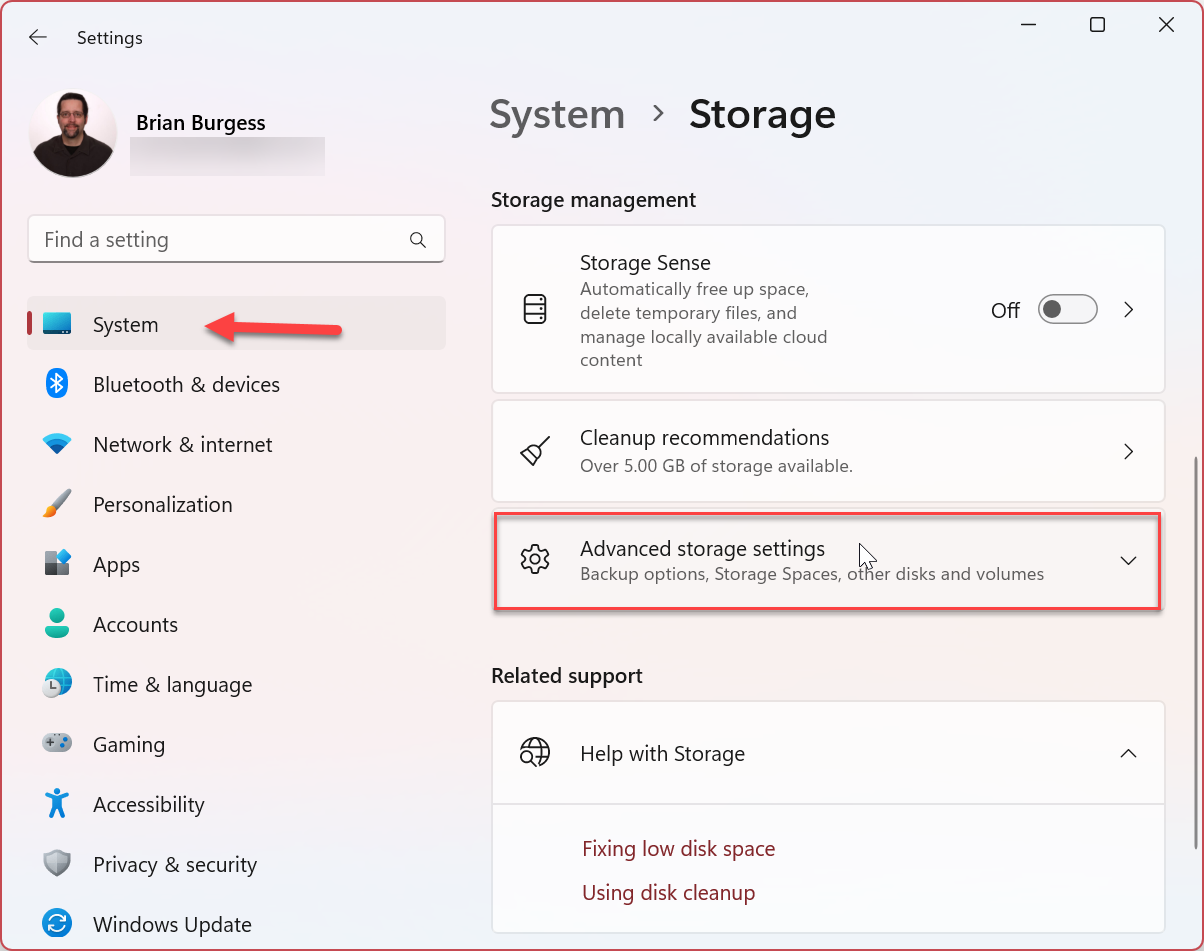
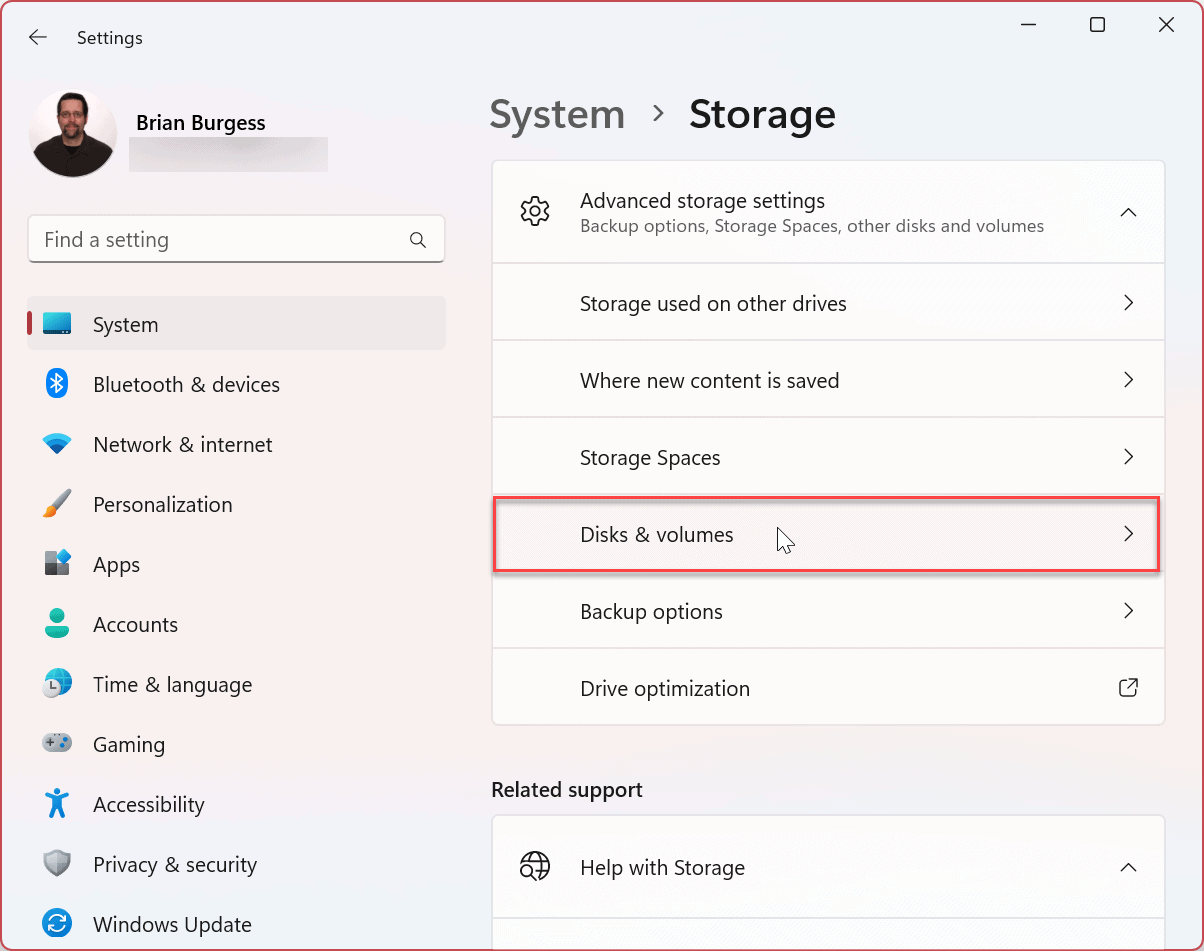
- When Settings launches, navigate to System > Storage > Advanced storage settings.

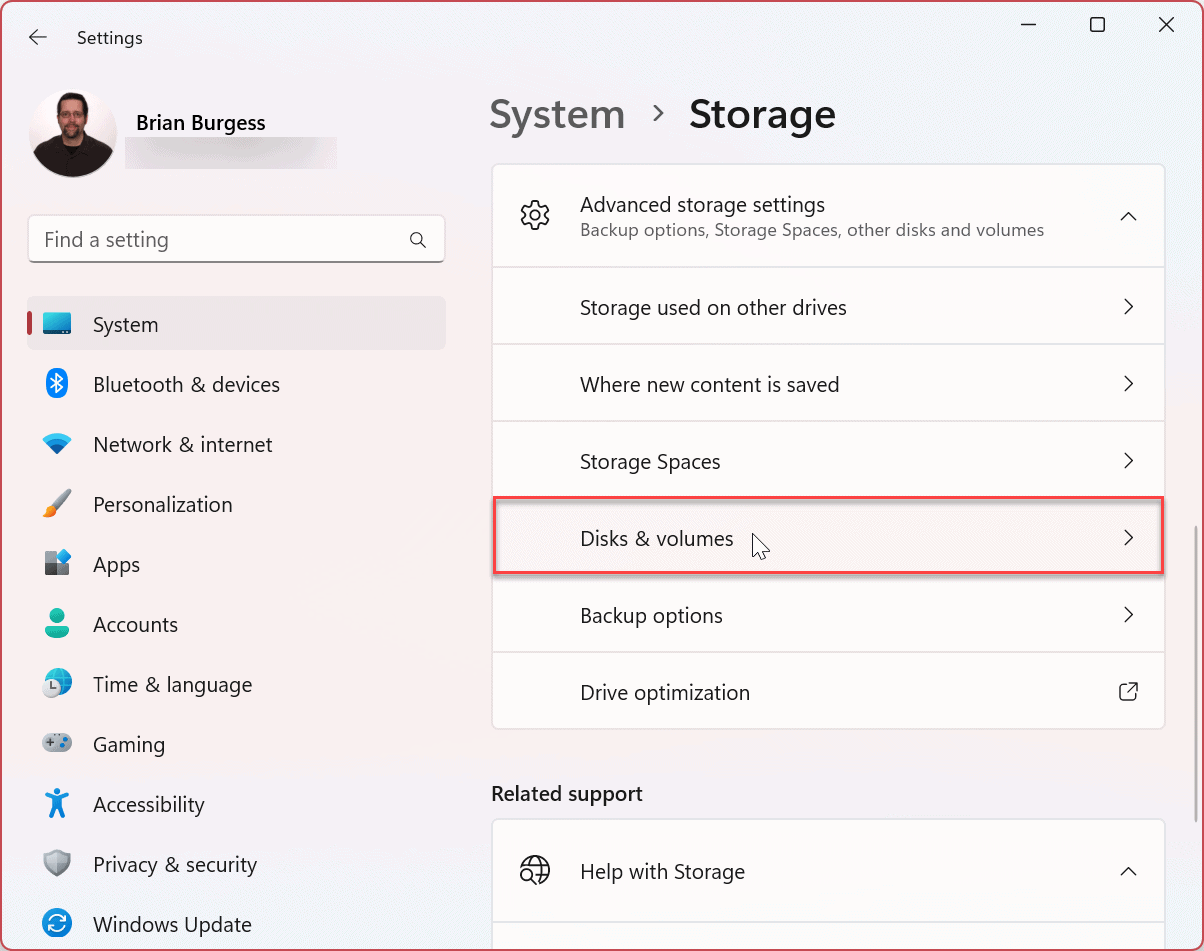
- When the Advanced storage settings column opens, click on the Disks & volumes option.

- Click the Properties button next to the drive to disable encryption. We are disabling BitLocker on the local C: drive in our example.

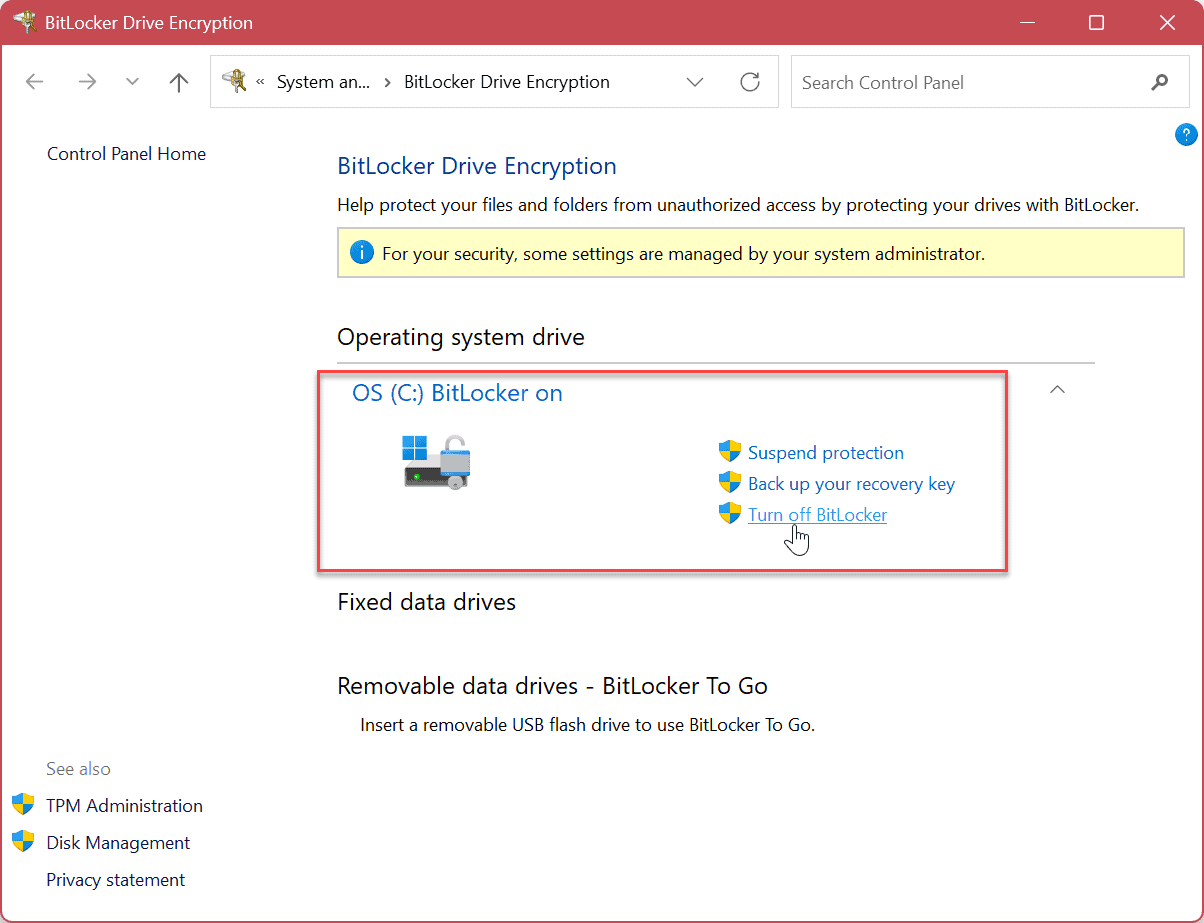
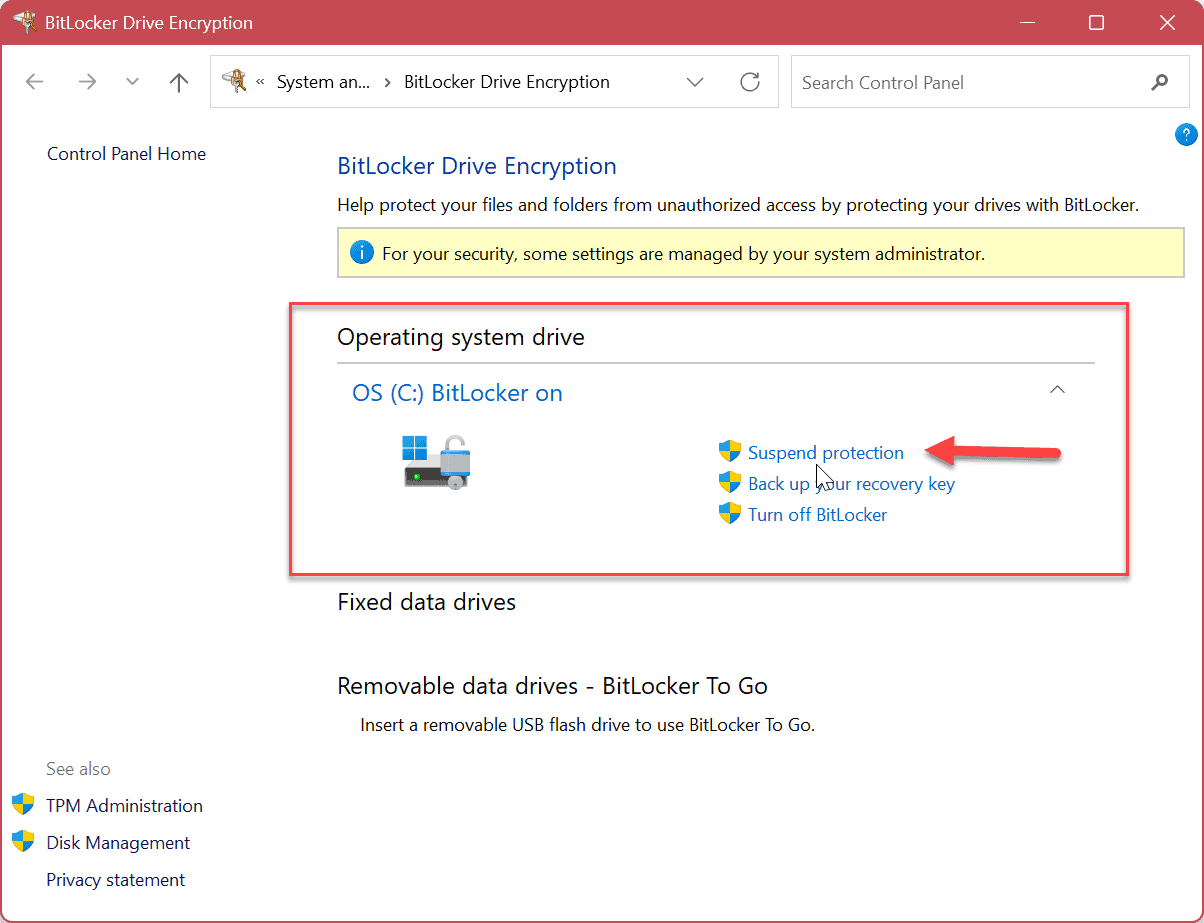
- Scroll down to the BitLocker section and click the Turn off BitLocker link.

- Under the Operating system drive section, click the Turn off BitLocker option again.

- When the verification message appears, click the Turn off BitLocker button.

- You will get a flyout notification on the lower right corner of the screen, letting you know that data decryption is occurring.

- You can also view the progress of the drive decryption process. Remember that it can take several minutes to complete the drive encryption process, and the amount of time will vary on each system.


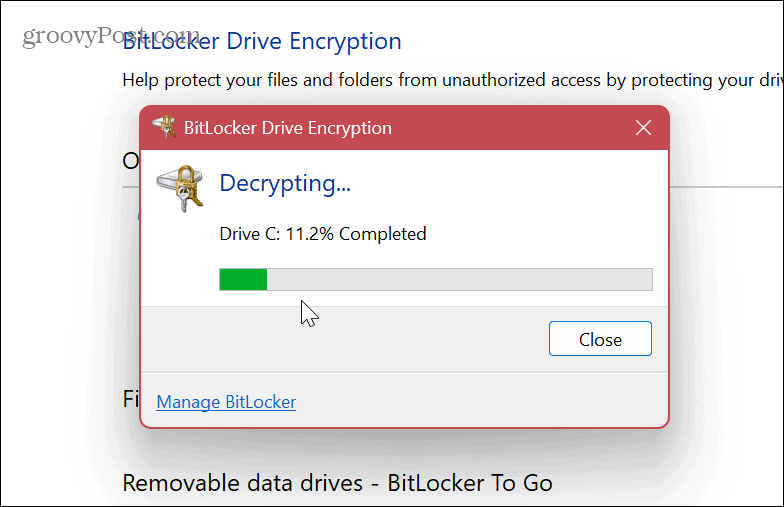
After following the steps above, BitLocker encryption will be disabled on your specified drive. Run the task(s) that BitLocker was getting in the way of, and when finished, enable BitLocker again to secure your data.
How to Suspend BitLocker on Windows 11
If you have problems completing a specific operation, you can suspend BitLocker to perform the task without BitLocker encryption getting in the way.
After you complete your task, you can reactivate BitLocker to protect your data.
To suspend BitLocker on Windows 11:
- Press the Windows key and launch Settings from the Start menu. Alternatively, you can use the Windows key + I keyboard shortcut to launch Settings directly.

- When the Settings app launches, navigate to System > Storage > Advanced storage settings.
- When the Advanced storage settings column opens, click on the Disks & volumes option.
- Select the drive you want to suspend BitLocker encryption, and click the Properties button next to it. For example, we are suspending BitLocker on the local C: drive.
- Scroll down to the BitLocker section and select the Turn off BitLocker link.
- Now, click the Suspend protection option under the Operating system drive section.

- When the BitLocker Drive Encryption verification message appears, click the Yes button.


After you suspend BitLocker protection, you can go ahead and do the task that encryption was getting in the way. Tasks like updating a non-Microsoft app or doing a firmware update.
After completing the operation, go to the BitLocker Drive Encryption section, as shown above, and click the Resume protection link.

Securing Your Windows 11 PC
While it’s vital to keep BitLocker encryption enabled on your PC to keep data secure, sometimes you need to disable or suspend it temporarily. Ensure you turn it back on after you complete the computer operation to keep your data safe.
Keep in mind that when you temporarily disable BitLocker on Windows 11, the decryption process can take a long time. For a more responsive experience, you’ll want to use the Suspend protection option instead.
In addition to using BitLocker to encrypt your data, there are other settings you’ll want to use to keep your PC secure. For example, you might need to lock a folder or remove personal info from files on Windows 11.
In addition to using BitLocker to encrypt drives, you can use the EFS feature to encrypt individual files and folders. Viruses and malware are always a threat, so ensure you configure Windows Security for maximum protection. And don’t forget to enable enhanced phishing protection on Windows 11.
Also, if you aren’t on Windows 11 yet, you can use BitLocker on Windows 10.


Paul
August 31, 2023 at 10:23 pm
Under step 6 you said to “click the Suspend protection option under the Operating system drive section.” The only option I have is to back up my recovery key.
Brian Burgess
October 17, 2023 at 1:34 pm
Thanks for reading. BitLocker may not be enabled on your system. You need to turn on BitLocker and ensure you back up your Recovery Key first.
https://www.groovypost.com/howto/use-bitlocker-encryption-in-windows-11/
Once BitLocker is on, following the steps will work. If the option is grayed out or missing, make sure you’re logged on as Administrator. Have you tried running DISM or SFC scans?