How to Use BitLocker Encryption on Windows 11

If you want to encrypt the data on your local drive and protect it from malware or data theft, you can use BitLocker on Windows 11 to do it. Here’s how.
Originally launched as a Windows 7 feature, BitLocker encryption is available to Windows 11 users to help protect saved data on your local, fixed, and removable drives. Using BitLocker, your data is scrambled using difficult-to-break AES encryption. Only users with the correct access (using a password, PIN, Windows Hello, or recovery code) can view and edit the files.
You can use BitLocker to Go on Windows 11 to encrypt data on removable USB drives. If you want to use BitLocker to encrypt a fixed drive (such as your local C: drive), you’ll need to follow this guide instead.
How to Use BitLocker Encryption on Windows 11
You can use BitLocker to encrypt any drive on a Windows 11 PC, but there is a catch. BitLocker is only available to Windows 11 users running Windows 11 Pro, Education, or Enterprise. If you want to use it, you’ll need to upgrade from Home to Pro (or another version).
To use BitLocker to encrypt your local or other fixed drives on Windows 11, follow these steps:
- Press the Start button and click the Settings icon (or press Windows key + I).
- In the Settings menu, select System on the left, then click Storage on the right.

- Under Storage, click Advanced storage settings (listed in the Storage management section), then select Disks & volumes.

- In the Disks and volumes section, you’ll need to pick the drive you wish to encrypt with BitLocker, then click the Properties button.

- Next, click the Turn on BitLocker option under the BitLocker section near the bottom.

- Next, click Turn on BitLocker next to the drive you selected to encrypt with BitLocker.
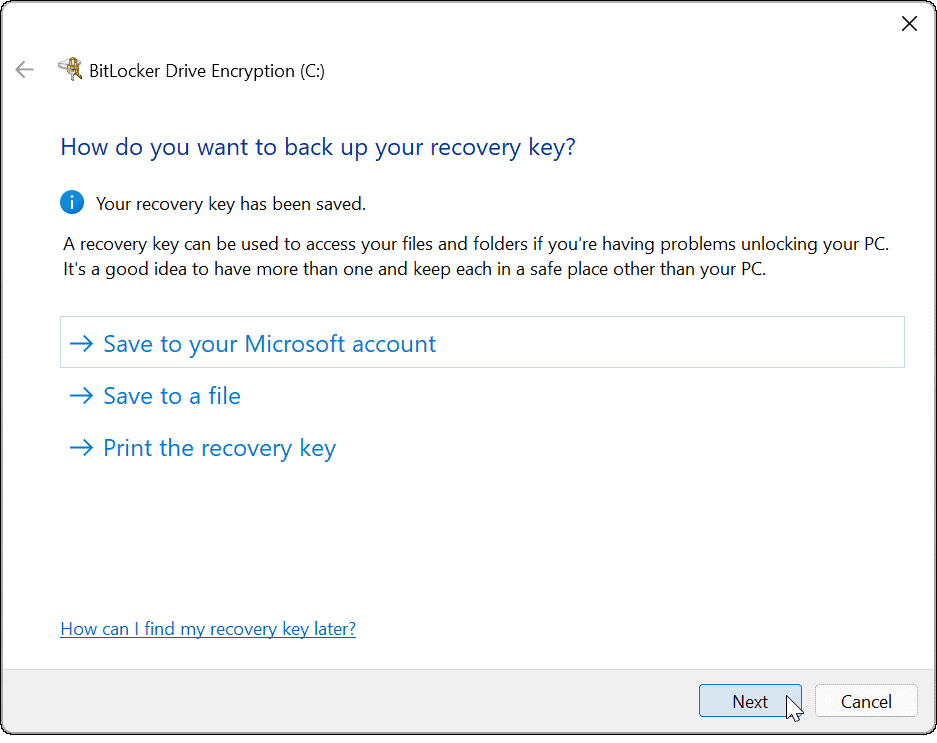
- After a couple of system checks, select how you want to back up your recovery key. You can choose to save to your Microsoft account, save to a file, or print the recovery key.
- The recovery key is essential for recovering your files without a password. If you lose your password and don’t have the recovery key, you won’t be able to access your files. We strongly recommend you do this, although it does remain optional.
- If you decide to save the 48-digit recovery key, the easiest way to store it is to link it to your Microsoft account. You’ll be able to recover the key in the BitLocker recovery keys section in your account settings.
- After your recovery key is backed up, click Next.
- Make sure to select Encrypt used space only (faster and best for new PCs and drives) on the following screen and click Next.

- You’ll need to determine your encryption mode. For best security, select New encryption mode (best for fixed drives on this device) as the preferred encryption mode, then click Next.
- If you’re planning on moving your BitLocker drive to a Windows PC using an older version of Windows (earlier than Windows 10 version 1511), you’ll need to select Compatible mode (best for drivers that can be moved from this device) instead.

- Next, check the Run BitLocker system check option, then click Continue.

- To complete the check and BitLocker encryption process, you’ll need to restart Windows 11.
- Once your PC restarts, log in and wait for BitLocker to encrypt your PC. You’ll see a lock next to your drive when you launch File Explorer to show this is complete.
![]()
How to Disable BitLocker Encryption on Windows 11
You’re free to disable BitLocker encryption on a Windows 11 drive at any time. Decrypting the drive will ensure that other users can freely access any saved files without needing a decryption key or recovery code.
To disable BitLocker encryption on a fixed drive, follow these steps:
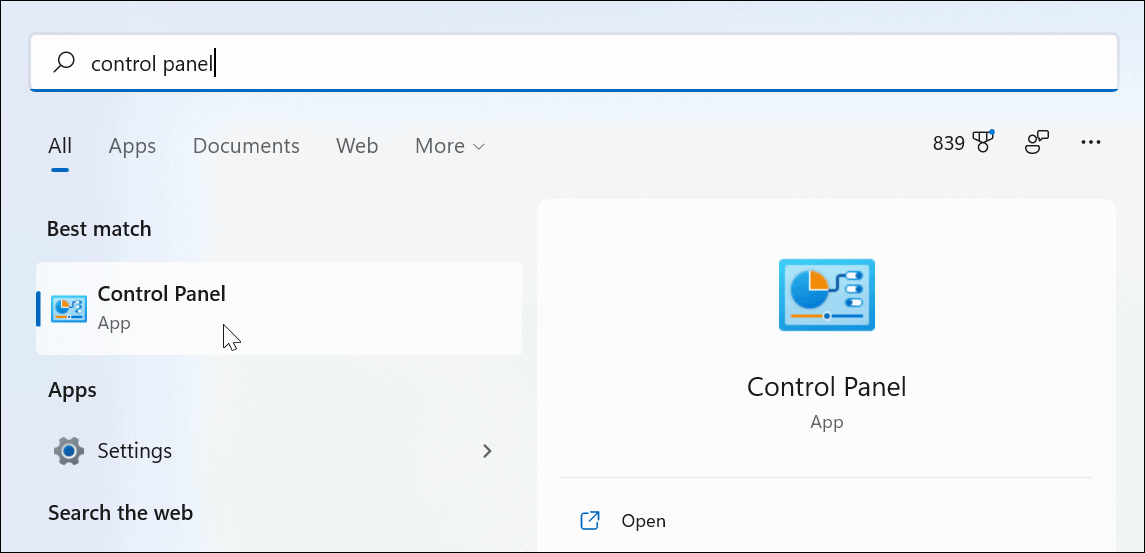
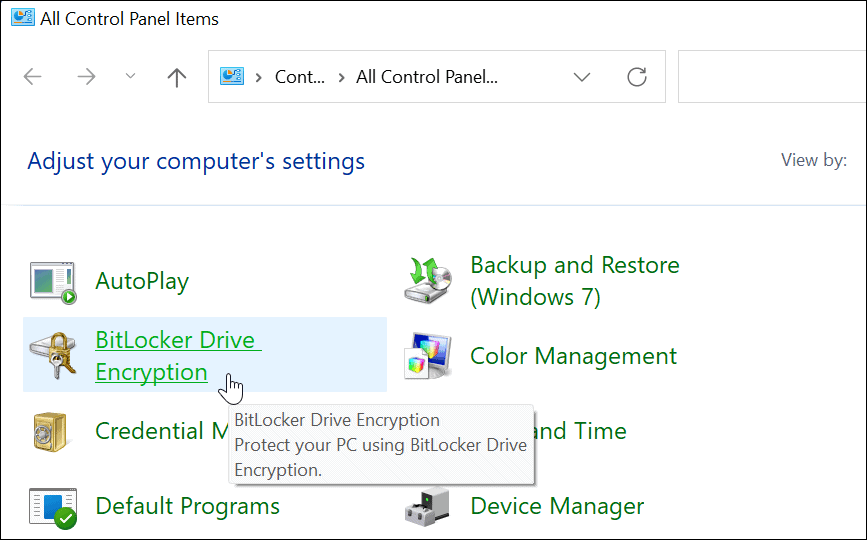
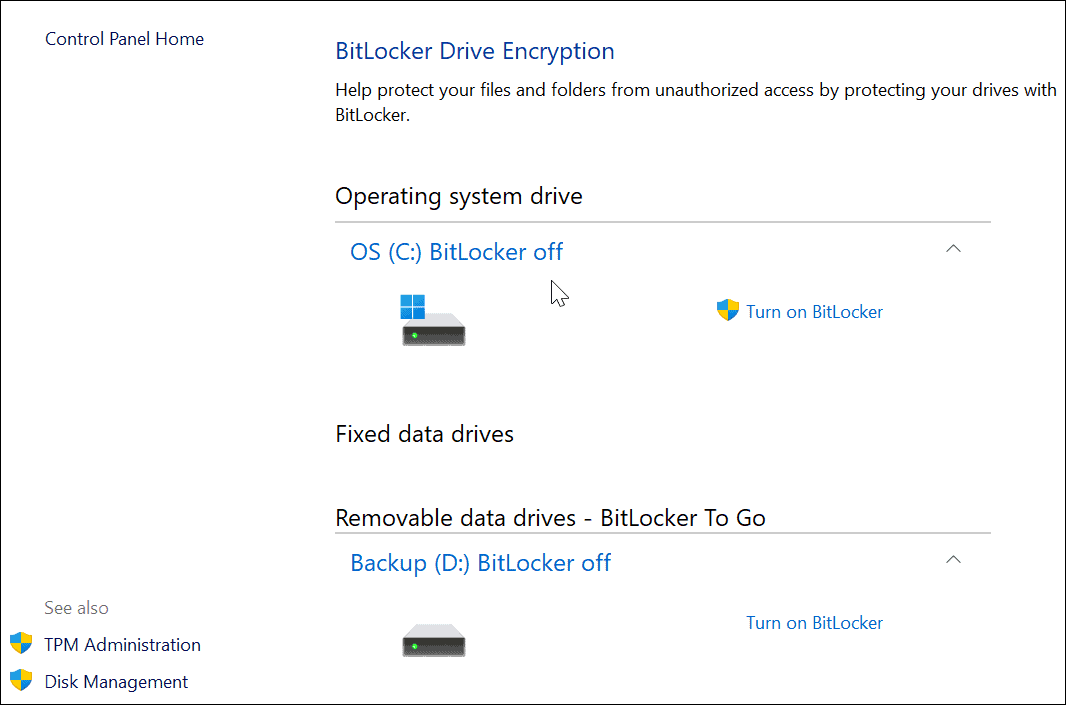
- Click the Start button and type control panel, then select the Best match result.
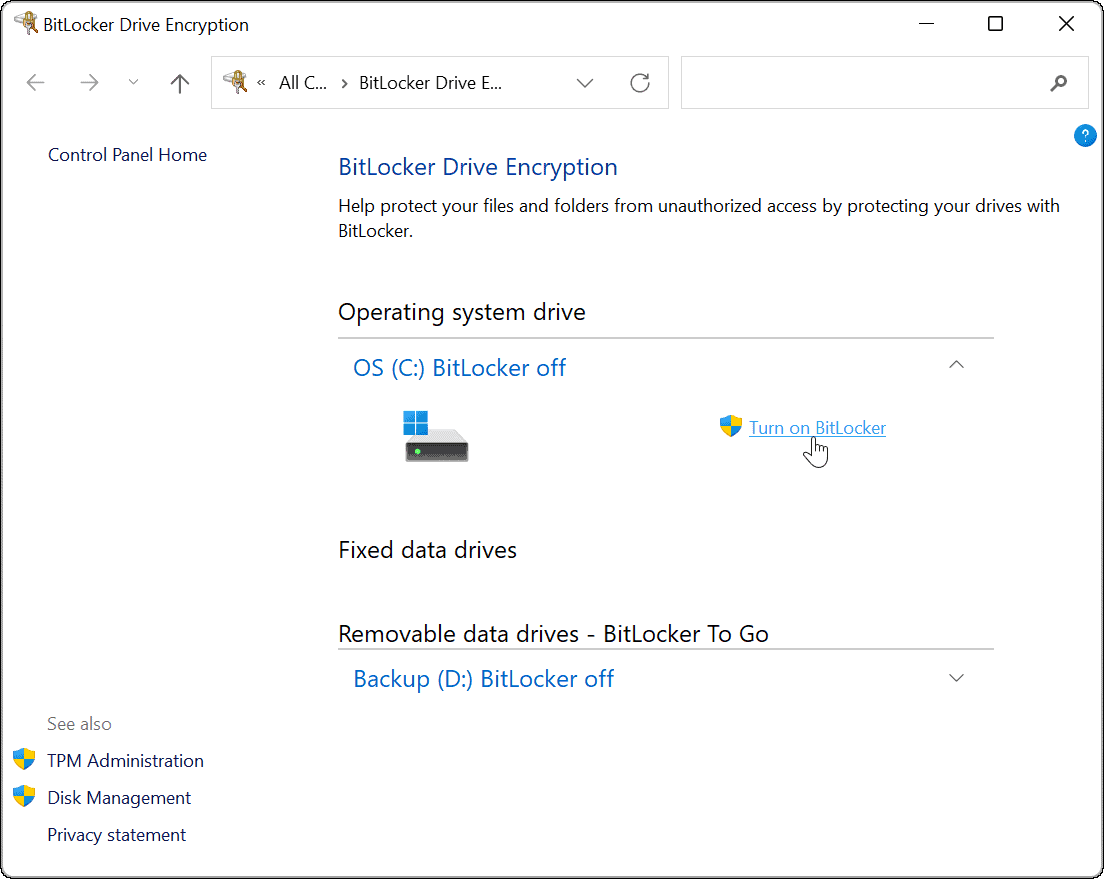
- When Control Panel opens, click the BitLocker Drive Encryption option.
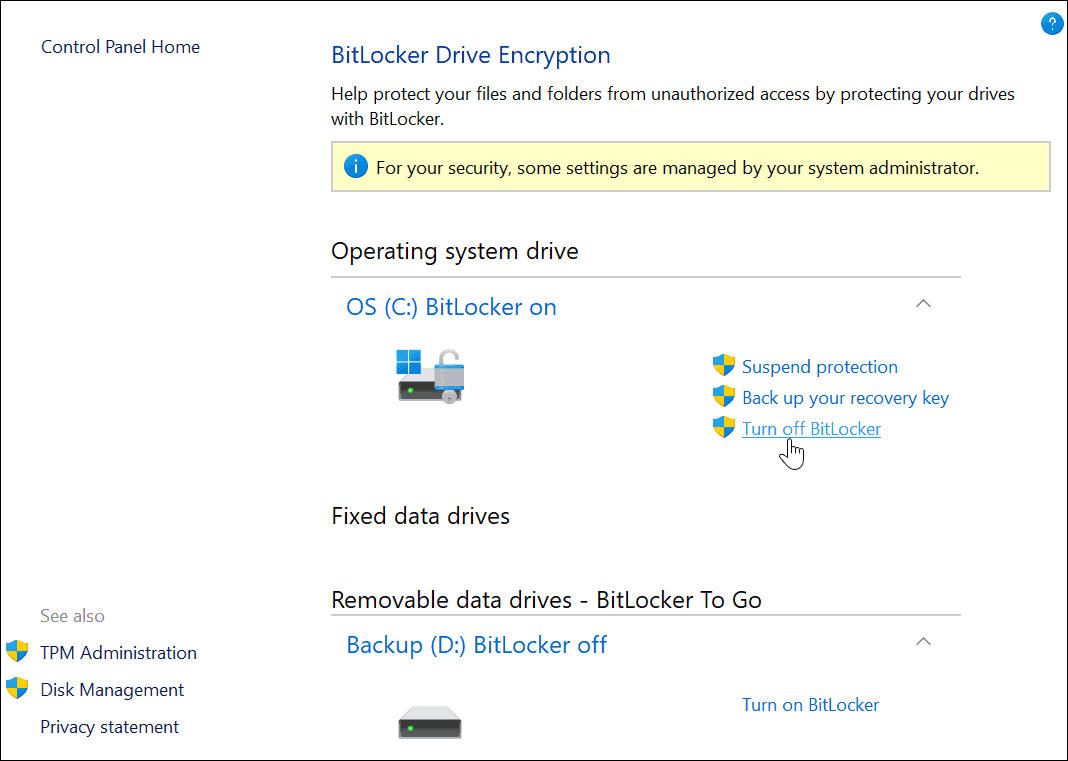
- Find the drive with enabled BitLocker encryption, then click the Turn off BitLocker option.
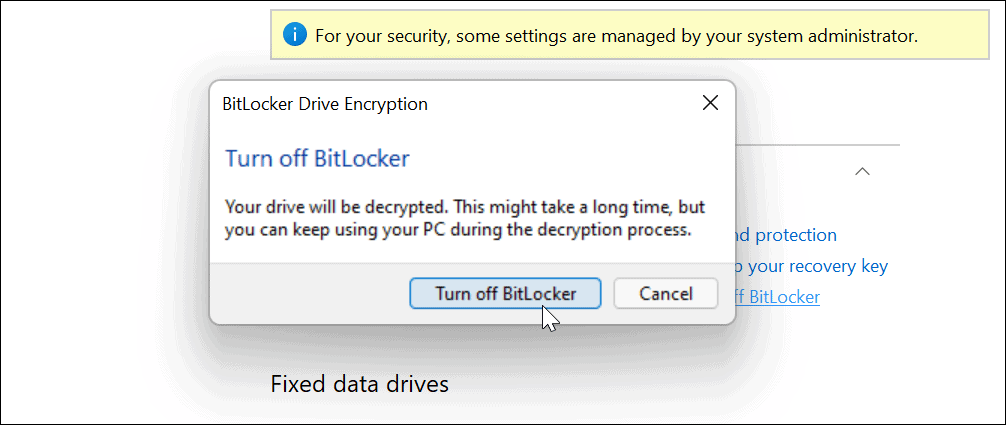
- When the confirmation dialog message appears, click the Turn off BitLocker button.
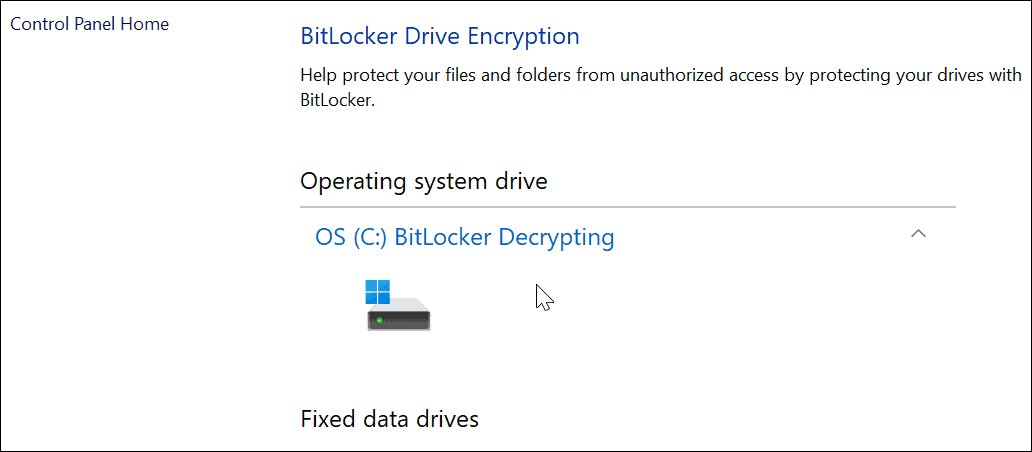
- A notification message will pop up letting you know that the drive decryption is in progress. Allow time for this to complete.

- You’ll also see confirmation that the drive is decrypting in Control Panel.
- When the decryption process is complete, you’ll see a fly-out notification. You’ll also see BitLocker off next to the decrypted hard drive in Control Panel.
Protecting Your Files on Windows 11
The steps above will help you to encrypt and protect your local files by using BitLocker encryption on Windows 11. BitLocker is critical to use if you’re protecting your personal and private data from hackers, malware, and other dangerous online threats.
BitLocker is just one feature designed to protect your Windows 11 PC—read up about TPM on Windows 11 and why it’s important for your PC security. If you’re not on Windows 11 yet, you can use BitLocker on Windows 10, too.
Before making any significant changes to your system, however, don’t forget to create a full system backup on Windows 11. This will allow you to recover your settings, files, and other data if something goes wrong during the encryption (or decryption) process.


