How to Remove Personal Information from Files on Windows 11

Your documents and other files include personal metadata. If you want to remove your personal information from files on Windows 11, follow this guide.
When you create a file on Windows 11, it embeds personal metadata into the file. The metadata includes personal information such as the author, geo-location, dates, tags, and more.
Typically, metadata is stored in documents and other files (including videos and images). When you share those files, the other user or third party can access the metadata.
Before sharing, it’s a best practice to remove personal information from files on Windows 11. The process is straightforward, but you need to remember to do it before sending files. If you want to know how to remove personal information from files on Windows 11, follow the steps below.
How to Remove Personal Metadata from Files on Windows 11
Before sharing files with others, removing personal metadata from the file before sending is essential. Removing the data only takes a few clicks, and then you can then share the file with more security-based peace of mind.
To remove personal information from files on Windows 11:
- Open File Explorer and navigate to the location of the file you want to remove metadata from.

- Right-click the file and select Properties from the context menu.

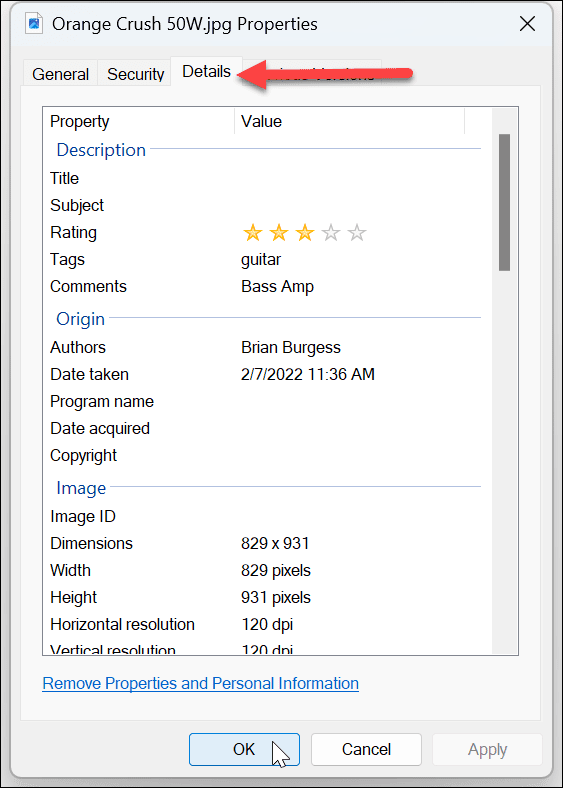
- Select the Details tab at the top and click the Remove Properties and Personal Information link at the bottom.

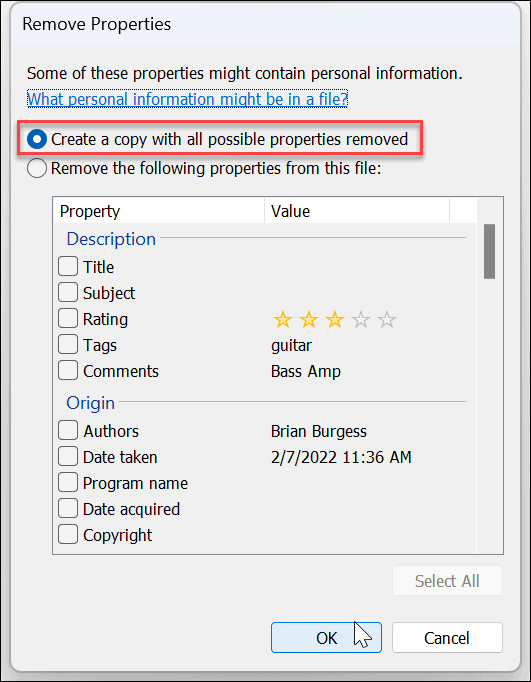
- Select the Create a copy with all possible properties removed option at the top and click OK.

- After clicking OK, the metadata included in the file will be removed. Since you created a copy, note that you need to send the copy of the file created in File Explorer.


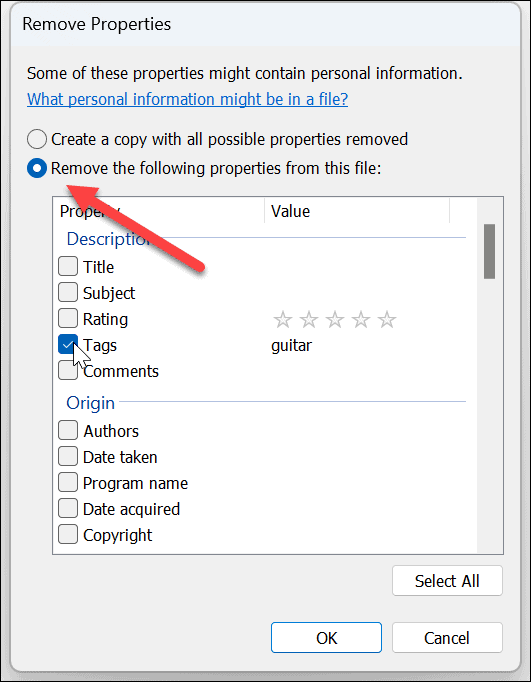
It’s also important to note that you don’t need to delete all personal metadata. On the Remove Properties screen, you can choose the Remove the following properties from this file option. Then go through the list and only uncheck the data you want to remove from the file.
How to Remove Metadata from Office Files
Removing personal information from files using the steps above works, but Office files (such as Word, Excel, and PowerPoint documents) add other data you might want to remove.
For example, a file could include data from add-ins, macros, comments, revisions, and other data. So, if you want to remove the extra data, you’ll need to use your Office apps.
Note: We’ll use Microsoft Word here, but the process is the same in all Office apps. Only the data types will vary between the Office files you work with. For example, an Excel spreadsheet could include different metadata than a Word document.
To remove personal metadata from Office apps:
- Open your document in its respective Office app.
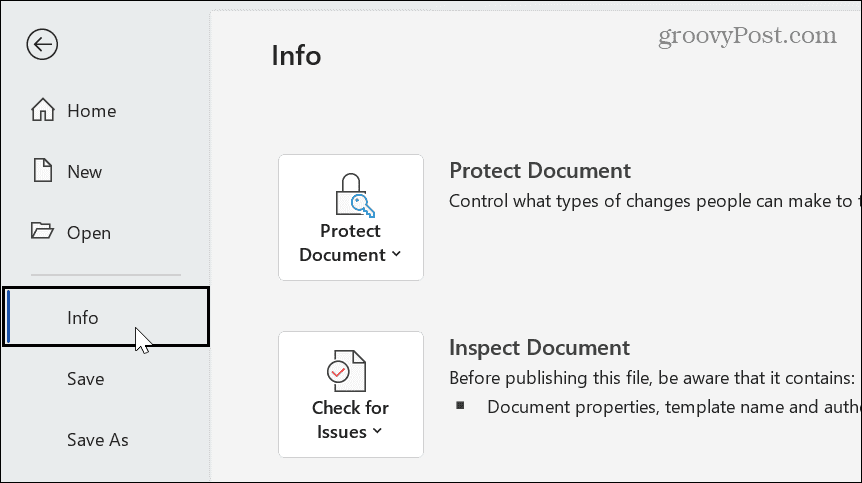
- Navigate to File > Info.

- Click Inspect Document from the Check for Issues dropdown menu on the right column.

- Check the contents you want to inspect. You can choose items like comments and revisions, documents and personal information, custom XML data, watermarks, hidden text, and more. When ready, click the Inspect button at the lower-right corner of Document Inspector.

- After the Inspector finishes analyzing your document, click the Remove All button next to the items you want to remove from the document or sheet.

- After removing the metadata, click the Reinspect button and then the Inspect button.

- Once you verify the document is free of personal and other metadata, click the Close button.


Once you have verified the document is clear of any metadata, save it to your preferred location, and share or send it off.
Removing Personal Information from Your Files on Windows
The metadata that Windows includes with files is quite helpful when searching your PC for documents and other files. However, you might not be a fan of the amount of data contained in these files.
In fact, if you have several photos on your PC, you will be surprised at the amount of GPS and other data included in those files. When you send an image, a person can know when you took it, the device you took it on, and its location. Luckily, if you follow the steps above, removing that personal data from your files is a straightforward process.
When it comes to securing your data on a Windows 11 PC, check out how to use Windows Security on Windows 11 for maximum protection. In addition, you might want to learn about enabling enhanced phishing protection on Windows 11. You might want to consider using BitLocker encryption on your system’s drive to keep your data secure, too.


Daniel Glasser
February 11, 2023 at 2:43 pm
The advice on how to disable 1-drive seems out of date for the latest Windows-11. The settings dialog shown is not available, even under “advanced”. When I set up this PC, I disabled 1 drive, and it seems to have not only re-enabled itself, but uploaded hundreds of personal files to the cloud without my accepting it to do so.