How to Add Tags to Files on Windows 11

Are you finding it hard to find certain files? You can add tags to files on Windows 11 to make the job easier. This guide explains how.
When you add tags to files on Windows 11, it makes file searching a little easier.
Tags are keywords attached to your files that describe the file’s content. The data is saved in the file’s metadata information. So, instead of searching for a file’s name, you can search by its tag name. This can help you to search for groups of files around a topic, rather than the filename.
Often you name a file that vaguely describes its content. However, if you forget its name, that’s when tags come in handy. We’ll explain how to add tags to files on Windows 11 below.
How to Add Tags to Files on Windows 11
The file tagging feature isn’t anything new, but most people don’t know about it or use it because of the manual process.
We use photos in this example, but you can add tags to different file types.
How Do I Label a File in Windows 11?
- Open File Explorer and browse to the location of the files you want to tag.
- Right-click on a file and choose the Properties option from the menu.
Note: You can select multiple files instead of tagging one at a time.
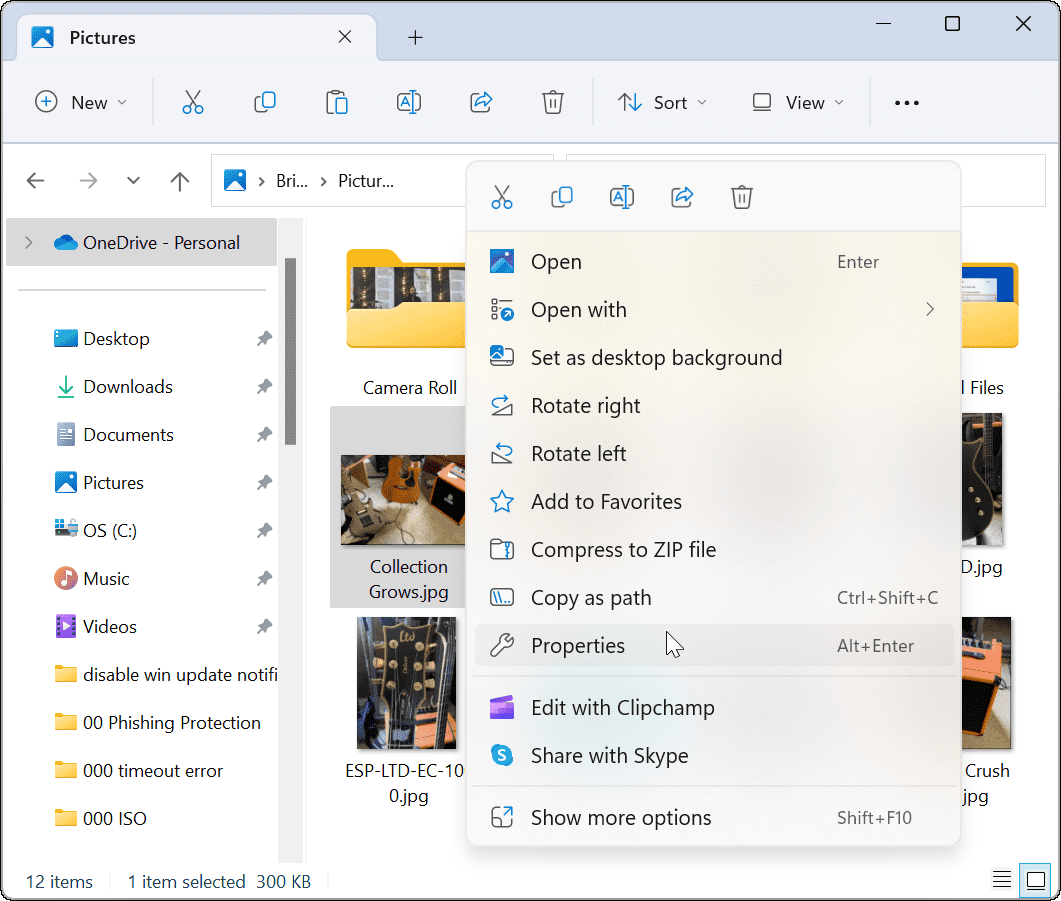
- When the Properties window appears, click the Details tab at the top.


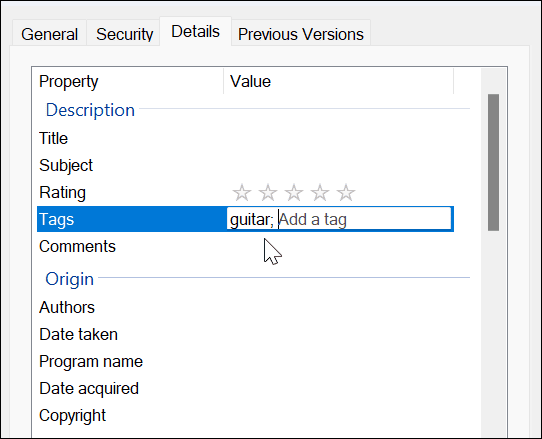
- Click on Tags and give it an easy-to-find name followed by a semicolon. For example, here, we named this file “guitar;” (without quotes) and clicked OK.
Note: A semicolon allows you to add more than one tag to the file if you wish to.
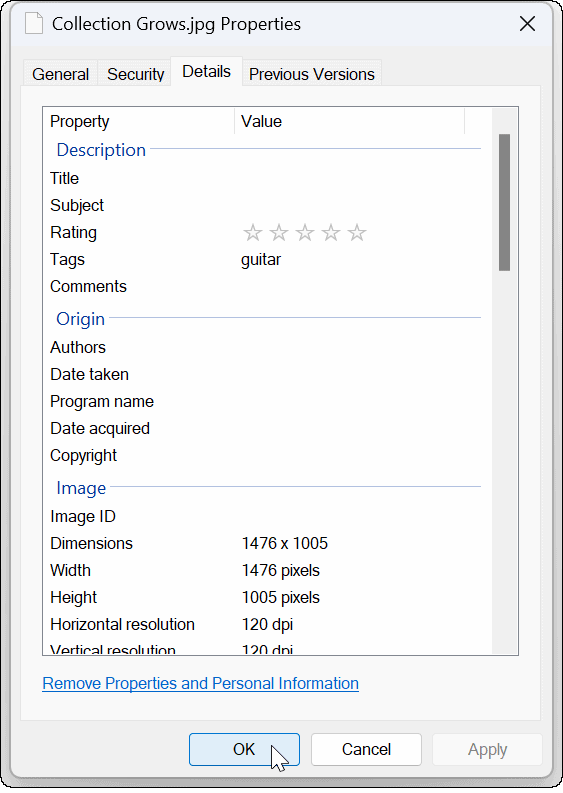
- To verify the file was tagged correctly, right-click the file, select Properties, click the Details tab, and look in the Tag section.

How to Find Tagged Files on Windows 11
Once you have your files tagged how you want, the next step is to find them during a search. This process is pretty straightforward.
How Do I Search for a File by Tag in Windows?
- Launch File Explorer and navigate to the location of your tagged files.
- Set the View to Details from the toolbar.

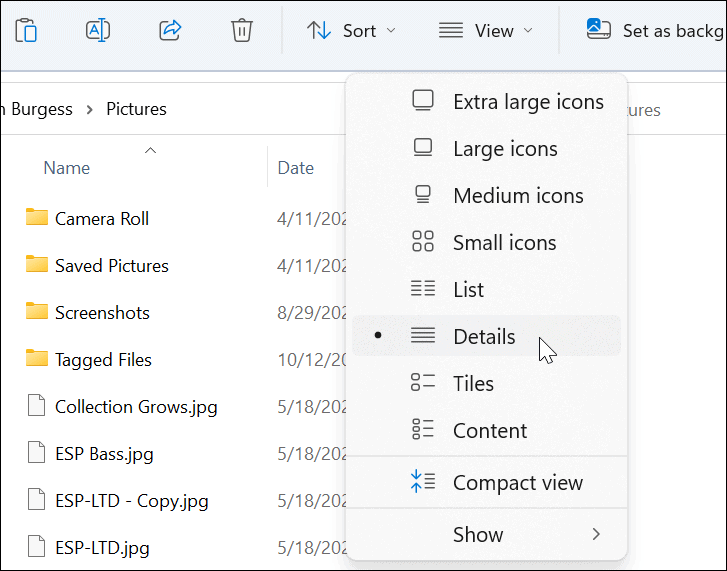
- Under the Tags heading, you’ll see the files you tagged. In this example, it’s guitar.


- You can also select the tag you want—only those files will display in File Explorer.
- If you want your tags to show closer to the files, drag the Tags header toward the Name field.


- Also, you can click Sort > More > Tags no matter what view you use to find your tagged files.


How to Add Tags to Office Files
Adding tags to Microsoft Office documents, including spreadsheets and presentations, is straightforward by using the Save function in any Office app.
How Do You Add Tags to Microsoft Office Files?
- Create your document, spreadsheet, or presentation, and click File > Save As.
- Click the More Options option under the file name and type fields.

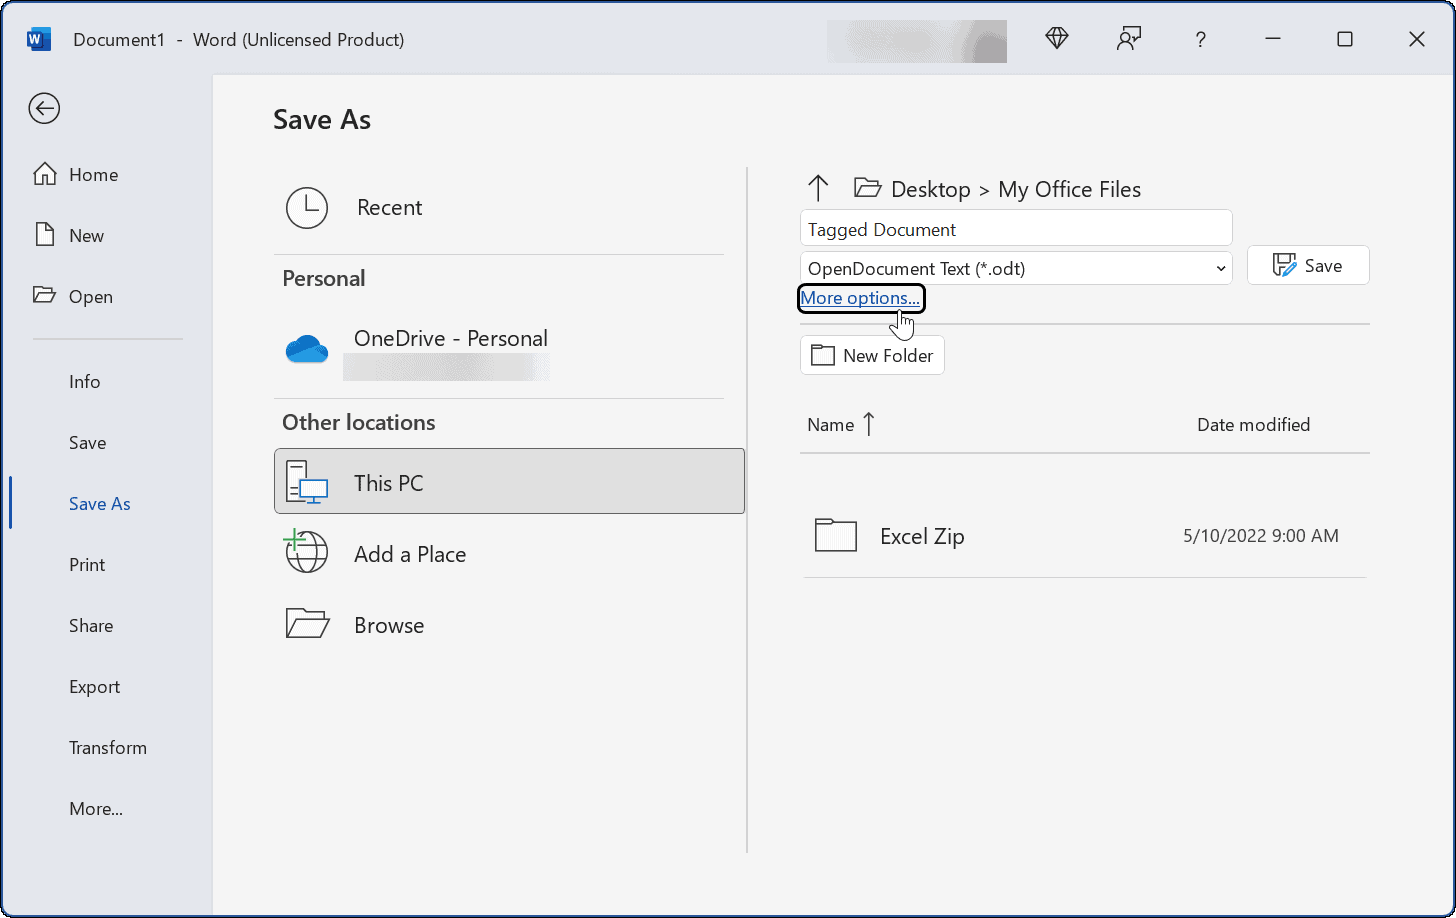
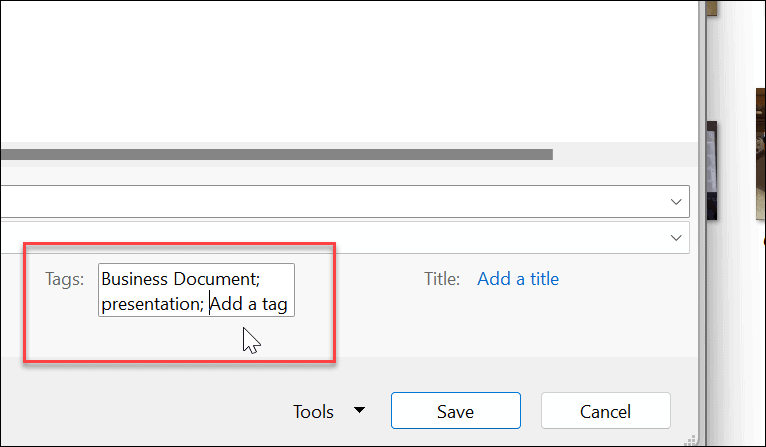
- Now, type in a name for the document, select file type, click the Tags field, and then type in how you want to make it easier to find later.
- Like other files shown above, you need to add a semicolon to the tag like “business document;” (without quotes) and click Save.

Finding Files on Windows 11
Tags are a great way to help keep your files in order. However, note that it’s only available for specific file types like Office files (.docx, .xlsx, and others). Tags are supported on JPEG or JPG, but they aren’t available for PNG, PDF, and ISO images.
You’ll know if a file type doesn’t support tags because the Tags option isn’t available in the Details tab. As we previously noted, adding tags isn’t anything new. If you’re not on Windows 11 yet, read about adding tags to files on Windows 10.
Leave a Reply
Leave a Reply


