How to Set Photos as a Screen Saver on Windows 11 & 10

Screen savers are relics from early versions of Windows, but they’re still fun to use. Here’s how to set photos as a screen saver on Windows 11 and 10 PCs.
Screen savers were typically used to prevent burn-in on old CRT monitors. Thanks to modern LCDs, burn-in isn’t much of an issue these days. If you want to use your monitor as a fancy display, you can still use screen savers to do so.
We’ve shown you how to enable and use screen savers on Windows 11, but these are typically animated. If you want, you can set photos as a screen saver on Windows 10 and 11.
Here’s what you’ll need to do.
How to Set Photos as a Screen Saver on Windows 11
You can make the screen saver feature more personal by adding your own photos.
To add your own photos, use the following steps:
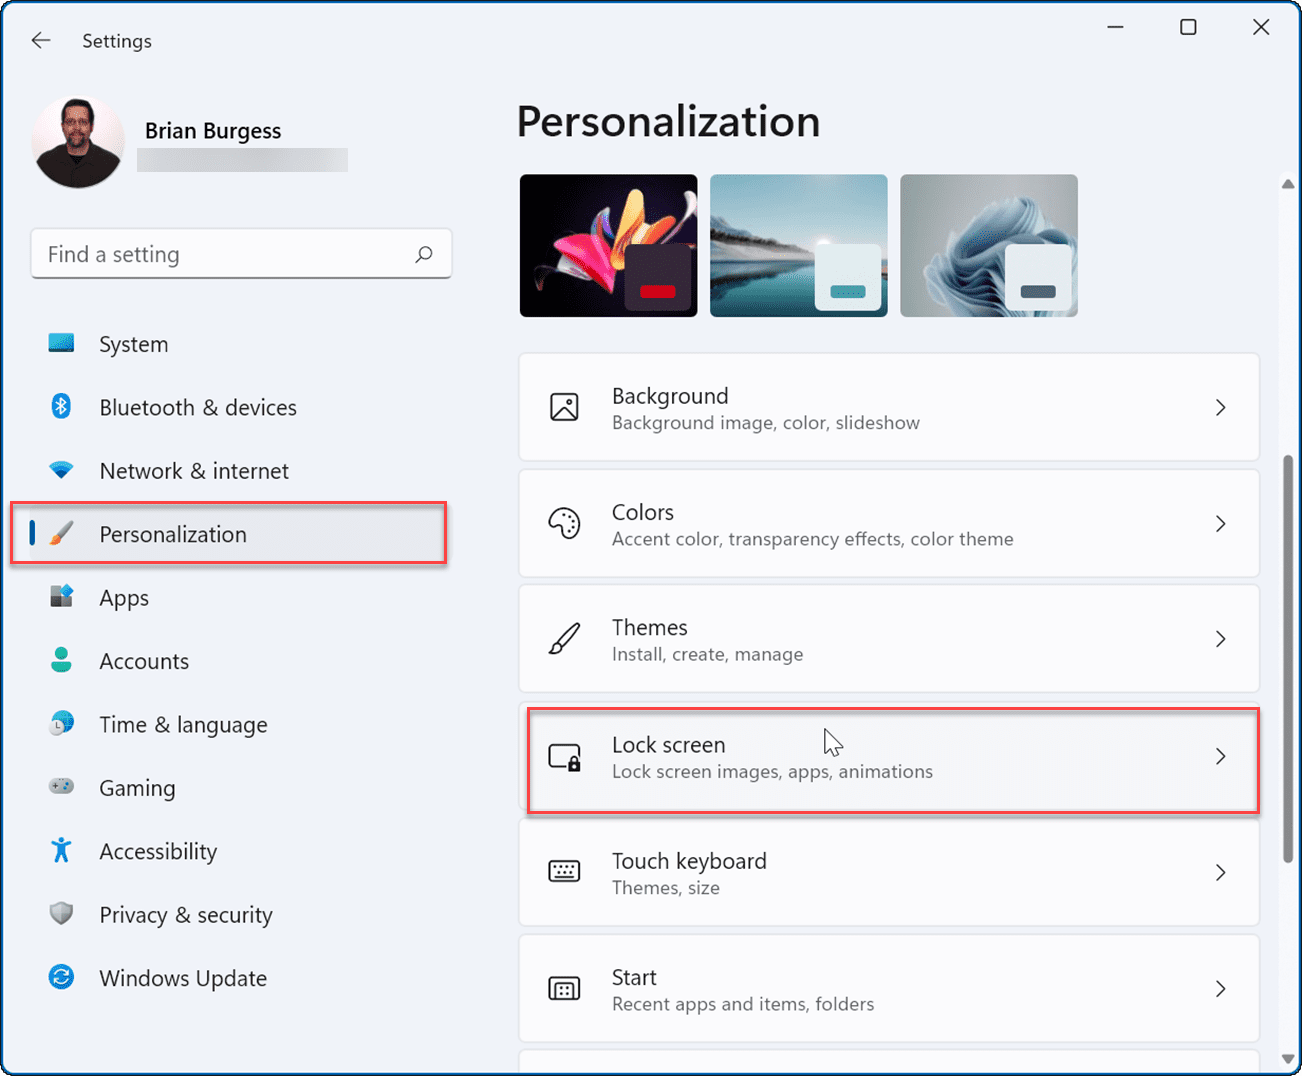
- Use the keyboard shortcut Windows key + I to open Settings.
- When Settings opens, navigate to Personalization > Lock screen.

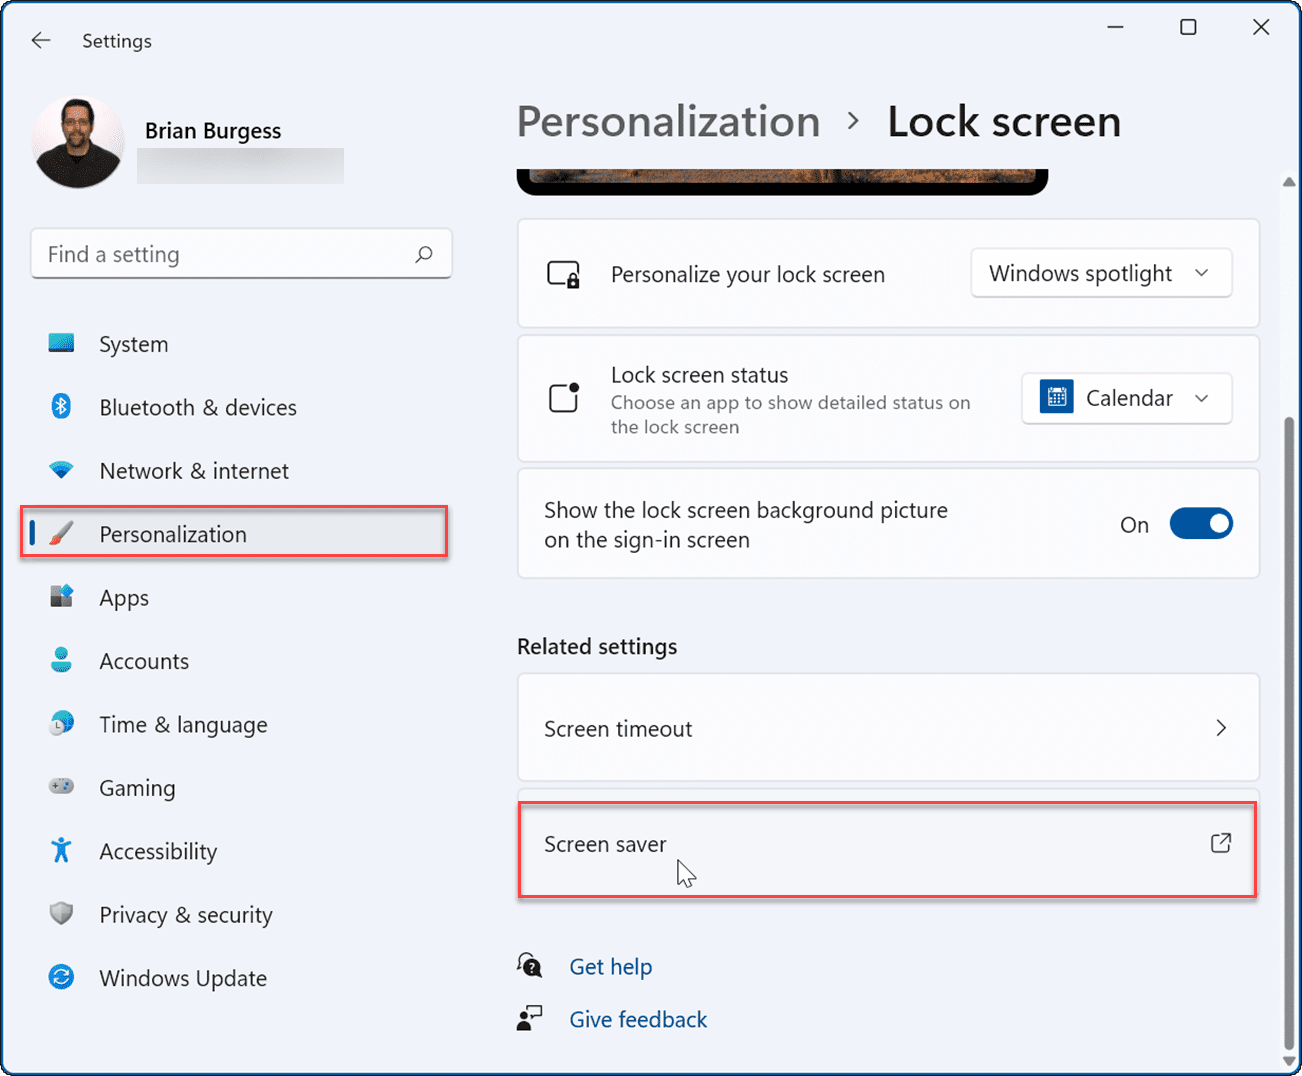
- On the Lock screen section in Settings, scroll down to the Related settings section, and click the Screen saver option.

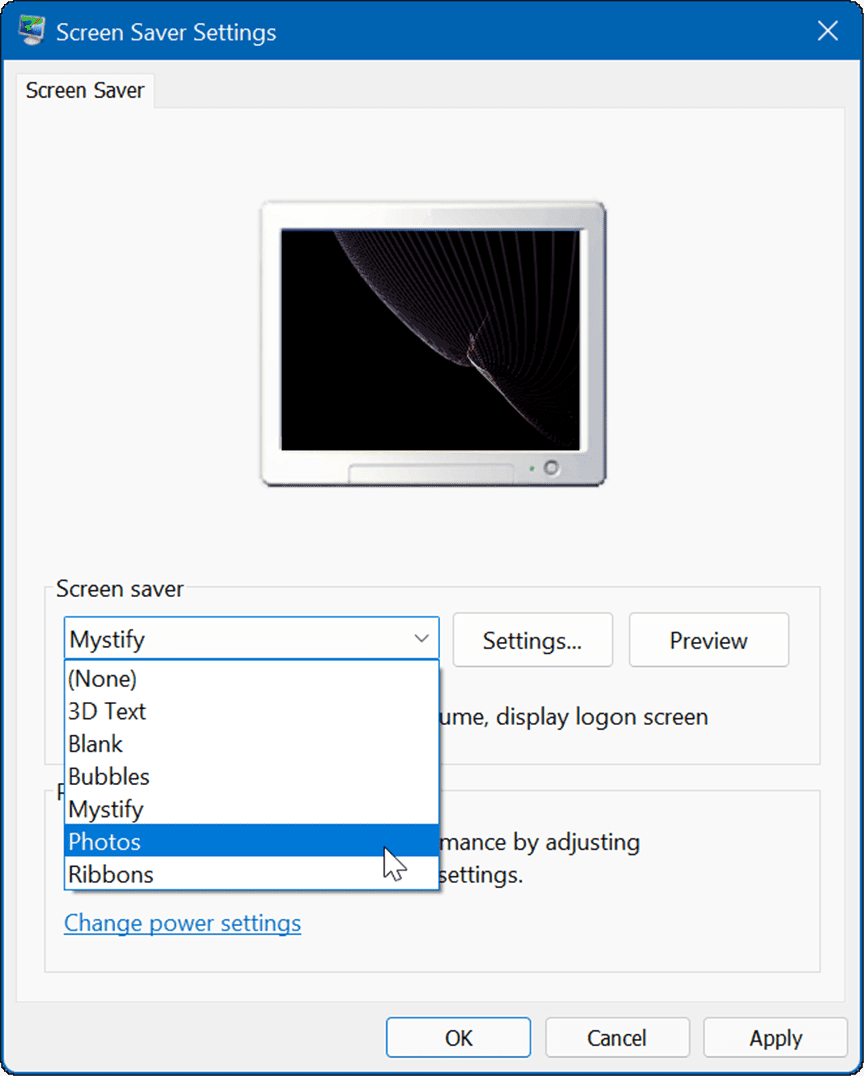
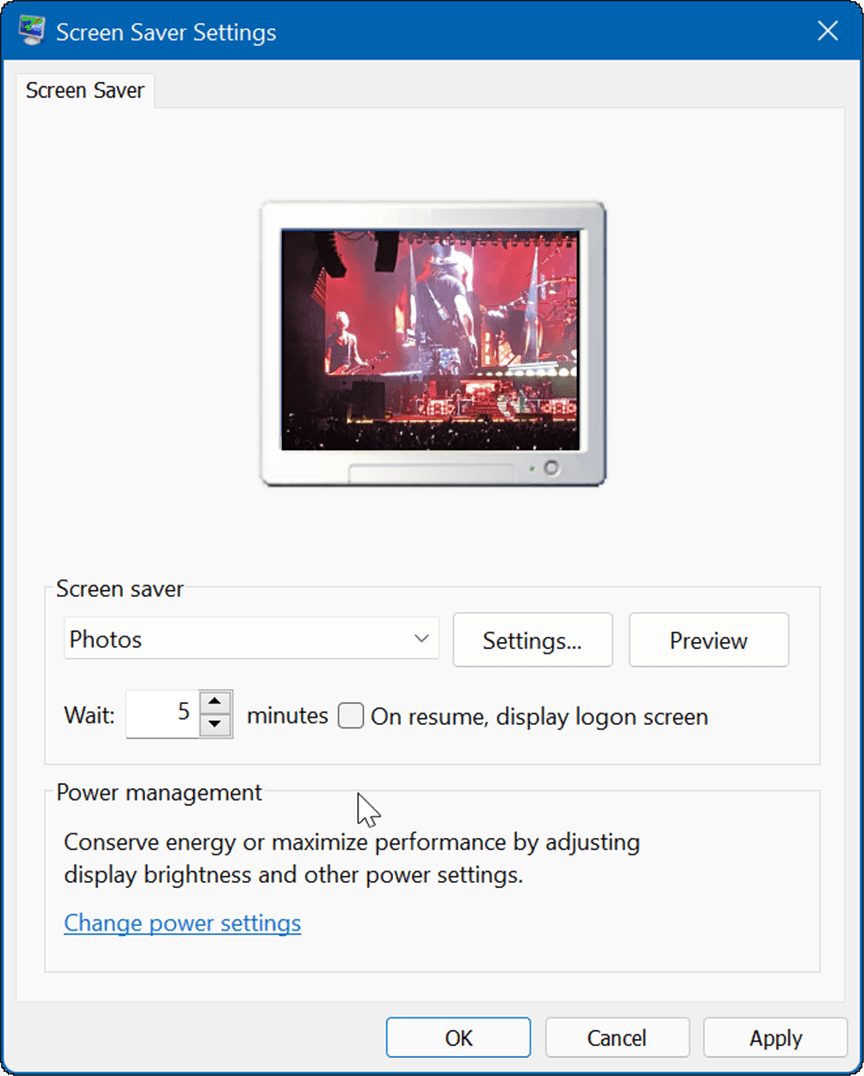
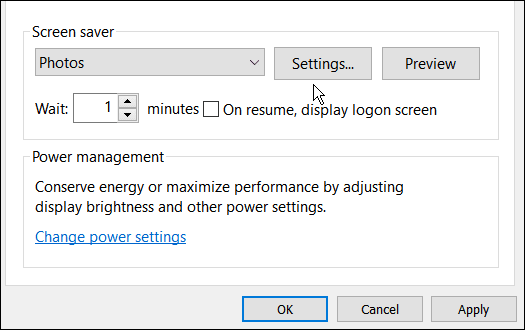
- When the Screen Saver Settings window appears, click the dropdown menu in the Screen saver section, and select the Photos option from the menu.

- The photos will come from your default Pictures folder. After reviewing them, you may want to change the location of the pictures to a folder of shots you like.

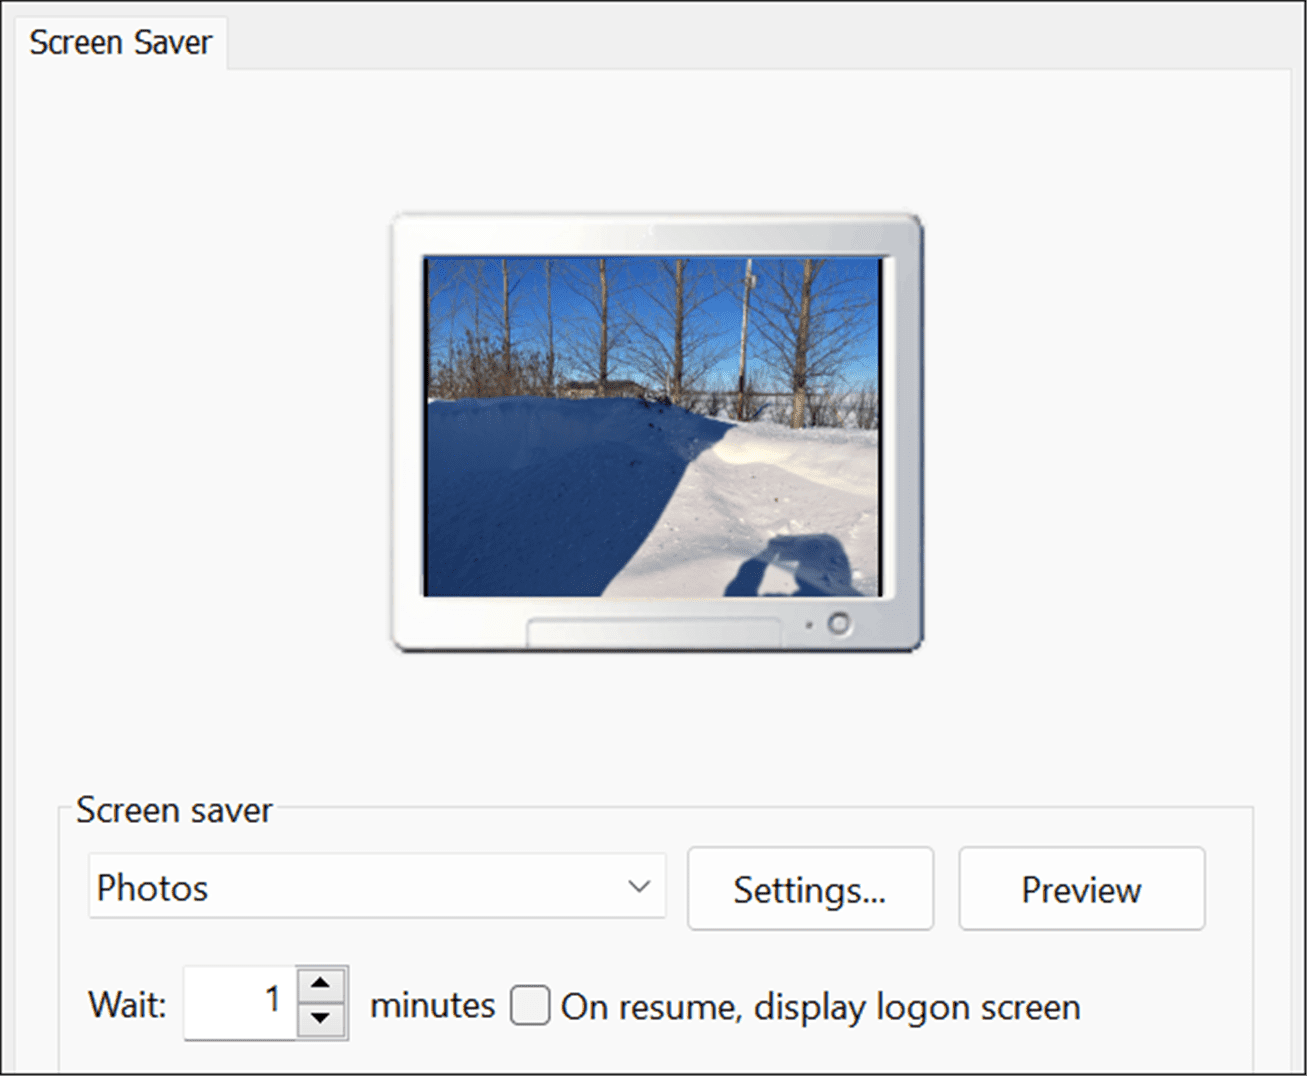
- To change the default pictures folder for your screen saver, click the Settings button in the Screen saver section.

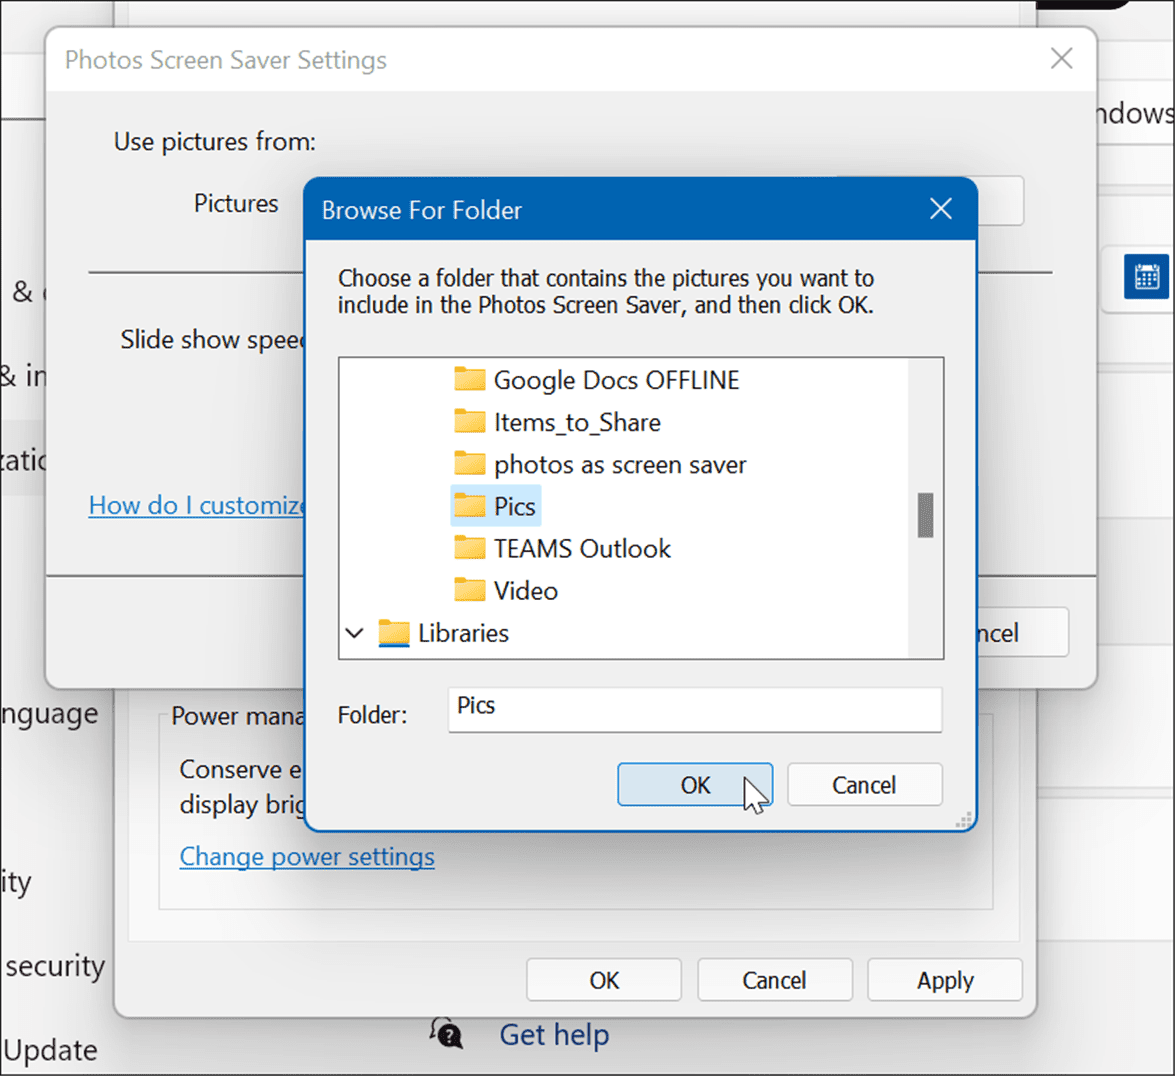
- When the Photos Screen Saver Settings window opens, click the Browse button in the Use pictures from section.

- Now, browse to the location of the pictures you want to use and click OK. Next, click the Save to exit Photos Screen Saver Settings.

- It’s also worth noting that you can adjust how your photos display as the screen saver. For example, you can choose the amount of time before it turns on. You can also set the Lock Screen to appear by checking On resume, display logon screen. Of course, that’s a good step for additional security.


How to Set Photos as a Screen Saver on Windows 10
You can also set a photo as a screen saver on Windows 11. The steps are similar, but the menu you’ll see is slightly different.
To set a photo as a screen saver on Windows 10, use the following steps:
- Click the Start button and select the Settings icon.
- Select Personalization from the home menu in Settings.

- Click Lock screen from the menu on the left.
- Scroll down the options on the right and click the Screen saver settings link.

- The Screen Saver Settings windows will open, and, just like Windows 11, it pulls images from the default Pictures folder. To change the location to a different location with photos you like, click the Settings button.

- The Photos Screen Saver Settings screen will appear — click the Browse button.

- Navigate to the folder with photos you want to use as your screen saver. Click OK, click Save on the Photos Screen Saver Settings window, click OK again for the change to take effect.

- That’s it. Now you can see a preview of the screen saver you created with your photos.


Personalizing Windows PCs
Adding your photos to the screen saver on Windows 11 and Windows 10 is one of many ways to personalize your Windows experience. For example, you can change the lock screen background or change the desktop wallpaper. You can also enable Dark Mode on Windows 11, and if you’re not on Windows 11 yet, you can use Dark Mode on Windows 10.
If you don’t like the centered Start menu and taskbar that ships as the default with Windows 11, you can move Start to the left corner.


Jerry Schmidt
February 29, 2024 at 2:49 pm
Very helpful!!!