How to Move a Table in Word

There are a few ways to move a table in Word if you’re editing your documents. This guide will explain how.
It’s always a good idea to proofread and edit your documents after you’ve completed the initial draft. After all, a PC isn’t a typewriter, so if you’re writing a document in Microsoft Word, you’re free to change it at any time.
You may decide to move document around to improve the layout. For example, if you’ve got a table with important data, you might decide to move it for greater prominence.
Thankfully, it’s easy enough to move a table in Word, and there are a few methods you can try. We’ll explain how to move a table in Word below.
How to Set Table Alignment in Word
If the table is in the right place in the document but isn’t in the right place on your page, you might want to change the table alignment. As a table is typically filled with text, you can use the alignment options to move it on your page from left to right or in the center.
To set table alignment in Word:
- Open your Word document.
- Select your table by pressing the handle icon in the top-left of the table.

- On the bar, press the Home tab.
- Choose one of the alignment options (left, center, or right) in the Paragraph section.


The table will move according to your chosen alignment option. You may need to resize your Word table to ensure it doesn’t fit the entire width of the page. Otherwise, the alignment options will only work for the text contained within the table.
How to Adjust Text Wrapping in Word
Another quick way to adjust how a table is presented on a page is to change the text wrapping. Text wrapping will determine how a table will react once it reaches existing text—will it move for it, or will it force the text to surround the table?
You can set this action for yourself by adjusting the text wrapping options for your table.
To adjust text wrapping options in Word:
- Open your Word document.
- Select the handle icon (top-left) on your table.
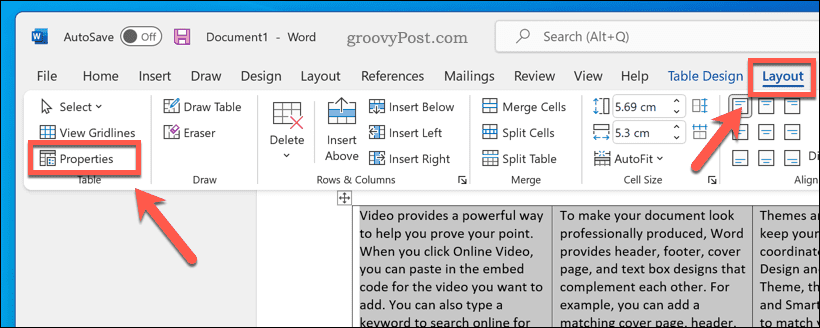
- Select the Table Layout tab (at the very far end of the ribbon bar) and then press Properties.

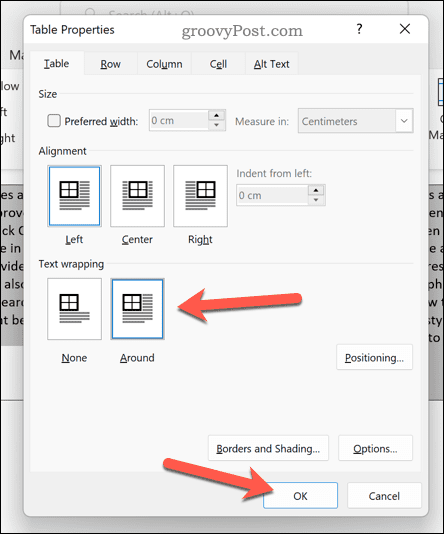
- Choose a text wrapping option (eg. none to leave the area around the table clear or around to let text surround the table).
- Press OK to confirm.

Using Drag and Drop to Move a Table in Word
If you want to move your table in Word from one position to another, the quickest and easiest way to do it is to use the drag and drop method.
To move a table in Word using drag and drop:
- Open your Word document.
- Select and hold the handle icon on your table (top-left) using your mouse.
- Without letting go of your mouse or trackpad button, drag and move your table to a new position.
- Once the table is in position, let go of your mouse button.


Using Cut and Paste to Move Word Tables
Struggling to move your Word table? You can place the table into your clipboard and paste it in position instead. You may prefer to do this if you’re struggling to scroll through a large document to move the table, for instance.
To cut and paste a Word table:
- Open your document in Word.
- Select the handle icon in the top-left corner of your table.
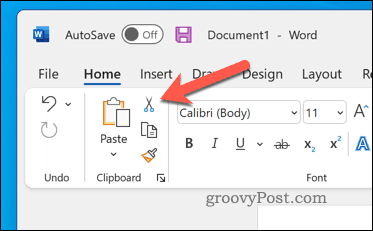
- In the Home tab, press the cut button. Alternatively, press Ctrl + X (Windows) or Cmd + X (Mac) on your keyboard.

- Move your blinking cursor to the new table position.
- In Home, press the paste button. Alternatively, press Ctrl + V (Windows) or Cmd + V (Mac) on your keyboard.

Editing Your Word Documents
Using the steps above, you can quickly move a table in Word. If you’re editing different Word documents, you may want to take advantage of some important tips for all Word users.
Want to customize your Word document further? You can always edit your images in Word itself. If you’re planning on publishing your document, you may want to consider adding a watermark in Word to make your ownership clear.


Kapil
December 16, 2022 at 1:11 am
Thanks Buddy, this was a lifesaver