 Content Aware Fill in Photoshop CS5 is our second tutorial in our series: groovyPost Teaches Photoshop Basics. I had a lot of fun creating this tutorial and screencast because Content Aware Fill in Photoshop CS5 is just soooo amazing. It’s actually my favorite new feature from CS5, so surprise, surprise I chose this as the first tutorial that drills down into the details of CS5.
Well, enough chit chat, let’s get right into the basics of this amazing new Adobe Photoshop CS5 feature – Content Aware Fill. Let’s kick things off with a groovy Screencast, followed by our customary step-by-step tutorial w/screenshots!
Step 1 – Opening An Image
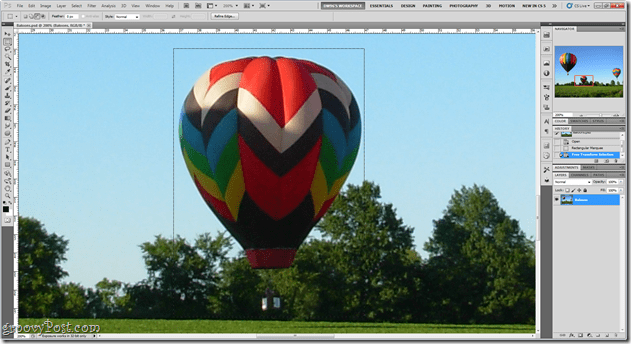
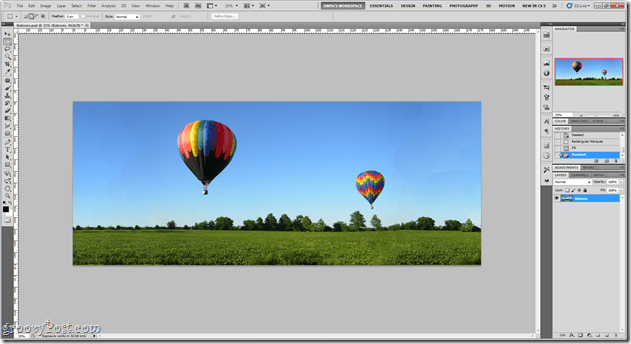
Find yourself an image and load it up into Photoshop. For my image, I’ll use a few hot air balloons with plenty of color (I love color!).

Step 2 – Removing An Object With Content Aware Fill
Go ahead and pick up the Rectangular Marquee Tool (or any other selection tool) and mark the object in the image which you’d like to remove.
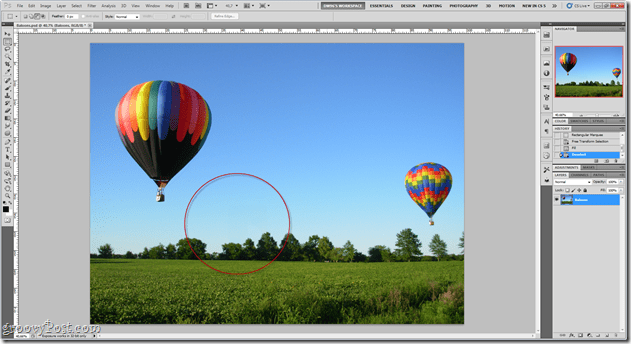
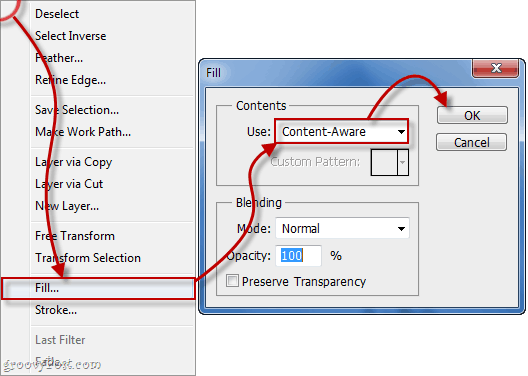
Now, Right-click on your selection and select Fill. From there, make sure that the Use menu is set to Content-Aware Fill and blending mode is Normal with 100% Opacity.
Hey look! The balloon has instantly disappeared! Notice that not only is the balloon gone, but Photoshop Content Aware Fill also created a few new trees in its place! Yeah I know… amazing!
Step 3 – Removing Smaller Imperfections
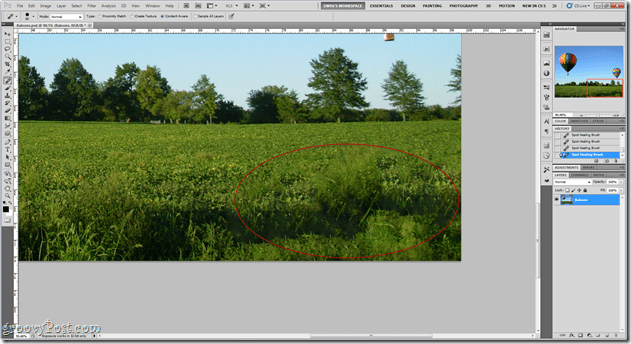
Another great use for Content Aware Fill is removing smaller issues or imperfections from your photographs. For instance, perhaps you need to remove some weeds from a perfect scenery photo. Or perhaps you have a few solar flares in a sunset picture. Not to worry–just pick up the Spot Healing Brush Tool and set its sampling mode to Content-Aware. Now, I’ll try to paint over that yellow grass in the lower right of my image.

Poof! Dead ‘n’ Gone (and replaced with perfection)!
Step 4 – Increasing The Canvas Of Your Image
This picture is actually starting to look so good, I might want to use it as my wallpaper. Aww… look at that – it’s not the right aspect ratio – it needs to be bigger in width. But wait! Content-Aware Fill can help us do even that! Let’s head over to Image > Canvas Size and increase the width by a few thousand pixels.

Now, let’s use the Rectangular Marquee Tool and turn on its Add To Selection mode to select the parts of the image which were filled with transparency when we increased our canvas size.
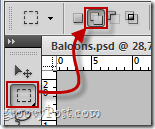
When selecting, make sure to keep a tiny part of the image in your selection as well. This improves guessing accuracy and will help create a better result.

Now, repeat the process we did earlier – Right-click your selection and select Fill, keeping all the same settings as last time.
The results will amaze you. If there are any parts of the image which don’t really look good, feel free to select them and try Content-Aware Fill over them as many times as you want until the result is right.
That’s it! You now know how to use Content-Aware Fill in CS5! Go show off your magical skills to your friends and stay tuned for all the other tutorials from our new series GroovyPost Teaches Photoshop!


iKlsR
January 12, 2011 at 3:28 pm
nice. i enjoy watching these. the steps are clear and the results are flawless. nice way to introduce people to photoshop.
makein
July 29, 2011 at 12:00 pm
that great jop!!!! thank you