How to Fix Photoshop Scratch Disk Full Error
Are you getting the Photoshop scratch disk full error? It’s a problem, but it’s easily fixed. This guide will show you how.
Photoshop is a powerful graphics editor that comes packed with features. Features that require a lot of system memory to work, however.
You may find that you get a pop-up message warning that Photoshop could not complete your request because the scratch disks are full. Scratch disks are the portion of your computer hard drive where Photoshop stores temporary files while processing your image.
If your scratch disks get full, Photoshop has no more room for these files, and everything grinds to a halt. The good news is that there are some effective ways to resolve this issue. If you want to know how to fix the Photoshop scratch disk full error, follow our steps below.
How to Free Up Additional Disk Space on Windows 11
Photoshop recommends having a minimum of 20 GB of free space on your hard drive to use it effectively. If you don’t have that much space available, there are ways to free hard disk space on Windows first.
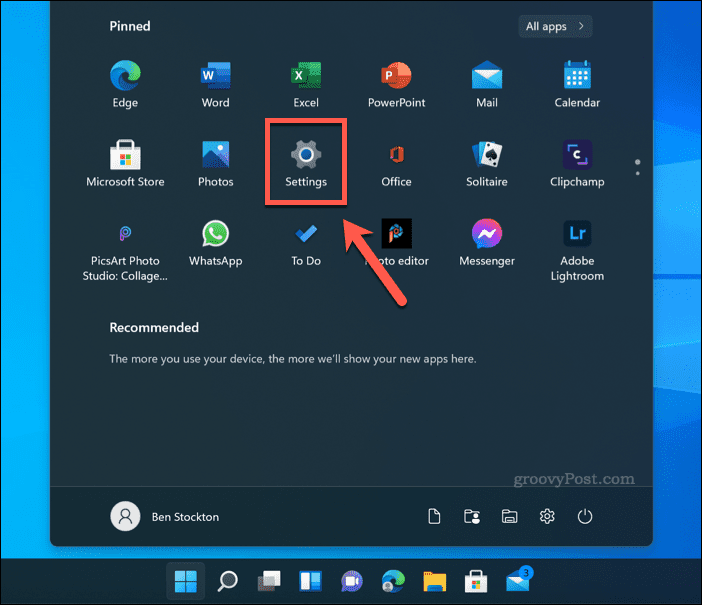
To free up additional disk space on Windows 11:
- Open the Start menu and select Settings.

- In Settings, press System > Storage.
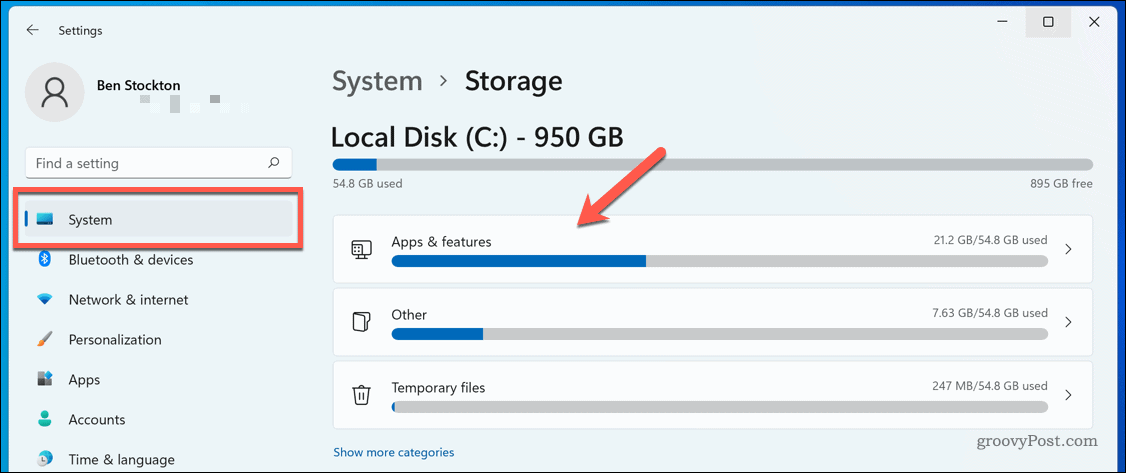
- You will see a breakdown of how your storage is being used. Select one of the options (eg. Temporary Files) to view further information and take further steps to remove the files.

- You can also turn on Storage Sense to automatically free up space for you—tap the slider next to Storage Sense to do this.

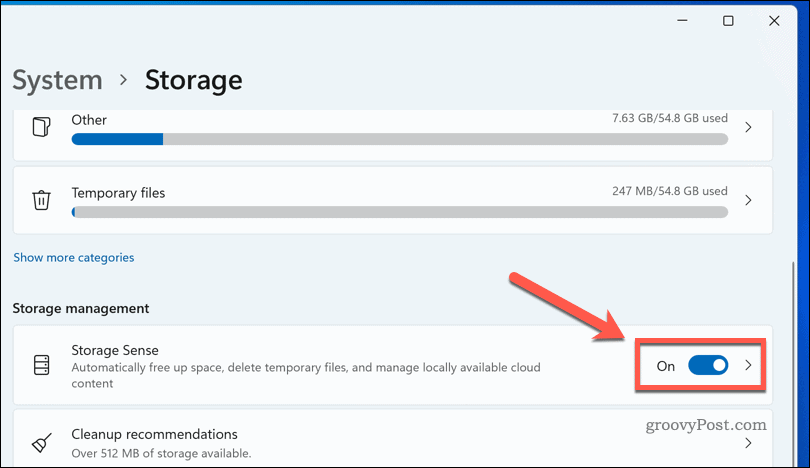
Work through the options until you have at least 20 GB of free space available to you. The more space you free up, the less likely it will be that you see the Photoshop scratch disk full error pop up.
How to Free Up Additional Disk Space on Mac
If you’re using Photoshop on macOS, you can try freeing up some additional disk space to see if this fixes the Photoshop scratch disk full error. The good news is that macOS offers some simple tools to help you automatically free up storage on Mac.
Here’s what to do:
- From the menu bar, press the Apple menu icon > About This Mac.

- Click Storage > Manage.

- Select one of the suggested options to start freeing up memory space.

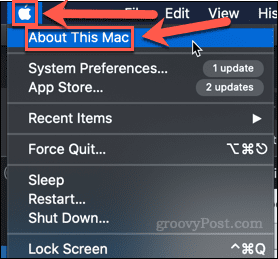


You can work through one or all of the suggestions. At the top of the window, you’ll see the current amount of free storage. The more storage space you can free up, the less likely it is that you’ll keep getting the Photoshop scratch disk full Mac error.
How to Select a Different Scratch Disk Drive in Photoshop
If you’ve freed up as much space as you can, and you’re still getting the scratch disk full Photoshop warning, you may find that you have more space on other hard drives on your computer. If this is the case, it’s possible to set the scratch disk to one of your other drives instead.
There are two ways to do so. If you don’t have Photoshop open, complete the following steps:
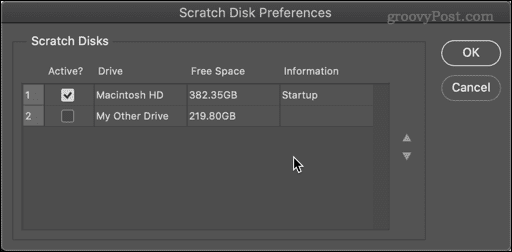
- Launch Photoshop.
- Whilst the application is loading, hold down Ctrl + Alt on Windows or Cmd + Option on Mac.
- In the Scratch Disk Preferences window that appears, select an alternative hard drive.

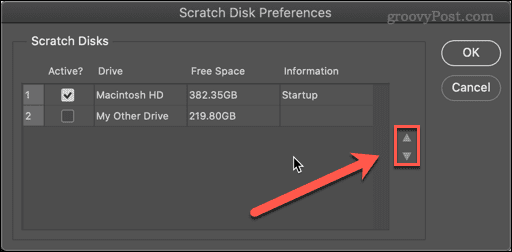
- You can select more than one hard drive if you wish and use the up and down arrows to determine the order of which is used first.
- Click OK to confirm your choices.
If Photoshop is already open, you can do the following:
- Select Photoshop > Preferences > Scratch Disks on Mac or Edit > Preferences > Scratch Disks on Windows.
- In the Preferences window, select the new hard drive for your scratch disk.
- You can select multiple hard drives and use the arrows to change the order to tell Photoshop which to use first.
- Click OK.
Photoshop will now use your chosen hard drive(s) as the scratch disk.
How to Clear The Photoshop Cache
Another cause of the Photoshop scratch disk full messages is having temporary files unneeded using up a lot of space. These could include things such as large images saved to the clipboard.
To clear cache files in Photoshop:
- Open Photoshop.
- Go to Edit > Purge > All. You can also choose to just purge the clipboard or histories if you wish.

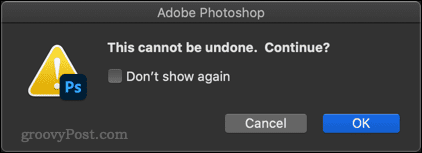
- You’ll see a pop-up window asking you to confirm your decision. Click OK.


Your cache should now be clean.
How to Let Photoshop Use More RAM
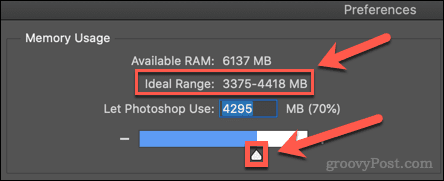
The more RAM that is available to Photoshop, the less often it will need to write to the scratch disk. By default, Photoshop will use 70% of available RAM, but you can increase this if you wish.
To increase the amount of RAM that Photoshop can use:
- Select Photoshop > Preferences > Performance on Mac or Edit > Preferences > Performance on Windows.
- Use the slider to increase the amount of RAM available to Photoshop. It’s best to stay within the Ideal Range that is shown above the slider.

- When you’ve made your selection, click OK.
If you find that your computer feels sluggish after making these changes, restore the RAM to the original values.
Get More Out of Photoshop
Knowing how to fix the Photoshop scratch disk full error will stop it from slowing down your PC or Mac while you’re editing your photos. It isn’t a perfect fix, however, and you may need to consider upgrading your PC or Mac with additional RAM or storage if the error returns.
New to Photoshop? You can learn how to rasterize in Photoshop or even how to use Photoshop Shake Reduction to remove motion blur from your photos. The more free space you have, the more you’ll be able to do without things grinding to a halt.