How to Fix NTFS File System BSOD on Windows 11 & 10

A NTFS file system BSOD error on Windows usually points to a problem with one of your drives. If you see it, fix it with this guide.
Nobody expects a blue screen of death (BSOD) to ruin their day when they’re booting up a PC. If it happens, don’t panic.
The first step is to understand why it’s occurred. A BSOD is usually a sign that something is wrong with your PC, serious enough for Windows to shut itself down to protect your system from further damage.
BSODs usually come with difficult-to-decipher names, and an NTFS_FILE_SYSTEM (or NTFS File System) error on a Windows 11 or 10 PC is no different. This error typically points to a problem with your system drive.
Once you know what the problem is, you can fix it using the steps below.
Check NTFS Formatted Local Drive for Storage Space
With the size of modern laptops and desktop drives being adequate, you might forget to ensure it has enough storage space. So, if your drive is full, it can cause the NTFS File System error and the BSOD.
To quickly clean up your local drive on Windows 10 or 11 and reclaim gigabytes of space, do the following:
- Open File Explorer and select This PC.
- Right-click your local drive (typically C:) and select Properties from the menu.

- When the Local Disk Properties window appears, click the Disk Cleanup button.

- Next, you’ll see the amount of space you gain if you click OK. However, click the Clean up system files button to regain even more space.

- Windows will recalculate gained drive space, and you should see a much more significant amount. So, for example, here, we can save nearly 7 GB of space by deleting old system files; when you’re ready, click OK.
- Click the Delete Files button when the verification message appears.


The amount of time it takes to complete the cleanup will vary. Note that it takes longer for large amounts of reclaimed space. When the process completes, restart your PC and see if you still get the error.
Reclaim Disk Space on Windows 11
While you can use the same steps above to clean your drive, you can also use the Settings app on Windows 11 to restore disk space.
To free up disk space on Windows 11, use the following steps:
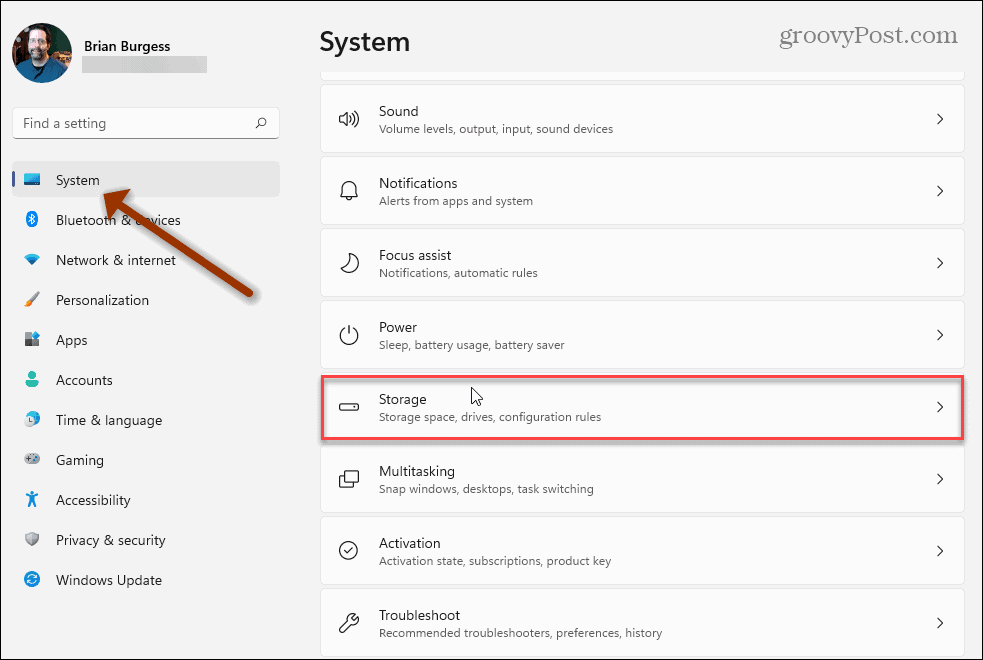
- Click Start and open Settings from the menu.
- When Settings opens, navigate to System > Storage.

- Scroll down to the Storage management section and click Cleanup recommendations.

- Scroll down and expand the Temporary files, Large or unused files, Files synced to the cloud, and unused apps. Select the items in each section to remove and click the Clean up button.
- To see advanced options – including system files you can remove – click the See advanced options link in the Temporary files section.

- A new set of temp files will display (like Windows Update Cleanup), which will help you reclaim gigs of space. Note that you may want to uncheck the Downloads option. All files in your personal Downloads folder will be removed if Downloads is selected.

- After selecting the items, you want to remove, click the Remove files button. Note the total space that will be reclaimed is shown at the top. For our example, we’re getting back over 1.5 GBs of space. The amount of space you clear up will vary.

- When the verification screen appears, click Continue.


Hopefully, a good chunk of disk space is reclaimed. Restart Windows 11 and see if the error no longer appears.
To avoid disk space issues, it’s a good idea to enable Storage Sense on Windows 10. You can also enable Storage Sense on Windows 11.
Check and Repair Drive Issues
If your local drive has errors, it can cause the NTFS File System error BSOD on Windows. Luckily, Windows 10 and 11 include the free ChkDsk utility to find and repair drive issues.
To check for disk errors and repair bad sectors on Windows 10 or Windows 11, do the following:
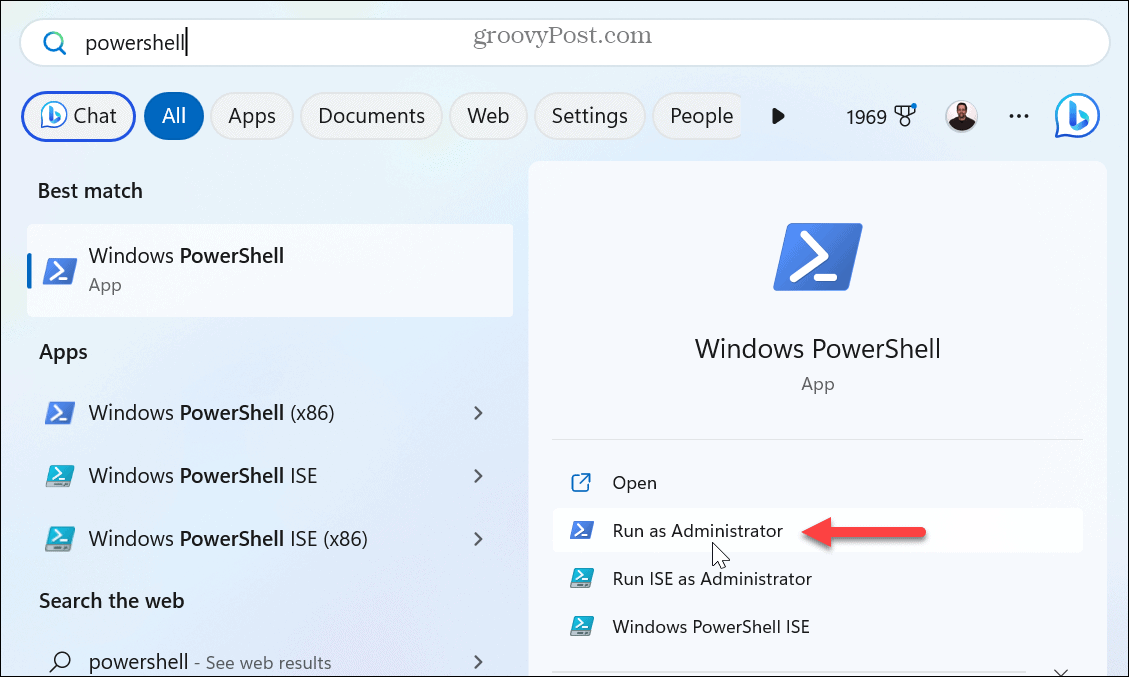
- Click Start or hit the Windows key, search PowerShell, and select Run as Administrator from the right column.

- When PowerShell opens, run the following command in the terminal and hit Enter.
chkdsk /f /r
- The utility will prompt a scan during the next reboot of Windows, Type Y and hit Enter.


Run SFC and DISM Scans
If you have plenty of drive space and the disk checks out, the problem could be within the system. Running DISM and SFC scans will find corrupt system files and replace them with working ones. The utilities are available on Windows 10 and Windows 11, and running them is the same.
To run an SFC and DISM scan, use the following steps:
- Click the Start button and search for PowerShell.
- Click the Run as Administrator option on the right.
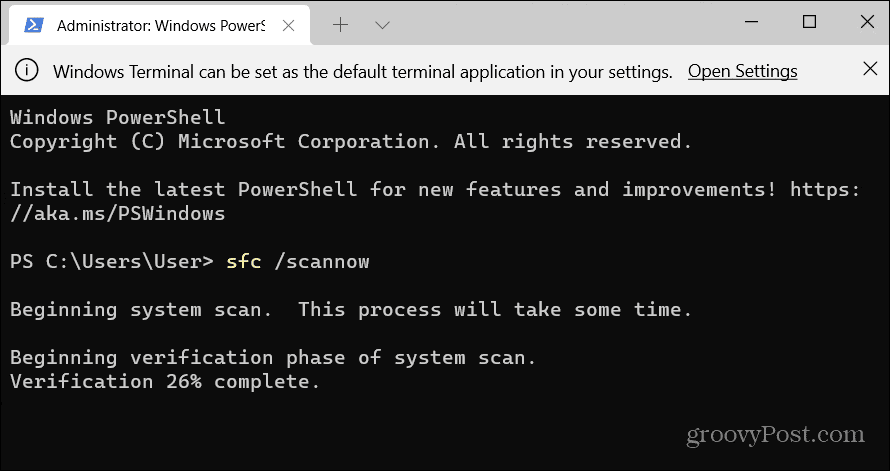
- When the terminal opens, enter the following command, and hit Enter.
sfc /scannow

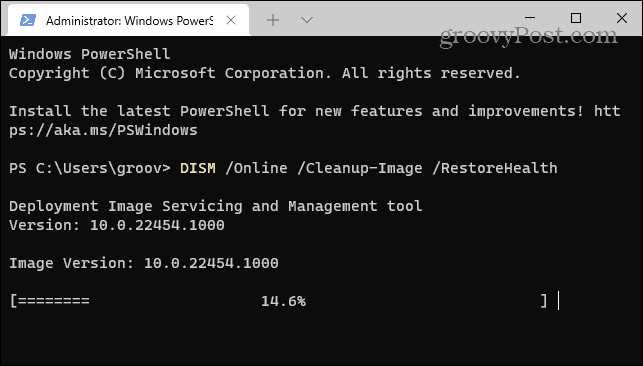
- After the SFC scan completes, run a DISM scan for good measure – especially if the SFC scan can’t replace files. A DISM scan detects corrupt files and replaces them with working files from Microsoft services.
- Type the following command and hit Enter.
DISM /Online /Cleanup-Image /RestoreHealth

Try a Clean Boot or Safe Mode
If you cannot get past the NTFS File System Error BSOD, try doing a clean boot into Windows 11. A clean boot uses minimal startup apps and drivers to load the operating system.
If a clean boot works, you’ll need to boot your PC and enable apps and services one at a time until you find the culprit.

If you’re still getting the error before getting to the sign-in screen, boot Windows 11 into Safe Mode. Or, if you’re not on Windows 11 yet, boot Windows 10 into Safe Mode. On either system, make sure to select Enable Safe Mode with Command Prompt so you can run the utilities shown above.

Reset Windows to Factory Settings
If the above options don’t work and you’re still getting the BSOD NTFS File System error, it’s time to take a more drastic step. You’ll need to use the Reset this PC utility built into Windows.
The Reset this PC features allow Windows to reinstall and keep your files; however, you want to back up your system first. That way, if something goes awry during the process, you can recover your PC from a system image backup. Note that creating a Windows 10 system image is virtually identical.
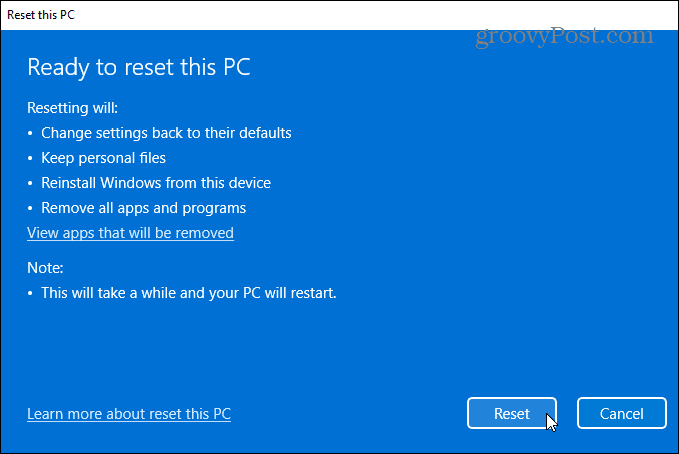
For step-by-step instructions, please read our guide on resetting windows 11. Or, for Windows 10 users, we have a Reset this PC guide for you, too.
Fixing a NTFS File System BSOD on Windows
It may seem alarming when you get a BSOD on your Windows system. If you encounter a NTFS_FILE_SYSTEM BSOD error, using the troubleshooting options above should get your PC up and running again. Make sure to use the Reset this PC option as a last resort. Typically, checking storage space and running a ChkDsk and SFC scan will resolve the problem.
For other issues, check out how to fix 100 percent disk usage on Windows 11 or fix Ntoskrnl.exe BSOD on Windows. Also, make sure your data is safe before disaster strikes.
You can create a restore point, so you’re able to roll back your system to a working state and use OneDrive to back up data and sync settings.


MAJANO CHRISTIAAN TIBOTH
March 22, 2024 at 10:16 am
No,I cannot even boot into safe mode or anything then i get an ntfs error and a message we will restatt for you and pc doesnot start automatic repair goes straight to recovery and when i enable safe mode i get ntfs error