How to Clear Cache on Your Windows 11 PC

If you’re looking to improve your PC’s performance (or just clear some disk space), you can clear cache on your Windows 11 PC. Here’s how.
When you clear the cache of temporary files on your device, it helps you troubleshoot issues and improve app and system performance. For example, clearing Android cache can help your phone to run better.
Clearing cache on your Windows 11 PC doesn’t take one step; instead, it requires different steps throughout the system. You can use Disk Cleanup to remove a PC’s temp files, clear DNS cache, clear Microsoft Store cache, and more.
Like cleaning up Google Chrome’s cache of temp files to fix issues and improve performance, we’ll show you how to clear the cache on Windows 11.
Use Windows 11 Cleanup Recommendations
The Settings app on Windows 11 offers Cleanup Recommendations as an easy way to clean up temp files cache.
You can run it by going to Settings > System > Storage and selecting Cleanup recommendations from the menu. Select the temp items taking up the most space from the list and click the Clean up button to remove the files.

It’s also possible to use the classic Disk Cleanup tool you’re used to from Windows 10.
However, you can no longer access it by opening This PC, right-clicking your C: drive, and choosing Properties. Now, you need to press the Windows key, type disk cleanup, and select the top result.

The Disk Cleanup utility will open directly so you can select temp files to delete and follow the onscreen prompts.

Clear Windows Store Cache
If you get many of your apps and games from the Microsoft Store, you can clear its cache of temp files to improve performance.
To clear your Windows Store temporary cache files:
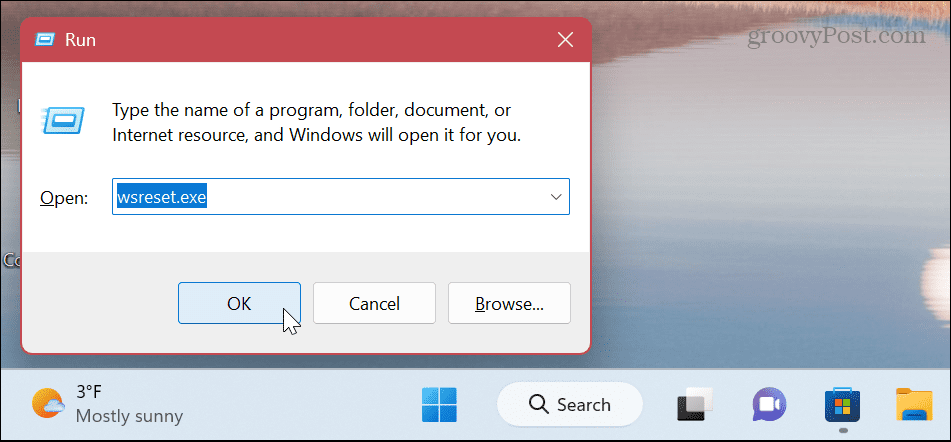
- Press Windows key + R to open the Run dialog window.
- Type wsreset.exe and click OK or press Enter.

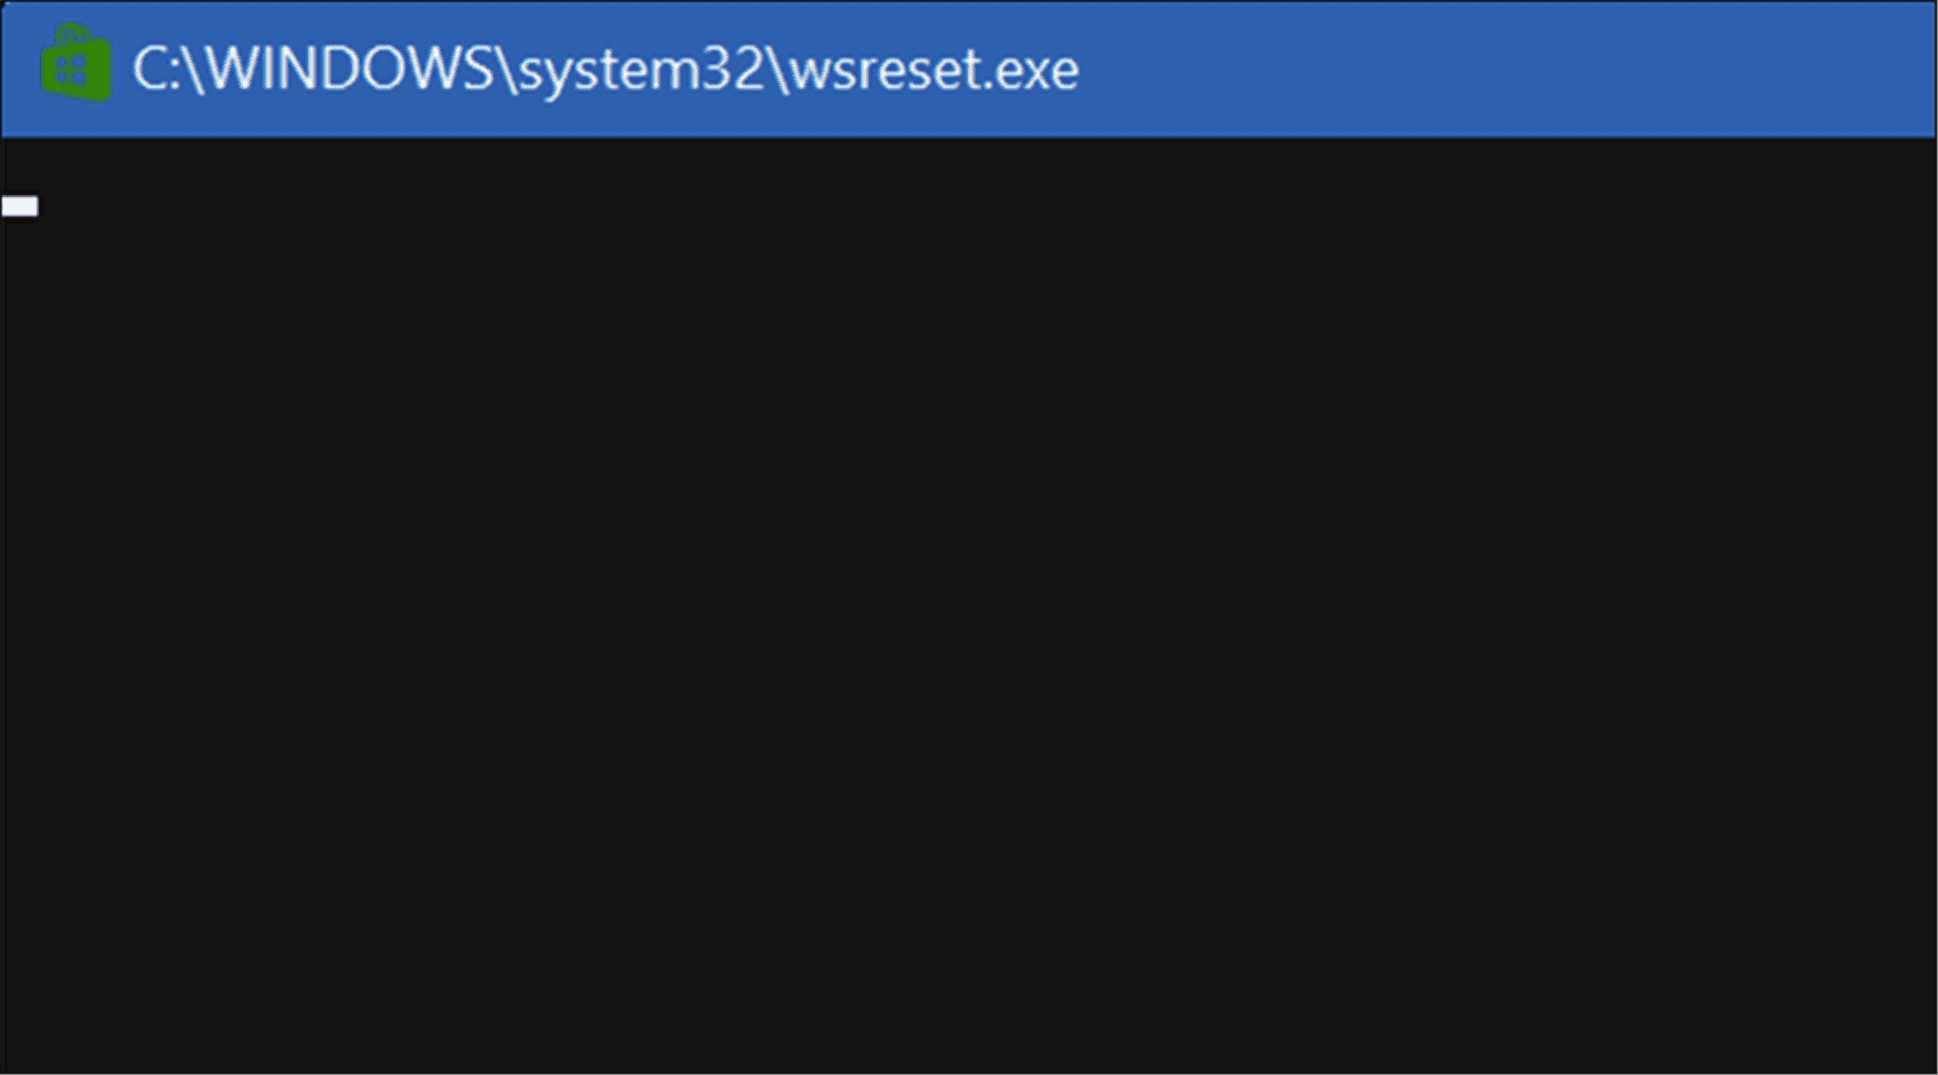
- A blank command prompt screen will briefly display.

- Once the screen disappears, your Microsoft Store’s cache of temp files is cleared and will run successfully.
Clear DNS Cache
Domain Name System (or DNS) points domain names to specific IP addresses. And flushing the DNS cache allows you to fix sites not loading in your browser due to too much IP address translation data.
To clear DNS cache on Windows 11:
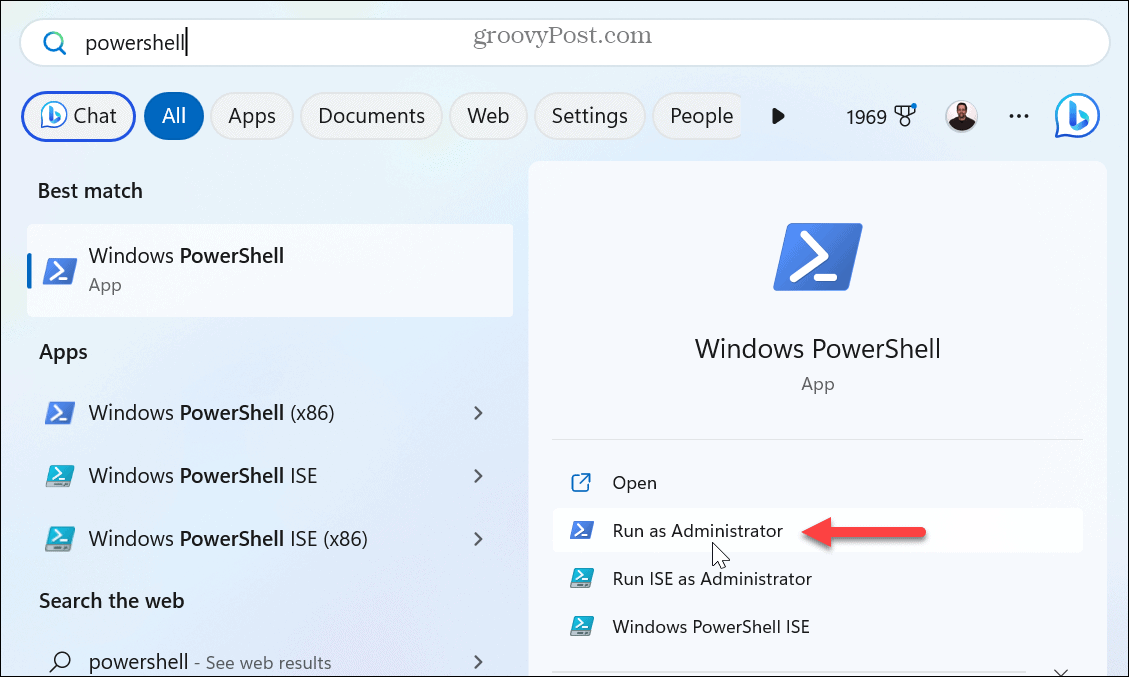
- Press the Windows key and open PowerShell as Administrator.

- Type in the following command and press Enter.
Clear-DnsClientCache


Use Run to Clear DNS Cache
Alternatively, you can use the Run dialog to clear DNS cache quickly.
- Press Windows key + R to launch the Run dialog window.
- Type in the following command and click OK or press Enter:
ipconfig /flushdns

You’ll see a command prompt window briefly appear while the command completes.
Manually Delete Temporary Files
If you suspect Storage Sense or Disk Cleanup are leaving temp cache files behind, you can manually delete temporary files on Windows 11. For example, you can remove files from the temp folder.
To manually delete temp files:
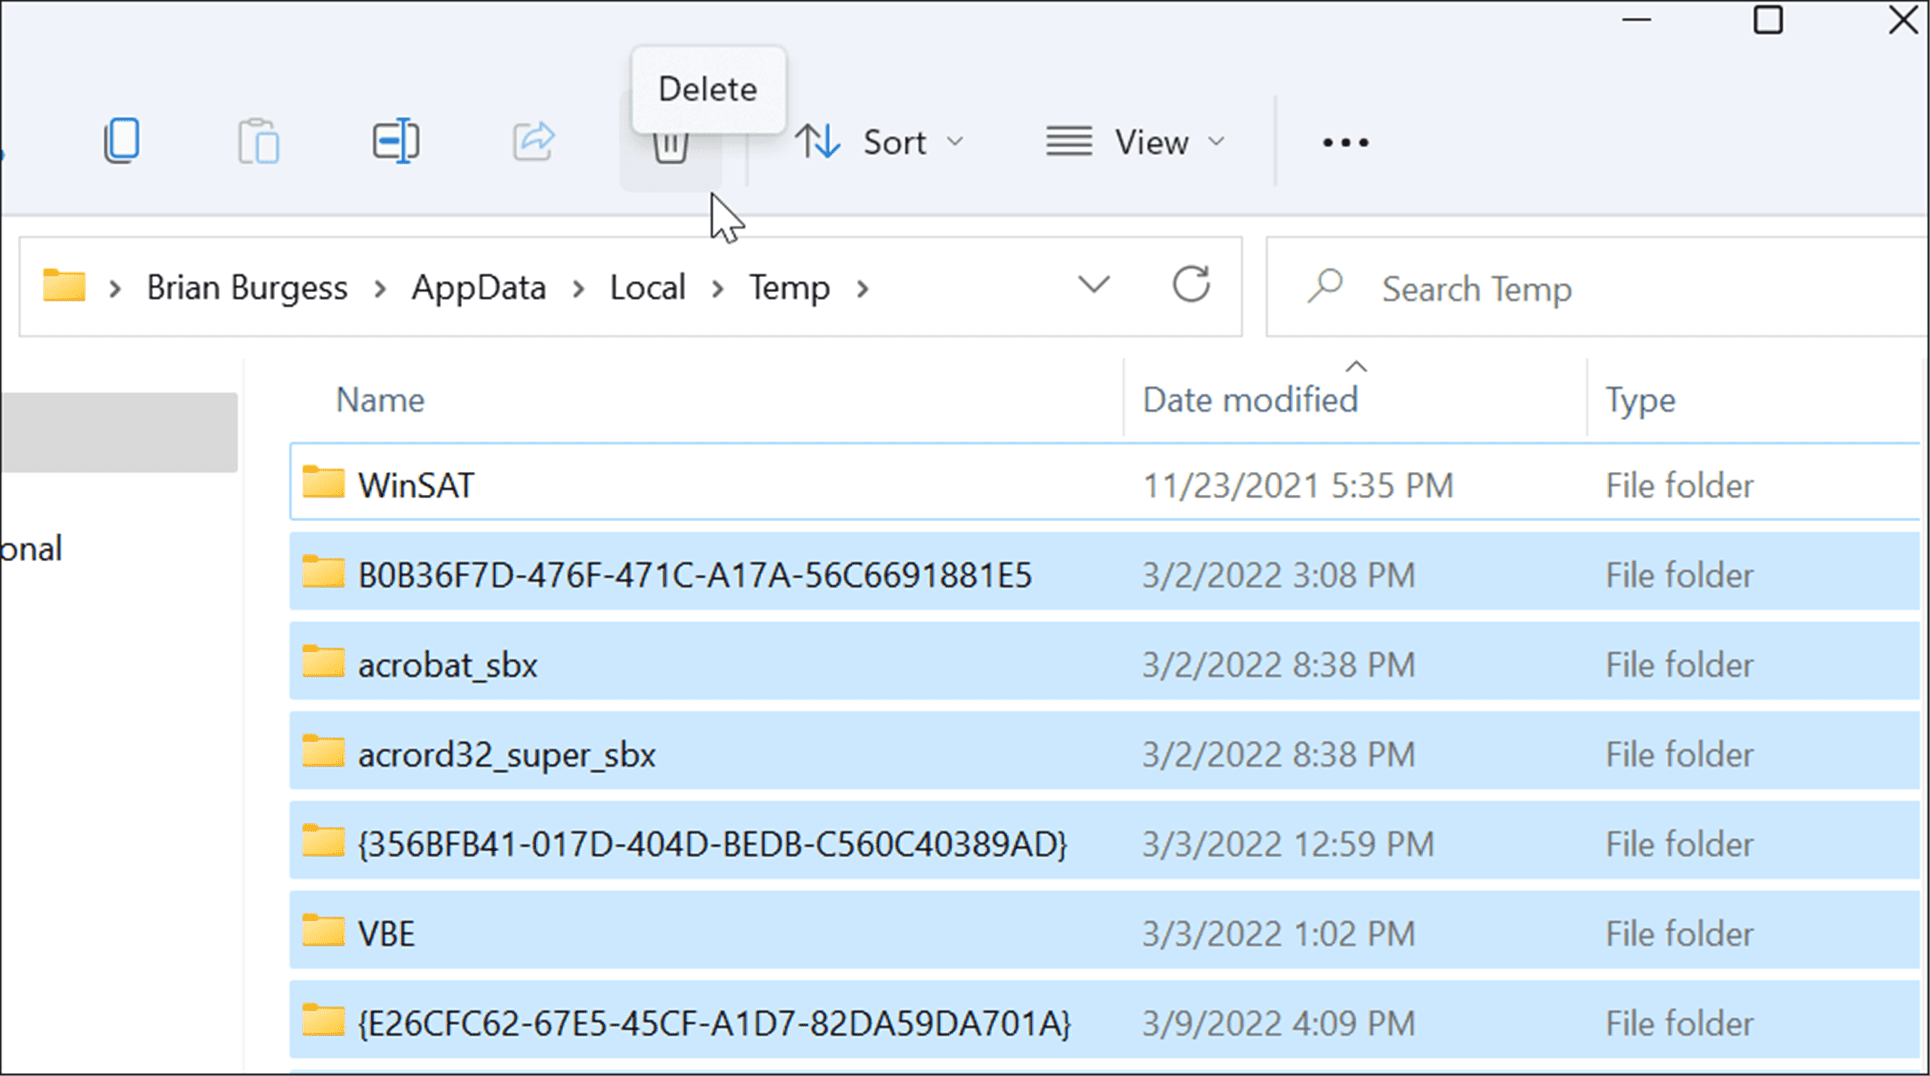
- Press Windows key + R to open the Run dialog,
- type %temp% and click OK or press Enter.

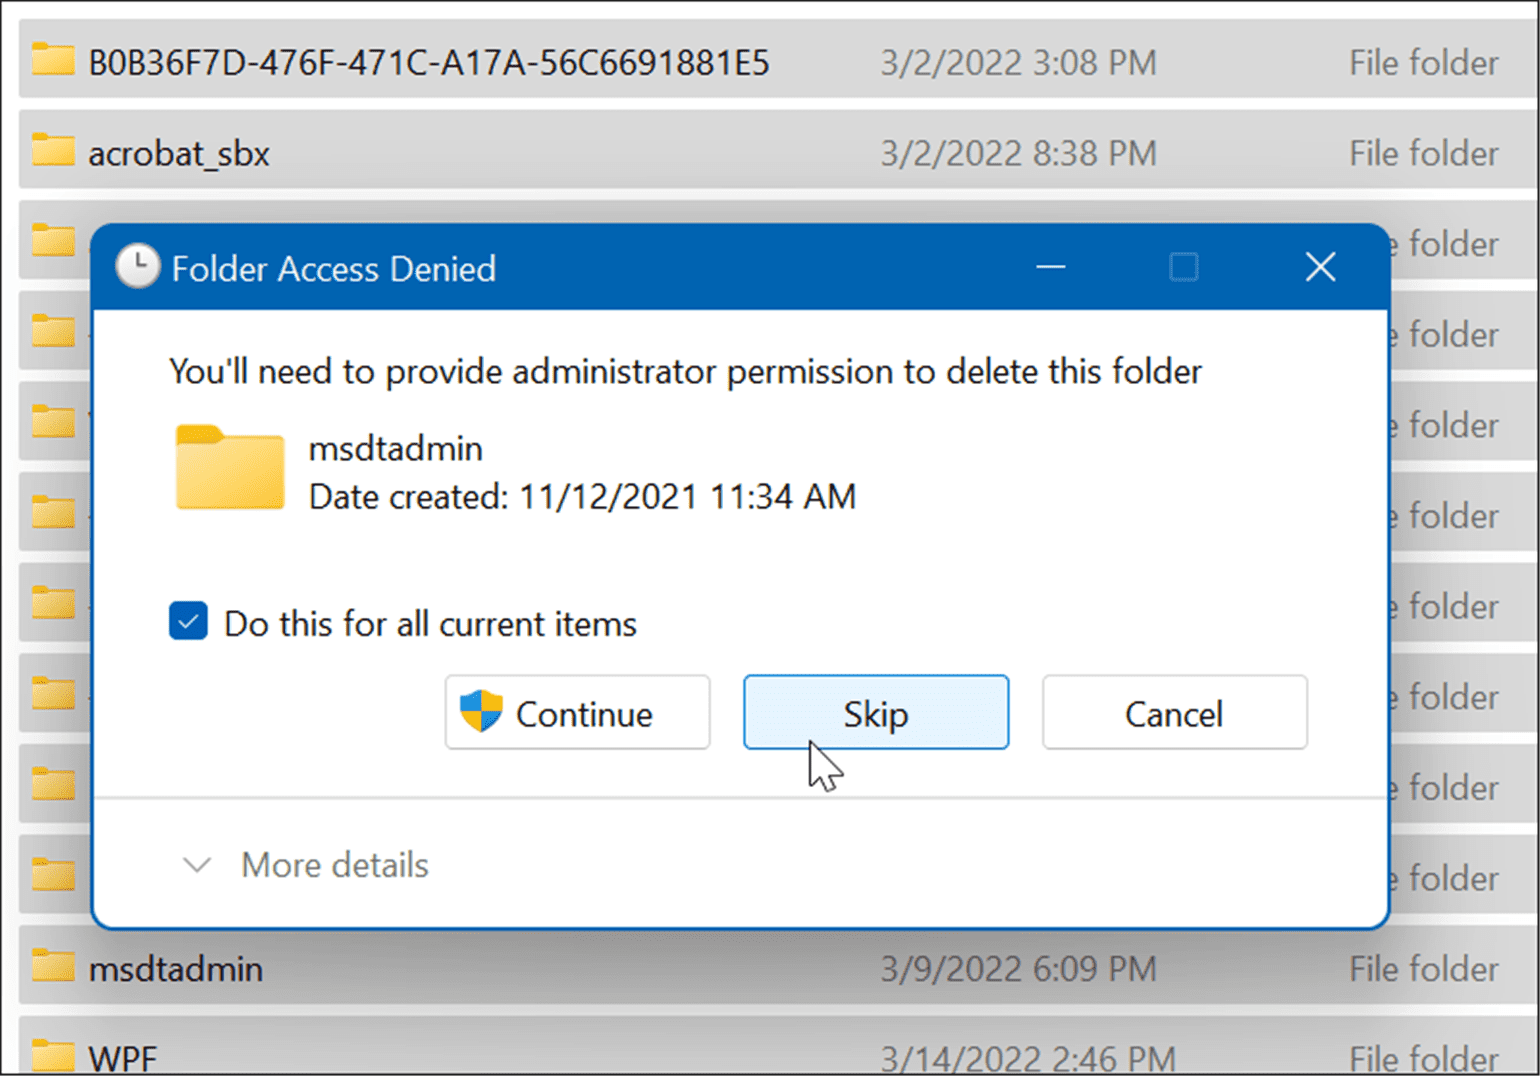
- Select all items in the Temp folder and click the trashcan icon on the command bar to delete them.

- If the Folder Access Denied message appears, click the Skip button.

Delete Temp Files from Command Line
If you prefer to use the command line interface, you can use PowerShell to delete temp files.
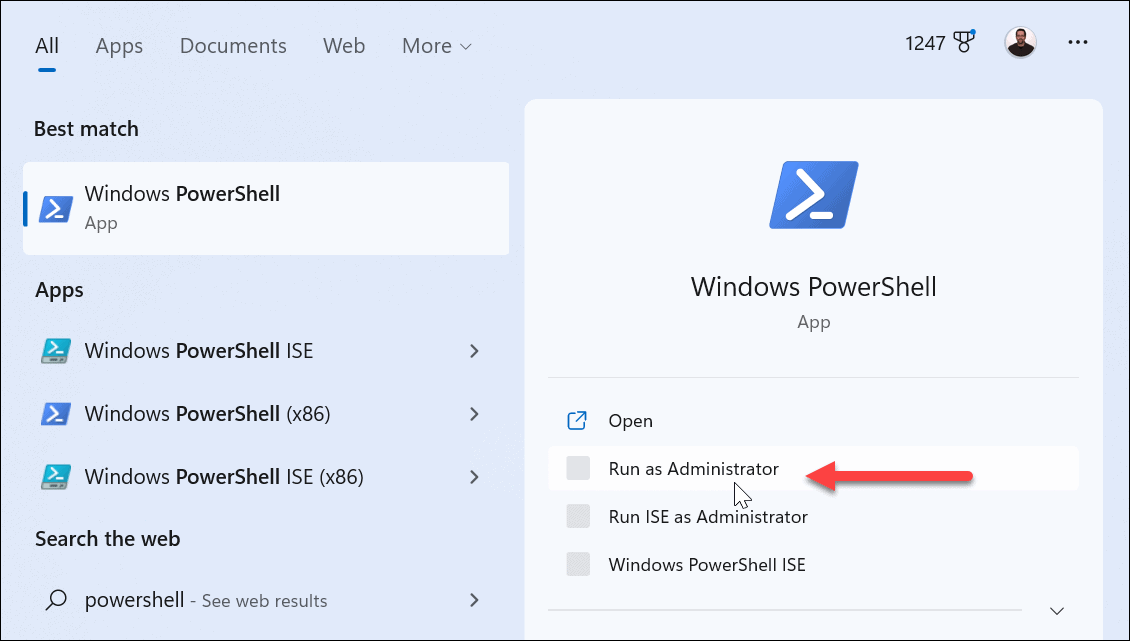
- Press the Windows key to open the Start menu and launch PowerShell as Admin.

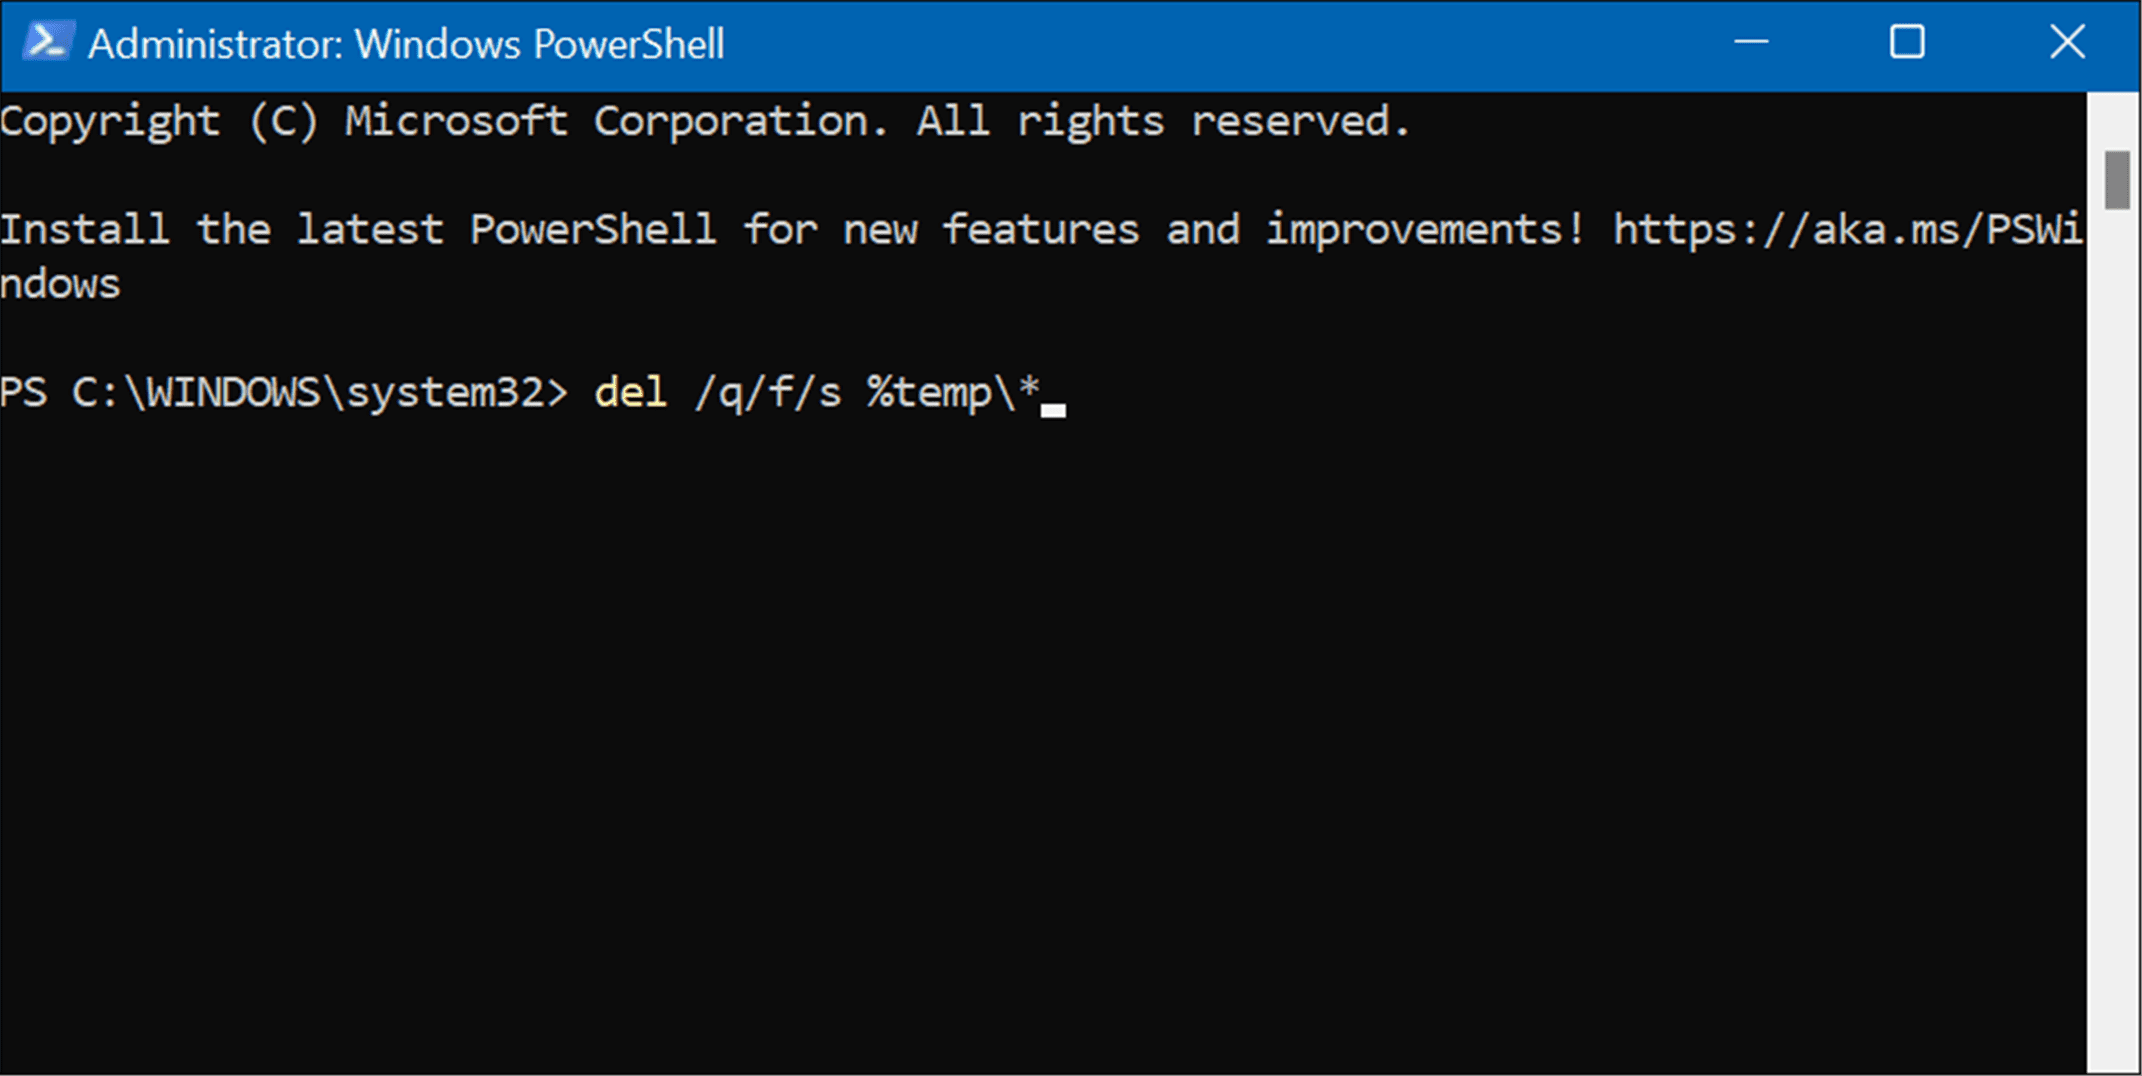
- Copy and paste the following command and press Enter:
del /q/f/s %TEMP%\*

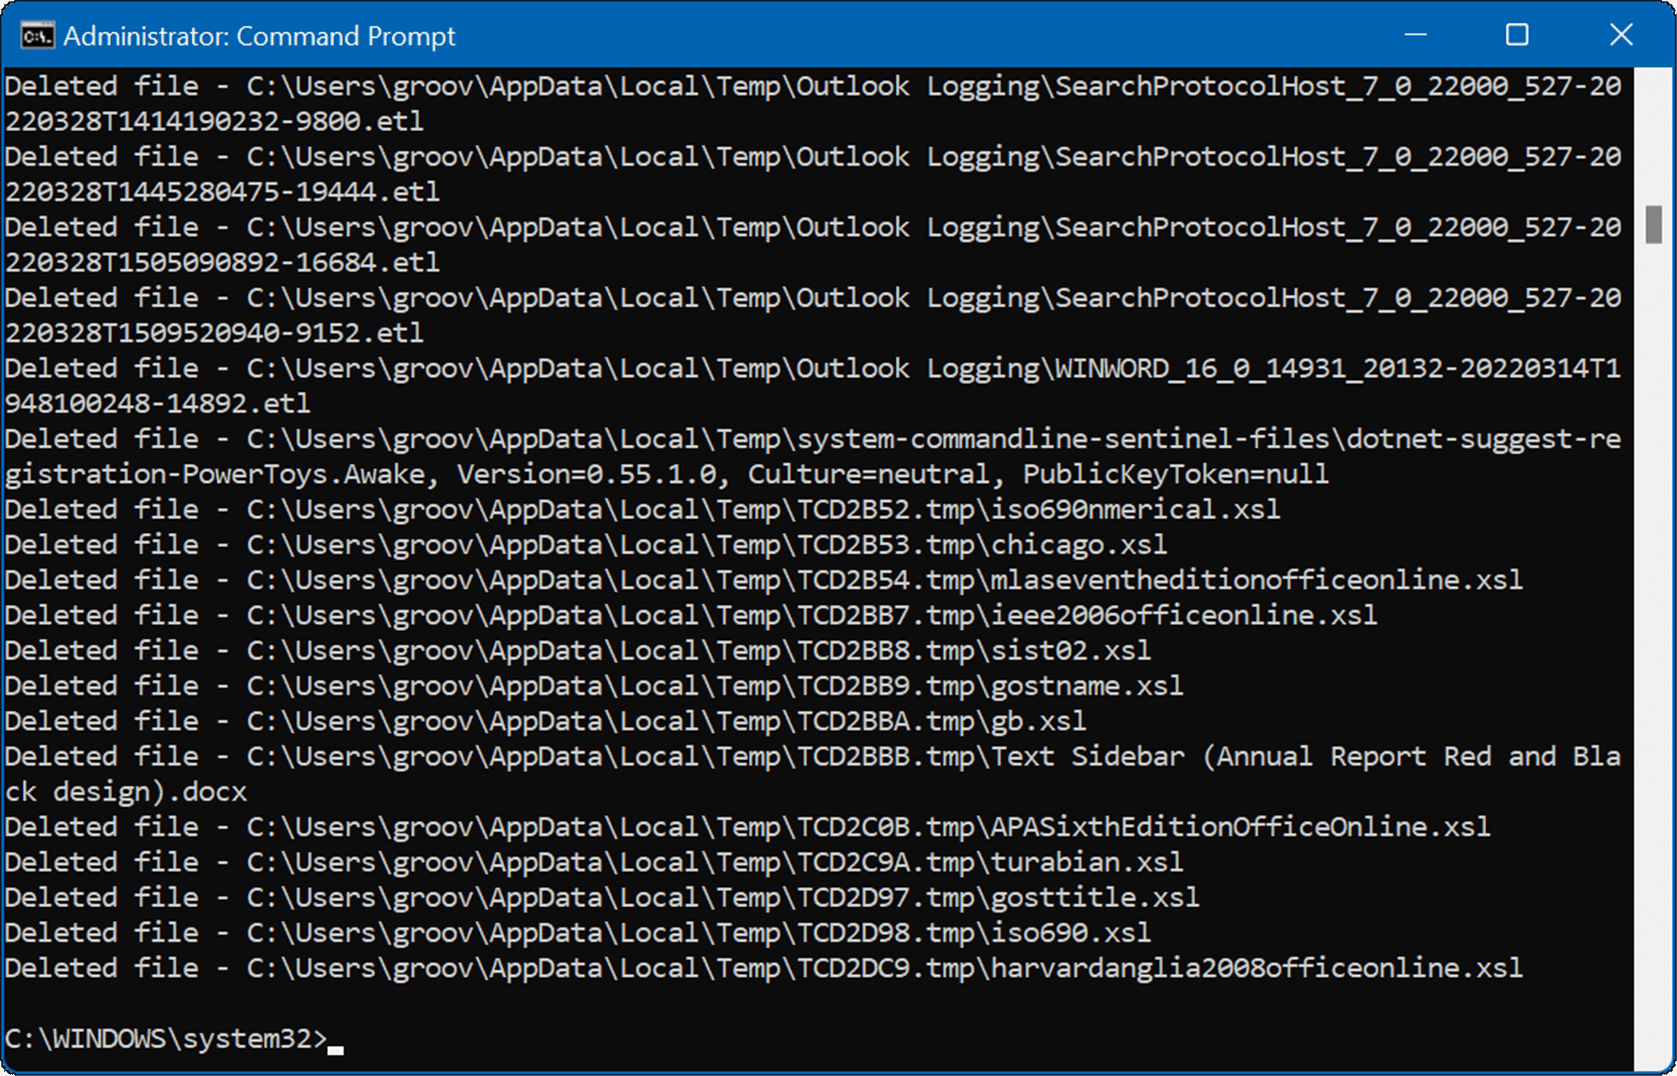
- During the process, you’ll see several lines of code that indicate the temp files being deleted from the Temp folder.

Clear Microsoft Teams Cache
If you do a lot of work and collaboration through Microsoft Teams, you might want to clear Teams cache of temp files. Temp files in Teams include large video files, images, and text.
To clear Microsoft Teams cache:
- Completely close the Microsoft Teams desktop app.
- Press Windows key + R to launch Run and enter the following path:
%appdata%\Microsoft\Teams

- When File Explorer opens, hold the Ctrl key, select the Cache, Code Cache, and GPUCache folders, and delete them.


Relaunch Microsoft Teams at this point—the folders you deleted will be automatically recreated, but they will be empty.
Clearing Cache on Your Windows 11 Device
If you want to improve your system’s responsiveness and performance, you can clear cache on Windows 11 using the above steps to achieve that goal.
In addition to improving performance and fixing problems, removing the temp files cache helps reclaim drive space.
There are apps you might want to clear the cache of old files to fix problems or improve performance. For example, for apps, you might want to clear Instagram cache or clear Twitter cache for better performance.


bromberg
August 23, 2023 at 2:33 pm
Am I correct to assume your article is for Windows 10 as well?
Dan
Brian Burgess
October 23, 2023 at 10:24 am
Yes. Several options will work on Windows 10. Although, Win10 doesn’t include the Cleanup Recommendations option that’s available through Windows 11 Settings app.
dan
October 23, 2023 at 9:37 pm
Understood…thnx!