Using Microsoft Outlook on iPad

Microsoft Outlook on iPad isn’t nearly as robust as the desktop versions. And yet, there are still things you can do to customize the mobile experience.
Microsoft Outlook is one of the most popular email clients in the world. Whether for personal or business use, Microsoft Outlook is available across multiple platforms, including iPadOS. Here are the steps to follow to get started with Microsoft Outlook on your tablet. The steps assume you already have a subscription to Microsoft 365.
Setting Up Email Using Microsoft Outlook on iPad
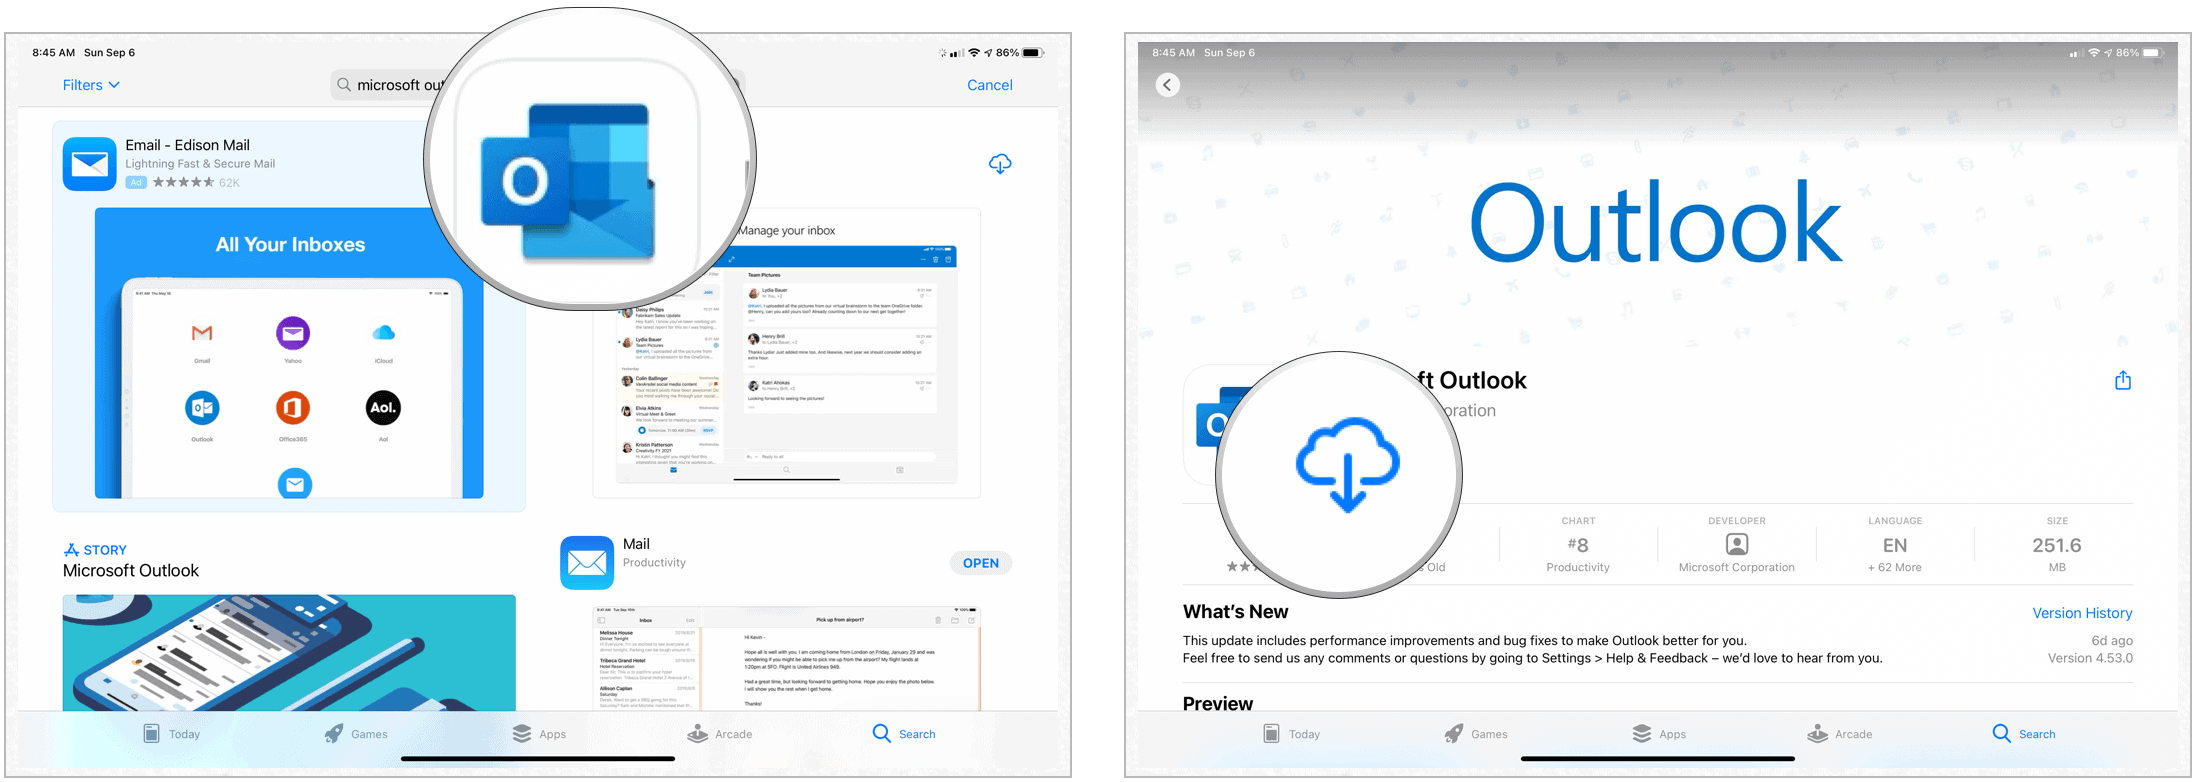
- Download the Microsoft Outlook app from the App Store on your tablet. The app also works on the iPhone.
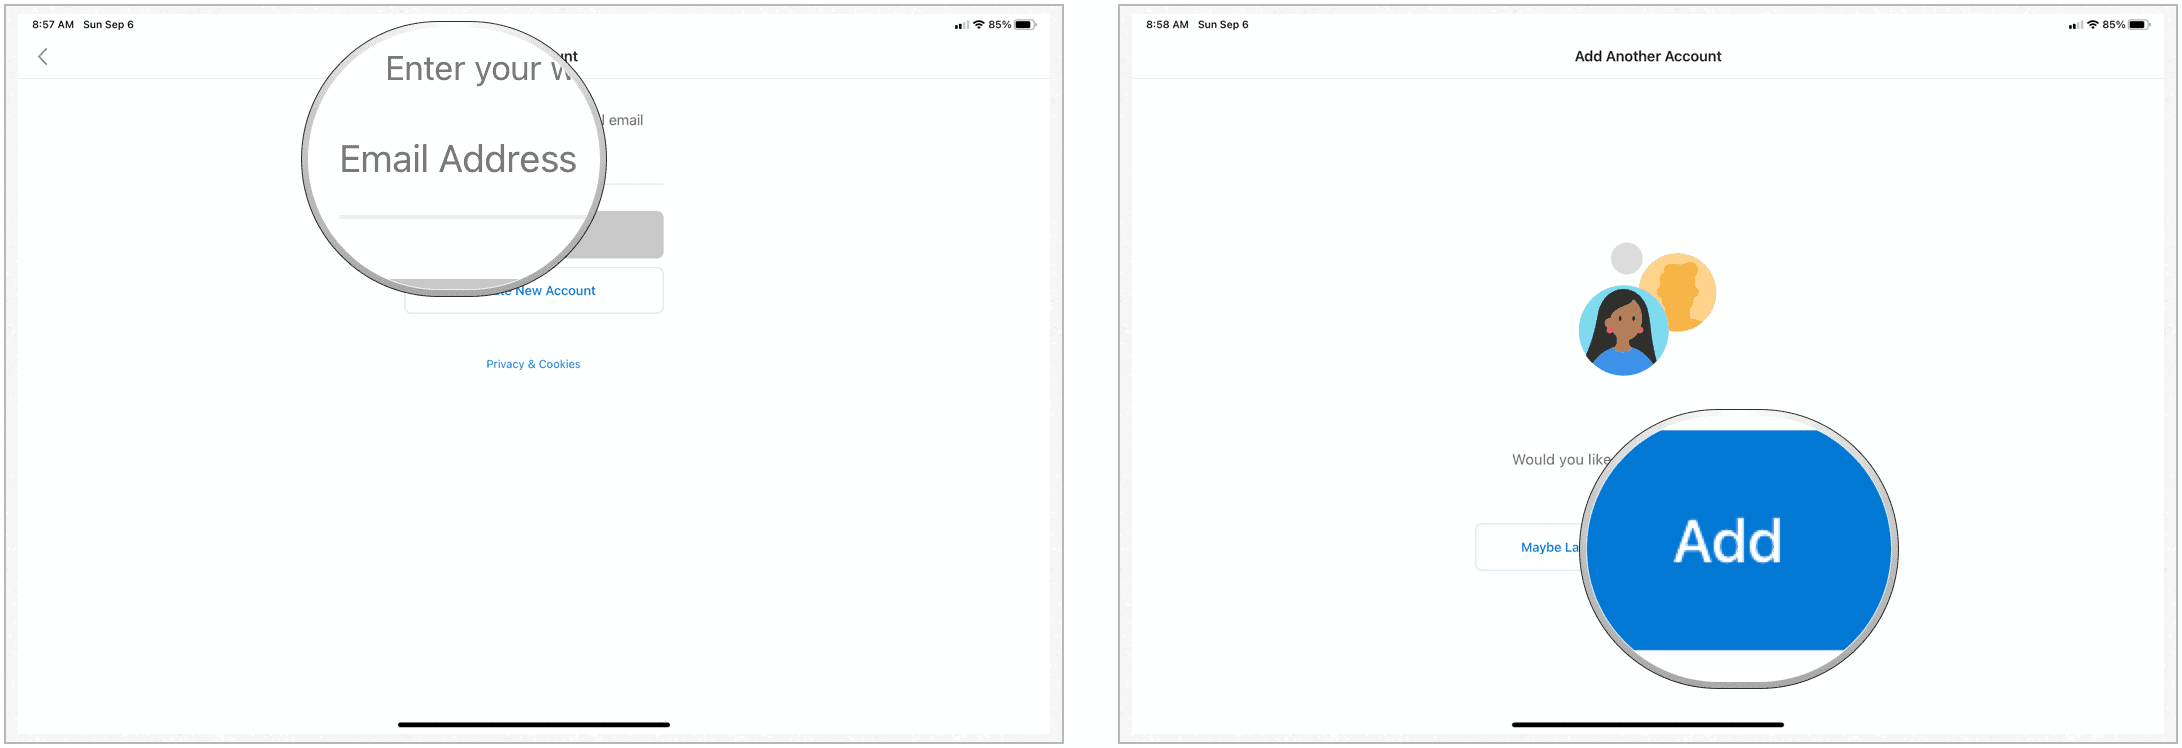
- Once installed, tap the Microsoft Outlook icon on your Home screen.
From there:
- In the Email Address box, add your work or personal email. You can also tap Create New Account to get a free Microsoft email account.
- Log into your email account.
- Tap Add to add another email account to the Microsoft Outlook app or Maybe Later to finish. Microsoft Outlook supports different types of email accounts, not just those provided by Microsoft.
Enable Notifications
Finally, enable notifications by tapping Turn On in the pop-up box. Otherwise, select No Thanks.
If you’re connecting to your school- or work-based email account, there might be extra settings that are required to use Microsoft Outlook for the iPad. Check with your IT department for more information.
Using Microsoft Outlook on Your iPad
Once you’ve set up Microsoft Outlook on your tablet, you can customize it to better suit your needs.
Swiping
Like other iOS/iPadOS apps, Microsoft Outlook relies heavily on swiping tools. Specifically, swipes allow you to move quickly through emails that show up in your Inbox. You can customize the swipe actions in the app.
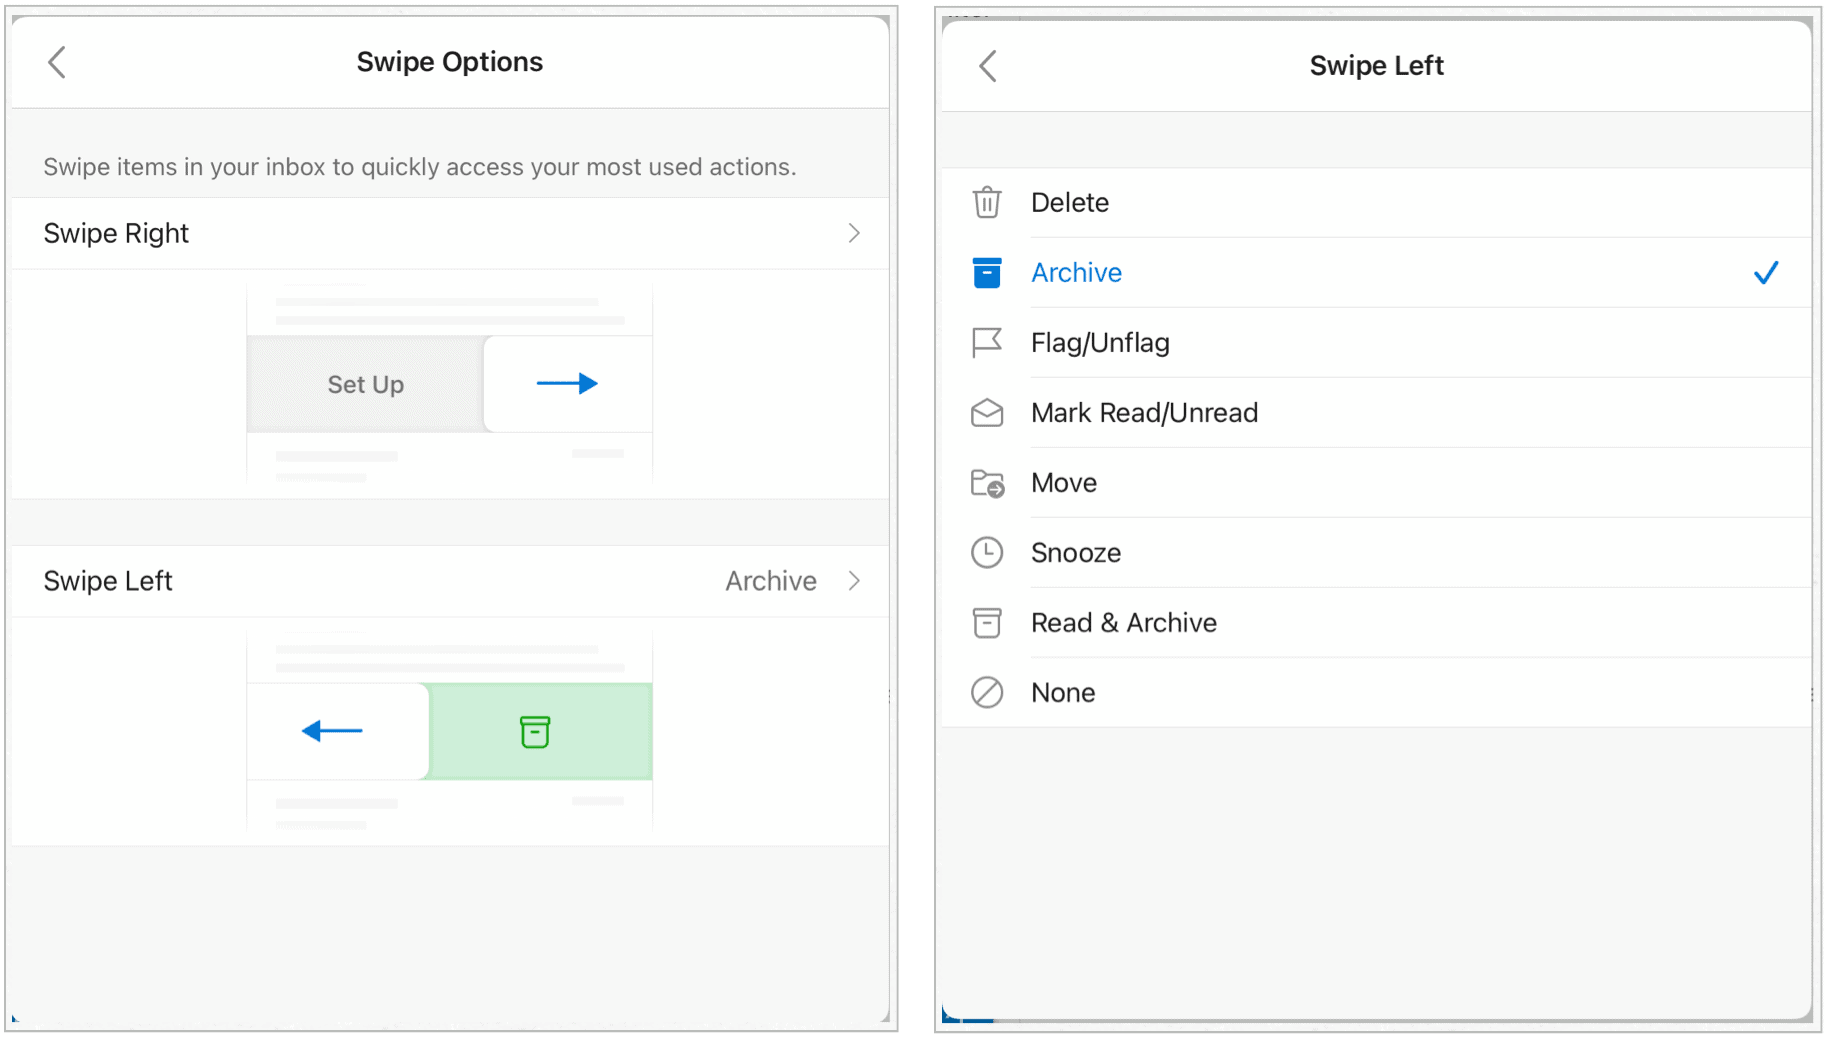
- Tap Settings > Swipe Options in the Microsoft Outlook app on your iPad.
- Choose Swipe Options from the Settings menu.
- Select Swipe Right and Swipe Left to adjust the settings for each. Choices for each include Delete, Archive, Flag/Unflag, Mark Read/Unread, Move, Snooze, Read & Archive, and None.
By default, a Swipe Left automatically archives an email; Swipe Right isn’t set by default.
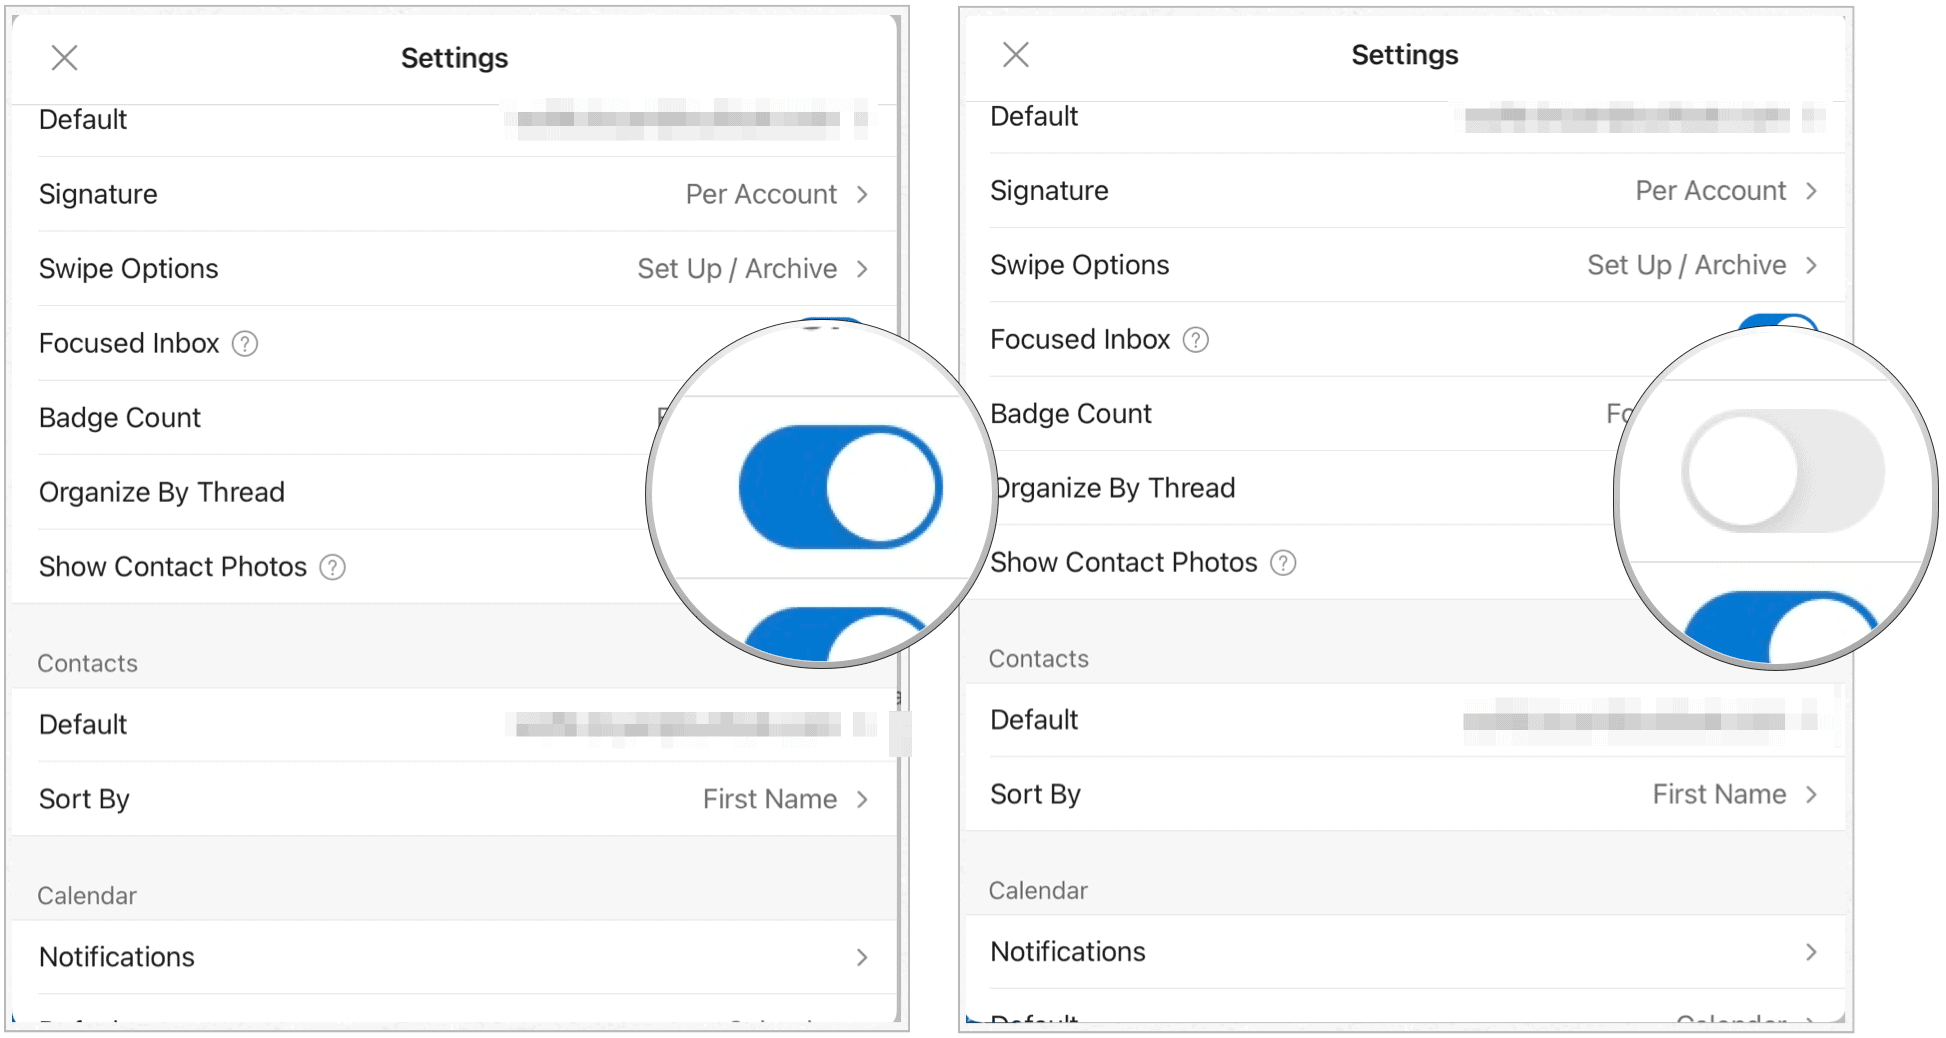
Organize By Thread
With the built-in organize mail by thread tool, you can arrange email messages as conversational threads that are based on the message subject. The tool is turned on by default, although you can change this setting at any time.
To adjust:
- Tap Settings.
- Scroll down, select Organize mail by thread.
- Toggle On/Off.
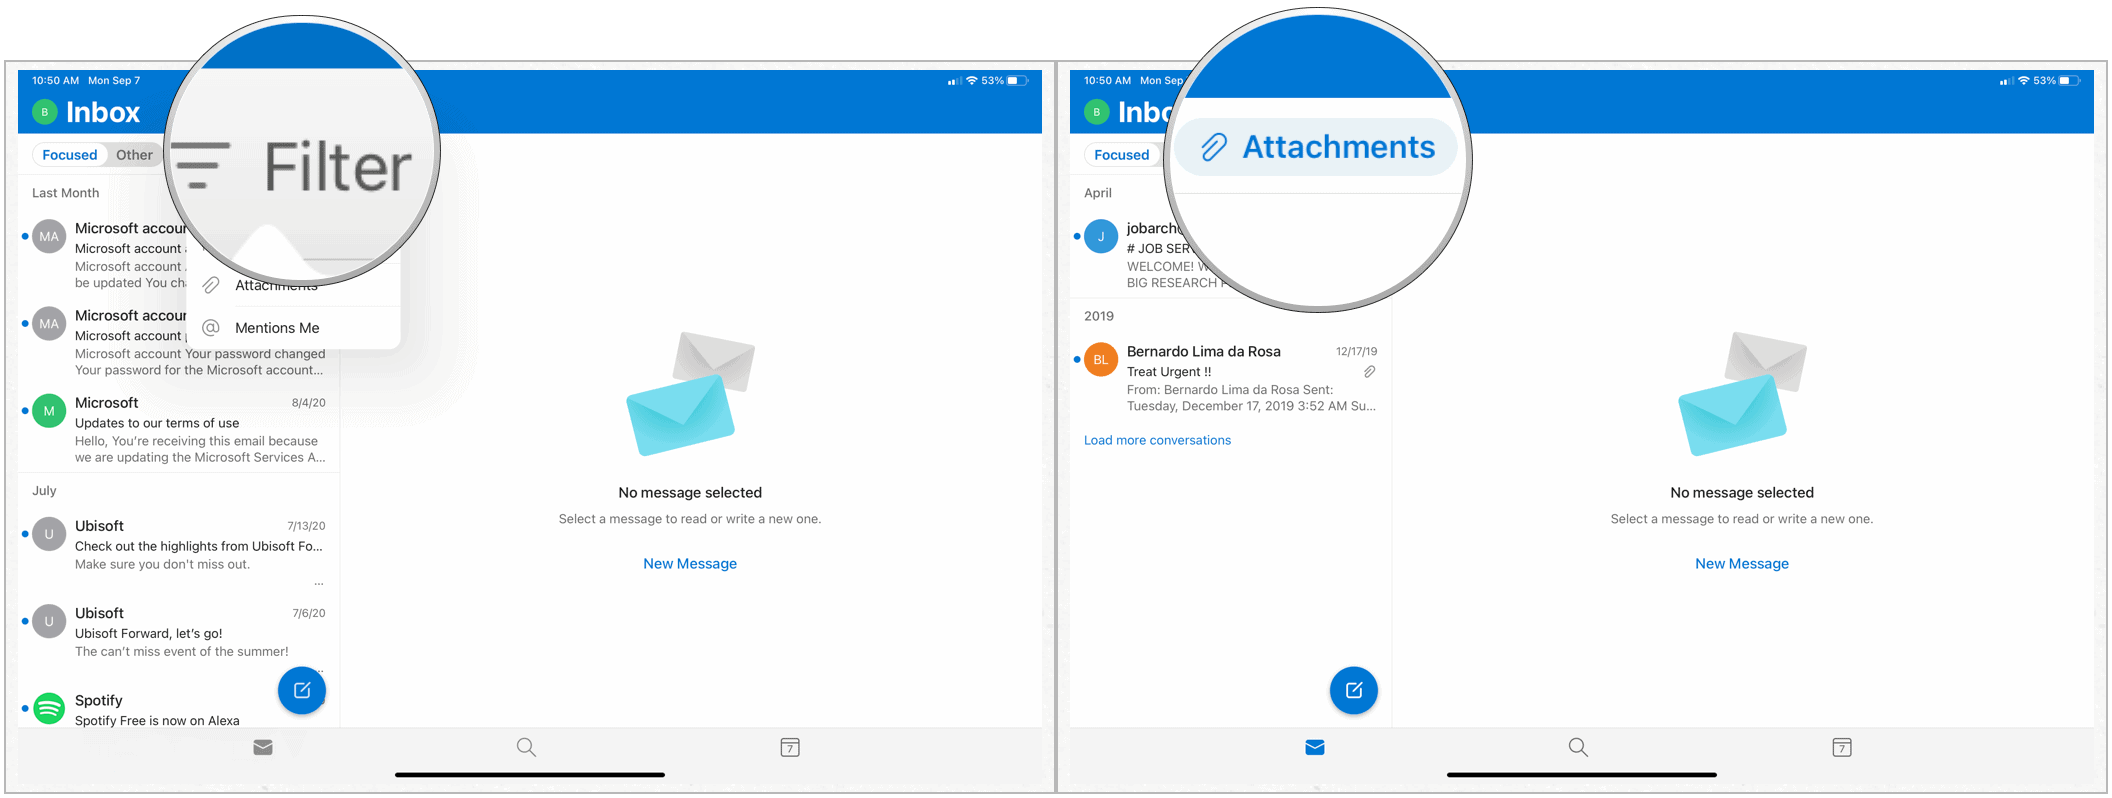
Filter Emails
One of the easiest ways to avoid some clutter in Microsoft Outlook is to filter your emails. In the iPad version of Microsoft Outlook, this is limited to Unread, Flagged, Attachments, and Mentions Me. You can find the Filter choices on any tab in the app, including Focused and Other. In the following example, only emails with attachments are shown.
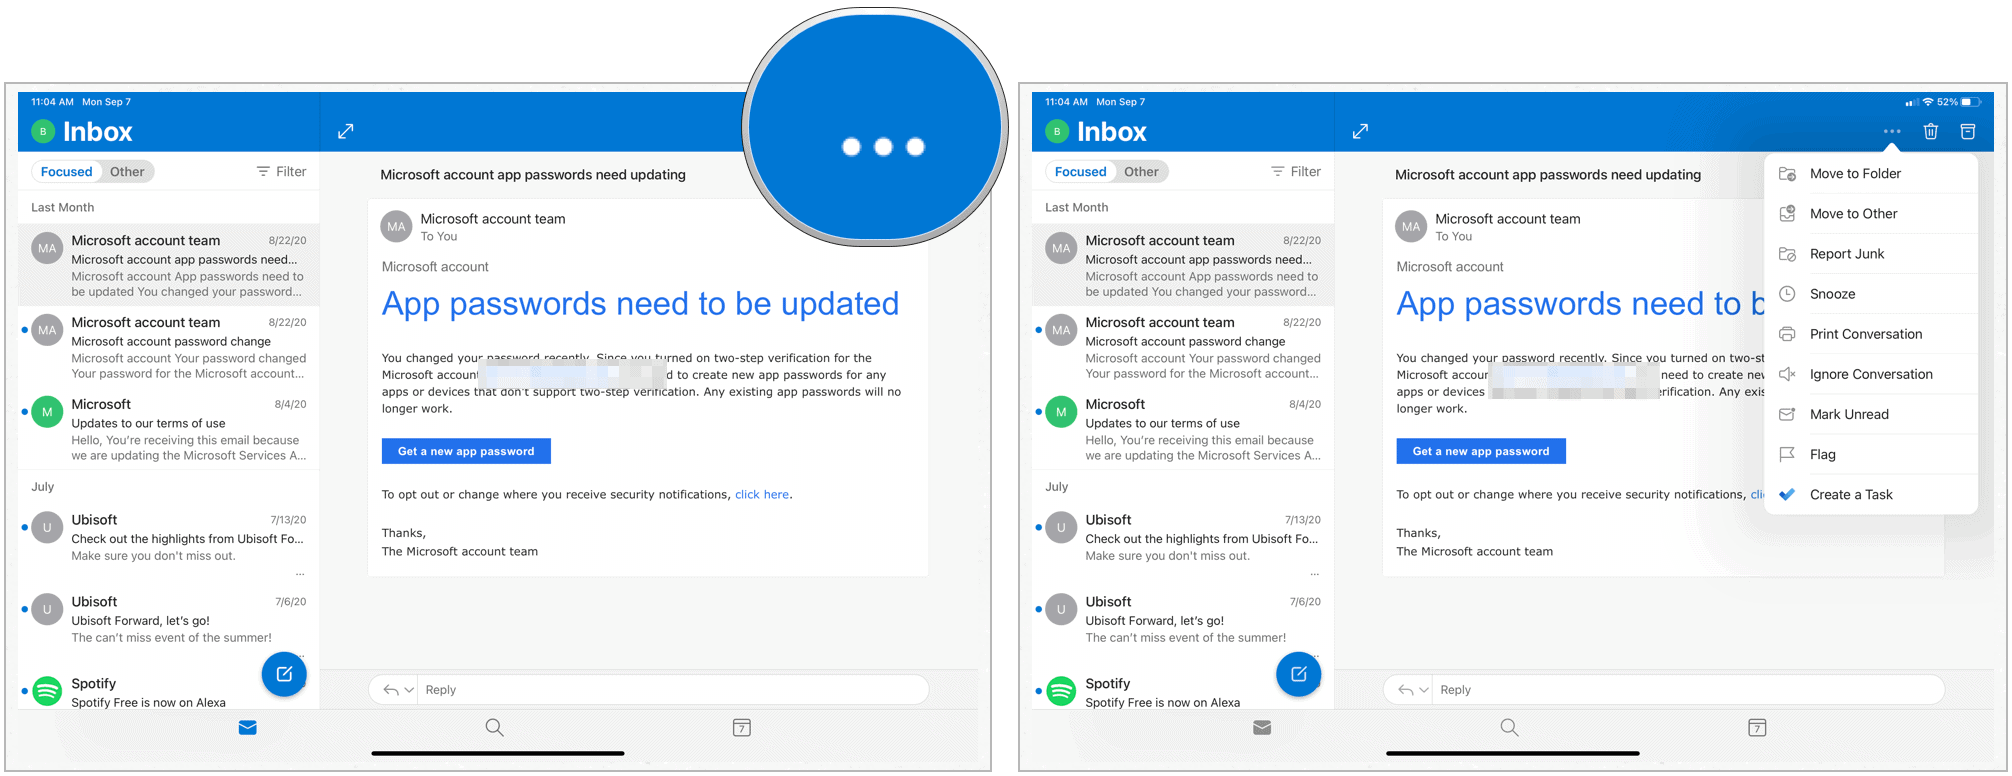
Take Quick Actions on a Message
When drilling down on an email, you can access built-in quick actions. These include Move to Folder, Move to Other, Report Junk, Snooze, Print Conversation, Ignore Conversation, Mark Unread, Flag, and Create a Task.
To access the quick actions in Microsoft Outlook on iPad:
- Select an email.
- Tap … at the top right of the screen.
- Choose your quick action.
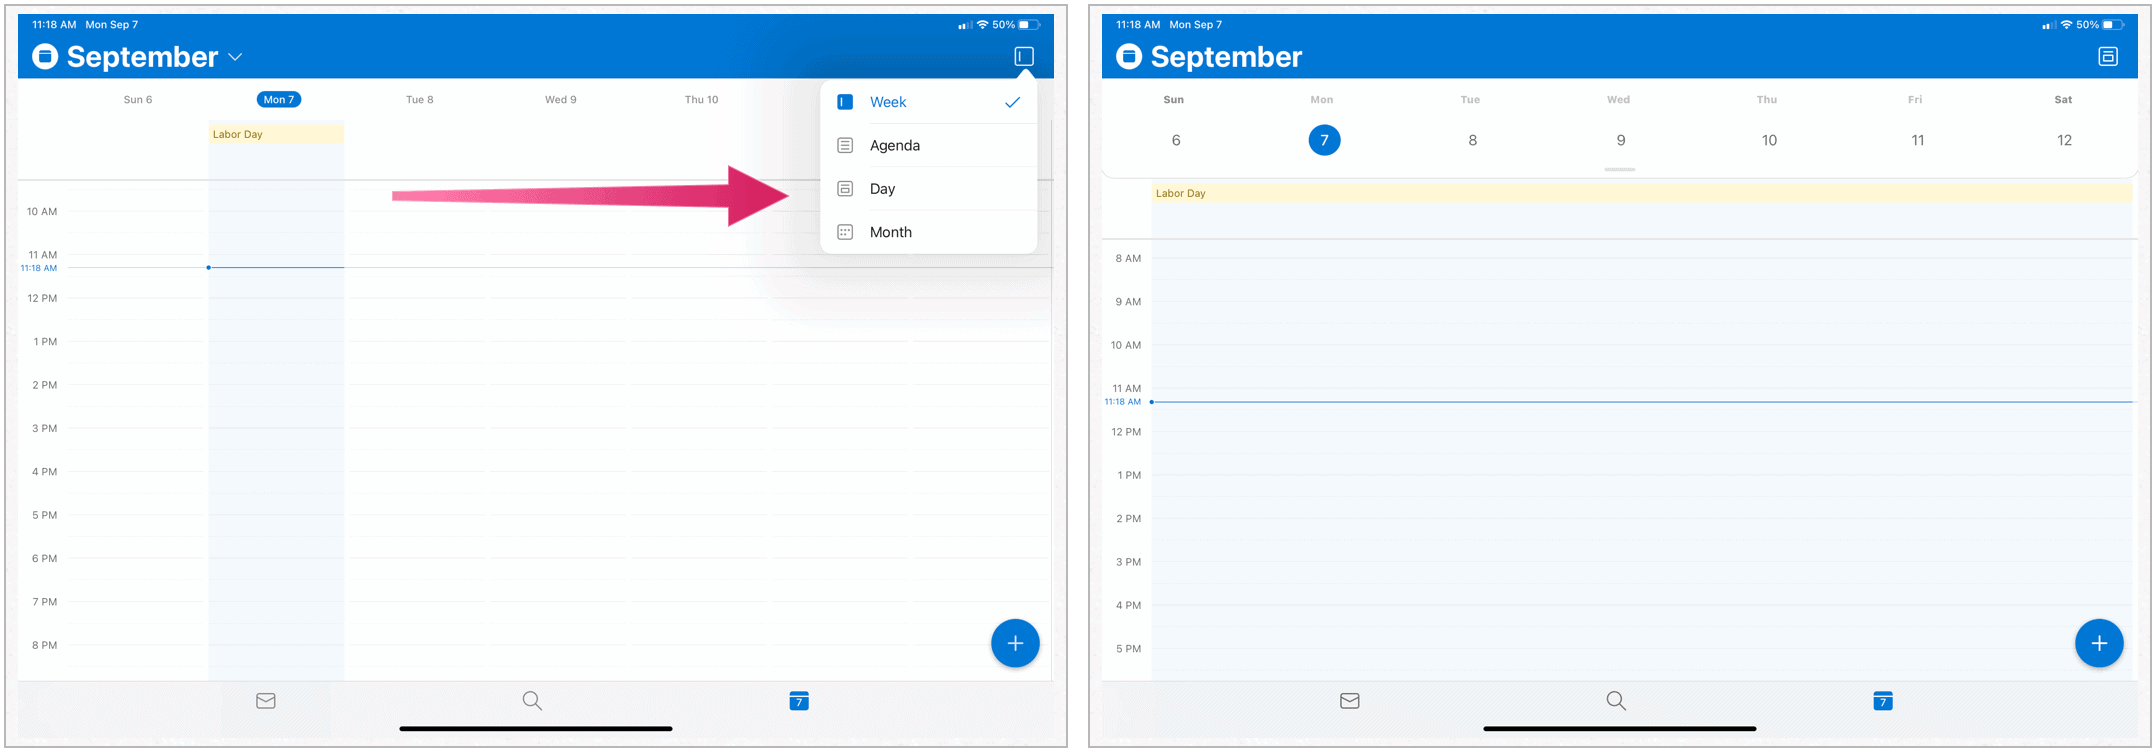
Change the Calendar View
Microsoft Outlook has a calendar that you can access across multiple devices. On iPad, you can change how you view this calendar. The choices include Week, Agenda, Day, or Month.
- Tap the Calendar icon at the bottom of the screen in the Microsoft Outlook app.
- Choose the View icon at the top right.
- Make your choice.
Conversations and Notifications From Your Contacts
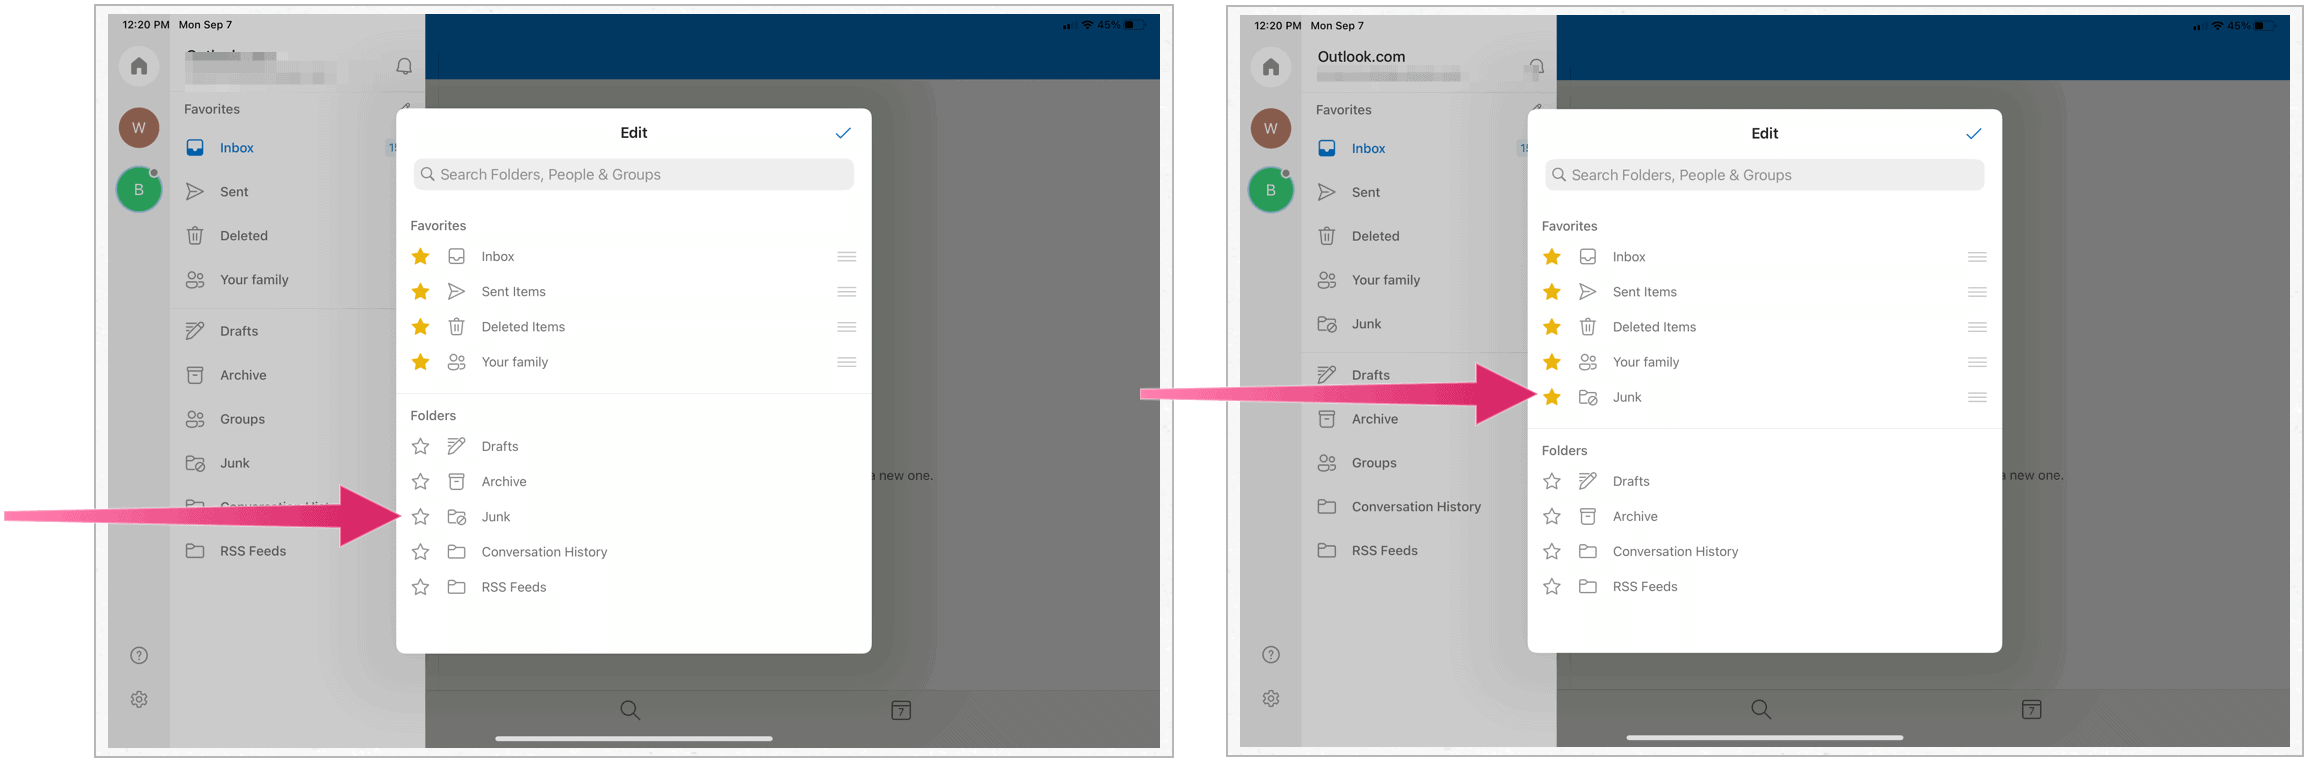
Add a Favorite Folder
By adding a catch-all folder, you can have easy access to your favorite emails. By default, these favorites include your Inbox, Sent, Deleted, and Your Family Folders. You can easily add Drafts, Archive, Groups, Junk, Conversation History, and RSS Feeds to your favorites list.
Note: You can only make changes to emails hosted by Microsoft.
To adjust your list of favorites in Microsoft Outlook for iPad:
- Tap at the top left of the app to open the menu.
- Choose your email account.
- Select the pencil icon next to the Favorites.
- Tap/Untap the star next to the folders.
RSVP an Invitation
When you receive a calendar invitation in Microsoft Outlook, you can RSVP directly from the Microsoft Outlook app. In the following example, you’ve been invited to a birthday party on September 26:
- Tap RSVP in the email in your Inbox.
- Choose from Accept, Tentative, or Decline.
- You can also add an optional message that’s sent to the event organized along with your RSVP.
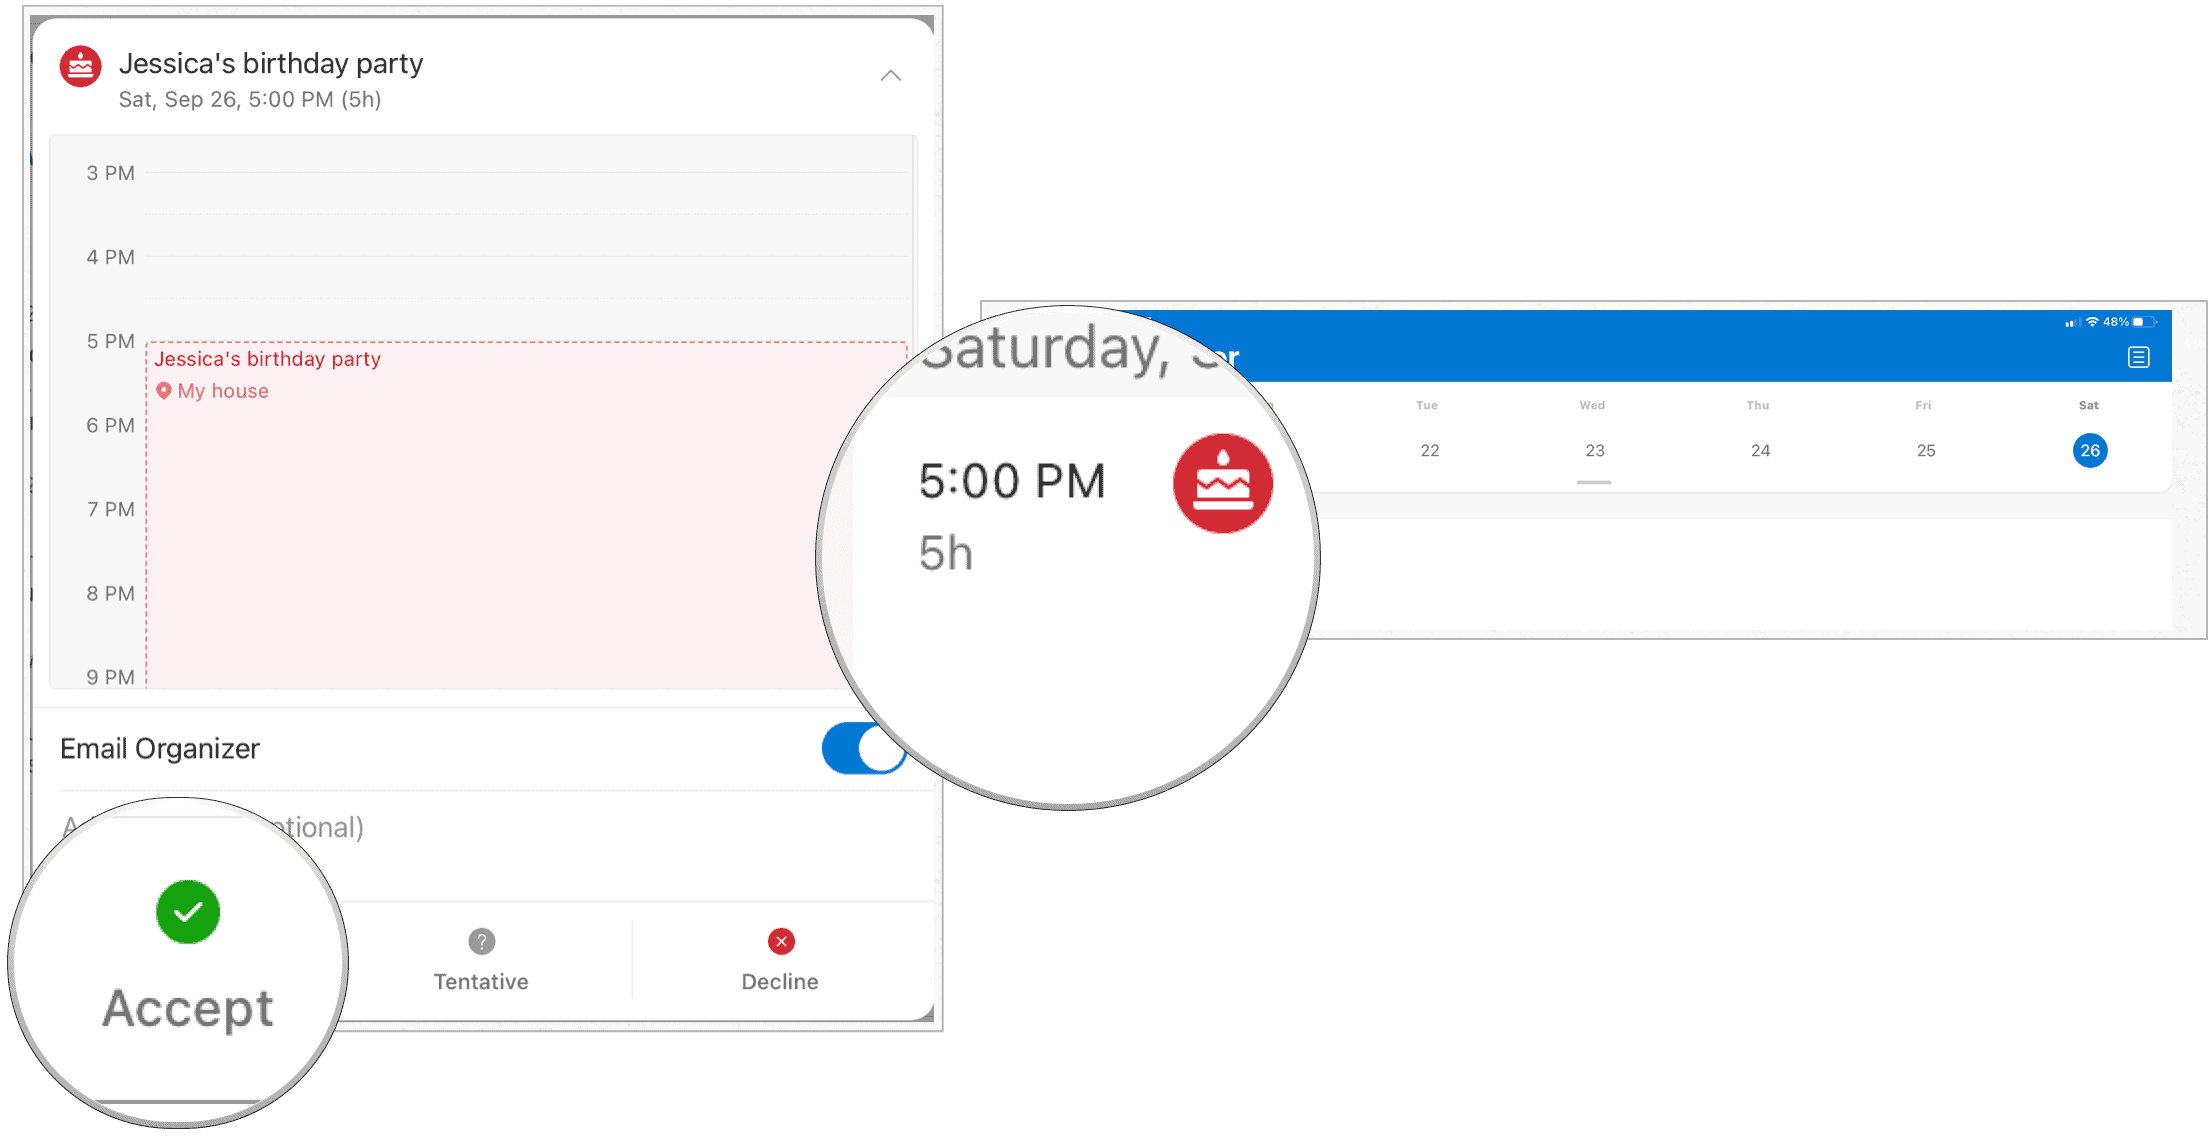
Once you’ve accepted an invitation, it will show up on your Microsoft Outlook calendar. From there, you can adjust your RSVP at any time.
Lots You Can Do
Microsoft Outlook on iPad isn’t nearly as robust as the desktop versions. And yet, there are still things you can do to customize the mobile experience. The app’s available in the App Store. Though the app’s free, you must have an active Microsoft 365 subsciption to use the email client.
For home use, the Microsoft 365 suite is currently available in three varieties, including a Family, Personal, and Home & Student plan. The first is priced at $100 per year (or $10/month) and includes Word, Excel, PowerPoint, OneNote, and Outlook for Mac, and is useful for up to six users. The Personal version is for one person and is $70/year or $6.99 per month. The student plan is a one-time purchase of $150 and includes Word, Excel, and PowerPoint only.
Business users can select from Basic, Standard, and Premium plans, starting at $5 per user/month.


