How to Use Split Screen in Windows 11
Windows 11 provides several ways to split your screen for multitasking. Here’s how to use split-screen in Windows 11.
Windows 11 has several multitasking features that can split your screen—an upgrade over how split screen works on Windows 10. The split-screen features allow you to have multiple screens open simultaneously with different actions happening in each. The most common and obvious method for splitting your screen is using Windows Key + Right or Left Arrow. You can also split your screen in Windows 11 through Windows management capabilities. For example, you can use Windows Snap, Virtual Desktops, and Snap Layouts. Let’s explore each in more detail.
We’ll show you how to use split-screen in Windows 11, so you can multitask and get things done.
Use Windows Snap to Split the Screen
Microsoft introduced the Windows Snap feature with Windows 7, letting you snap open windows to the left and right sides of the screen. Then you can view the screens side-by-side.
- Drag an open screen (browser, open file, or app) and drag it from the title bar to the left or right side of the screen until you see a translucent outline.

- When you let it go, you’ll have a split-screen with the item you dragged and other open apps on the other side.

- When two windows open, you can resize them by hovering the cursor between the screens and dragging and dropping to resize.

- You can also use the keyboard shortcut Windows key plus the arrow key for the direction you want it to go.
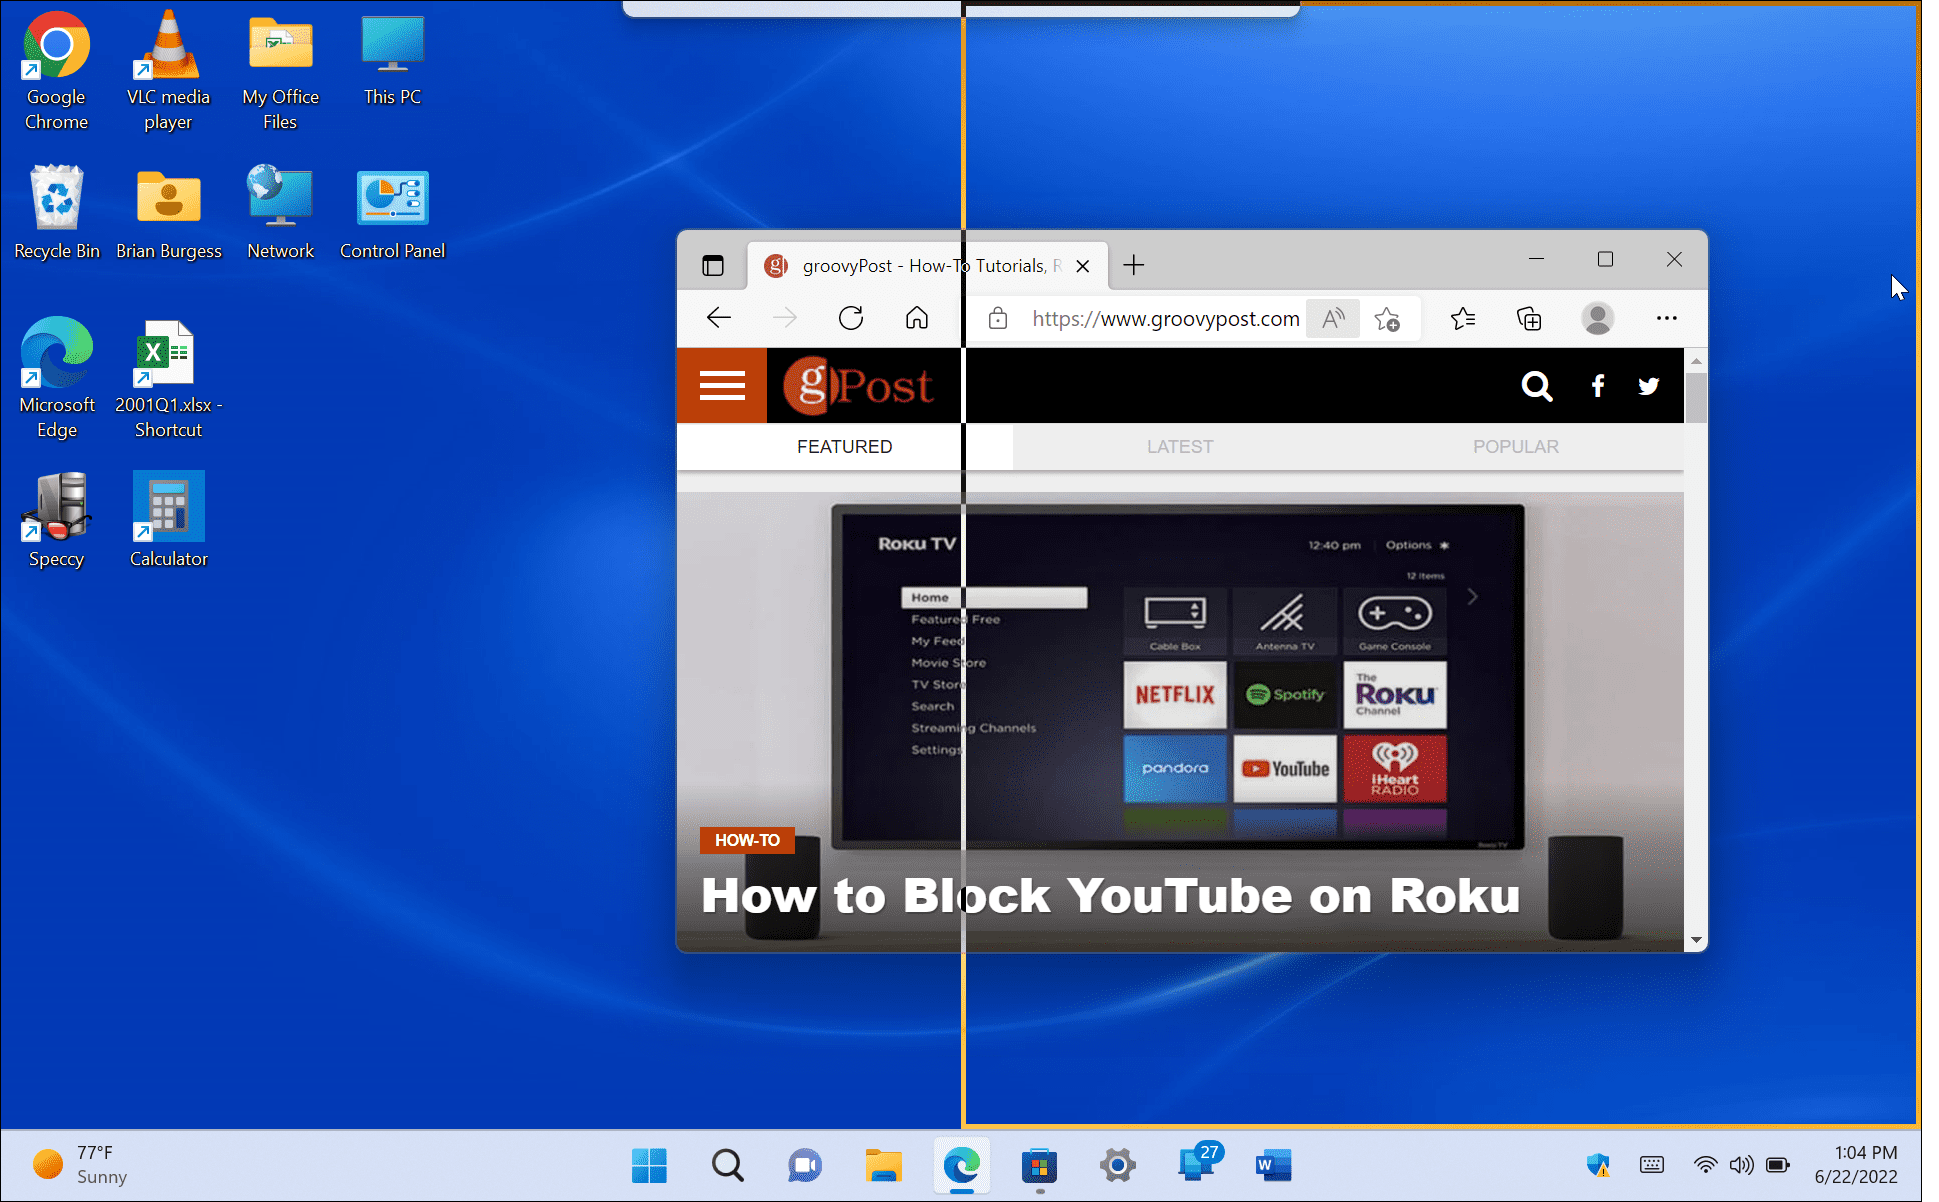

Using the standard snap feature to split your screen is helpful for multitasking. For example, you can research a subject with your browser on one screen and write your paper in Word on the other.
Use Snap Layouts on Windows 11
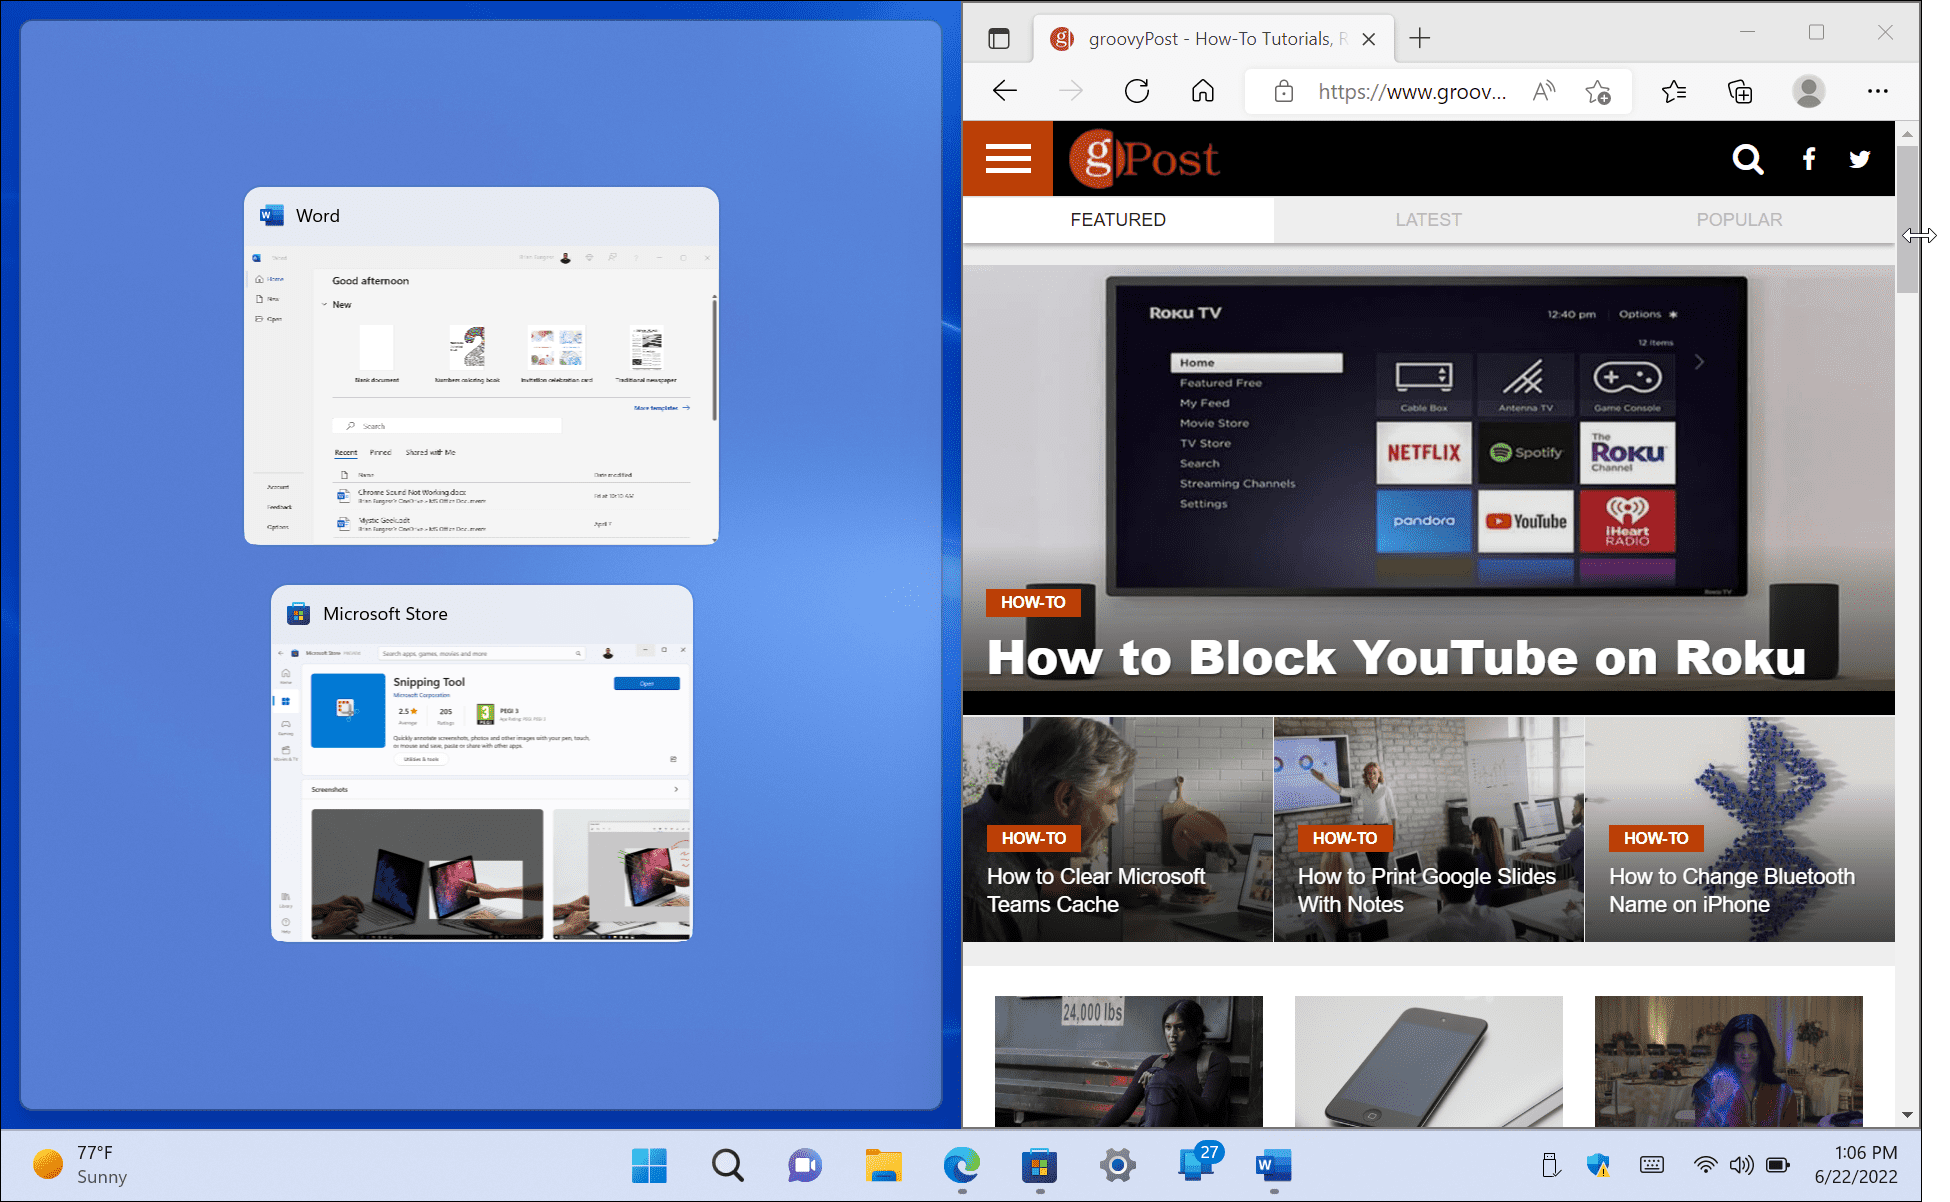
One of the new features in Windows 11 is the Snap Layouts. They appear when you hover over the Maximize button in an open window. Some people find them annoying and want to disable Snap Layouts right away. But if you’re going to multitask, it makes using split-screen in Windows 11 much more accessible.
When the layout appears, click the available zone to snap the window into it. Snap Layouts make splitting your screen straightforward. For example, on Windows 10, the snap assist required dragging each window to the edge of your monitor.

In this example, we put an app in each zone and resized them slightly. Note that the larger your screen, the more zones it will have.
If you want to change the layout, hover your mouse over the zone you want the window in and click it.
Use Virtual Desktops
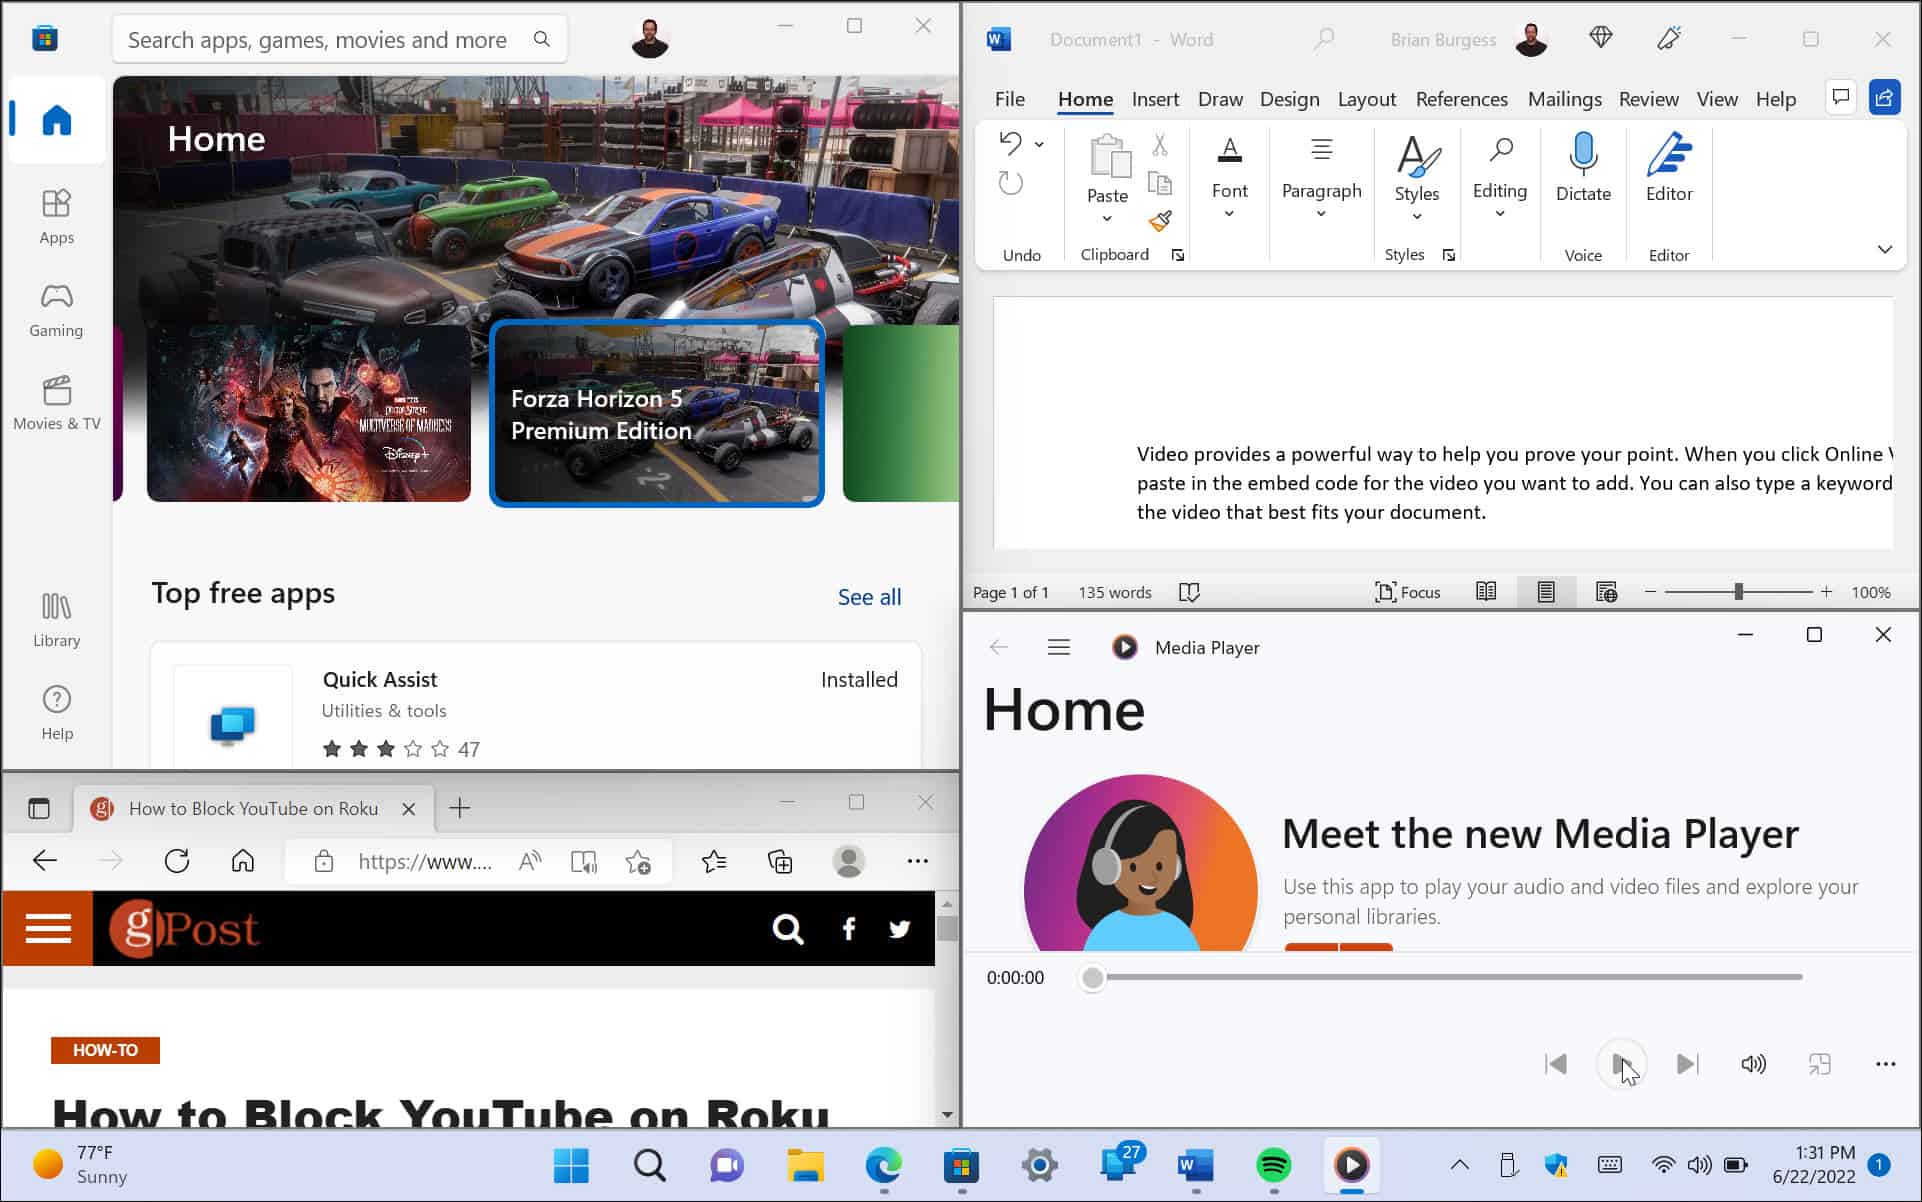
Another way to split your screens into different configurations is to use Virtual Desktops on Windows 11. Virtual desktops are a good option if you want a desktop with open Office apps, another with multimedia, and another with chat and social media, for example.
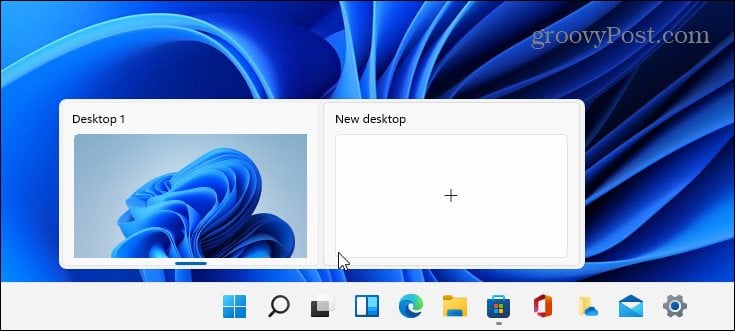
- Hover the mouse over the Task View button on the taskbar and click New Desktop.

- Open the apps you want on each desktop.
- Hover the mouse over the Task View button, and you’ll have access to the desktop you need to work with.

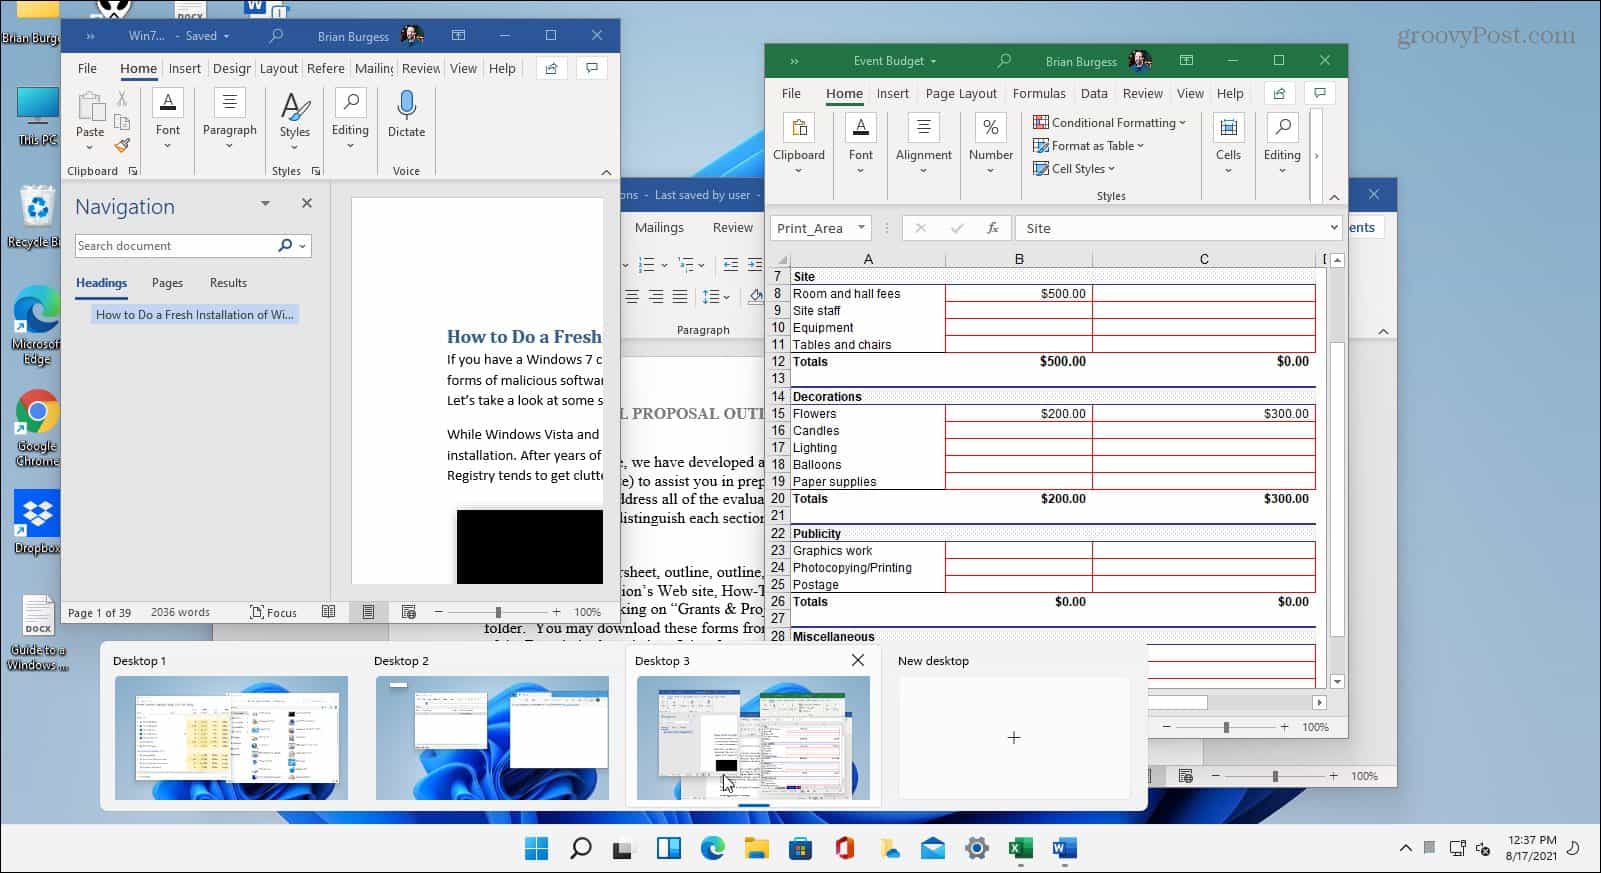
If you have several virtual desktops, hover over the Task View button and preview what’s happening on each one.
Use Split Screen in Windows 11
If you need multiple screens open simultaneously, Windows 11 provides quality solutions for getting things done. Microsoft offers many ways to achieve a split screen in the new OS. Of course, if you don’t use virtual desktops and find the Task View button gets in the way, you can hide the Task View button from the taskbar.


