How to Disable the New Snap Layouts on Windows 11

A new feature on Windows 11 is called Snap Layouts. It’s an easier way to snap your open windows to different areas on your desktop. Here’s how to disable it.
One of the new features in Windows 11 is called Snap Layouts. It allows you to hover your mouse over a window’s maximize button at the top-right corner to see available snap layouts. Then click one of the “zones” you want to snap the window to. After you click on one zone to snap to, you’ll be guided to snap to windows in the remaining zones with the guided assist.
Snap Layouts on Windows 11
Smaller screens give you four snap layouts while larger screens provide more. You can also kick off the snap layouts feature using the keyboard shortcut Windows Key + Z. Also, note that “Snap groups” are at least two apps on your screen. You can then hover over a group and click to switch back.
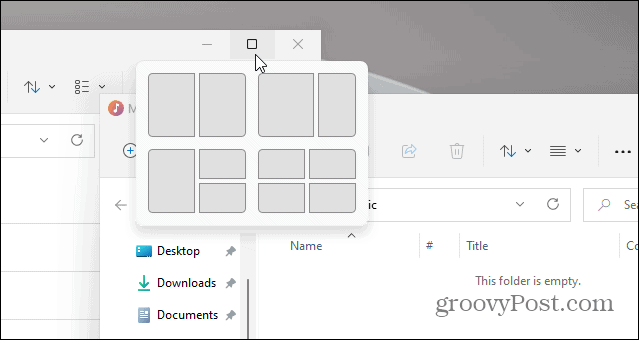
Here is an example of the new Snap Layouts feature on Windows 11. Note that it has different available zones for screens to snap to.
Snap Assist Windows 10
Windows 10 has a windows snap feature, too that’s called Snap Assist. It lets you use a split-screen, for example. But it works differently. You have to drag a window over to the edge of your monitor for it to snap into place. You can also use the Windows key + an Arrow key.
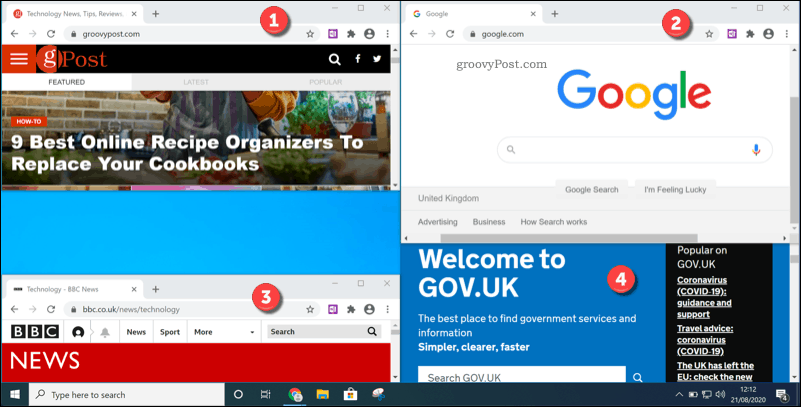
This is an example of four zones using the Snap Assist feature on Windows 10. It’s less elegant than Snap Layouts on Windows 11.
Snap Assist on Windows 10 can be useful, but setting it up isn’t nearly as easy as it is on Windows 11 with the new Snap Layouts feature. It has fewer features as well.
Disable Snap Layout on Windows 11
Still, some users may never use the Snap Layout and actually find that it gets in their way while getting things done. If that’s you, then you can disable (or enable) Snap Layout using the following steps.
Head to Start and then click on Settings.

When Settings opens, click on System on the left side of the screen. Then on the list on the right, click on Multitasking and click the “Snap windows” dropdown menu.

From there, uncheck the “Show snap layouts when I hover over a window’s maximize button” box and close out of Settings.

That’s all there is to it. No restart is required, and you’ll no longer see the snap layouts on Windows 11. If you want to turn it back on, go into the Settings section and reenable it and it will be back on.
By the way, you might have noticed my Start button is on the left. You can do that, too. Read our article on how to move the Windows 11 Start button to the left corner.


