Three Ways to Stop Automatic Updates on Windows 11

Keeping your PC up to date is important, but there might be times when you want to stop automatic updates on Windows 11. Here’s how.
Windows 11 receives automatic system and security updates to improve performance, fix bugs, and add new features. It will then restart your machine outside of Active Hours.
While automatic updates will keep your system up to date, the process can be frustrating. Occasionally, a restart will be required to apply the update, interrupting your workflow in the process. An automatic update can also stop your PC from working correctly, forcing you to try and troubleshoot the issue.
Keeping your system updated is important, but if you’re having trouble, you might want to stop automatic updates on Windows 11. Once you’ve figured out the issue, you can then update Windows 11 manually to get back up to date.
Here’s a look at a few different ways you can stop automatic updates on Windows 11 Home or Pro.
How to Stop Automatic Updates on Windows 11
One way to stop automatic updates on Windows 11 is by adjusting your update settings. When using this method, you can pause updates for up to five weeks on Windows 11 Home or Pro.
To pause updates on Windows 11, use the following steps:
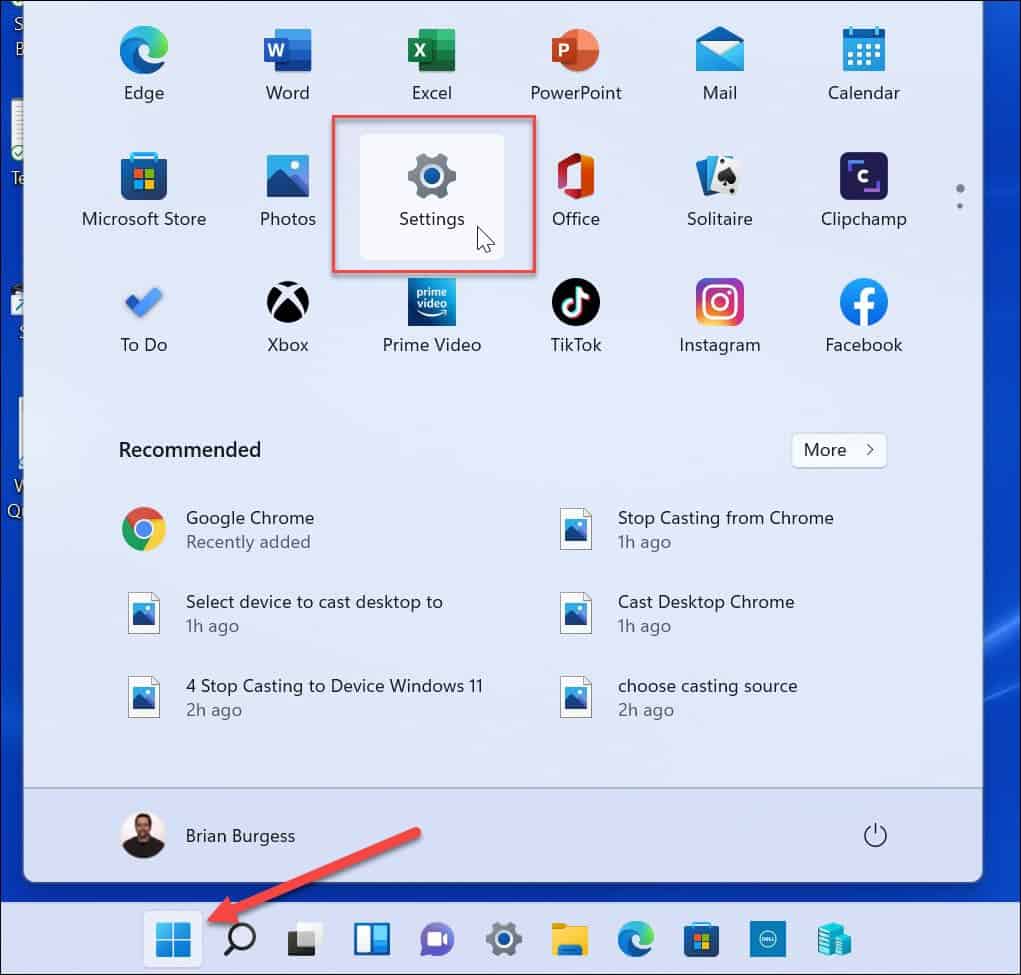
- Click the Start button or press the Windows key and click the Settings.
- Alternately, use the keyboard shortcut Windows key + I to open Settings directly.
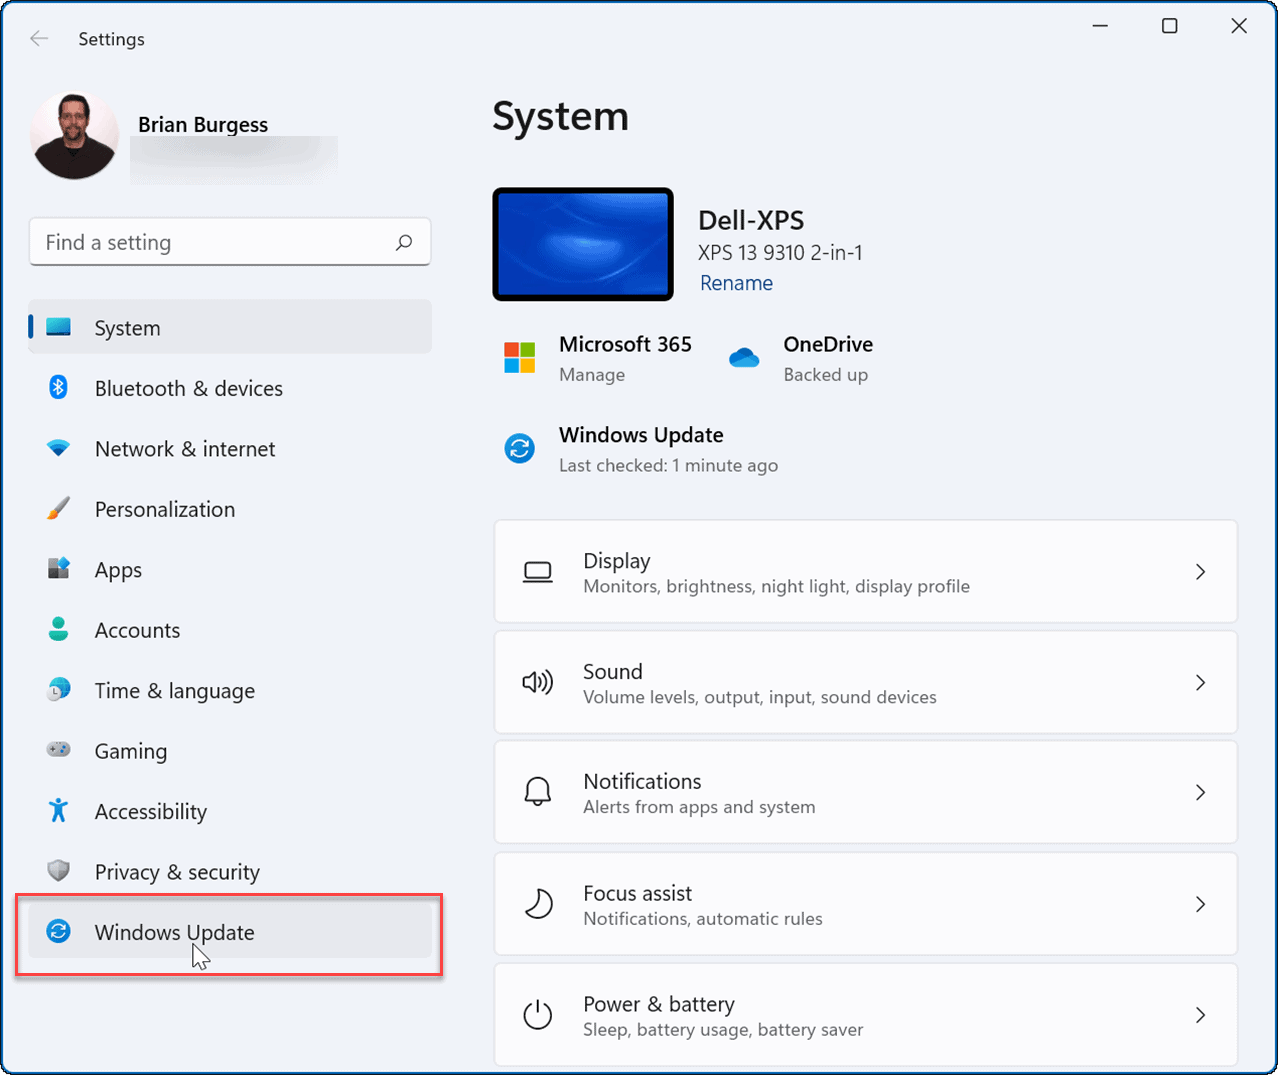
- In Settings, select the Windows Update option on the left.
- In the Windows Update menu, press the dropdown menu next to the Pause updates option. Select the amount of time to pause automatic updates, choosing from one to five weeks.

As soon as you select an option, Windows will pause updates for that length of time. If you want to resume updates before that period ends, go to Start > Settings > Windows update and click the Resume updates button.

How to Stop Automatic Updates Using Group Policy
If you’re running Windows 11 Pro or above, you can use Group Policy rules to stop automatic Windows updates completely.
To use Group Policy to disable automatic updates, use the following steps:
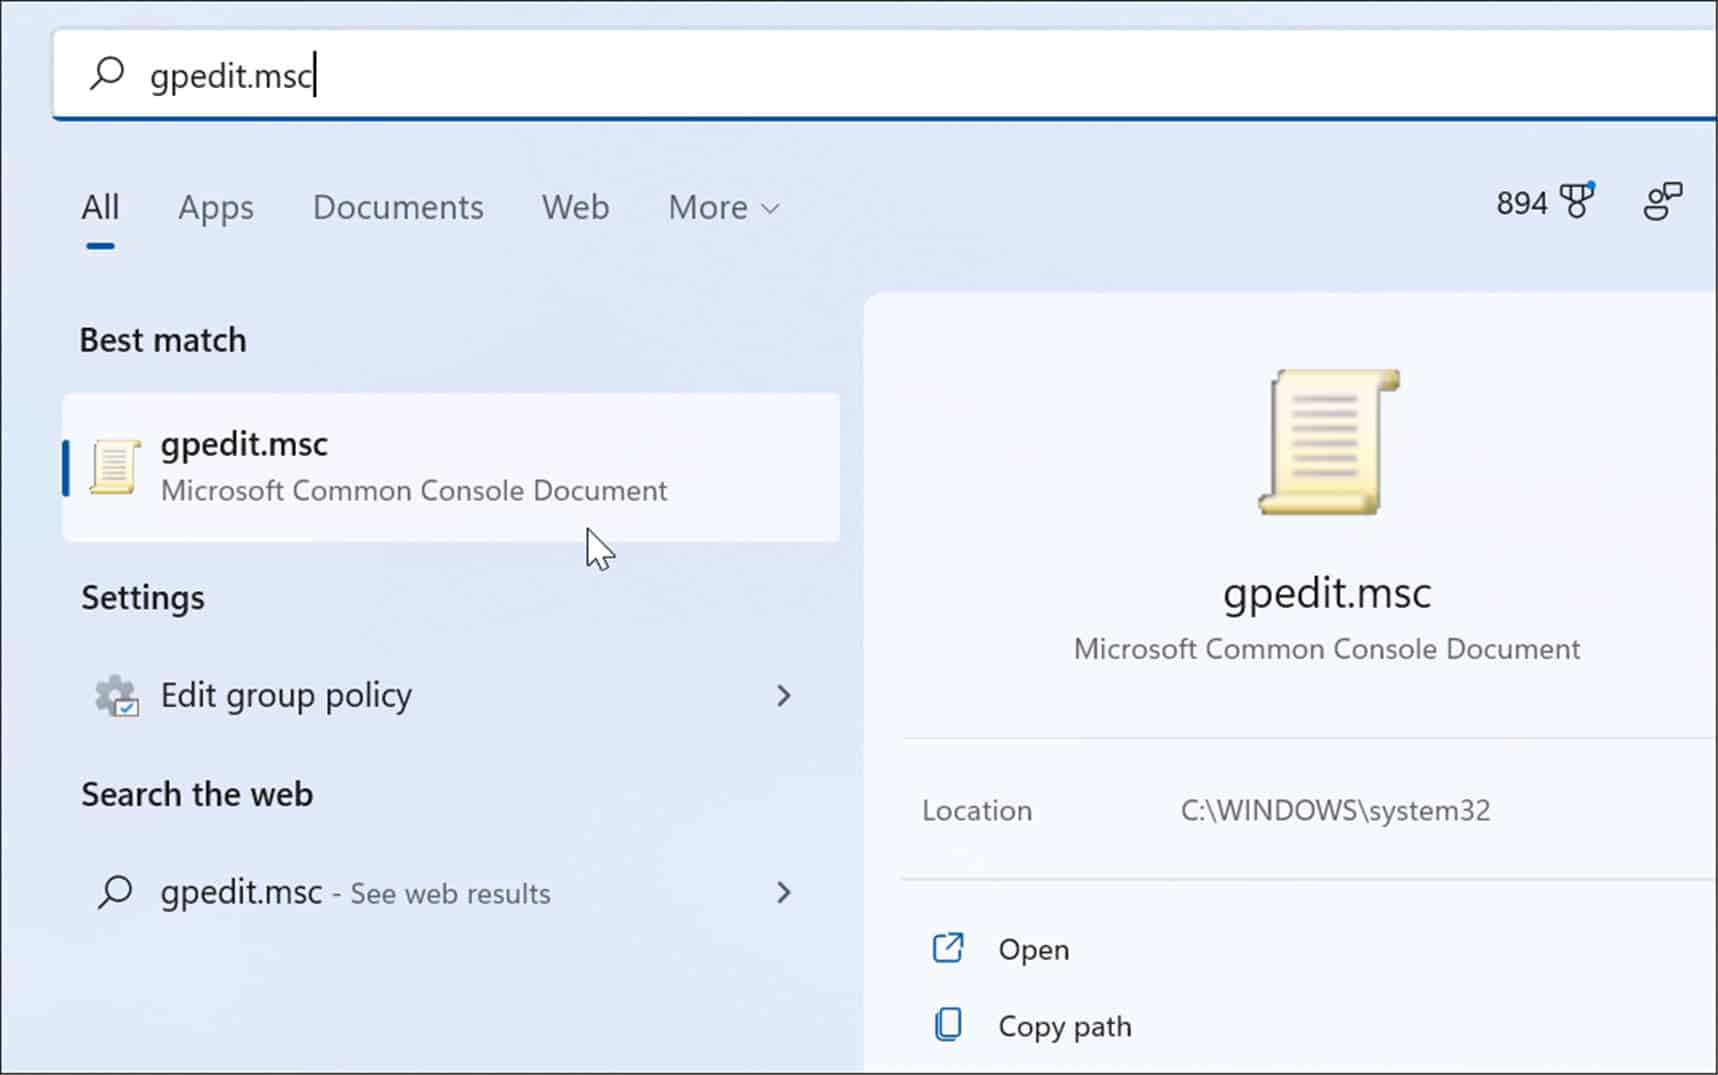
- Click the Start button or press the Windows key and type gpedit.msc, then select the top result.
- When the Local Group Policy Editor opens, head to the following path:
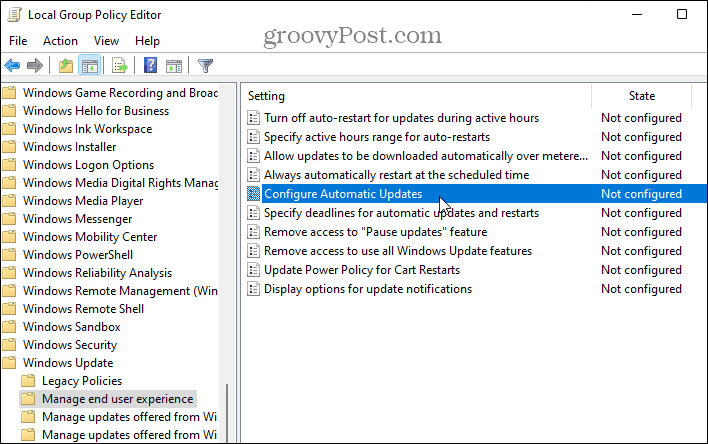
Computer Configuration > Administrative Templates > Windows Components > Windows Update > Manage end user experience

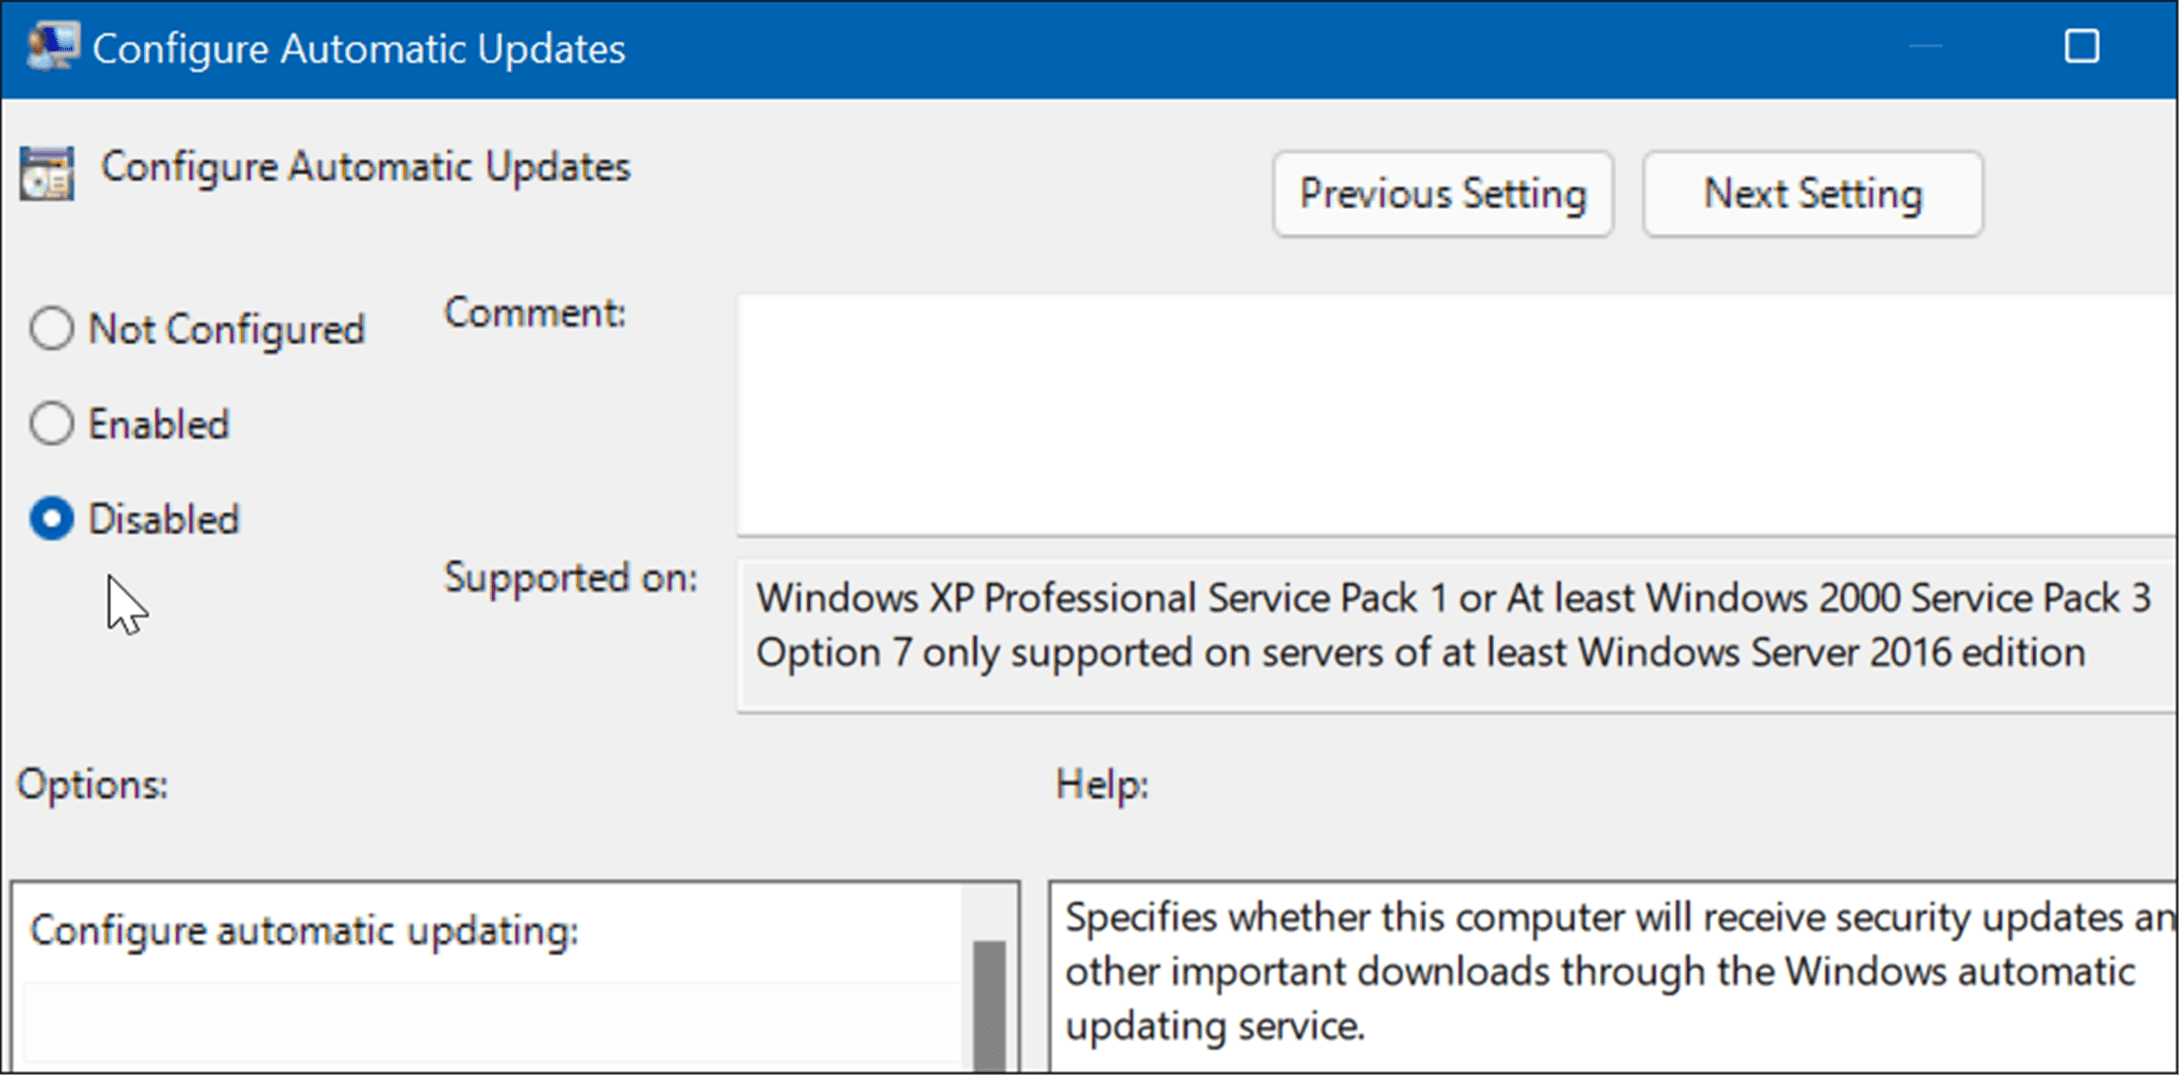
- Double-click on the Configure Automatic Updates policy.
- Check the Disabled option to permanently turn off automatic updates on Windows 11.
- Click OK at the bottom of the screen.
Windows 11 will no longer download and install updates automatically. If you want to get them in the future, you’ll need to manually update Windows 11.
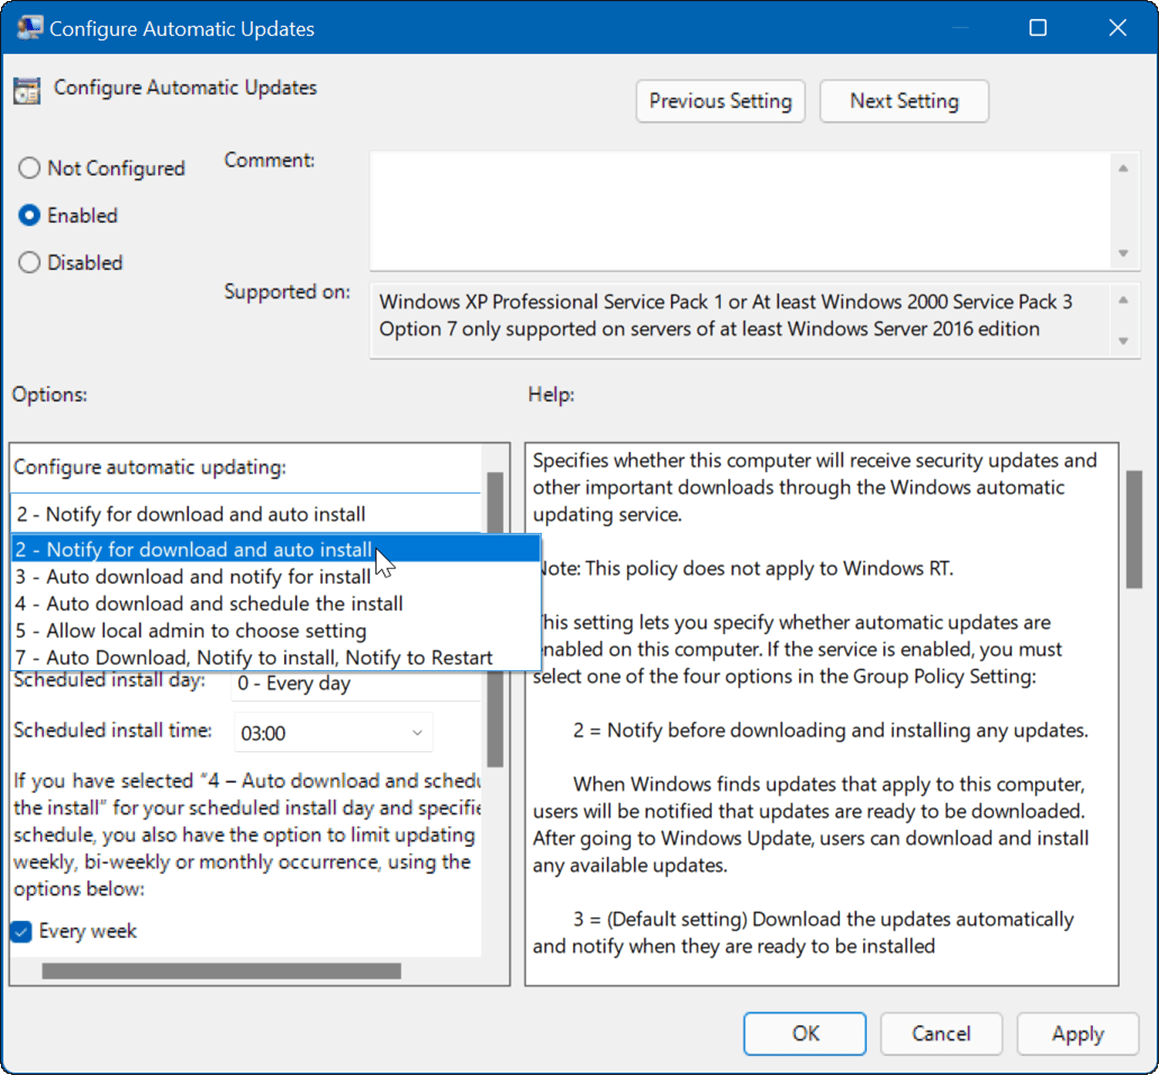
Note: It’s important to mention that you can set Windows 11 to notify you about updates, and not stop automatic updates altogether. To do that, change the policy to Enabled and set the Options section to 2 – Notify for download and auto install.
Click Apply and OK at the bottom to save your choice.
After applying the policy, it stops automatic updates from occurring, but you will see an Install now button when going to Windows Update in Settings.
How to Stop Automatic Updates Using the Registry
For users running the Home version of Windows 11, there is no Group Policy Editor, but you can stop automatic updates using the Registry.
To stop automatic updates on Windows 11 using the Registry, use the following steps:
- Press Windows key + R to launch the Run dialog, type regedit, and then click OK.

- Navigate to the following path—you can copy and paste it into the Registry Editor address field at the top:
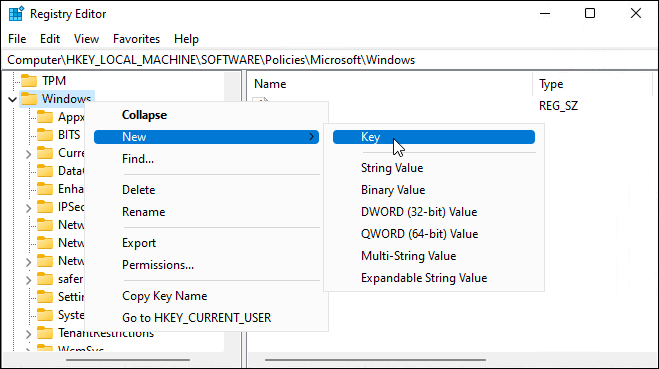
HKEY_LOCAL_MACHINE\SOFTWARE\Policies\Microsoft\Windows
- Right-click the Windows folder and select New > Key from the submenu.
- Name the new key to WindowsUpdate, right-click it, and then select New > Key from the submenu.
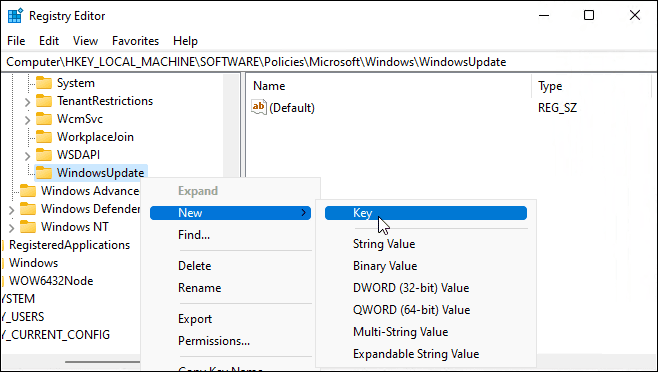
- Name the new key folder AU.
- Right-click AU and select New > DWORD (32-bit Value) from the menu.
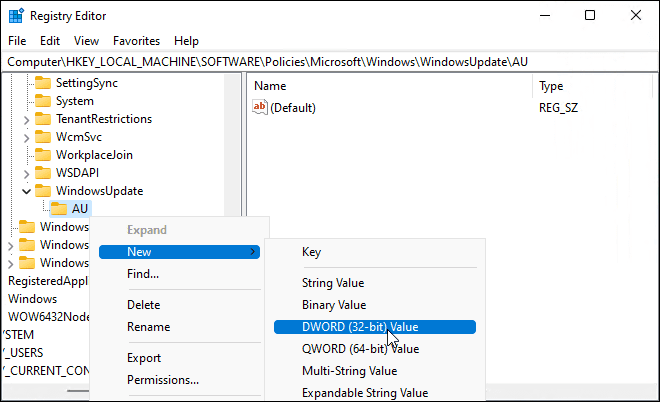
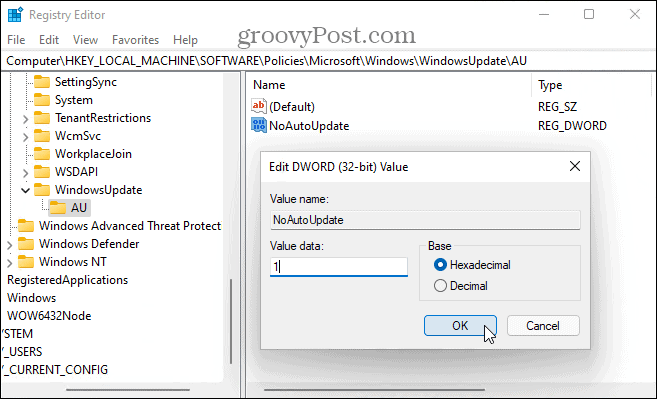
- Name the new DWORD key NoAutoUpdate, double-click it, and change its Value data to 1.
- Click OK to save.
After following the steps above, restart Windows 11 and sign back in. Just like using Group Policy, automatic updates are now disabled, but you can still manually update your system via Windows Update in Settings.
Keeping Windows Updated
Cumulative Windows updates roll out once a month. Patch Tuesday, as this update is known, brings a number of software fixes and user improvements, but there are times when Microsoft releases an out-of-band patch that you need sooner than later.
That’s why it’s important to keep Windows updated and, where possible, to avoid pausing updates. If you’re having trouble, however, you can always follow the steps above to stop automatic updates on Windows 11. f you disable automatic updates, ensure that you’re manually checking Windows Update for the most important bug fixes.
If you’re not on Windows 11 yet, take a look at these four ways to turn off updates on Windows 10.


jacey
August 9, 2023 at 10:49 am
Thanks u so much! Im a writer and needed more fonts, and then i find this website and it works!!
Victor David
April 8, 2024 at 12:09 pm
None of this works any longer. You can disable the Windows Update service; Windows doesn’t honor that and turns it back to enabled. You can set the group policy to disabled as you’ve described; Windows doesn’t honor that and installs updates anyway. You can set the registry as you’ve described; again, Windows throws a big FU at the user. Good info here and I appreciate it, but apparently MS has decided that the user isn’t to be trusted with decisions of auto update.