How to Manually Backup and Restore the Windows Registry

The Registry is the heart and soul of your Windows operating system. Before making any major changes to it it’s important to back it up first. Here’s how.
If you’re a power user, there may be times when you need to make changes to the Windows Registry in order to modify a system setting or 3rd party application. Before “hacking the Registry”, however, it’s very smart to first make a backup because if you make a mistake, it’s possible your Operating System could become unusable.
Some third-party utilities like Revo Uninstaller and CCleaner will automatically back up the Registry before executing actions however when making changes manually using Regedit, you will need to back things up manually.
Manually Backup the Windows Registry
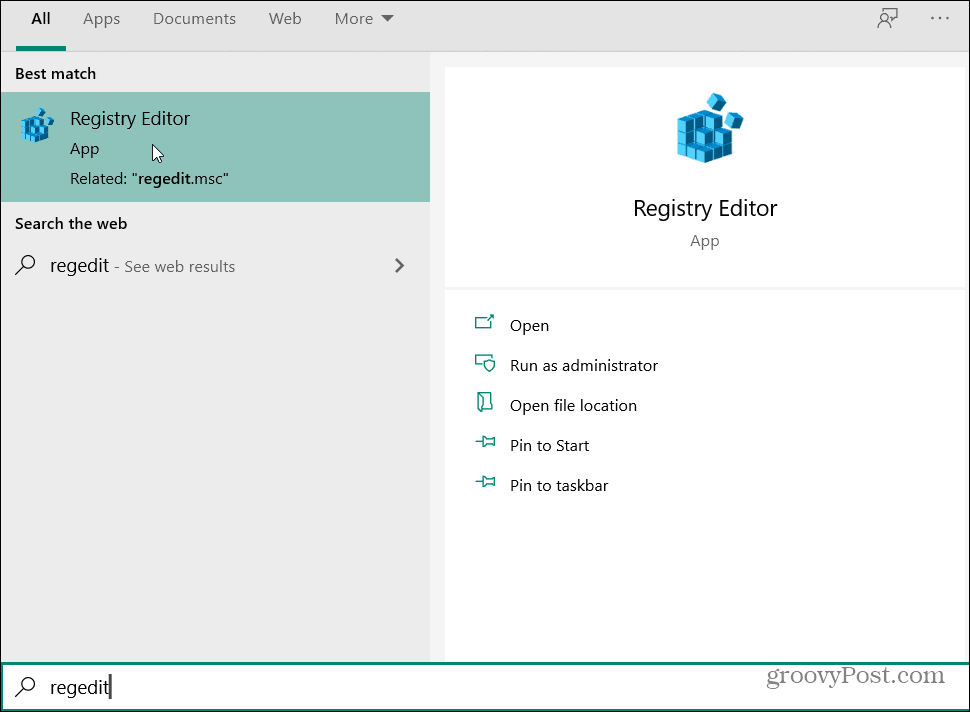
To get started hit the Windows key and type: regedit and press Enter or choose the Registry Editor option from the top of the Start menu.
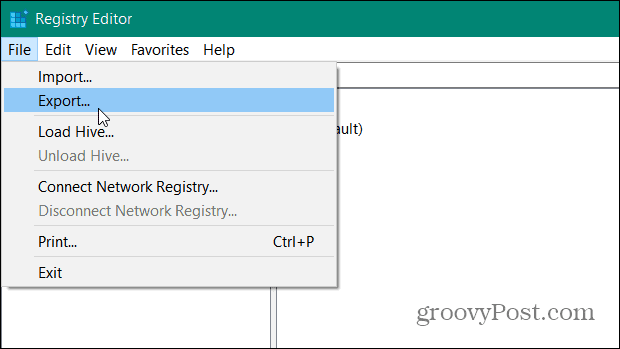
When the Registry Editor opens, click File > Export.
Now in the “Export Registry File” screen choose a secure location to save the file. Then type in an easily identifiable name for the backup. I would suggest something that identifies what the file is. Something obvious like “Registry” then type in the date of the day you are saving the file.
Then there are some important things to consider under the “Export Range” section at the bottom of the window. Make sure to select All to back up the entire Registry. Otherwise, it will back up the selected branch only. When you are done click the Save button.
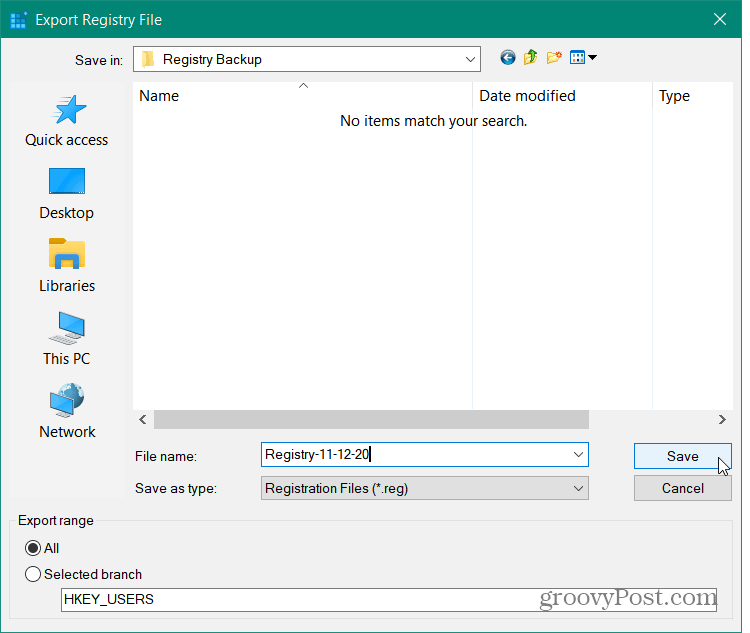
After clicking Save, it will take a few moments while the Registry is exported and backed up. In fact, you might see a “Not Responding” message on the title bar but don’t panic, as that is normal. Just wait until it goes away, and you are good to go.
Restore the Windows Registry
The simplest way to restore the Registry is to merge it. To do that, navigate to the file you backed up, right-click on it, and select Merge from the menu.

A confirmation message will appear. Click Yes. Wait a few moments while the Registry is restored, and you are good to go.

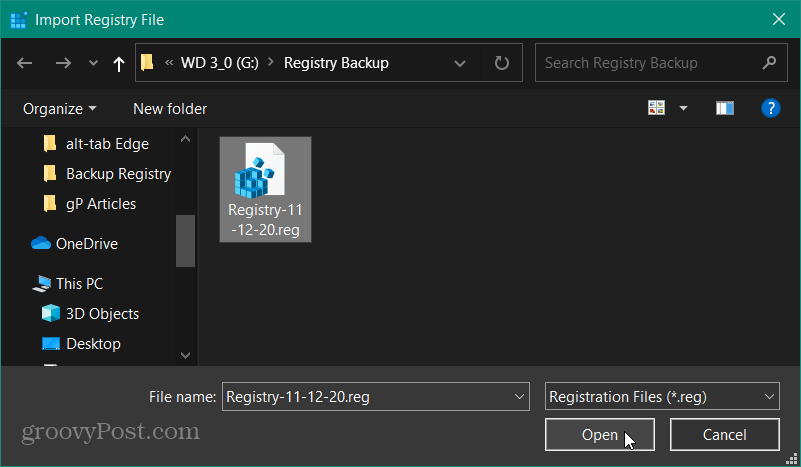
Another way to restore the Registry is to import the saved file. Open the Registry from the Start menu, as explained at the beginning of this article. Once it’s open, go to File > Import.

Once the import window opens, navigate to the location where you saved your backup. Select the one you want to restore and click Open. Again, wait a few moments while you’re backed up Registry is restored and you are good to go.
Whether installing software, troubleshooting, or hacking the Registry it’s always important to have a recent backup in case something were to go awry.


