How to Optimize Windows 10 for Gaming

Windows 10 is a great gaming platform, but there are still things you can do to optimize it. Here’s how.
If you’re thinking seriously about gaming, you need to think seriously about a Windows 10 gaming PC. While consoles like the Xbox and PlayStation are good alternatives, a Windows 10 PC offers the best functionality to support gamers, include a gameplay DVR mode to help you record your best bits.
Like any well-oiled machine, however, Windows 10 can be optimized with several settings, features, and tools you can use to improve the gameplay experience. If you want to optimize Windows 10 for gaming, here’s what you’ll need to do.
Using Game Mode in Windows 10
Above any other setting or feature, the Windows 10 Game Mode offers the best enhancements for gameplay.
With Game Mode enabled, your PC instantly activates many built-in settings and enhancements for gaming. In addition, system resources are refocused towards open games, prioritizing CPU and RAM access for any, particularly hard-hitting games.
You don’t need to activate Game Mode while you’re playing games, but you will need to enable it in your Windows Settings menu first.
To do this, right-click the Windows Start menu and click the Settings option.

In your Windows Settings menu, press Gaming > Game Mode. In the Game Mode settings menu, make sure that the Game Mode slider is enabled.

Windows will now prioritize your PC gameplay. It isn’t a miracle cure for an underpowered PC, but it may help you grab a slightly higher frame rate and reduce lag as you play.
Enabling Ultimate Performance Power Mode
Windows will attempt to use system resources based on your power mode. If you’re using a laptop, for instance, you may find that Windows caps your CPU or RAM usage to reduce power consumption.
This ensures longer battery life, but this isn’t ideal if you’re plugged in and ready to play. Thankfully, you can change your power mode in your Power Options menu.
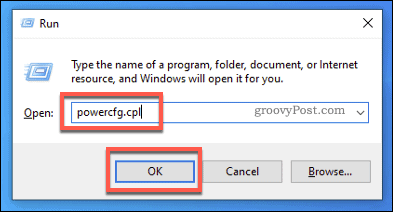
To do this, right-click the Windows Start menu, then press the Run option.

In the Run launch box, type powercfg.cpl and hit OK. This will open the Power Options menu.
In your Power Options menu, you’ll see a list of available power plans. Select the Ultimate Performance plan from the list.
This is a high-performance power plan designed to ensure maximum power is available for games. No caps, no limits.

If you don’t see this plan here, you’ll need to enable it first.
To do that, right-click the Start menu and select Windows PowerShell (Admin) from the menu.

In the PowerShell window that opens, type powercfg -duplicatescheme e9a42b02-d5df-448d-aa00-03f14749eb61 before hitting enter.
This will ensure that the Ultimate Performance plan appears in your Power Options menu, allowing you to enable it.

Updating Your Graphics Drivers
As every PC gamer will tell you, updating your graphics driver is an essential part of your regular PC maintenance. New drivers bring new enhancements, as well as support for newer games.
If you’re playing a game that feels a little sluggish, you may find that updating drivers fixes the problem. Graphics drivers will be issued through Windows Update, but they may be several months out of date.

For the most recent driver releases, you’ll need to visit your manufacturer’s website. For instance, you can search for and download NVIDIA drivers from the NVIDIA website.
Follow the on-screen instructions for any drivers you install, then restart your PC. If you get a black screen or similar graphics issues, don’t worry—you can boot up safe mode and revert to your older driver.
Disabling Visual Effects
Windows 10 is a visual experience, with animations, shadows, and other effects used to create an appealing user interface.
However, these can be demanding on your graphics card, especially if your card is under strain while you play. To get the maximum power out of your card, you should consider disabling these effects.
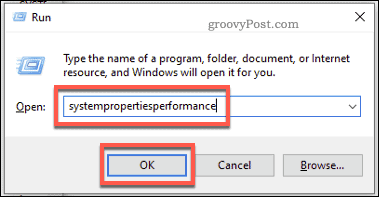
To do this, right-click the Start menu and press Run.
In the Run dialog box, type: systempropertiesperformance, then press OK to run.
This will launch your Performance Options settings menu.
In the Performance Options window, you can disable individual visual effects by selecting Custom and unchecking each effect.
Alternatively, select the Adjust for best performance option. This will disable several higher-intensity visual effects, allowing you to boost your graphics performance safely.

Once you’re happy, press OK.
Your visual effects will be updated, allowing you to (potentially) play with less strain on your graphics card.
Boosting Your Network Settings
If you want to optimize your online multiplayer gameplay, you may need to boost your network settings first.
There are a couple of ways you can do this. First, if you’re serious about latency, you’ll need to switch to a wired connection or an excellent Wi-Fi network with little interference. This is to ensure you get the absolute most out of your internet connection.
Secondly, you’ll want to make sure that you aren’t impacted by any unnecessary demands on your connection. For instance, make sure you only download game updates while you’re not playing. You may also want to increase your Steam download speeds to get in-game faster.
Finally, you can tweak your Windows settings to disable Nagle’s Algorithm. This is an efficient method used by Windows 10 to combine data packets as they’re sent across a network.
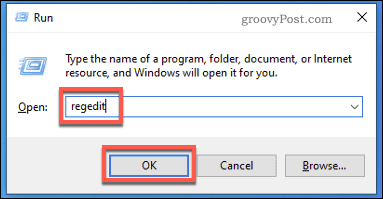
This can increase latency, however. In addition, higher pings can impact your gameplay, so you’ll want to disable this by editing the Windows Registry. To start, right-click the Start menu and press Run.
In the Run box, type regedit, then press OK. This will launch the Registry Editor.
In the Windows Registry window, use the side menu to find the HKEY_LOCAL_MACHINE\SYSTEM\CurrentControlSet\Services\Tcpip\Parameters\Interfaces folder.
You’ll see some sub-folders here. Look through each to find a DhcpIPAddress value that matches your IP address.

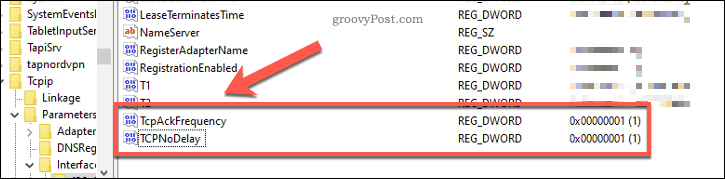
Once you find the correct folder with your IP address as the DhcpIPAddress value, right-click the white space inside the side view on the right, then select the New > DWORD (32-bit) Value option.

Create an entry named TcpAckFrequency. Double-click the entry to edit, then give it a value of 1 before clicking OK.
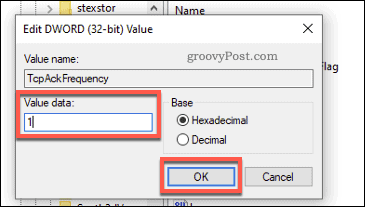
Repeat the steps, creating a second entry named TCPNoDelay with a value of 1.
Close the Registry Editor and restart your PC once you’re done. Nagle’s Algorithm will be disabled at this point and should ensure a higher latency for online gameplay moving forward.
Better Gaming on Windows 10
With closer Xbox integration, Windows has become an even better platform for gaming. It isn’t just about PC games, either, with the ability to play Xbox One games on your PC, thanks to Xbox game streaming.
If you’re not sure what game to play, don’t worry—there’s an enormous selection of games to choose from, from casual games like Minecraft to complex shooters like Call of Duty. You could even install old Windows games like Solitaire to keep you occupied.