How to Fix a Black Screen After Adjusting Display Settings in Windows 10

Getting a black screen when booting up your Windows PC can annoying and a little scary. But, you can fix a black screen using these steps.
The problem when troubleshooting a black screen issue is that, well, the screen is black. Although the problem can be caused by a number of issues, if you boot the computer and see the manufacture logo then the screen goes black when Windows 10 begins to launch, the black screen is likely a software issue, not a hardware issue. That’s a very good thing and what we’re going to explain how to fix in this article. So, take a few deep breaths, and let’s fix your issue.
Solution 1: Revert or Change Graphic Driver in Safe Mode
In my experience, the cause of a black screen or other display problem is often related to corrupt or incorrect drivers. It can be a bit difficult to correct driver issues if the screen is black, however. One method to go around this is to start up in Recovery Mode and boot the PC using Safe Mode. From there, you can begin the repair. Let’s do this step by step:
- To enter the Recovery mode, interrupt the normal boot process by shutting down the machine just when you see the Windows logo. Repeat this three times in a row, on the fourth time, and you will see the Recovery mode. Click the See advanced repair options button.


- Here select Troubleshoot on the “Choose an option” page.


- Be sure to select Advanced options on the “Troubleshoot” page.


- Select Startup Settings at the “Advanced options” page.

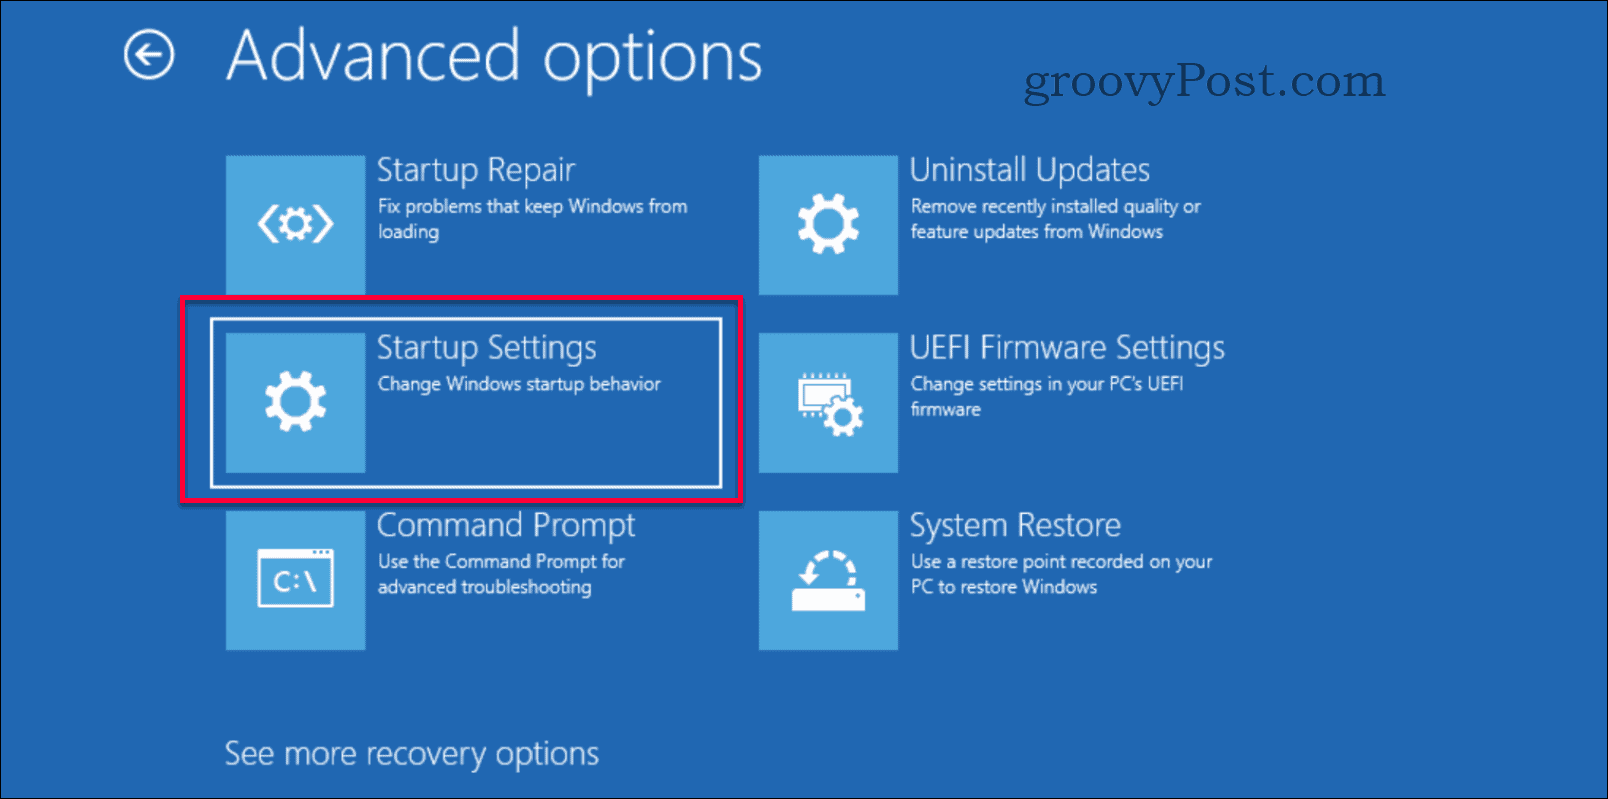
- Click on the Restart button.

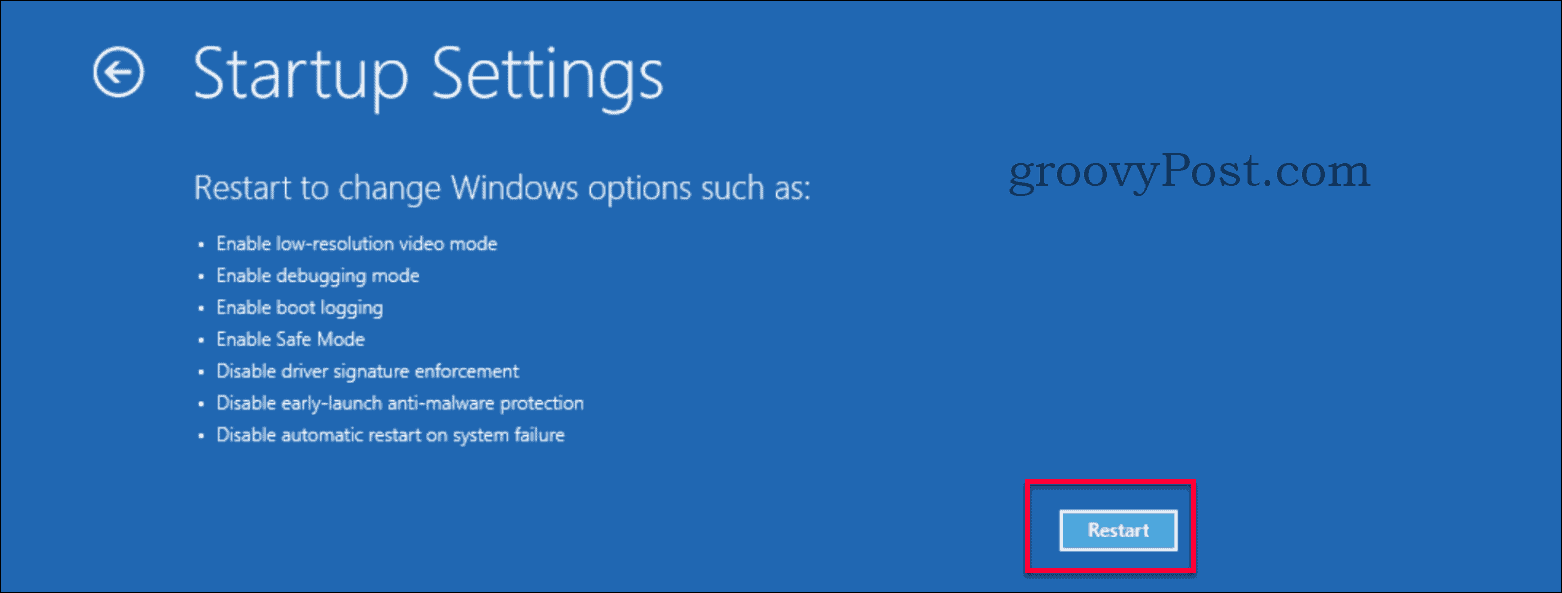
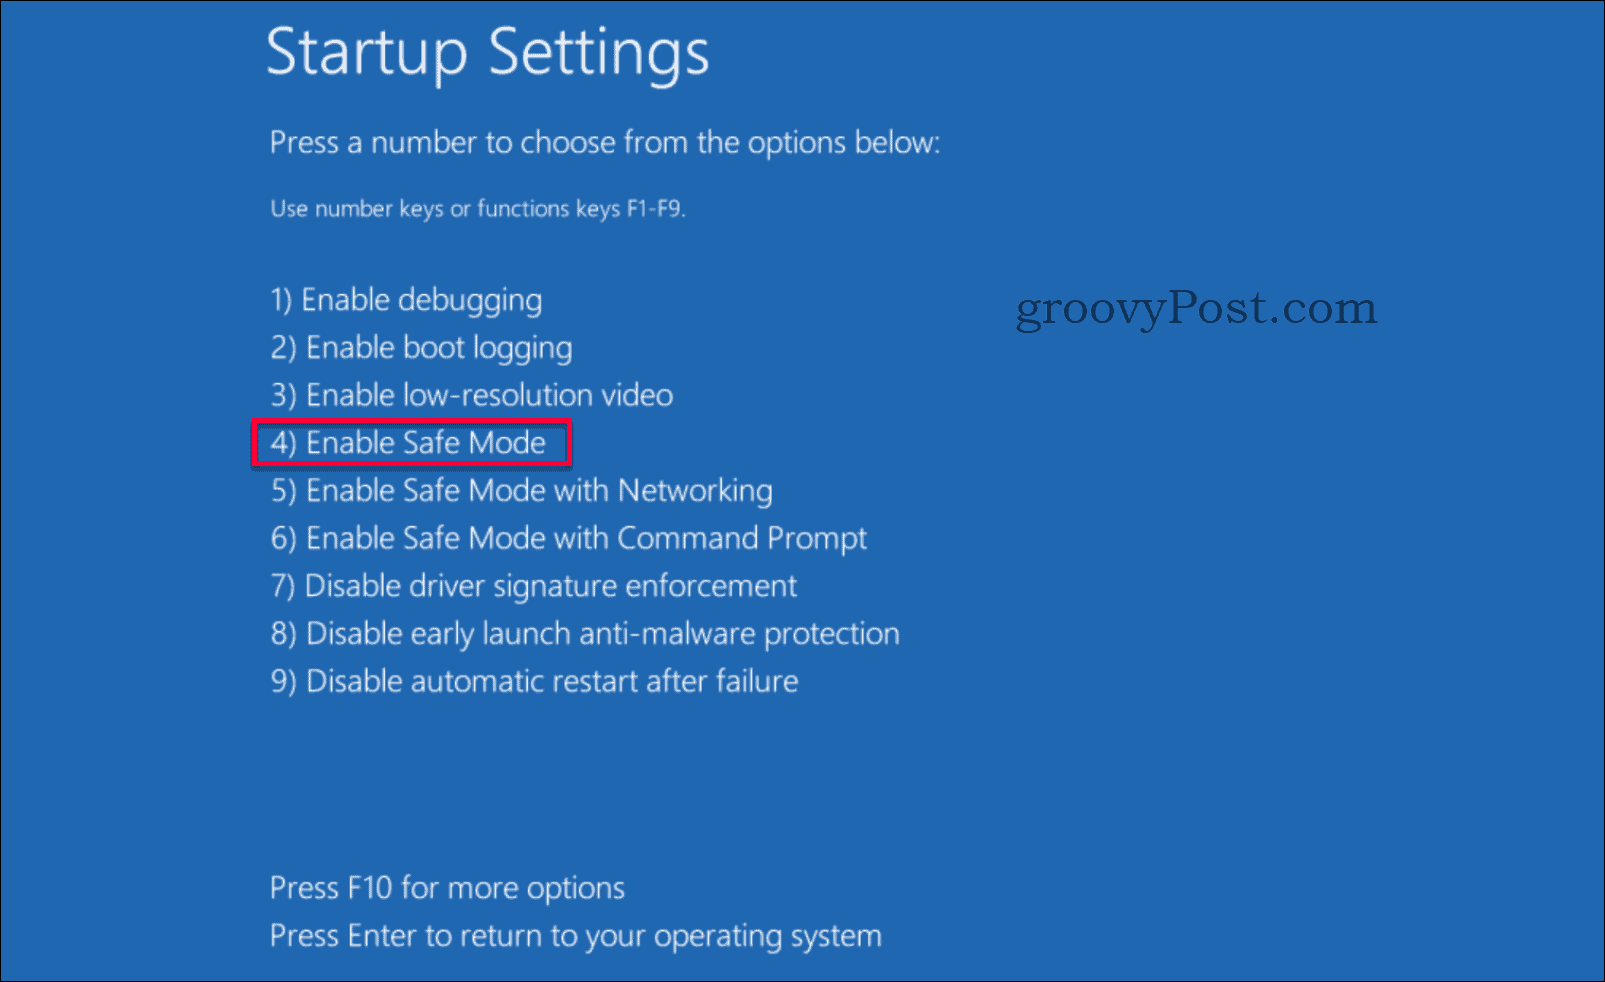
- Restart happens quickly and displays a new menu, press either the numeric 4 or F4 button on the keyboard.

- Your machine now restarts into Safe Mode, which is visible on the wallpaper with Safe Mode written in each corner and the build number on the top-middle screen.
- Start Device Manager by either pressing Windows Button + X or right-click on the start button and then select Device Manager.


- In Device Manager, find the section Display Adapters and expand that, and double click on the name of the display adapter or right-click properties. The hardware name is specific to your machine. The name is most likely different from the image below.

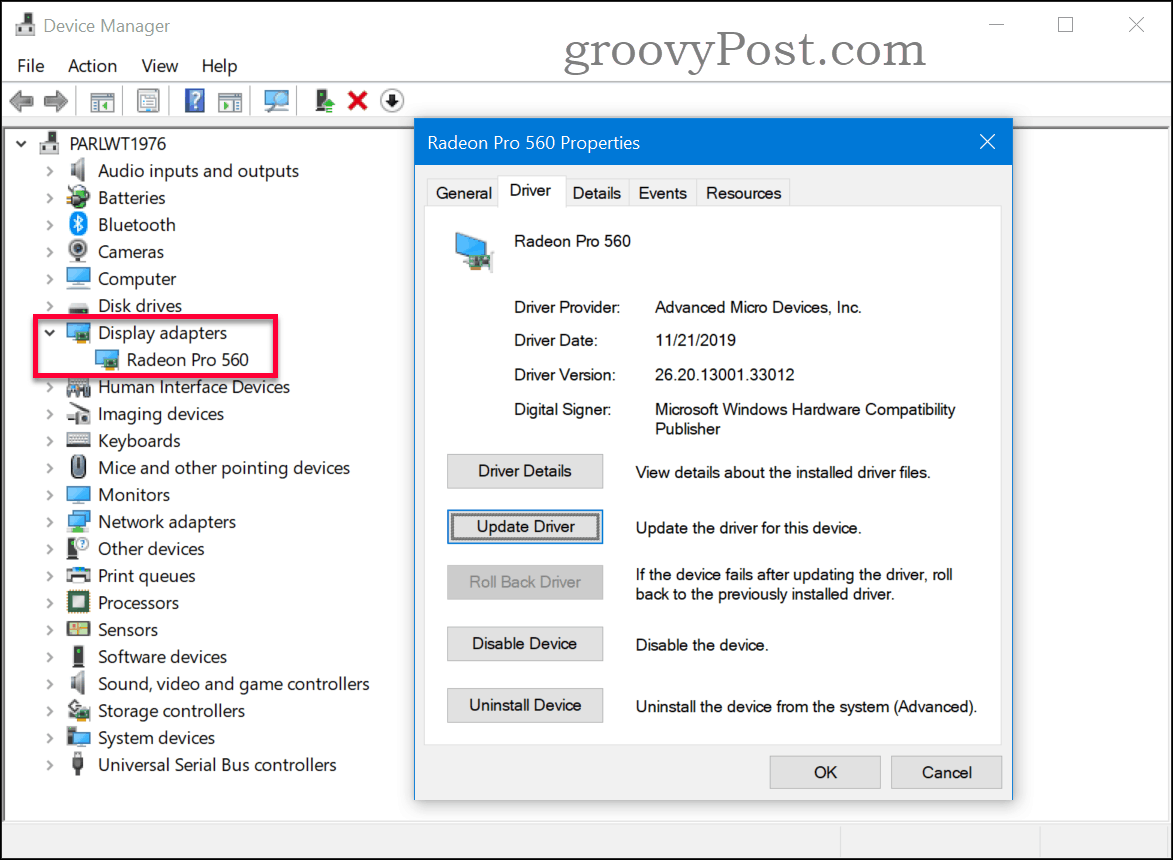
- If you know the correct driver, click on the Update Driver button and browse to the correct driver. If the previous driver worked, you can try the Roll Back Driver button to restore the last working driver (if it is grayed out it means there were no previous drivers). There’s no “downloaded driver” or option to roll back, click the Uninstall Device button and delete the driver. The system will reinstall it using the default driver.
- Restart your machine and hopefully, your issue is fixed, if not continue to the next solution below.
Solution 2: Enable Low Resolution
Sometimes you can have the correct driver however your resolution is set to a none supported value which causes your monitor to show a black screen. What you need to do is change the display resolution to a lower, supported setting. This can be done by following these steps.
- To enter the Recovery mode, interrupt the normal boot process by shut down the machine just when you see the Windows logo. Repeat this three times in a row, on the fourth time, and you will see the Recovery mode. Click the See advanced repair options button.


- Here select Troubleshoot on the “Choose an option” page.


- Be sure to select Advanced options on the “Troubleshoot” page.


- Select Startup Settings at the “Advanced options” page.


- Click on the Restart button.


- Restart happens quickly and it will display a new menu. Press either the 3 or F3 button on the keyboard.

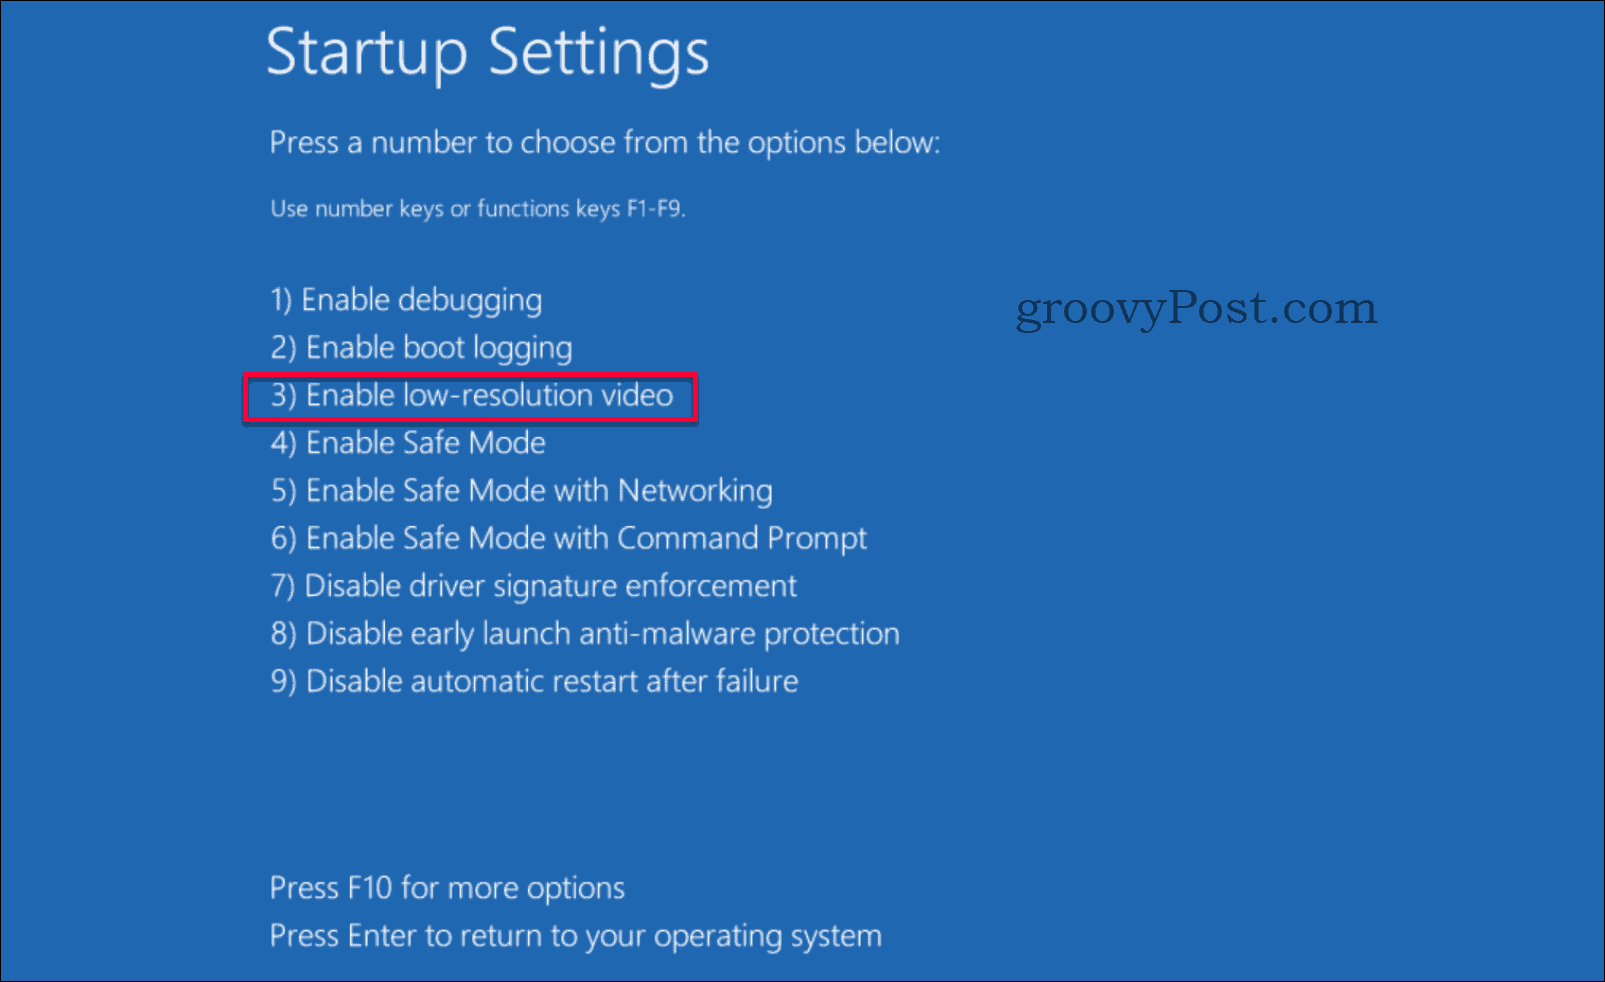
- Your machine restarts into low-resolution video mode. Hopefully, your issue is fixed, if not continue to the next solution just below.
Solution 3: Startup Repair
If you’ve tried the two previous solutions and still no luck, we have another one for ya. As a last resort, we will try a Startup Repair. You can reach the Startup Repair feature using two different paths.
- Option 1 – Perform actions 1 to 3 from Solution #1 to enter into System Recovery > Advanced Options then continue below with step six below.
- Option 2 – Create an install media (or if still using DVD boot on that) and then, continue on with step one below.
- Boot from the installation media (USB or DVD).
- In Windows Setup, choose your language, time and currency format, and keyboard layout. Then click Next.

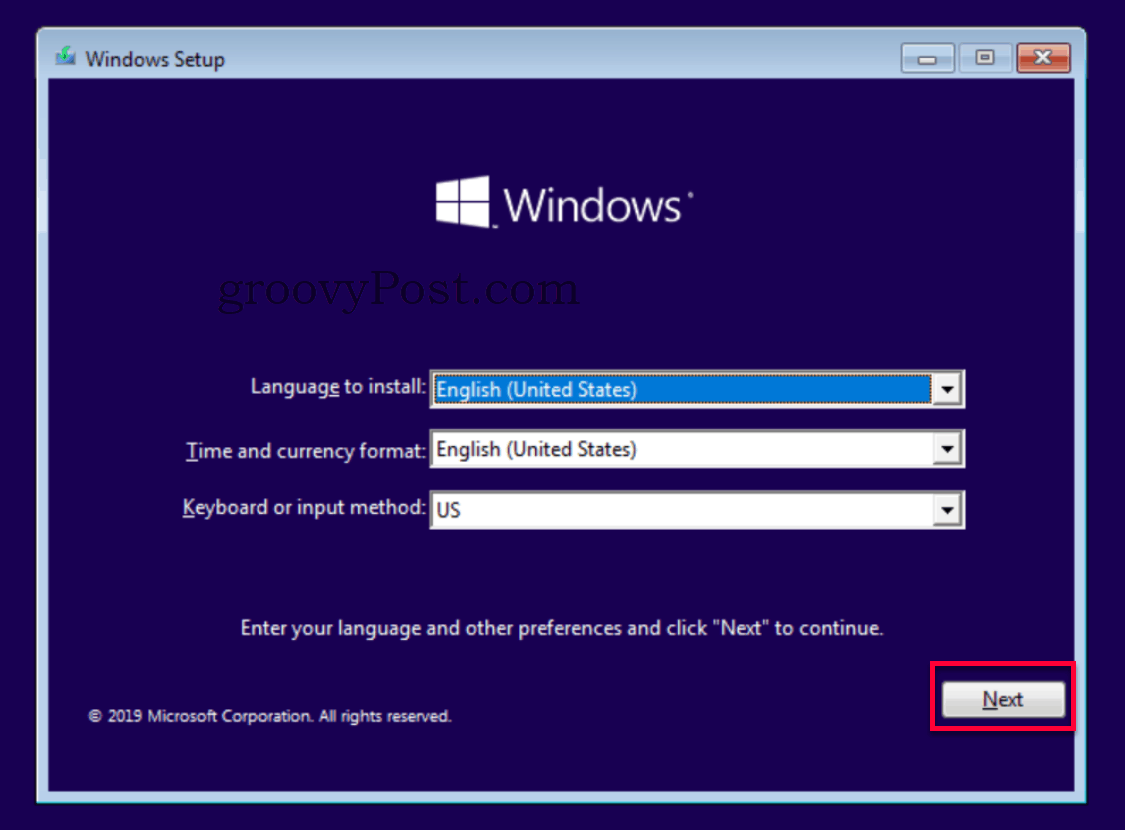
- Click Repair your computer.


- Here select Troubleshoot at the “Choose an option” page.


- Be sure to select Advanced options on the “Troubleshoot” page.


- Select Startup Repair at the “Advanced options” page.


- A repair will start to run, and a result of the repair will show up in a few minutes. Restart your computer and verify if the black screen issue has been resolved.
Are you still having issues?
If none of these solutions fixed your issue, it may be something more hardware related issues. Check out our other groovyPost which focuses on those types of problems relating to fixing black screen issues in Windows 10.
Conclusion
A black screen in Windows, if not a hardware problem, is most often related to the drivers or a misconfigured resolution setting. The fix is often fairly simple if you know where to go. As always, if you run into this issue and need more help, feel free to post your specific issue on our free Windows 10 discussion forum.


