How to Mount and Burn ISO Images in Windows 10
If you skipped Windows 8 and upgraded Windows 7 to Windows 10, here’s a look at how to mount and burn ISOs with native built-in tools in the new OS.
When Windows 7 was released, a significant new built-in feature was burning ISO images to disc. When Windows 8 came around, it included the ISO burning and allowed the mounting of ISO images natively without third-party software.
If you skipped Windows 8 and upgraded Windows 7 to Windows 10, here’s a look at using both features that are still present in Microsoft’s new OS.
Mount ISOs in Windows 10
First off, we’ll take a look at mounting an ISO file. In previous versions of Windows, you needed to use a third-party tool like Virtual Clone Drive to mount an ISO or a utility like ImgBurn to burn them to disc.
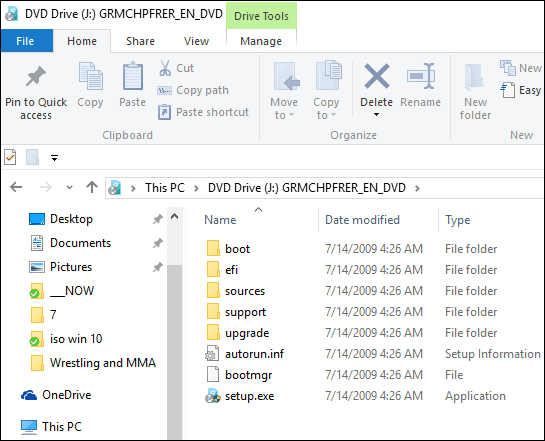
However, since Windows 8, mounting an ISO is a simple as a double click. That will mount the disc image as a virtual drive, and you can see the contents.

Like in the example below, I double-clicked the Windows 7 image to reveal its files.
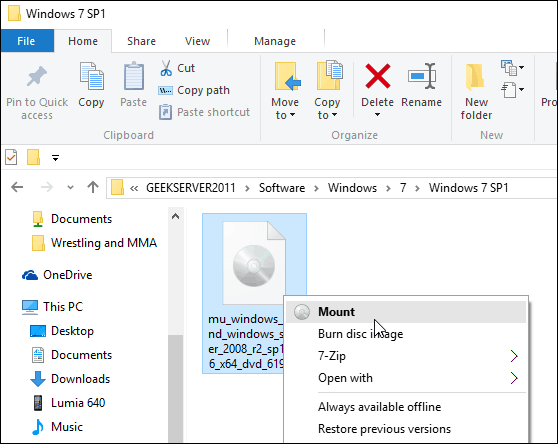
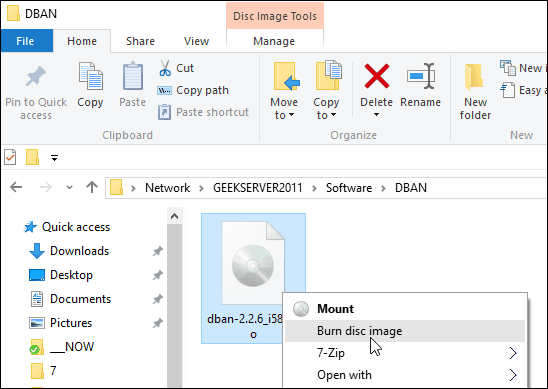
Alternately, you can right-click the ISO file and select Mount from the context menu; note that just below that is the option to Burn disc image.
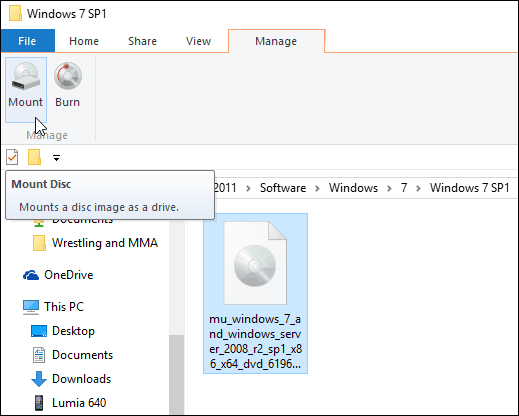
You can also select the ISO file, and from the Ribbon, go to Manage > Mount…; note that you also get the burn icon by using this navigation method.
No matter how you choose to mount your ISO, it mounts it as a virtual disc, and it will show up on This PC as a drive. For example, in the shot below, I have three different ISO files mounted.
Then you can access them just as if there was a physical disc in your drive.

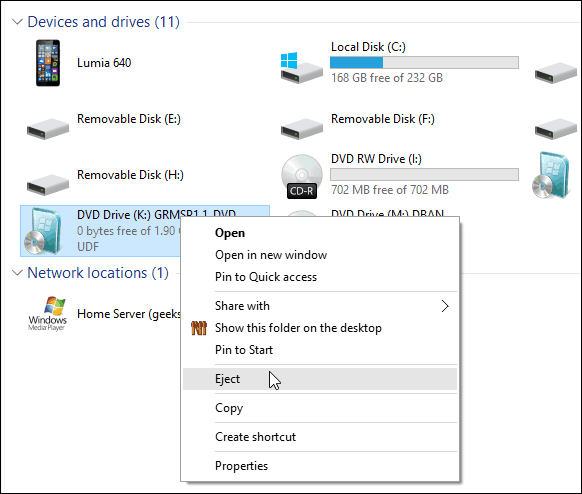
Also, note that if you want to unmount the ISO, right-click and select Eject.
Burning an ISO
As I explained above, the option to burn an image is either on the Ribbon or the context menu. Burning an ISO to disc is essentially the same as it was in Windows 7. Pop in a blank disc and right-click, and select Burn disc image.
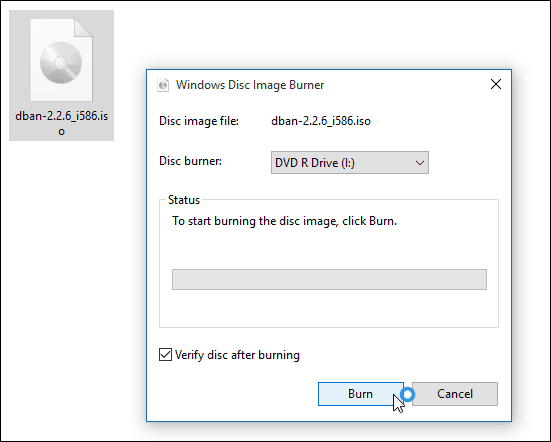
Then the Windows Disc Image Burner tool kicks off. Select the drive with your blank CD or DVD. I also suggest checking Verify disc after burning. That will make sure there are no errors on the disc during the burning process.
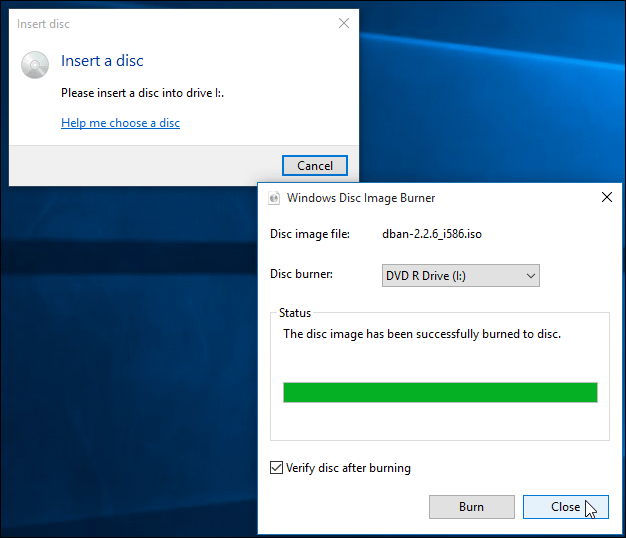
After it’s done, the drive will pop open with your completed disc. That’s all there is to it!
While it’s usually faster to create a USB installation drive for software, some people are just more comfortable using a physical DVD, CD, or Blu-ray disc. Flash drives have a tendency to be lost easily. If you need to burn a retail copy of Windows 7 or higher to disc for any reason, head to the Microsoft Software Download site.
There you will find an ISO for 32 and 64-bit versions of Windows 7, 8.1, and Windows 10.
One more thing. If you have a file compression utility installed, like 7-zip, it might have taken over the file association for ISOs. If so, you will need to change it to Windows Explorer. To do that, head to Settings > System > Default Apps > Choose default apps by file type. Scroll down and make Windows Explorer the default.

For more on that, please read our article: How to Change Default Programs in Windows 10.
And if you have questions, concerns, or suggestions about Microsoft’s new OS, make sure to sign up for our free Windows 10 Forums.


Peter Johnson
January 19, 2016 at 4:03 pm
Thanks Brian – great article that explains the disk imaging thing in perspective. And I found the information about files compression utilities very useful too because that’s exactly what was happening on my system.
Menno
February 15, 2016 at 12:47 pm
Was banging my head over this one for some time now … cheers for making this post :D
Ziyad
May 1, 2016 at 5:08 am
When I right-click there’s no mount option. Any help?
Ziyad
May 1, 2016 at 5:57 am
Never mind, just uninstalled Nero 7 Essentials and now I have it.
saeb
May 16, 2016 at 11:37 pm
LOL i thought My windows10 ISO file is some kind of different .
but problem was 7zip default settings. thanks man . u r life savior
Ziyad
May 17, 2016 at 2:50 am
lol no problem :)
Tim
May 27, 2016 at 12:54 pm
Thank you for this! Default was not set to windows explorer and I couldn’t figure out why I could mount on my laptop but not on my desktop.
Ziyad
May 28, 2016 at 3:08 am
Glad I could help
R Norwood
July 9, 2016 at 12:49 pm
If this is about windows 10, why are all the illustrations in Windows 7???
Steve Krause
July 9, 2016 at 3:53 pm
Hi R. They are not. It’s a Windows 7 ISO file he’s using for examples only.
Thanks!
-S
OrangPintar
February 12, 2017 at 8:13 am
Yes, i confused too at first, but it worked on Win10, though :)
Milus Campbell
July 31, 2016 at 11:07 am
I’m sorry but I’ve checked several times and I do not see any link to download the .iso. When I click on “Microsoft Software Download site” – – nothing happens, the web site will not open, I get a blank screen.
I found but this site will also not open.
Likewise does not work, blank screen.
And, as I said in my earlier E-mail, I would not be able to complete this process even if I had a copy of the .iso because my Windows Explorer does not have the “Manage” item on the tool bar.
Any other ideas would be appreciated. Thanks for your help.
Milus Campbell
holdum333
August 21, 2016 at 3:59 pm
Hi Very nice Brian! I read all your groovy blogs! You are much appreciated!
Dan Kasak
October 21, 2016 at 9:55 pm
ImgBurn software that you linked includes a lot of adware and a virus that AVG detected.
Steve Krause
October 22, 2016 at 9:20 am
Be sure you don’t download the advertisement they put on the site. This is the GREEN BUTTON for PC Mechanic they put on the site. Who knows what that junk is. Probably full of spyware and other JUNK.
Use the download links http://imgburn.com/index.php?act=download
Be sure to READ it and don’t download the Ads they put on the site.
That said, we probably need to update the article. They have not updated the software since 2013. Might have been abandoned.
Mark
November 16, 2016 at 1:31 am
Many thanks,
Nicely laid out, especially the section on how to deal with another app having made itself the default for iso files.
peter
December 23, 2016 at 6:03 am
WHen you burn the ISO image to DVD, does it just copy the .ISO file to the DVD (1 file) or does it copy all the contents within the ISO (like when you see when you mount it) to the dvd? thanks!
Steve Krause
December 23, 2016 at 6:49 am
No, it doesn’t just copy the .iso file to the DVD. It will apply the ISO to the DVD so that it will become a normal DVD you can play. Granted, the ISO needs to be created properly for this to work. In most cases, however, if it’s an ISO, it’s a true image of a DVD or CD.
Mark Zimmer
December 28, 2016 at 9:06 am
Thanks for this—especially the bit about changing the file associations. All the other descriptions I found about burning an ISO image neglected to mention that key detail so it was making me crazy that I didn’t have the options that they were claiming I should have. That should probably be up at the top since programs love to automatically associate all of the file types to themselves.
Carl
February 9, 2017 at 9:33 am
I am using Windows 10 — None of those options appear when I right click on the ISO file. My version is as plain as they come. Is this a feature of some advanced super pro extra plus maximum whatever version of this crap?
Curious Tourist
March 24, 2017 at 1:25 pm
to quickly/simply change the file association of .ISO files (or any file): right-click the file in question and click properties. The 3rd line says “Opens With:” followed by the associated program and a [Change] button. No need to go to a file list and seek the extention you want to change.