HDMI Not Working on Windows 11? 11 Fixes
Having trouble with HDMI connectivity on Windows 11? No matter the problem, the fixes are usually the same. To help you, check out this guide.
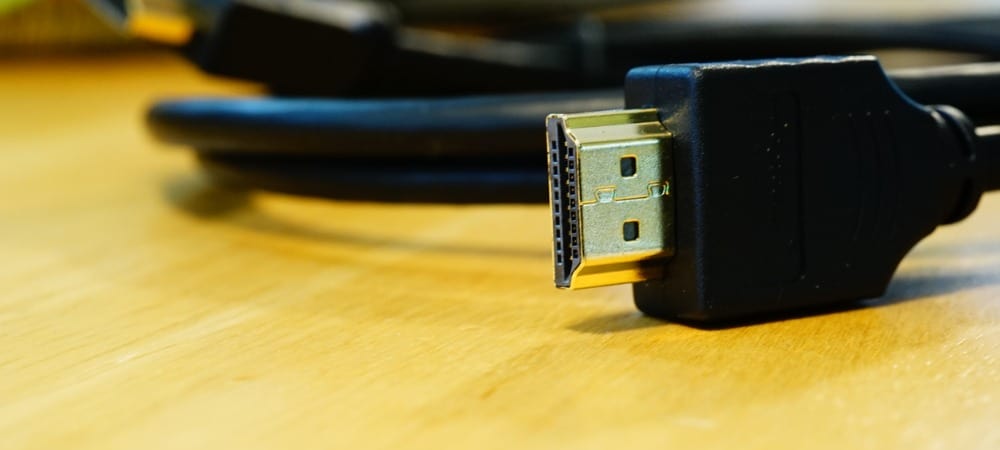
The High-Definition Multimedia Interface (or HDMI) is proprietary audio and video tech that transmits uncompressed video to a High-Definition (HD) or 4K display. Put simply, an HDMI cable is a typical cable you’ll use to connect third-party devices to your TV or to a PC monitor.
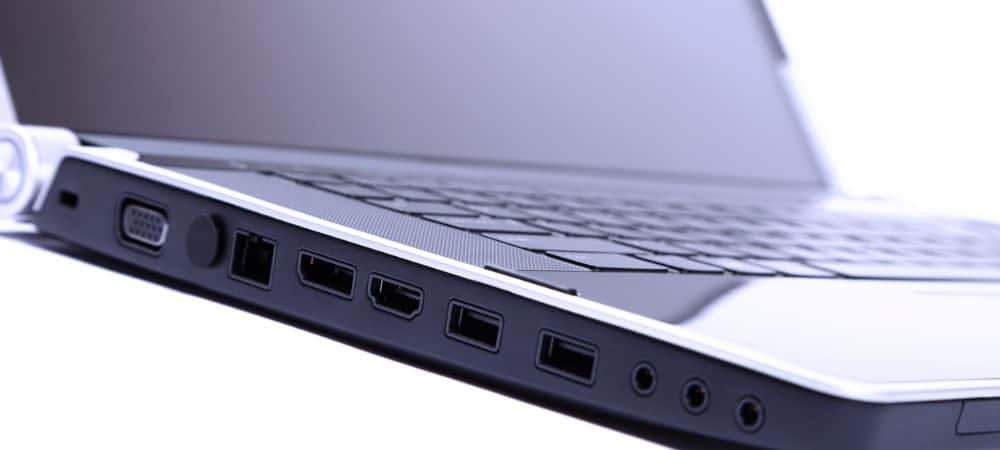
PCs and laptops often come with an HDMI port that allows you to branch out with a second monitor or to enjoy TV and movies on a bigger screen. This relies on your HDMI port actually working—if it doesn’t, you’ll need to troubleshoot.
If your HDMI isn’t working on Windows 11, you can try some of these common fixes to get it working again.
Why Is My HDMI Not Working on Windows 11?
Several things might cause HDMI to stop working on Windows 11. The biggest indicator is a lack of sound or video on the external display. You might get sound without video, video without sound, or neither—it all points to a problem with your HDMI connection.
If you’re really unlucky, you might see (or hear) your content, but it might seem distorted, or you’ll see an error, etc. Whatever the case, give one of these fixes a try.
1. Clean Your HDMI Port and Reseat the Cable
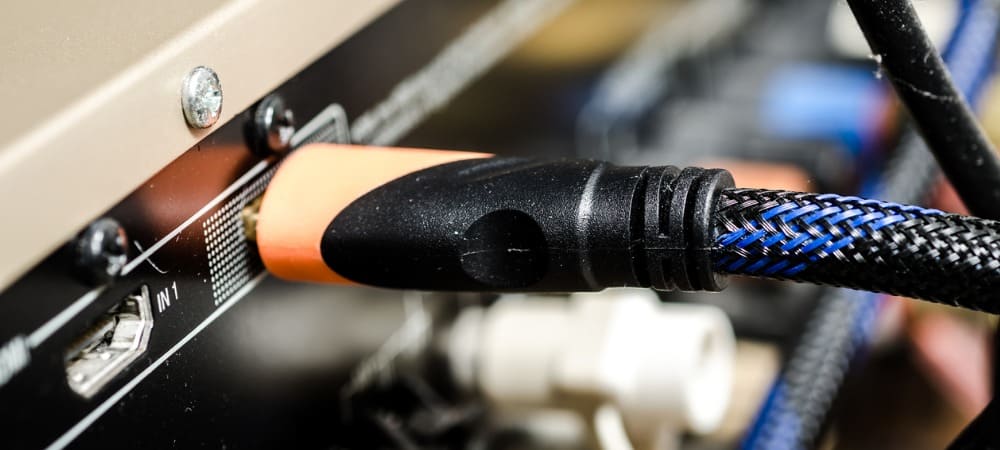
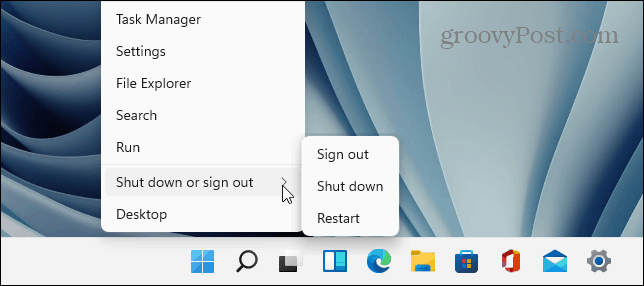
Before you panic, try one of the most basic troubleshooting steps for HDMI problems on Windows 11—disconnect the cable and reconnect it.
Before you plug it back in, make sure to blow out any dust from the port manually or, better still, with canned air. You should also visually inspect the cable to check for damage. If there is, replace the cable, as this is likely the cause of your problems.
When you’ve done this, reset the cable at both ends.
2. Try a Different HDMI Port
Trying to connect your Windows 11 PC to HDMI but you’re seeing two or more HDMI ports? It’s probably a sign that you’re using a graphics card and your cable is in the wrong port.
Some computers come with integrated graphics that include an HDMI port connected to the motherboard. If you have a graphics card, ensure you’ve plugged the cable into the HDMI port on the graphics card and not the HDMI port on the motherboard.
Hopefully, that will fix the issue. Also, if your GPU has multiple HDMI ports, try a different one.
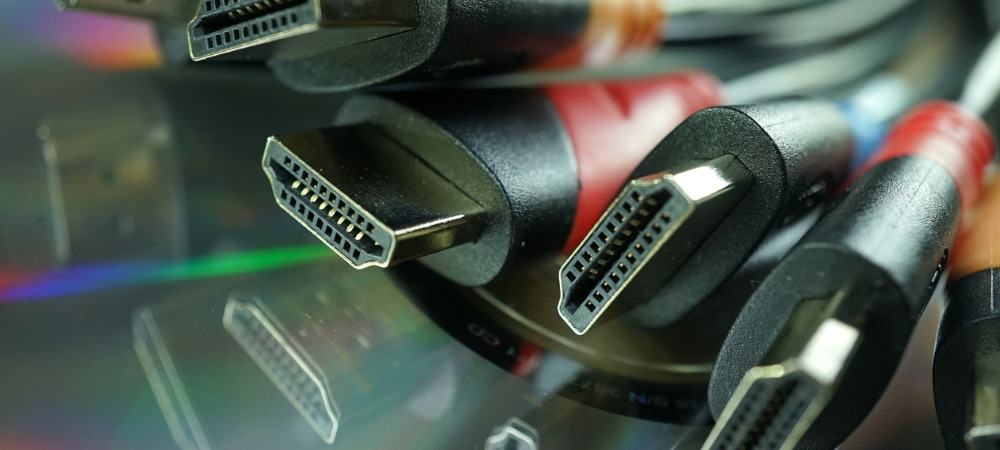
3. Swap Out Your HDMI Cable
Your HDMI cable doesn’t need to have visual signs of wear or tear for it to stop working. It could just be luck—a bad cable may break without warning.
If you’re still having trouble, switch out your current cable for a new one. If it’s working with a new cable, you’re good to go—keep the cable plugged in or purchase a new one if needed.
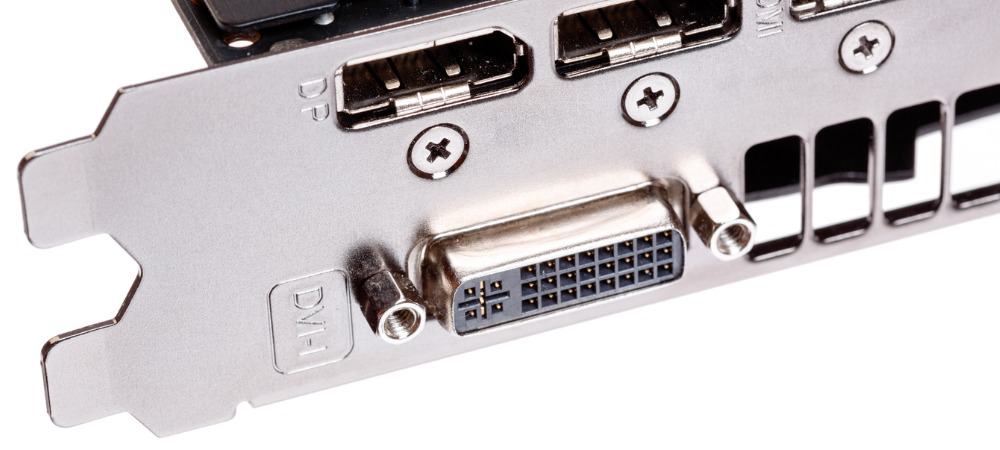
Things can be complicated even further if you’re using adapters, such as USB-C or DVI to HDMI. Your mileage with these may vary, and you may need to replace these if you find your TV or monitor still isn’t working.
4. Reboot Your PC
As soon as you connect an HDMI cable to your PC, Windows 11 should kick into action and display something. Sometimes, however, Windows might fail to recognize the port is active straight away.
If this happens, try restarting Windows 11 with the cable connected. During the reboot, Windows should recognize the port and (if necessary) install the correct driver.
5. Try a Different Output Type
If your video card and external display have different outputs like DVI, DisplayPort, or even VGA, then give these a go instead.
This will help you to narrow down the cause of your problem. Is your graphics card failing, for instance? If another port is working, then it’s possible that your TV or monitor is at fault.
If you can get by using a different output, you might want to carry on using it while you troubleshoot your HDMI connection further.
6. Check for Windows Updates
It’s essential to keep your system up to date, as there could be an update that contains a “fix” for HDMI not working on your Windows 11 PC.
You can manually update Windows 11 by opening Start and clicking Settings. From there, click Windows update, then click the Check for updates button.
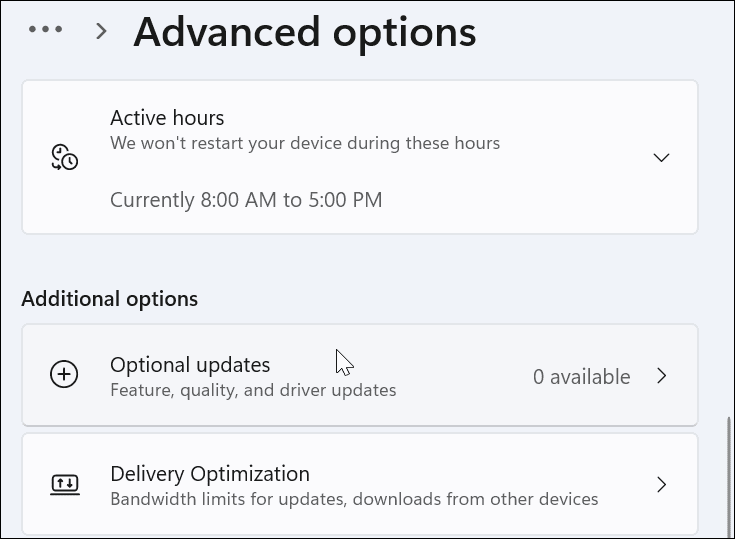
If required, restart your PC or set your Active Hours to make Windows restart when you’re not using the PC.

You’ll also want to check for optional updates. This is the Windows Update section that will show additional feature, quality, and driver updates. You can check this by going to Settings > Windows Update and clicking Advanced options.

Next, scroll down to the Additional options section. You should see the number of optional updates available (if there are any). If updates are available, click on Optional updates to install them.
7. Update Display Drivers
In addition to Windows updates, you’ll want to make sure your graphics card drivers are updated. For example, a new graphics card could see major graphics card driver updates that fix stability issues like this one.
To update your display drivers, right-click the Start button and select Device Manager from the menu.
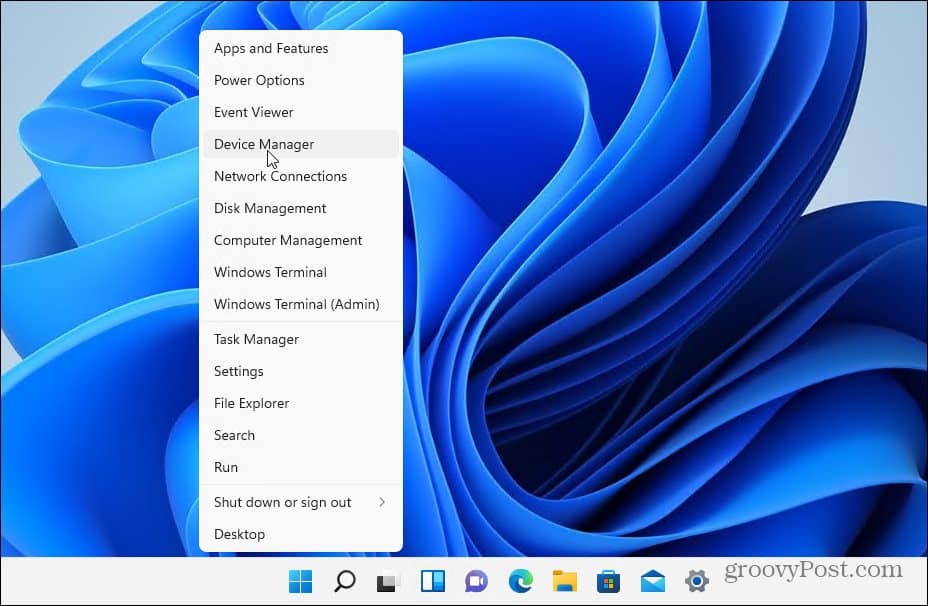
Next, scroll down and expand Display adapters. Next, right-click your graphics card and select Update driver.
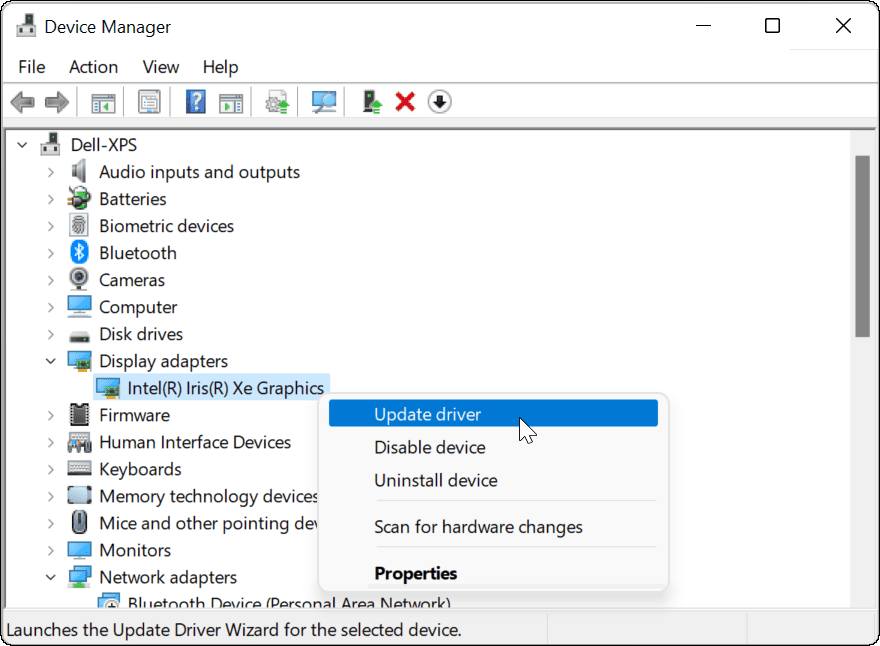
Select Search automatically for drivers and Windows will search for an updated driver. Note that your screen will flicker a couple of times during the process.

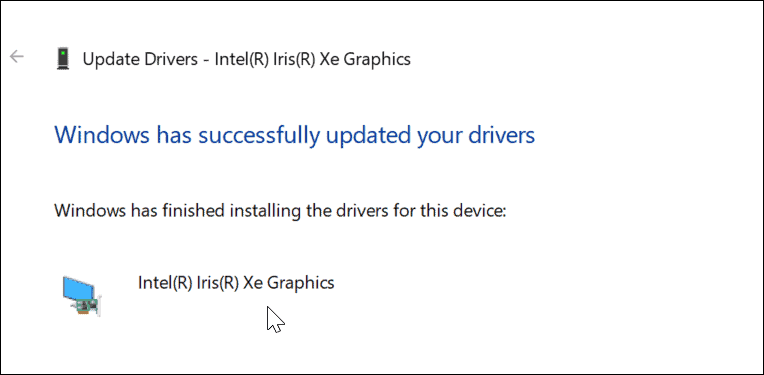
When complete, you should get a message letting you know that Windows successfully updated your drivers.
If that doesn’t work or you’ve downloaded an updated driver from the manufacturer’s website, you can manually install it.
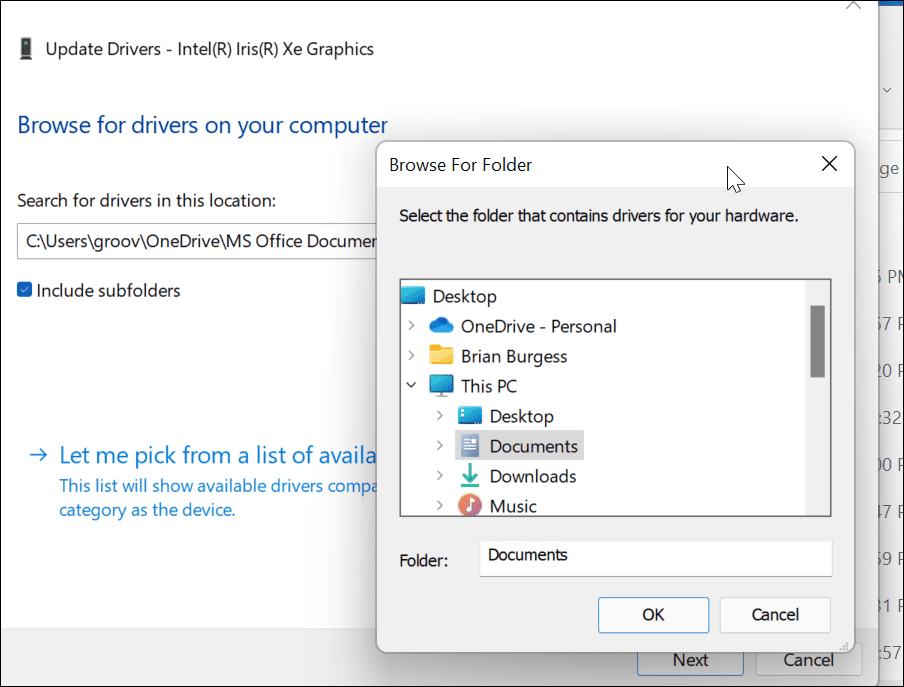
To do this, right-click the graphics card in Device Manager and select Update Driver. Instead of having Windows look for the driver, select Browse my computer for drivers.

Navigate to the location of the driver you downloaded and continue with the on-screen instructions. You’ll need to restart your PC to see if HDMI is working afterward.
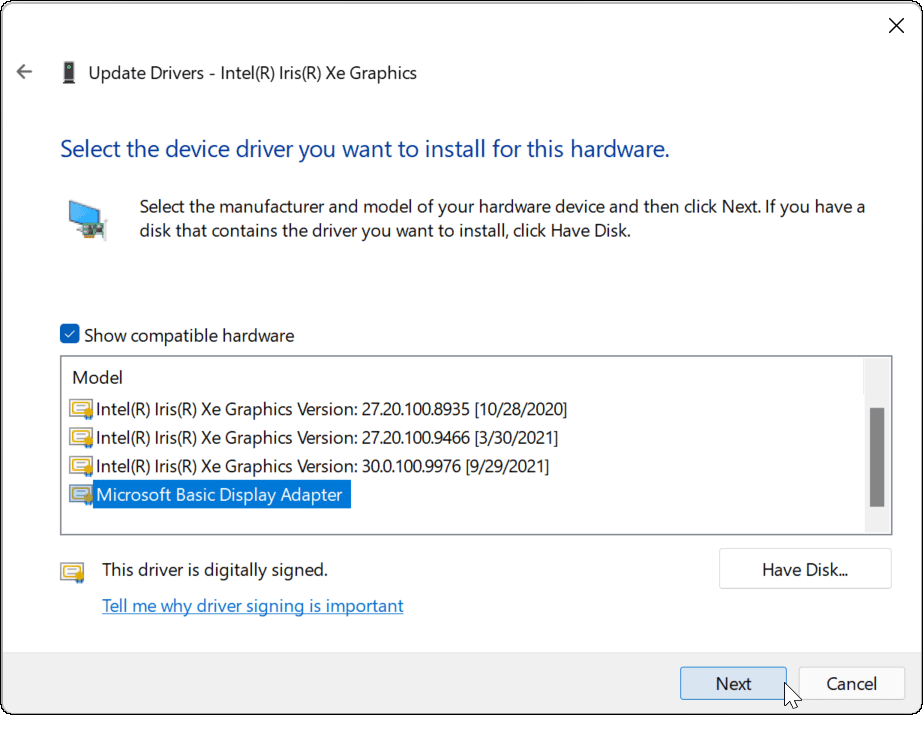
Alternately, you can try installing the Microsoft Basic Display Adapter driver. This is a barebones driver that should work in an emergency.
Instead of browsing to a driver, select Let me pick from a list of available drivers on my computer.

Make sure to check the Show compatible hardware box. Select Microsoft Basic Display Adapter and click Next. Restart your PC after installing the driver afterward.
8. Check OEM Software for Updates
Depending on the make and model and manufacturer, your PC might include an OEM update tool from the manufacturer. You’ll typically find the update tools in a folder named after the manufacturer on the Start menu, such as Dell, Lenovo, or HP.
You can also find OEM apps by searching the first letter on the Start menu. For example, we searched under D and found the Dell Update utility on an XPS laptop.
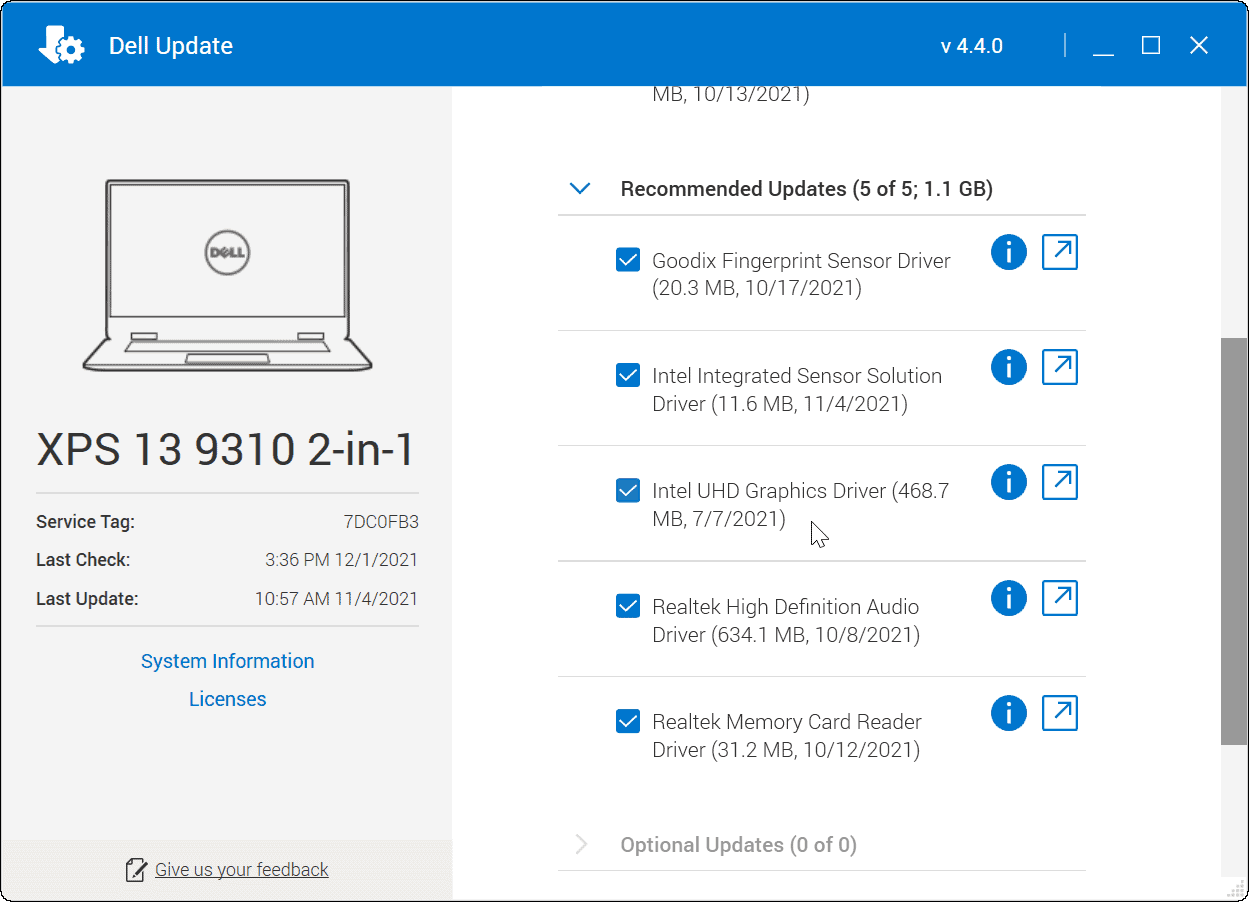
Run the OEM’s update utility, and you’ll probably see updates that Windows 11 didn’t find. Usually, it consists of OEM software updates and, more important, driver updates.
If you have a GPU driver update, make sure to install it. Hopefully, HDMI will work once you’ve updated your system.
9. Check Resolution and Refresh Rate
When you plug in the HDMI cable to your PC and external display, it should select the correct resolution and refresh rate. However, this isn’t always the case. You might get a blank screen on the external monitor—this could be due to a resolution or a no signal error.
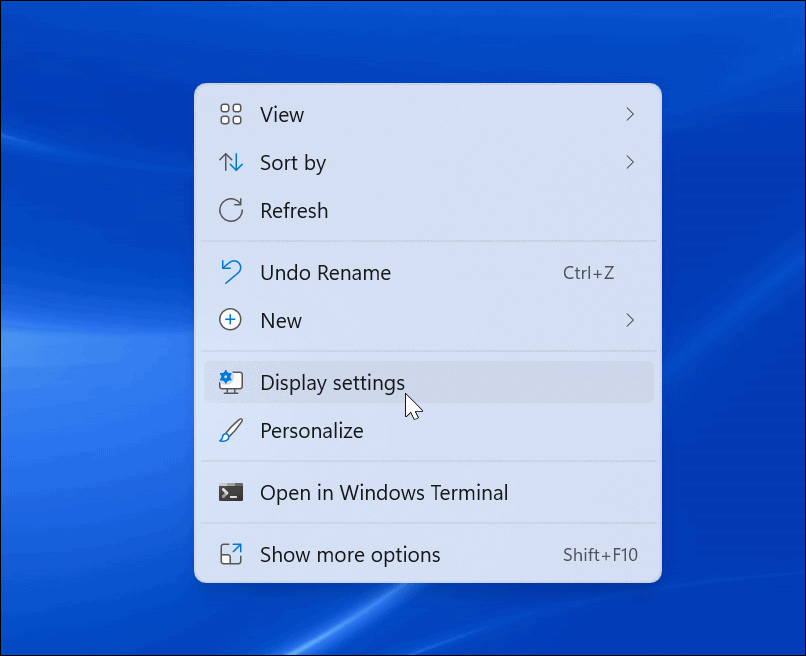
To fix the issue, go to the Windows 11 display settings to make changes (you’ll need to make sure you have access to a monitor that still works). First, right-click an empty area on the desktop and click Display settings from the context menu.
Next, select the display you want to modify. If you don’t see it, click the Identify button. Scroll down to the Scale and layout section and use the dropdown menu to adjust the Display resolution for the external monitor.

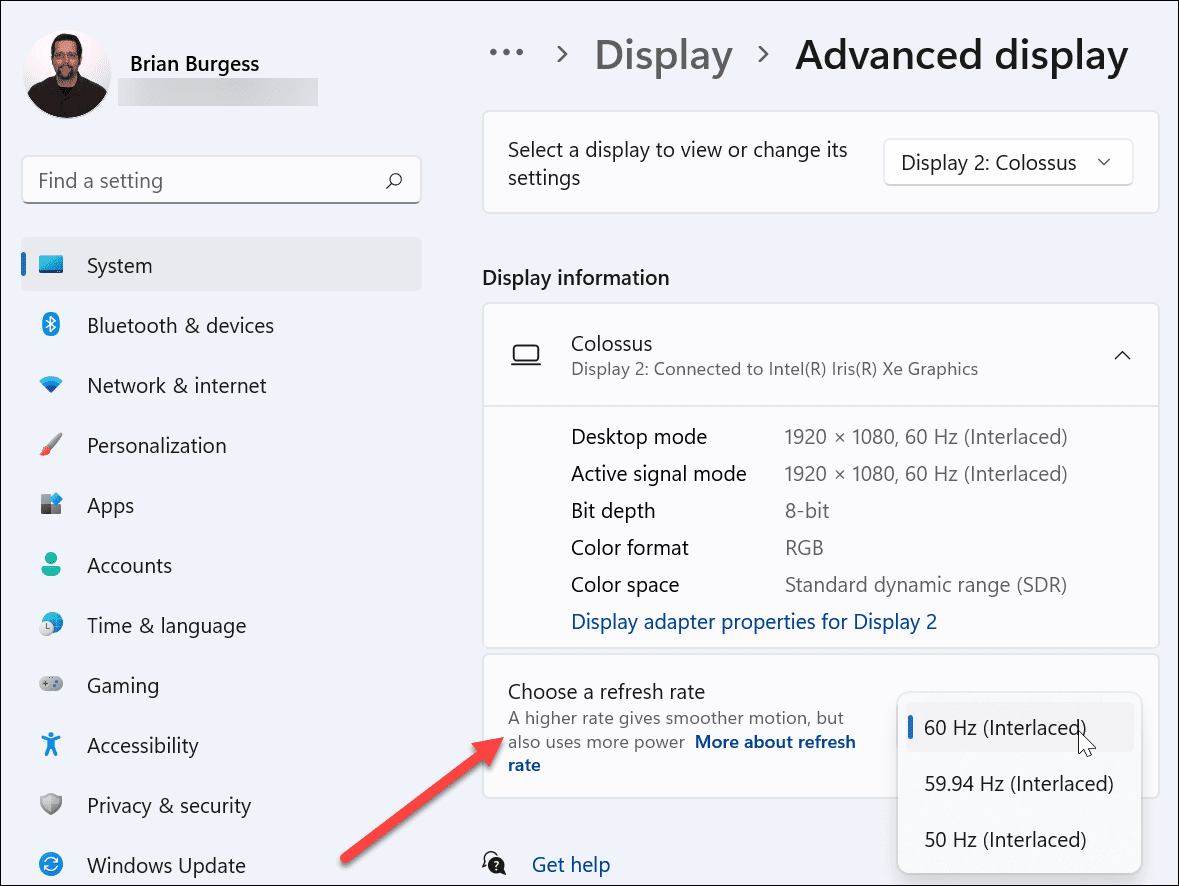
After setting a resolution, scroll down in the same section and click Advanced display under the Related settings section. Select the monitor you want to change the refresh rate for at the top.
Adjust the refresh rate for the display in the Choose a refresh rate section. You may want to check your monitor or TV’s user guide for the maximum rate to use here.
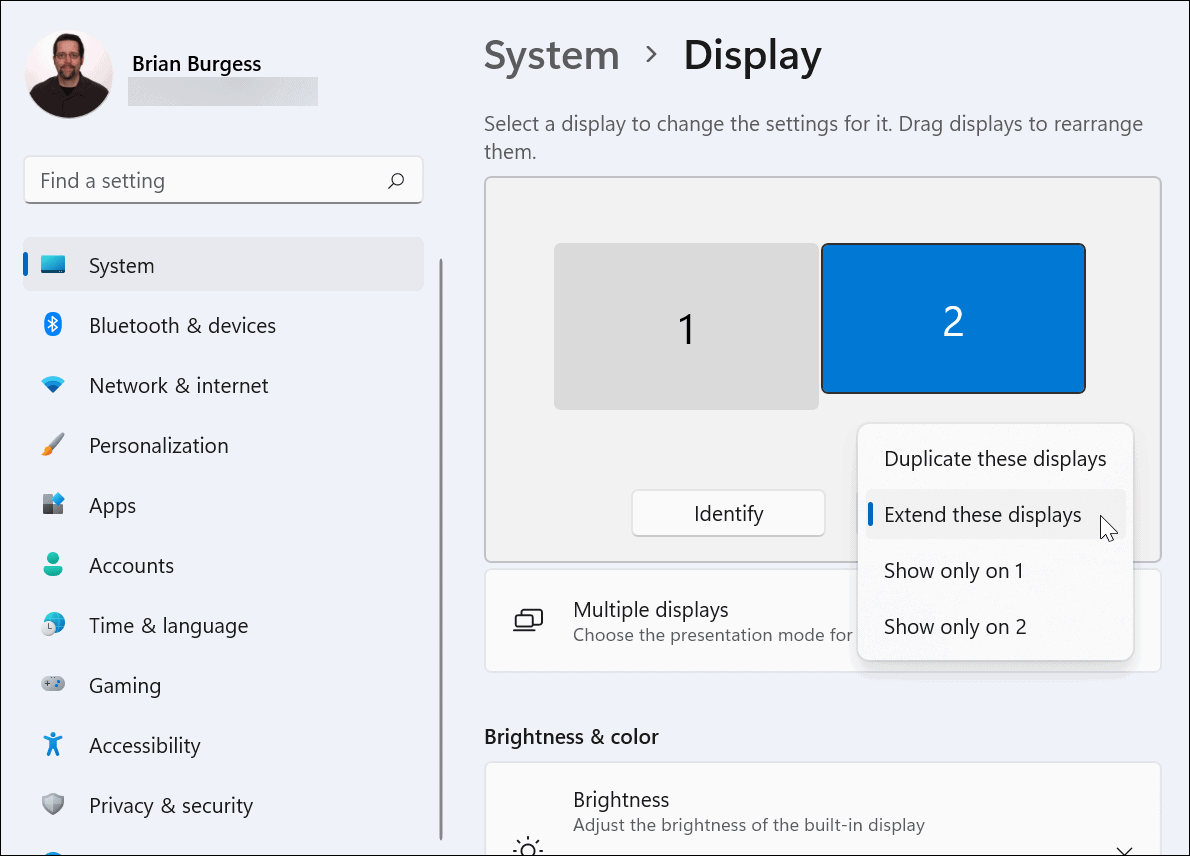
10. Check Multi-Monitor Mode
If you’re using HDMI for a second display, it’s worth checking the multi-monitor setup. If this is configured incorrectly, your PC might ignore your HDMI TV or monitor entirely.
To check this, right-click an empty area on the desktop and click Display settings.
You’ll need to select the appropriate option in the Display menu.
You can choose between Duplicate these displays, Extend these displays, show only on 1, or Show only on 2. If you have more than two monitors, you’ll see additional options.
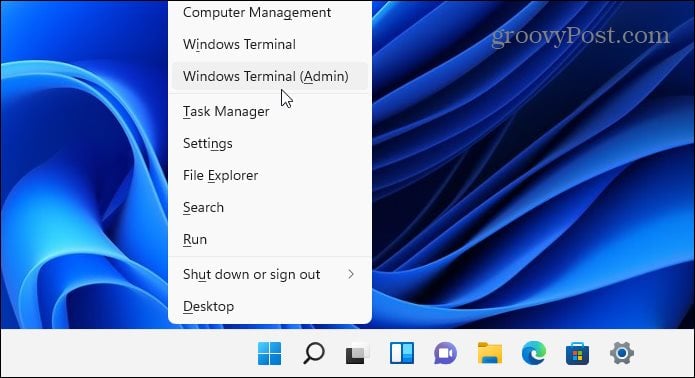
11. Run SFC or DISM Scan
If the options above don’t work, system file corruption could be the problem. You can use the SFC and DISM tools to check your local drive for corrupted system files and replace them.
To run these tools, right-click the Start button and select Windows Terminal (Admin). If UAC comes up, click Yes.
In the Terminal window, enter the following command:
DISM /Online /Cleanup-Image /RestoreHealth
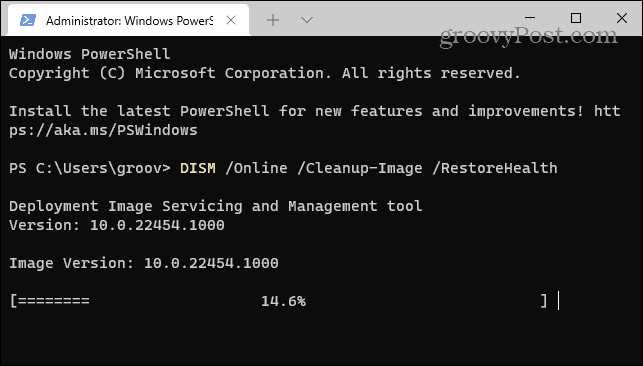
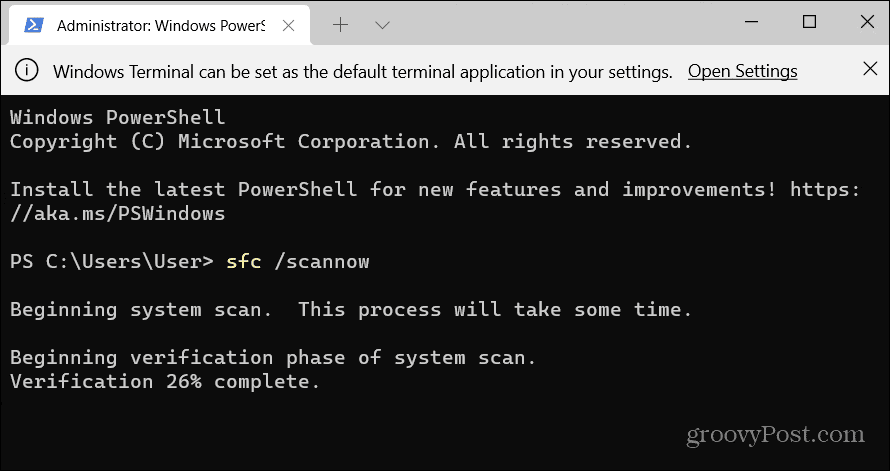
Allow time for the DISM tool to complete. Once it’s done, type the following:
sfc /scannow
It can take a while for these tools to run, so you might want to grab a coffee. Restart your PC and see if HDMI is working once the SFC tool finishes its scan.
Fixing HDMI Problems on Windows 11
The steps above should help you if your HDMI is not working on a Windows 11 PC, whether you’re connecting to an external monitor or to a TV.
Usually, you won’t need to dive deep into the troubleshooting. HDMI issues are typically caused by a bad cable, loose connection, or incorrect display settings. If you do have problems, these fixes should resolve the problem.
Do you have other problems with your Windows 11 PC? Don’t panic—troubleshooting tips are readily available, whether it’s a failed update or a keyboard not working properly.


Montesquieu
May 16, 2023 at 6:26 am
Please delete the above comment. It appears to be the PC model itself that does not support Miracast.
Juan
February 6, 2024 at 10:14 am
Method 7 Works for me
Thanks