How to Draw in Microsoft Word

While Microsoft Word isn’t the best drawing tool, you can create basic drawings or scribbles in Word directly. Here’s how.
Microsoft Word isn’t essential software for graphics designers, and for a good reason. It’s true—Microsoft Word isn’t best suited for drawing, but it does have some built-in drawing tools you can use, should you need to.
For simple drawings, you can draw in Word directly using shapes, lines, or pen tools. If you want to draw in Microsoft Word, here’s what you’ll need to do.
These instructions have been designed with Microsoft Office 2019 in mind. Note that Microsoft 365 (formerly O365) is the Office suite with 1 TB of OneDrive per user. While the steps may work for older versions of Word, there may be some variations or missing features.
Using Microsoft Word Drawing Tools
There are two sets of drawing tools available to Microsoft Word users. If you want to draw basic, block-like images, you can insert shapes or lines into your Word document and group them together. You might want to do this if you’re creating a diagram or flow chart, for instance.
Alternatively, you can turn Word into your own personal canvas using pen drawing tools. If you have a touchscreen device or a graphics tablet, you can create freehand drawings.
To insert shapes, you’ll need to press the Insert tab on the ribbon bar. For freehand drawings, press the Draw tab instead.

Inserting Shapes into Microsoft Word
If you’re not confident of your freehand drawing ability, or you want to create diagrams in Word, you can insert shapes.
There are hundreds of pre-set shapes available. You can draw typical shapes like squares or circles or insert arrows, stars, speech bubbles, and more. To insert a shape, press the Insert tab on the ribbon bar, then press the Shapes button.
This will list the various shape options in a drop-down menu for you to choose from.

Press on one of the pre-set shapes or line options to select it—your cursor will change at this point.
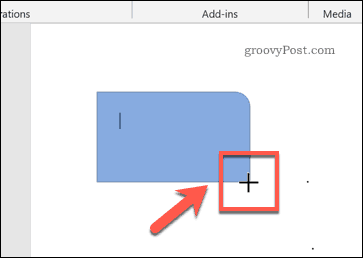
Once this happens, draw onto your Word document directly to insert the shape or line you selected. This allows you to select the appropriate size for your shape.
With the shape inserted and selected, Word will switch to the Format tab on the ribbon bar. From here, you can format your shape.

For instance, add text to your shape and begin typing with the shape selected–the text will be inserted inside the shape.

You can also change the color and style of your shape, as well as the position and alignment of any inserted text, using the options listed in the Format tab.

Creating Freehand Drawings in Word
If you want to create more original Word drawings, you can use various pen drawing tools to draw onto a Word document. You can do this using a mouse or trackpad, or more precisely, using a touchscreen device or graphics tablet.
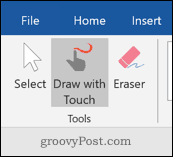
To start, press the Draw tab on the ribbon bar. This will display the pen drawing tool options for you to use.

Three drawing options are available under the Tools section. Press Draw with Touch to begin drawing with one of the pen tools, Eraser to switch to the eraser tool, or Select to select your drawings as objects to move, copy, or delete them.
A list of available pens to draw with is shown under the Pens category. There are three drawing pens available—Pencil, Pen, and Highlighter.
As you’d expect, using the Pencil tool inserts a finer, less precise drawing line to your document. The Pen tool is the opposite—lines are clearer, thicker, and more defined. The Highlighter tool can be used for emphasis, adding color to your drawings.
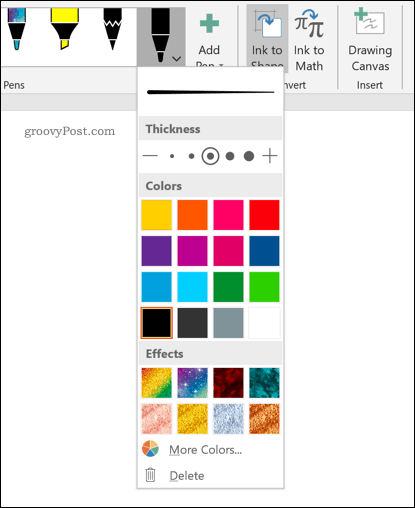
Several pre-set colors and designs are available already in the Pens category—select one of these to begin drawing. Alternatively, you can create your own by pressing the Add Pen button and selecting one of the tools listed in the drop-down menu.

This will add a new pen design to the Pens category, with a settings drop-down menu. From here, you can set the thickness and color of the pen tool, with a preview of the pen design at the top.
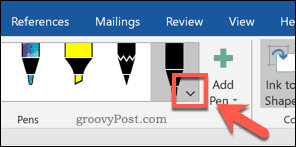
You can edit these in the future by hovering over a pen design and press the arrow icon in the bottom-left corner.
With your drawing pen tool selected and configured, you can begin drawing onto your Word document directly.

Creating a Drawing Canvas in Word
Word allows you to draw onto a Word document without constraints. If you’d prefer to draw onto a much smaller area of your Word document, however, you can insert a drawing canvas.
A drawing canvas groups your drawing into a single object which can then be moved, resized, or copied elsewhere. To do this, press the Drawing Canvas button in the Insert section of the Draw tab.

This will insert the canvas into your Word document. You will only be able to draw inside the canvas object’s borders– anything drawn outside of this will be ignored.

Designing Microsoft Word Documents
While it hasn’t been designed with drawing in mind, you can still use shapes, lines, and freehand pen drawings to create simplistic images in Microsoft Word. You can use shapes to create a flow chart or diagram or use free-hand drawings to show your artistic drawing skills.
You can insert and edit images in Microsoft Word too, but don’t forget Word’s main purpose. If you’re designing new documents, you may prefer to use building blocks to help you create them more quickly.


