Create a Windows 10 System Image using the Best Free Alternatives

Macrium Reflect and Ease Todo Backup are two great alternatives to Microsoft’s deprecated backup solutions: System Image and File History.
Microsoft recently made it known that built-in backup solutions in Windows 10 will be removed in an unknown future revision of Windows 10. That means users need to start considering alternative options for their backup needs from now on. For years, we have recommended BackBlaze as a backup solution, and it appears that CrashPlan for Home Users is also shutting down. Luckily, there are a lot of choices, both free on the market.
I’ve placed my bets on two well-known third-party offerings: Macrium Reflect and EaseUS ToDo Backup. Both are available in free versions with even more options than what Microsoft offers.
How to Use Free Third-Party Alternatives to System Image for Backup in Windows 10 – Macrium Reflect and EaseUS ToDo
If you depend on Microsoft’s System Image, File History, or Backup and Restore tools, you need to reconsider since Microsoft will be removing them in a future Windows 10 release. You can keep using them for now, but you need a contingency plan when the time comes. I have decided to move to Macrium Reflect, personally, because I’ve read such good reviews about it. EaseUS ToDo Backup is another option that works just as well. Because I’m a cheapskate, I’ve decided to work with the free versions.
Editor’s note: Andre may be a self-proclaimed cheapskate, but note that a big gamechanger for him is that he lives out in the middle of nowhere and gets all his internet via mobile data costly and slow. This makes online solutions—like Backblaze or ElephantDrive are untenable solutions for him. But if you have a good internet plan and are looking for a service to keep multiple versions of your personal files safe, online backup solutions like Backblaze are still your best bet.
Macrium Reflect – Installation
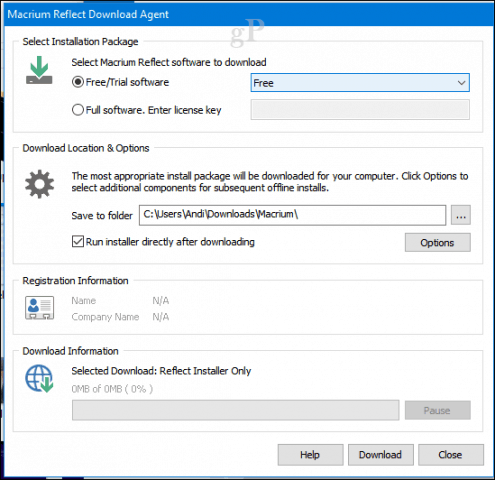
Let’s start with Macrium Reflect (Free). Macrium provides a small click to run the installer, but I chose the offline installer, which required finding the download agent; this downloads the full installer at around 800 MBs. Included are a collection of preinstallation environment tools based on Microsoft’s Windows Image deployment solutions.
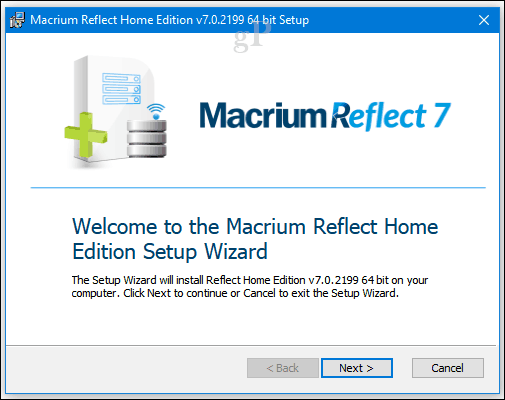
Setup was quick and easy but needed a restart to complete changes made to the system.
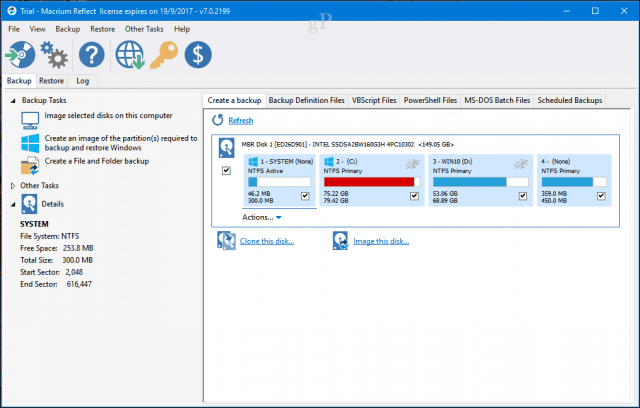
The Macrium Reflect interface is a bit more jam-packed than what you would normally find in Windows 10. But this a powerful alternative offering a range of options for creating and managing backups. Macrium integrates heavily with Windows—examples include support for attaching and browsing backups; boot image backups in Hyper-V; generating PowerShell scripts to automate backups; creating batch files, and of course, scheduling backups. You can also find handy options such as cloning and standard file and folder backup.
For this article, we are going to focus on image backups. Similar to the System Image backup feature in Windows 10 and previous versions, this lets you create a replica of your current installation state. You can be granular with your backups by choosing only the partitions you want to save as part of your image.
To create your first image, click the menu Create an image of the partition(s) required to backup and restore Windows.
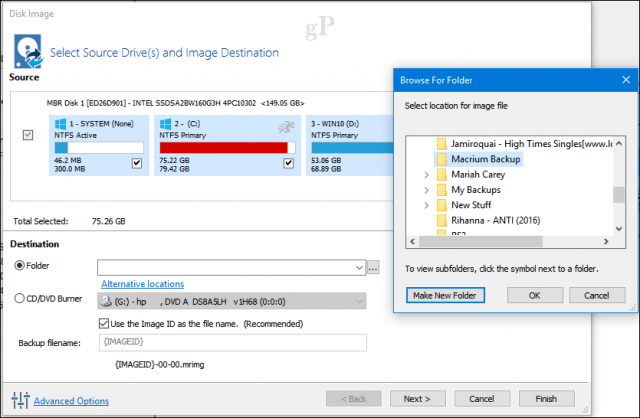
Under Destination, click the Browse button, point to your external drive where you want to store the backup, create a new folder, select it, then click OK. Click Next to Continue.
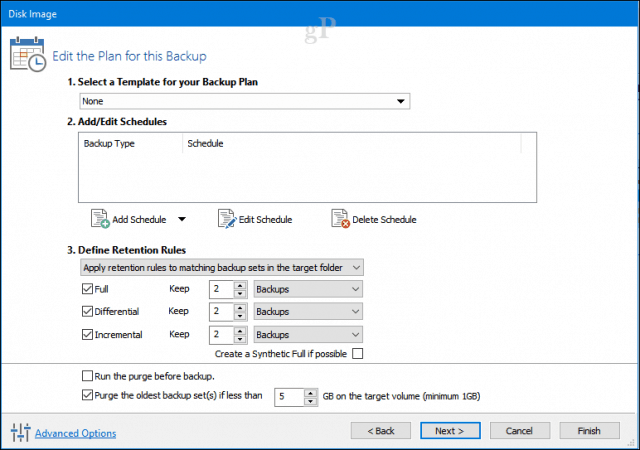
This phase of the wizard lets you create a backup plan if you want. It’s optional but lets you choose different backup methods, including full, incremental, and differential. For now, I am going to choose a schedule to make things simple. I recommend you review the retention rules to save on disk space. Users can retain several backups using any method; this can quickly eat up disk space over time to reduce the amount for each to about two. Click Next to Continue.
What Backup Should You Choose?
A full backup gives you one backup file that restores your entire system up to that point. Full backups are a comprehensive way to go, but they take a long time to create, and if you have multiple backup images, you end up duplicating a lot of the same data. Incremental and differential backups are two ways to address this inefficiency.
Incremental Backup – This maintains a regular backup in addition to changes that have been made since the last full or incremental backup. Incremental backups are often preferred because they use less disk space; not to mention, they are faster, too. So, if you created new Word documents since your last backup, those are added to the backup.
So, let’s say Backup A is a full backup you made on Monday. On Wednesday, you can make an incremental Backup B which only includes the new data since Backup A. On Friday, you can make Backup C, which only includes the new data since Backup B. In this way, you are storing no duplicate data. The downside is that if you want to restore your image, you have to use all three backup files: Backup A, Backup B, and Backup C.
Differential Backup – This creates a backup of the differences made since the last full backup. So, if you made changes to a few Microsoft Word documents, those changes are applied to the backup. A disadvantage is that differential backups use more space since you need to maintain a full backup in addition to changes since you created your last backup.
How is that different than an incremental backup? Let’s say you make a full Backup A on Monday. On Wednesday, Backup B contains the differences since Backup A was made. On Friday, Backup C contains the differences since Backup A. In this way, if you want to do a restoration, you need two files: the last full backup and the last differential backup. This means you only ever need two files, compared to the incremental backup method. The downside is that, as you can imagine, your differential backup image file gets bigger and bigger as the time since your last full backup increases. And after a while, you end up with quite a bit of duplicated data across your various differential backups.
So, which should you use? Either one is fine. It all depends on how much storage space and time you have. Incremental backups are faster and take less space during the backup phase. Differential backups take more time and space during the backup phase but are easier during the restoration phase.
Finishing Up
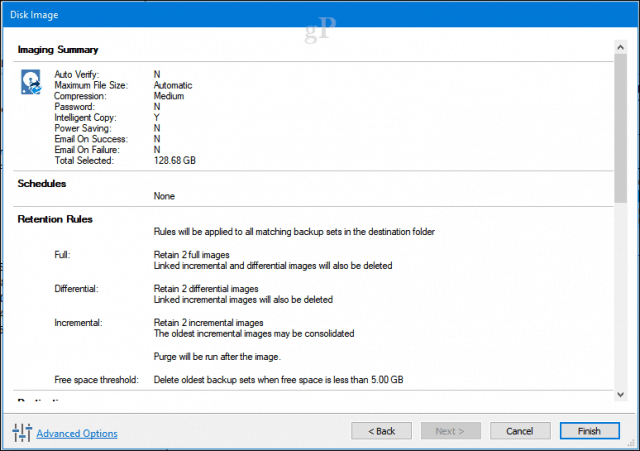
Review the image summary to ensure you chose the right options. If you maintain a dual boot configuration, make sure each partition is checked as part of your backup. Click Finish to begin the backup.
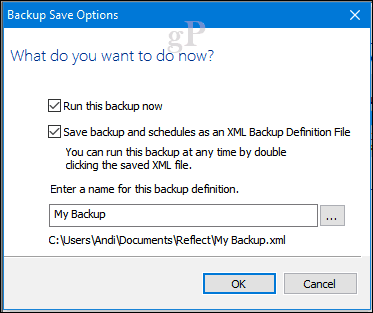
Click OK to start the backup immediately.
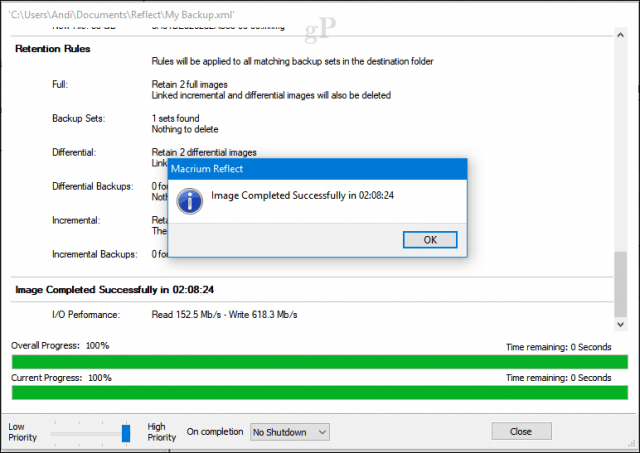
As with all image backups, it will take some time, so sit back and relax as your image is saved. Click Close after your image is created.
Restoring Your Macrium Image
There are multiple ways to restore a backup. You can start the restore process from within a running installation of Windows 10 with Macrium already installed. But in most cases, restoring an image would occur after booting into a recovery environment similar to System Image in Windows 10.
Create Rescue Media
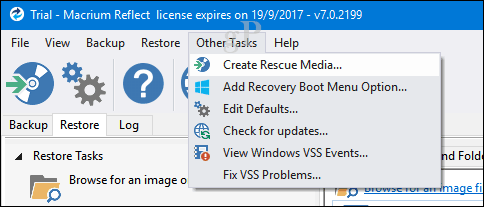
One important task you should complete after creating your image is to create rescue media, facilitating the restoration of the image. This is perfect for scenarios where your computer won’t boot or install a new empty hard disk. Click the Other Tasks menu, then click Create Rescue Media.
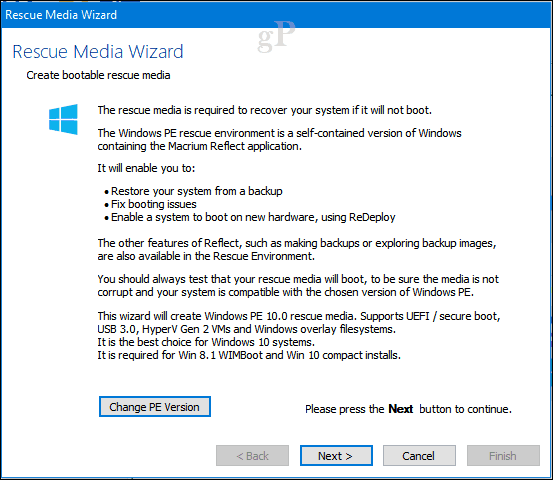
This will start the create a bootable rescue media wizard. Remember, as we mentioned earlier, Macrium downloads a full installer at around 800 MBs. This is where the preinstallation environment tools based on Microsoft’s Windows Image deployment solutions are used. Macrium adds its own recovery tools to facilitate the restoration of the image when you boot from it. Click Next.
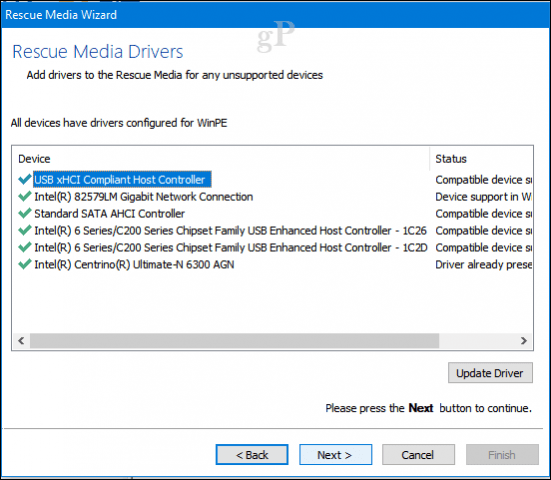
You can add drivers in advance for hardware that the restored image might not support. Click the Update Driver button to do so, then point to the source. This can minimize the chances of Windows 10 not booting on new hardware, especially if you are changing motherboards.
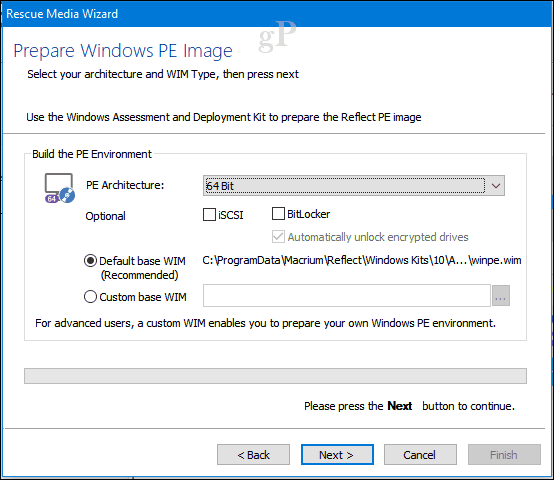
Depending on your Windows 10 image architecture, you can choose either a 32 or 64-bit recovery image. For this particular case, I am restoring a 64 bit Windows 10 installation to choose that. Click Next to begin the creation.
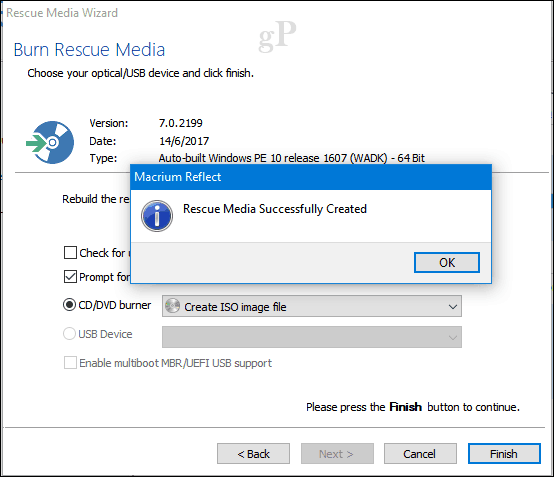
Bootable media can be prepared using a blank DVD or USB drive, or you can create a bootable ISO image instead. Choose your desired method, then click Finish.
Restore Image – Macrium Reflect
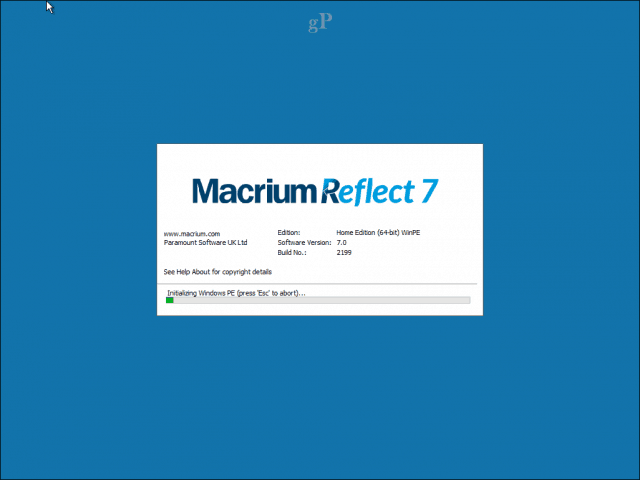
Configure your computer to boot from the installation media on the target computer. Attach your external drive where the image is stored, then power it on.
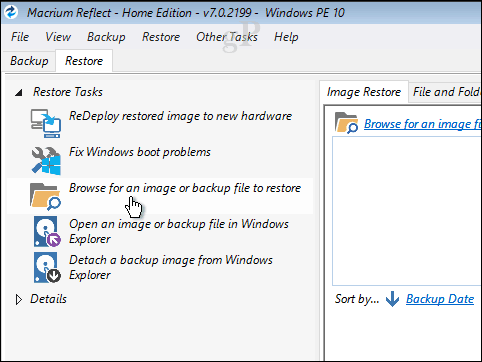
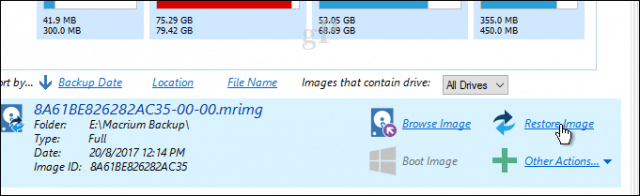
Under the Restore tab in Macrium, click the menu; browse for an image or backup file to restore.
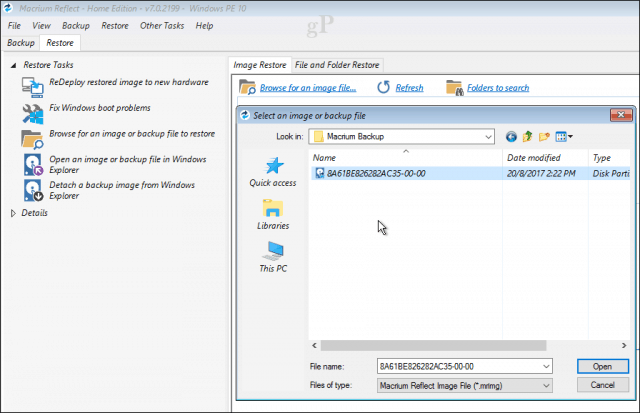
Browse to the image file, select it, then click Open.
Click Select a disk to restore to… then click the selected image that appears. Click Next to begin the restoration.
After the image is successfully restored, click File > Exit to reboot.
A Simple Process
That’s pretty much all involved in preparing a system image of your Windows 10 installation using Macrium Reflect. Macrium feels a little complex and overwhelming at first, but once you familiarize yourself with it, you should feel comfortable using it in no time. If you still want something a bit more user-friendly, then check out EaseUS Todo Backup Free.
How to Use EaseUS Todo Backup Free
EaseUS Todo Backup Free provides similar backup options. I appreciated its simplicity in several areas: easy to find and download, simple setup wizard, and quick installation. While EaseUS Todo Backup doesn’t offer quite as many features and functionality as those found in Macrium Reflect, I find it sufficient for basic backup and recovery.
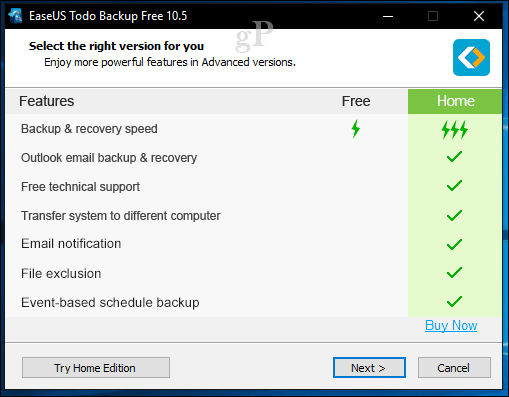
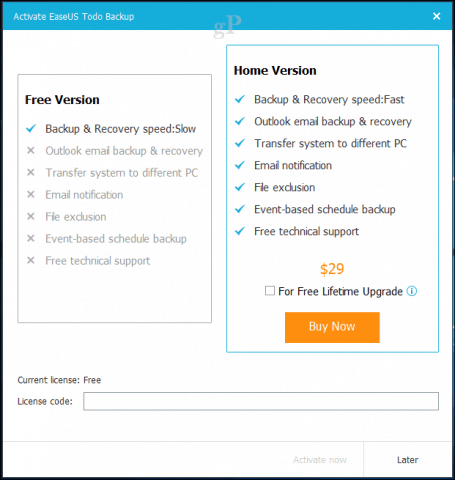
Offer Free or Home Version
After completing the installation, launch EaseUS Todo Backup; you will be prompted to step up to the Home version offering additional features. I don’t need some of the features like Outlook email backup, email notifications, and scheduled-based backups. EaseUS Todo Backup does include cloning, which lets you transfer your installation to a new hard disk or SSD or a new computer.
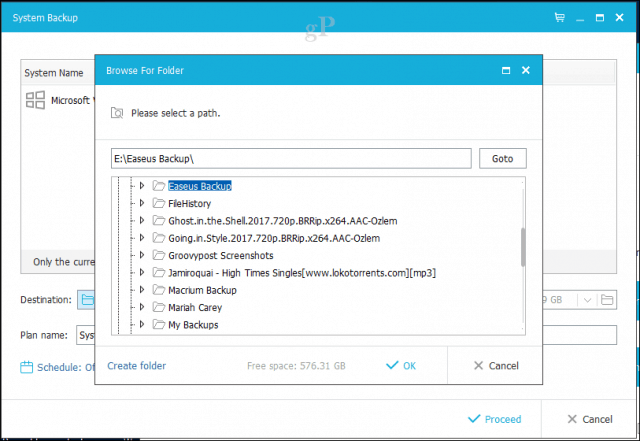
EaseUS Todo Backup also includes file and folder-based backup. We want to perform a system backup for our particular needs, which creates an image of your Windows 10 installation. To begin, click the System Backup button. Browse to where you want the image stored (external drive). Please create a new folder, then label it, select it, then click OK.
Retention Options
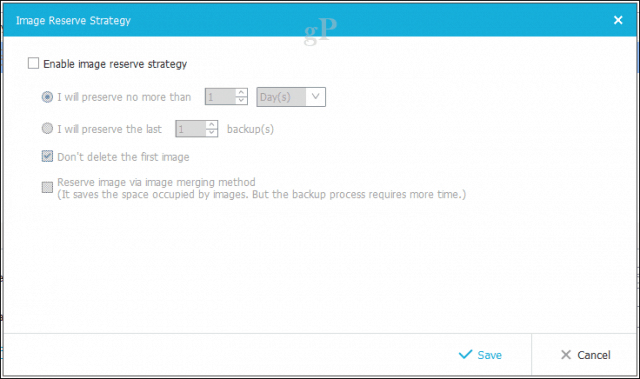
EaseUS Todo Backup also includes retention options, letting users manage how much space is used by backups. Click the Image Reserve Strategy menu, then choose your options for when you want backups to be created and how they are preserved and deleted.
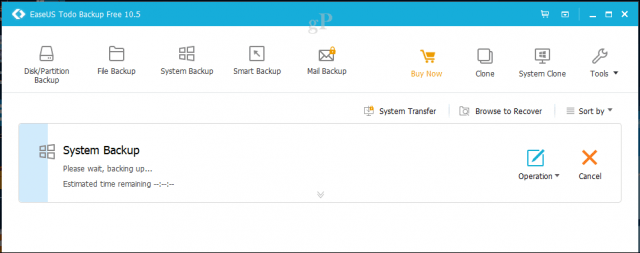
Click Proceed to begin the backup. According to EaseUS Todo, backups with the free version are a little slower, but I don’t think it’s much of a deterrent. Using a USB 3.0 external drive, the backup of a 68 GB partition was completed in about 10 minutes. So, the time will vary depending on the size of your installation. Please sit back, relax, and give it some time to complete.
Create an Emergency Disk
After your backup is created, create a rescue disc, which you can use to restore your image. Just like Macrium, EaseUS Todo’s rescue media is based on Microsoft’s Windows Imaging Format. When you boot from it, you will notice it uses the same Windows 10 pre-boot environment to load its own recovery application.
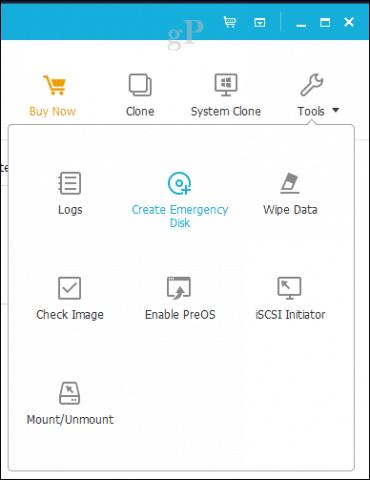
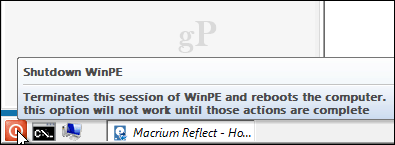
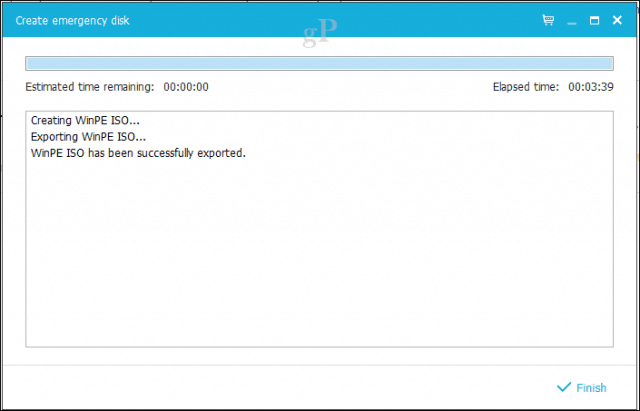
Click the Tools menu, then click Create Emergency Disk. The Emergency disk wizard offers several options, including creating an emergency disk based on WinPE or Linux. Boot media can also be in a USB thumb drive, DVD/CD, or ISO image.
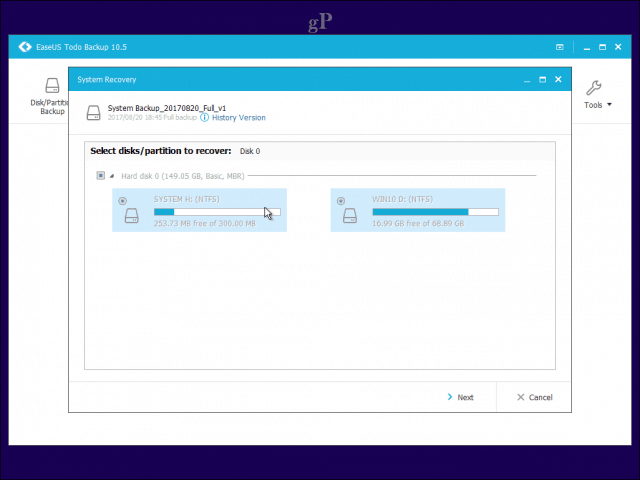
Restore Image – EaseUS Todo
When you are ready to restore an image, configure your computer to boot from the installation media. Make sure your external drive is connected and powered on. I noticed that if you connect after booting into the recovery environment, EaseUS doesn’t detect the drive.
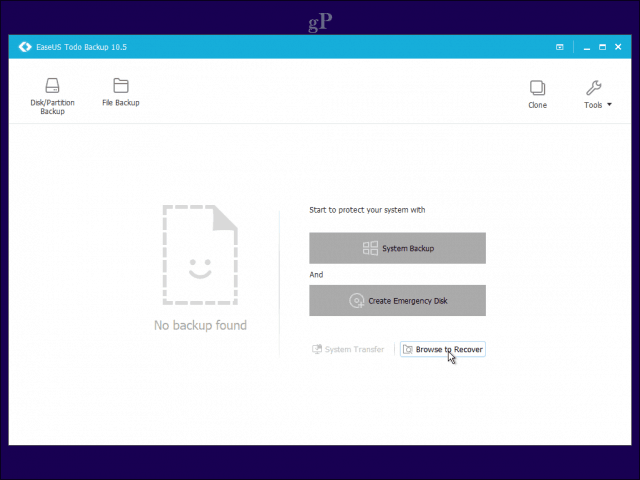
Once booted into the recovery environment for EaseUS Todo, click the Browse to Recover button.
Browse the folder on your external drive containing the system backup image file, click OK.
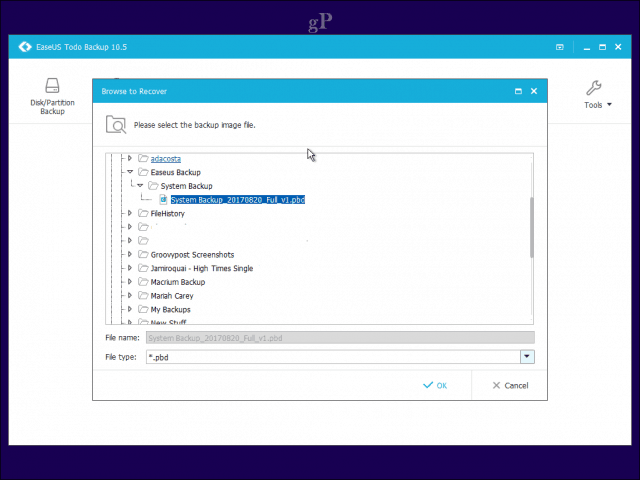
Click Next.
Creating the Disk
Choose the local drive where you would like to have the image restored, then click Proceed. When the restoration is complete, close the EaseUS recover application. Your Windows 10 installation should be up and running.

Conclusion
That’s a look at two solid options for users who want to migrate from Windows 10’s System Image. Of course, they work differently, but you will appreciate some of the benefits included in both, such as cloning, easier migration from one system to another, and automated and granular options for backup.
Macrium is the more powerful of the two, featuring many more options, some of which are a bit too advanced for the average user. But if you want to grow with your backup solution, it’s there if you need it. EaseUS Todo Backup is bare-bones, but something about that makes it feel lighter and more approachable. At the same time, it could be a little more intelligent, but what do you expect? Whichever solution you decide on, you won’t regret it.


Milton Almeida Canabrava
August 29, 2017 at 8:12 am
Intrusive software can generate problems with Windows 10 upgrades, specially with new compilations. I’ve already problems with antivirus in Creators Update.
James
August 31, 2017 at 8:25 am
Could you let us know what anti-virus that is, and which options of which facilities you are running.
I have had ‘fun’ trying to setup anti-malware processing on the apps I run, without including the data files those apps process –
As in an audiobook download facility where the malware checker scans the downloaded parts, the re-combined files, and then the files as I set the PC to play them, or copy them to my MP3 store, and then again as they get copied to the player.
I gave up with Symantec offerings when they applied Symantec values to the ‘NORTON’ product they acquired.
And – then had so much ‘fun’ getting rid of the -install facilities – even using the specially supplied to me – REMOVAL programs – that didn’t and left the remnants trying to use the partition most space as a work area – And that included any removable drives that were attached at startup – so locking them in always in-use.
Also – advisable at all times to turn off 3rd party anti-malware when installing new OS – or updates to the running one.
BUT
MICROSOFT does not want you to be able to do that – or to take a backup of the system before MICROSOFT changes the OS –
And – remember Windows is a Service provided to you – and YOU cannot go to court complaining it (in it’s many guises and varying versions)
Is NOT FIT FOR PURPOSE
James
August 29, 2017 at 8:45 am
Andre, Great article,
and I’m probably going include Macrium
in place of the Paragon I currently use alongside Eaesus TODO.
Some considerations for the preferred app:
And apologies if I repeated anything in your article
Want to be able to move the backup to another location – is it all 1 large file, or can you specify 4GB files
Want to be able to get individual files back – as in the word doc before you saved the file with (now) only pages 1 & 2 –
so can you just access the backup as a folder set and drag the files you want to a new place on the PC’s normal folders –
or do you have to ‘Mount’ the backup as a partition image and then access that as if it was a separate drive.
Then again – can you access old files using an incremental process – or would adding something like Spideroak be useful – just for les you type ‘stuff’ into
OK – incremental may allow access on a per day basis! Does the app you are considering?
BUT daily incrementals means the RESTORE could be slow.
And – you’d maybe want to take a new full save on a monthly basis – especially if the incrementals total to double or more than the space for the full save
Me – I take a backup to a USB attached drive, then copy the backup set of 4GB files to cloud storage
Don’t have to do that unless I consider that bringing the old backup up-to-date would be very painful
And I have separate backups of the data files –
The main thoughts regarding backup – should be WHAT catastrophe would I want to recover from
So – home burgled PC with backups and all documents taken
Malware encrypted all the MFT’s and data files i could access
Windows just will not start – hard drive dead – or motherboard dead or windows files damaged.
Consider the effort to backup against the effort to recover from that backup.
I would also recommend having at least 2 different backup facilities – painful when the new app will NOT read the old files.
My recovery –
Rebuild the OS and installed and specialised software from backup or install DVD’s
Bring back the saved data files from my file level backup
Bring back the Spideroak – as I work backups of the stuff I typed-in
Bring back my email – whatever I keep on the PC – see the retain for a second PC option on your account settings for the providers server.
Take a new backup as soon as I believe the system is in an appropriate state- but keep the previous ‘good’ one.
And – Cloud storage for backups –
Back to the problems with Onedrive – 1TB free for each user when you subscribe to Office-365 seems great for ‘other location backup storage’
Latest ‘find’ in my attempts to use it
– having uploaded my document and e-book collection
Blocks of 2000 files so I can do visual compare of source set with upload actually done
To identify what actually still needs uploading
I combined the upload sets into a folder of 40,000 files – painful at 200 files done for each ‘Move’ directive
Now – having found that I can drag &drop more than 200 files at a time – if I can see source and destination in the same Onedrive window
So- I then try to move that folder of 40,000 files to another users Onedrive area – having edit permission to their folder
Persistently EDGE session falls over and IE session reports an error occurred – seems like the app cannot handle folders with lots of files in them.
And .. Onedrive app does not always -process work in the order you specified it!
So load a folder with files – and then copy the folder may have the copy run after just a few files have been uploaded.
Dr Abdul Rasheed
August 29, 2017 at 8:50 am
Great info. I have been using the professional version of Macrium for the last few years. I always take an Image backup when I feel that the system is now running perfect. This enables me to take some risks with suspecious softwares. The re-imaging is also very smooth.
Free version of Acronis true image is also equally good. But I prefer macrium.
Folder backup is another facility.
I am using Microsoft outlook as my email client for more than 15 years. I have hundreds of folders and sub folders under my Inbox. To keep them safe I take an image backup of the folder where my .pst files are stored once in every 7 days.
Milton Almeida Canabrava
August 31, 2017 at 9:15 am
Concerning James’ reply and mine one,I’ve had problems with Avast free (installed with it’s performance and optimization paid module). I’d like to inform same kind of problems with Norton (pre installed with Windows 10 in a Samsung i3 notebook). Finally, I’ve also had same kind of problems with the Samsung pre installed updater software.
beergas
September 3, 2017 at 3:36 pm
Macrium Reflect – still using free 6.3 Series & Windows 10 x64 Pro. Do a twice weekly backup to be safe and preserve Outlook emails. Easier to just redo the whole C drive again rather than use a faster files only type saving program since a major system issue is quicker repaired by replacement.
A full image repairs the registry too. If I’ve blown away a file then Recuva is faster than the 30 mins to restore a full C drive. Just be good about setting warning to do those backups. Darn easy to get lazy and skip doing one even though you can still use PC, but not so for restore of course.
Series 7 looking pretty pricey when 6 works just fine. Will be checking to see if EaseUS improves.
Erik
October 10, 2017 at 12:24 pm
When I boot from the installation media, the external drive with the backup image cannot be found.
James
October 11, 2017 at 12:58 am
Erik –
Considering the amount of detail in your post – PC system, backup facility used, and the version of whatever backup and boot facility you are using – the only appropriate response would be – (sarcastically) Well don’t do that then!
If you want a helpful response – then provide some details so the forum members can understand what software and hardware you want help with!
Erik
October 11, 2017 at 5:54 am
The external drive is a 1 TB Western Digital HD in an Apricorn EZ Upgrade enclosure with USB 2.0. diskmgmt.msc shows the drive as 931.51 GB capacity, NTFS file system, Healthy (primary partition) – this is the only partition on the drive. Macrium Reflect will write a backup image to this drive but will not recognize the drive in recovery.
Please let me know if you need anything else.
James
October 11, 2017 at 6:19 am
And ,,, the PC is a …..
And … the OS is Windows XP 7 10 8,1 ?
And … the OS is 32 bit?
And Explorer shows files on the drive ?
And those (relevant to this ) backup files are ?
And … the app running within Windows? will see the backup (and it’s content)?
Also does the BIOS indicate the drive is visible to it when you boot the PC with that USB drive attached?
And the installation media you are booting from is what media and what OS and what app to be installed?
And that install process was put on the media by ???
Remember – we cannot see the system, or what you are doing with it-
so if you don’t tell us then it’s like complaining that your vehicle isn’t moving your ‘stuff’
or
the person you want to talk to is not responding!
Erik
October 11, 2017 at 6:40 am
The installation media is Macrium Reflect Rescue Media 6.3.1835 on a DVD.
Explorer shows the Macrium backup image on the drive.
Macrium will show the backup image if opened within Explorer.
I don’t believe the BIOS shows the drive but will check.
This is a Lenovo G510 (20238)
Erik
October 12, 2017 at 6:55 am
Following up on my post from 10/11/17 at 6:40 am.
I checked the BIOS and confirm the drive does not show as WDC WD10 etc as I would expect.
James
October 12, 2017 at 7:24 am
If the drive is not showing at all that probably indicates the PC is too old to include the drivers needed to access it – and it is being accessed using the windows extensions.
Possibilities – If the BIOS includes USB port indications
check that autodetect (etc.) is enabled
Also check that the drive is plugged into ports that are on the motherboard – (at the back!) and not into an add-in board
There are some occasional problems with windows not automounting partitions ( as in not checking for the NTFS file-management structure BUT – if the system is not seeing the drive, then that is a moot point as you cannot access a partition on a drive if the drive is not considered ‘present’
Another possibility for problems with PARTITIONS not being seen would be that the PC (or whatever OS is running) only recognises MBT type setup drives ( 4 Primary partition limit) and the drive is setup with the new GPT partition definition structure – but again – the drive would need to be considered ‘present’ for the access process to have got far enough to detect the partitioning.
So – basic need – get the drive to be seen according to the BIOS – until that happens it is unlikely to be accessible via any basic booting CD or DVD or USB stick. – that would usually be on a system restore or partition management facility
Additional options – check if another USB device can be seen from the BIOS and check is that drive can be seen by the BIOS on other PC’s
Erik
October 12, 2017 at 7:44 am
Thanks.
I have a different internal 320 GB Western Digital drive (with too many ‘errors’ on CHKDSK to use reliably) that I connected to the PC’s USB port with a SATA cable outside of the APRICORN enclosure and this drive shows up in the BIOS. Maybe this isolates the problem to the enclosure or its cable or even the 1 TB drive in the enclosure.
Harmand
August 18, 2018 at 11:52 pm
In addition to the Windows environment, my 128GB SSD system disk contains about 40GB of non-system data.
I’d like to create a “light” system backup image file from which to restore JUST the system (boot sectors, system files and installed programs, totalling about 30GB), without those non-system data.
In other words:
I’d like to obtain a single file from which to be able, in the event of SSD failure, to quickly restore (just) my system in a new (possibly bigger) SSD disk.
However such a task, which looks quite obvious to me, seems to be very… weird, as it’s almost never mentioned in any articles or reviews or tutorials. Maybe I’m the one who is odd and strange?
Anyway, despite beginning to suspect that I am the weird one, I’m still looking for a software with which to do that.
Thanks in advance for any help or advice. :]
Graham
January 3, 2023 at 4:52 pm
Aomei Backup much easier to use and has many more options.