How to Create and Print Envelopes in Microsoft Word

If you want to design and print your own envelopes for letters, you can do so using Microsoft Word. Here’s how.
If you’re using Microsoft Word to create a series of letters, then you’ll need to think about the next step: mailing them. You’ll need envelopes to do this, but if you want to create a professional touch, you could create your own envelope design. This allows you to add branding, warnings, or more to the outside of the envelope.
Microsoft Word allows you to create envelope designs, letting you design the envelope, change the print sizing, and add a mailing address. If you want to know how to create and print envelopes in Microsoft Word, here’s what you’ll need to do.
Printing Envelopes in Microsoft Word
Word is associated with document creation, so it’s no surprise that it’s a straightforward process to begin printing envelopes in Word. You can do this in Word for Windows or, if you own a Mac, you can do this in Microsoft Word on Mac instead.
To start, open Word on your PC or Mac. From the ribbon bar, open the Mailings tab, then click the Envelopes option.

Adding Delivery and Return Addresses
The Envelopes menu will configure your Word document for envelope design and printing.
To begin with, you’ll need to add a mailing address. Type this in manually into the Delivery address box or, alternatively, press the Contacts button to import an address from your Outlook contacts.
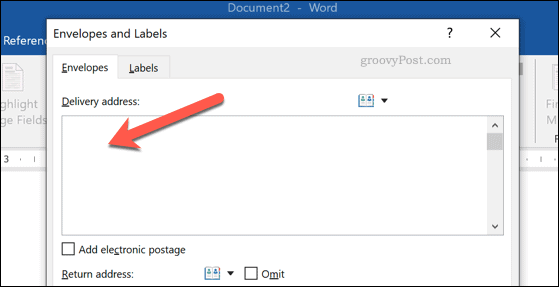
If you want to add a return address to your envelope, type this into the Return address box or press the Contacts button to import it.
Otherwise, press the Omit checkbox to hide this.

Setting Envelope Sizes
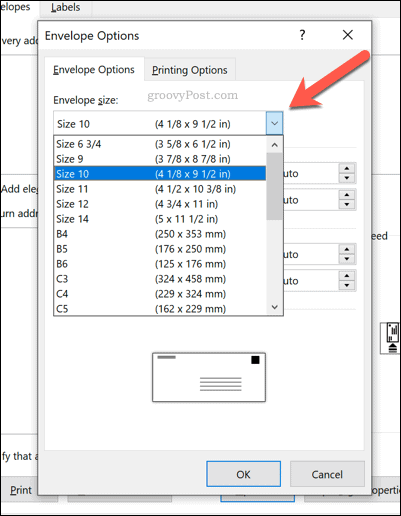
You’ll need to determine how large you want the envelope to be next. To do this, press the Preview icon.
![]()
In the Envelope Options box, choose a sizing from the Envelope size drop-down menu.
Several pre-set options are available, but select Custom Size if you want to use a custom envelope sizing.
You can also change the font used for your delivery and return addresses. Press the Font buttons for each option to do this.
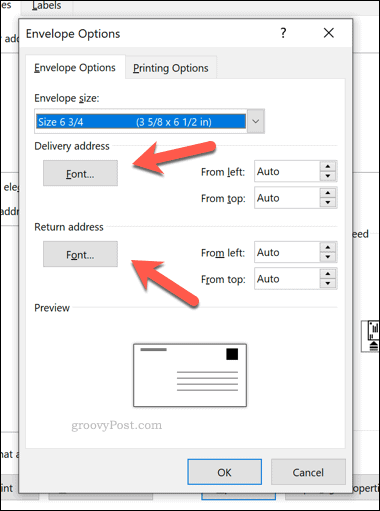
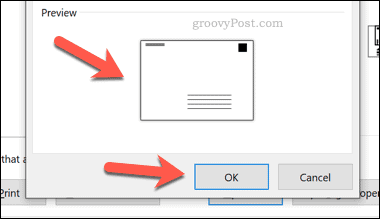
As you change the size of your envelope, the Preview section will change, giving you an idea of the size and layout.
If you’re happy with the preview, press the OK button to save the options.
Adding Electronic Postage
Depending on your location, you can also add electronic postage. This is digitally-purchased postage that you can apply to your envelope directly in Word. This requires a third-party plug-in, so check your local postal mailing firms to learn if this is supported in your area.
If you do have a third-party e-postage plug-in installed, press the Add electronic postage checkbox to enable this.

Setting Printer Feed
Finally, you’ll need to determine how the printer will feed the envelope to print on. To do this, press the Feed icon.
![]()
In the Printing Options tab of the Envelope Options menu, you can select how you want your printer to feed envelopes. To do this, select an option from the Feed method carousel.
If you intend for the envelope to be face up or down during printing, select either Face up or Face down. You can also enable the Clockwise rotation checkbox to change the design rotation.

You can also change the printer feed method used for your envelope. This is only suitable if your printer has more than one printer feed tray to feed paper or envelopes from.
Select an alternative option from the Feed from drop-down menu or leave the default Default tray option intact. Click OK to save your options once you’re done.

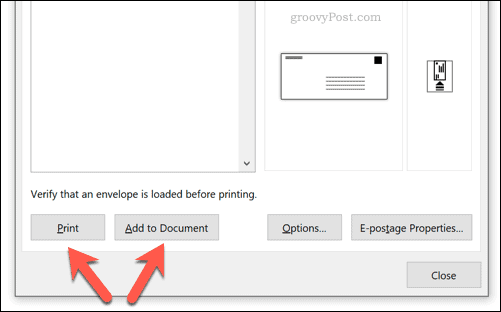
Printing the Envelope
Once your envelope is ready, press the Add to document button to make further changes to the design (as well as preview it in full).
Otherwise, press Print to send the envelope design to your printer without previewing or changing it.
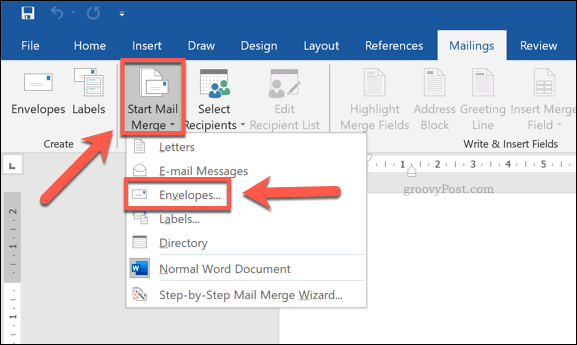
Using Mail Merge with Envelopes in Microsoft Word
If you’re using mail merge in Word, you can use it to print onto envelopes directly. This allows you to save time–rather than adding each address manually, Word will automatically insert them into your envelope design.
If you have your addresses ready for mail merging, press Mailings > Start Mail Merge > Envelopes.
In the Envelope Options box, choose your envelope size from the Envelope drop-down menu. You can also change the font used for delivery and return addresses by clicking the different Font options.
Click OK to save and insert the design into Word once you’re done.

Word will change the page layout to suit the envelope printing options, adding the addresses on each page. If you’re happy with the design, press File > Print > Print to begin the printing process.

Designing Documents in Word
Microsoft Word is the only document design tool you’ll need. Thanks to mail merge and envelope printing, all you need is a printer and a PC or Mac to print and send letters for your business or personal needs. If you need to switch things around, you can also rearrange pages in Word with ease.
If you want to create different types of documents, you can. It’s easy enough to create flyers in Word or, if you’re creating an academic document, you may want to create a flowchart in Word instead.


