How-To Set Up a Movie Library in Windows Media Center using YAMMM


Windows Media Center in Windows 7 although not perfect was a nice upgrade over Vista. Media Center allows you to record TV, listen to music, view photos, and watch your movies through it as well. I’ve enjoyed using the movie feature combined with my XBOX 350 to stream them in HD as a Media Center Receiver. Unfortunately, setting up a movie library the first time can be a bit. Luckily, a freeware application called Yammm built by Mikinho lets you easily automate the process.
Step 1 – Downloading YAMMM
Down Yammm at the Mikinho’s website. If you find YAMMM useful, be sure to drop a buck or two into the donation box.


Step 2 – Configuring YAMMM
Once you install YAMMM, it’s time to configure it.
Movies Location
From YAMMM’s first tab – Library – Point it at your movie library. Click on the Include a folder button and use the small mini browser to reach the folder (or folders) in your computer that contain movies.


Library Settings
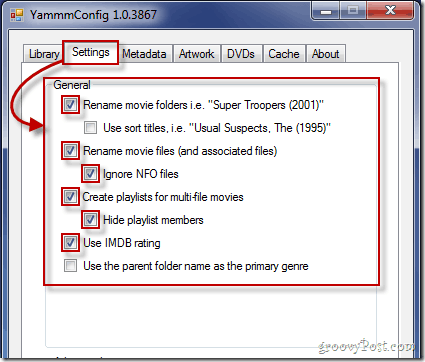
On YAMMM’s next tab you’ll need to check Rename movie folders i.e “Super Troopers (2001) as well as the check boxes from Rename movie files (and associated files) to Use IMDB rating (as shown below). These settings are required to display your movies in an organized list in Media Center.

Metadata and Users
In the third tab, you’ll need to check Windows 7 Media Center under the meta information files category and select which users can use YAMMM.


Movie Artwork
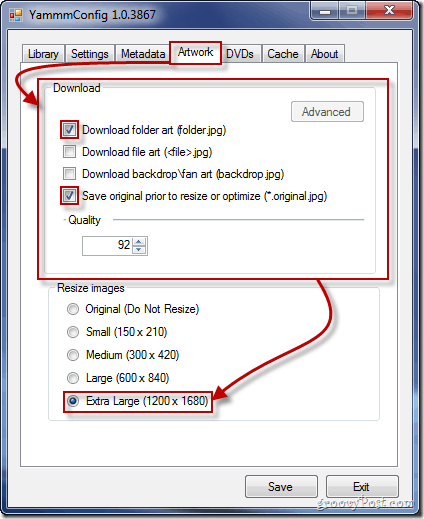
Choose your Artwork settings from the Artwork tab. This will display the cover art of the movies. Check Download folder art (folder.jpg) and Save original prior to resize or optimize (*original.jpg). If you’re going to be viewing this on a big high-definition computer monitor or TV, I recommend setting extra-large for maximum image resolution and quality. The setting is configurable so play around until you find what works on your TV.

DVD Movies
Should you insert a DVD disc into your computer, Windows Media Center and YAMMM will recognize it, and download any data needed from it. Below are the options I recommend but again, it’s up to you.


Cache
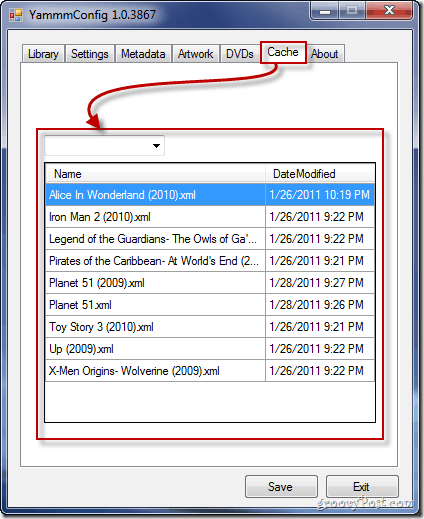
The Cache tab allows you to view the .xml files created for your movies. If your Cache tab is blank, don’t panic. YAMMM may still be updating your movies and your metadata may not be still downloaded.

Saving
Be sure to Save your config once you complete the setup then jump into Media Center to see how things look.
![]()
![]()
Step 3 – Configure the Windows Media Center Movie Library
Start off by going into Tasks and then Settings.


Pick Media Libraries.


Select Movies and then Next.
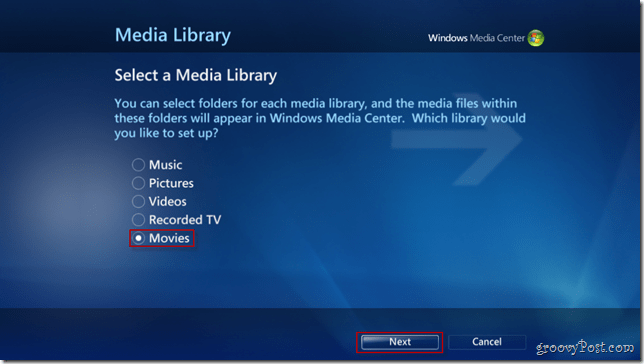

Pick Add folders to the library and then Next.


Pick the option which is right for you (usually On this computer) and then click Next.
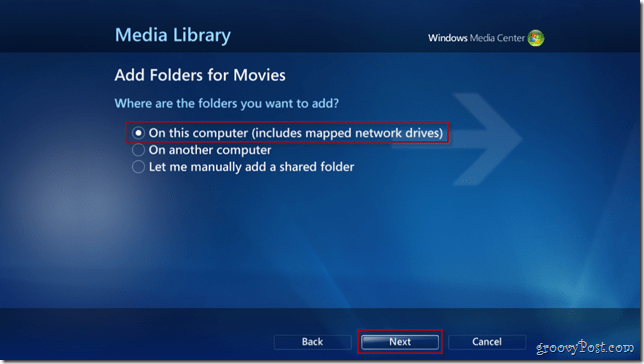

Navigate to your movies and check the folders that contain them. Press Next again to continue.


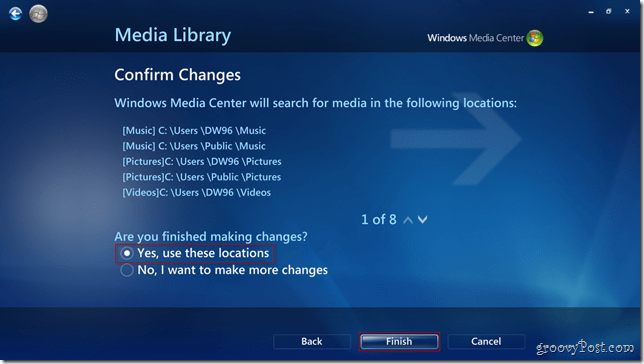
Confirm your changes by pressing Yes, use these locations and click Finish to go pack to the previous screen and save your settings.

All done! Your Movie Library should now show up with the new flash look of YAMMM for Media Center!


4 Comments
Leave a Reply
Leave a Reply


Daniel Knutson
January 24, 2013 at 2:50 pm
Fantastic! Works on Win8 too.
Steve Krause
January 24, 2013 at 3:07 pm
Hey that’s good to know. Thnx Daniel!
Colin
July 3, 2013 at 11:17 am
Cant get it to work i’m using vista ultimate is that ok ?? .
NZHome
December 16, 2016 at 12:12 am
yes this method still works well in 2016!!!