How To Install Windows 8 on Virtualbox
If you don’t have a free Tablet from the Microsoft Build event, installing Windows 8 in a virtual environment is probably a good idea especially if you don’t have a spare tablet or PC lying around. The first step is to download a copy of Virtual Box and get it installed. The installation is very straightforward so I won’t review the step-by-step on that. From there, go download Windows 8 and copy the .iso file somewhere you won’t lose it because you will need it in just a few minutes.
Note: This was written during the launch of Windows 8 Developer Preview. You can run Windows 8 Consumer Preview on VirtualBox too. The steps are essentially the same.
Ok ready to get started?
Before we begin
In order to run a Windows 8 VM, your CPU must have built-in hardware-assisted virtualization technology. For Intel, this is VT-x, and for AMD it’s called AMD-V. To test your CPU, download the Microsoft Virtualization Detection Tool and scan your system.
The first time I ran the tool, my system reported that it didn’t support VT-x. Fortunately, I found a new BIOS upgrade for my motherboard which added the support to my system. After updating the system with the new BIOS, enabling the VT-x support in my bios settings, and rebooting, I was good to go with the How-To below.

How To Install a Windows 8 Virtual Machine using VirtualBox
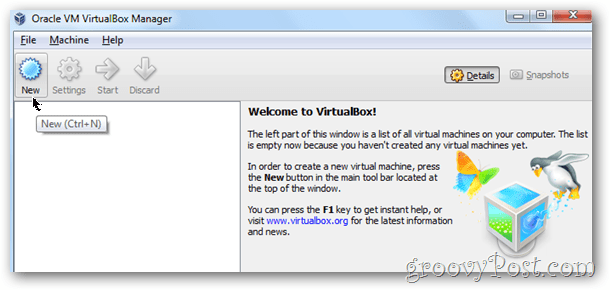
First, Launch VirtualBox and Click New from the VirtualBox Manager Console.
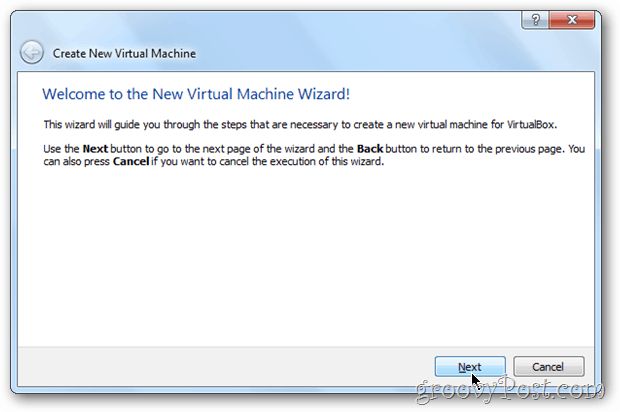
Click Next
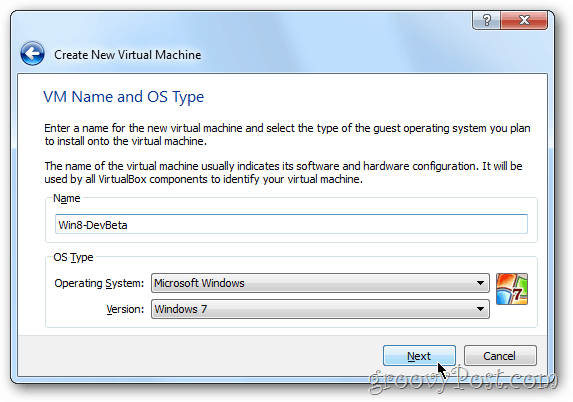
Give your Virtual Machine (VM) a name, Change the OS to Microsoft Windows and the Version to Windows 7.
Note – Don’t worry about x64 etc… be sure to choose Windows 7 for your OS Version or the install will die later on…
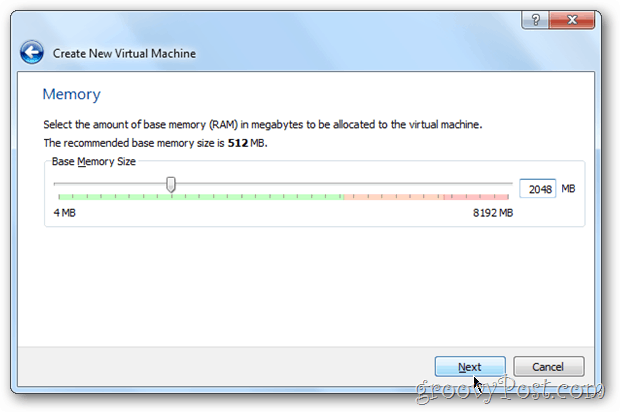
Assign your Windows 8 VM some memory. My recommendation is at least 2Gigs / 2048MB as shown below. More is always better however for a VM, less is probably OK. Just don’t go under 1GB / 1024MB.
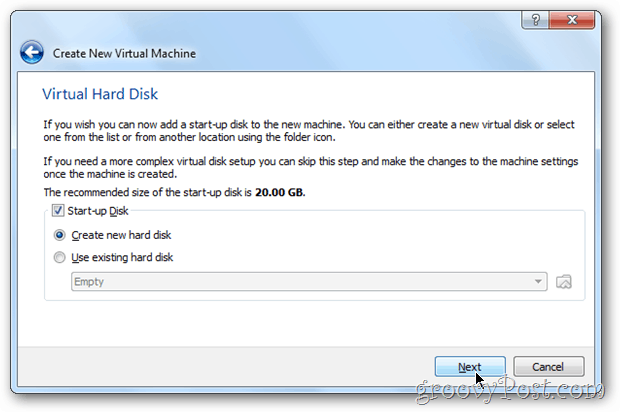
As a new machine, leave the Hard Disk settings at default. Click Next
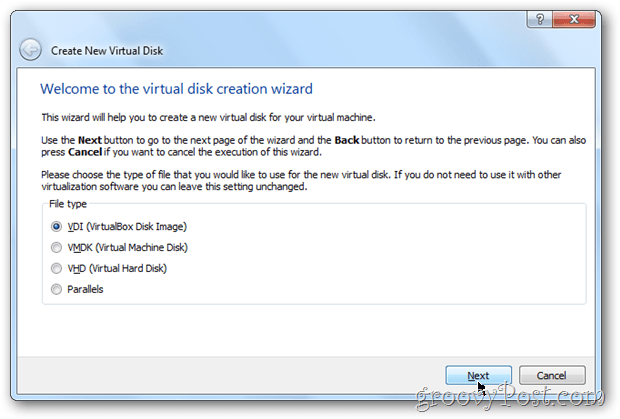
Click Next
For this next setting, 99% of you should choose Dynamically allocated. If however you want… 5-15% more performance, choose Fixed Size. Personally, I use Dynamic for everything but Virtual Servers.
Note – If you choose Fixed size, your Virtual Hard disk will expand to the full size at installation vs. dynamically expanding over time. That’s a lot of wasted space if you ask me… Drop a note in the comments if you are confused.

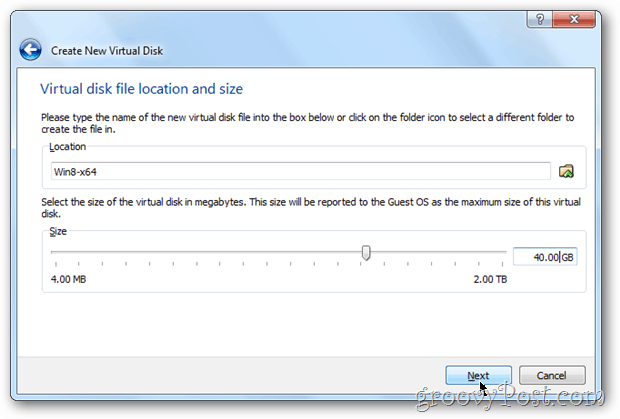
Choose the size of your Virtual Hard Disk size. The default is 20GB however if you chose Dynamic above, I would recommend nothing smaller than 40GB.
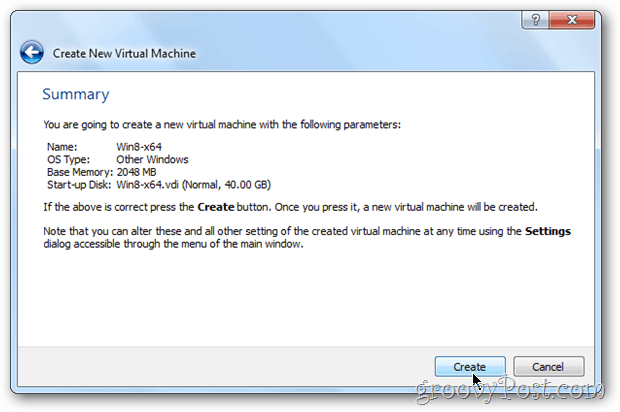
Verify your settings and Click Create.
Configure VirtualBox
VirtualBox will configure your VM to the settings you chose in the Wizard. Now it’s time to customize the VM to make it compatible with Windows 8.
Start by Selecting your Windows 8 VM and Clicking Settings.

Click the System tab on the left then the Motherboard Tab. Check the box Enable IO APIC and Enable absolute pointing device. It should look just like my screenshot below when done.

Click the Processor Tab and Check the box Enable PAE/NX.

Click the Acceleration Tab and Check the box Enable VT-x/AMD-V if not already selected. If these boxes are greyed out… You’re in trouble. Your CPU does not support hardware virtualization which means you might as well stop.

Click the Display Tab on the left and under the Video tab, I recommend you increase the Video Memory to a minimum of 32MB and Check the box Enable 3D Acceleration.

Click the Storage tab on the left, Click the Empty drive under the IDE Controller, and Click the Disk Icon.
Note: If you are not installing your Windows 8 VM from an ISO but instead using a DVD, Skip this Step and Click OK to save your config. Then Start your VM shown in several screenshots below.

Click Choose a virtual CD/DVD disk file…

Navigate to where you saved the Windows 8 .ISO file. Select it then Click Open

All done! Click OK to save all your config changes.

Now it’s time to Start your VM. Click the VM and Click Start

A warning might pop, telling you about Auto capture keyboard etc… All this means is while the VM is running, you will need to press the Right-Ctrl key to release the keyboard and mouse for your host PC. blah blah blah…
Click OK

By default, a few screens will pop letting you know things are working.

Install Windows 8
If you get the screen below, good job! You did everything perfectly! If you get an error screen, you probably forgot to configure the CPU and Motherboard settings above. Go back and review those settings again.
Click the Next button if your screen matches mine below.

Click Install Now


Check the box I accept the license terms and Click Next
Note: By checking that box, you just gave Steve Ballmer permission to watch you at night using your computer’s integrated webcam. Just kidding. But you should read the license anyway just in case Steve wants a kidney or something.

Click Custom (advanced)

Click Disk 0 and Click Next

Time to wait… wait more… wait a little longer… Oh, wait!
Have you subscribed to the groovyPost Daily Newsletter? If not, this is the perfect time while you wait for the file copy. It will take 30 seconds to Subscribe and confirm your email. I’ll never send you SPAM, sell your email, or bug you. I will however send you groovy How-To tutorials like this one.
Wait more… Keep waiting… Scroll down…

Wait a little more…

Configure Windows 8
Green Screen? YAHOO! You are almost home free! Enter a PC Name and Click Next.

Click Customize

Click No, don’t share or connect
Note, if you want to set up home sharing with this VM, Click Yes however I didn’t show that setup because I was lazy.

Click Next

Optional – For those of you who like me are a bit paranoid educated about Privacy, Scroll down and turn off all the options to send Microsoft data about your usage of Windows 8, your location, etc…
Click Next when done.

Click Next again

Link your Windows Live Email address to your new Windows 8 system by filling out the Email Info. This will probably make things like accessing your Skydrive and other Microsoft Live services super easy. If you prefer to create your User Locally and manually, Click Don’t want to log on with a Windows Live ID. Click Next.

Password…


All done!

From this point, you should have a brand new Windows 8 VM sitting inside your VirtualBox Client. Now being that you don’t have the touch features you will have with normal tablets, you should next take a look at this keyboard shortcut guide I created for Windows 8. It will help you navigate around the Metro UI with a keyboard.
Update 9/17 – Be sure to read my new article as well in order to fix an issue with Windows 8 Metro Apps not loading using a VM. Otherwise, most of the Metro Apps won’t load with your new Virtual Machine.


Onamac
September 15, 2011 at 5:50 am
Works fine for me, except I can’t get Metro to
work as expected. If I move my mouse pointer
over to the right side of the screen, the sidebar
never slides out. If I select a tile like say “weather,”
the weather app runs, but I can never get back to
the “start” screen because I can’t get the sidebar
to pop out. Any ideas? (this is on OSX)
Maybe something to do with screen size, but I
can’t install guest additions, and I am seeing the
edge of the screen(based on desktop view.)
Onamac
September 15, 2011 at 6:58 am
OK, found Charms(hover mouse in lower left), and Win I(right Apple I)
That solves my problems. But I still thought hover on right side
would bring out the sidebar.
MrGroove
September 15, 2011 at 9:42 am
Last night I wrote some tips on keyboard shortcut keys – https://www.groovypost.com/groovytip/windows-8-metro-keyboard-shortcuts/
Give some of these a try inside the VM. I’ve honestly not had time to play with the VM yet.
Onamac
September 15, 2011 at 10:46 am
Very helpful. Thanks.
dlearner
September 15, 2011 at 10:59 pm
Dude !! You rock :) Good work.. I was getting an error that “Windows failed to start. A recent hardware or software change might be the cause.” but that was corrected after I enabled those options you told me..
Thank you :)
Chaitanya
September 16, 2011 at 10:30 pm
your post is very clear and explanatory. I have a quick question. I ended up with this error which you mentioned above.
“”Click the Acceleration Tab and Check the box Enable VT-x/AMD-V if not already selected. If these boxes are greyed out… You’re in trouble. Your CPU does not support hardware virtualization which means you might as well stop.””
Acceleration tab is grayed out. So what does that actually mean? Do I have any other option to run win8 on my system? or cant I?
MrGroove
September 17, 2011 at 12:48 am
Bummer…. OK, basically what that means is your Intel or AMD CPU Processor is probably a little older and does not support built-in virtualization support on your CPU.
All is not lost however. 6 months ago when I first got my laptop, the VT support on my Intel processor was disabled in my BIOS. Once I enabled it, everything was groovy. So reboot your PC and take a look in your BIOS. You might get lucky and find it’s just been disabled.
Option 2 – continue with the how-to and see if it lets you continue with the install. I’ve been doing more reading and it appears….. you might be able to install (I can’t test this unfortunately) the VM anyway using VirtualBox however things will be a little slow. Some are saying the limitation of not have VT technology is only going to impact you once you install Windows 8 on your machine THEN try to install Hyper-V on it.
Honestly, if you should test this and report back here, that would be great! I’ve been wanting to find a way to test this out.
Let me know!
-Steve
Chaitanya
September 17, 2011 at 6:20 am
Thanks man for the quick reply.
Yeah even I came to know the same things which you mentioned now in my research.
I guess my intel processor does not support virtualization support. I even checked in BIOS but it is of no use, coz i dint find any option like that.
Then I searched in some other forums and came to know that VMware will not give us any probs regdn virtualization. It takes care of everything by itself. So finally got windows 8 running in VM Work station.
PS: All editions of VMware are not capabale of handling Win8. Only VM workstation 8.0 has that capacity. But it is damn slow. I dont know if it is due to my system config or anything else. More over VM 8.0 is is just 30day free trial or 99USD. So looking for some other way out.
Thinking to directly upgrade my win7 to win8.
Shockersh
September 17, 2011 at 9:29 am
Instructions works flawless. I never knew Oracle made virtualbox. Funny. That must make Microsoft pretty happy hehehe
One problem however, when I try to run things like the Weather App inside the Windows 8 metro start desktop, it won’t start. Neither will stocks or news etc….
Any ideas? Just cant get them to start or run. Control Panel and IE work fine tho…???
Onamac
September 17, 2011 at 12:17 pm
Try changing your screen size(within Windows/right click desktop) to 1024 x 768.
jordan
September 20, 2011 at 6:12 pm
Yep, @Onamac you’re dead on, this pretty much always solves the problem. We even have a post about it here: https://www.groovypost.com/groovytip/fix-windows-8-metro-apps-run-virtualbox-vm/
Enjoy!
Steve Krause
June 27, 2012 at 7:54 am
Aye – that hit everyone including me! @a112d04765ace1ae6162ce02de3acf75:disqus
Phillip Krause
September 18, 2011 at 5:33 pm
Great Job Steve,
Running Windows 8 Developer Preview in a virtual environment
Functional:
• Hyper-V in Windows 8 Developer Preview
• Hyper-V in Windows Server 2008 R2
• VMware Workstation 8.0 for Windows
• VirtualBox 4.1.2 for Windows
Non-functional:
• Microsoft Virtual PC (all versions)
• Microsoft Virtual Server (all versions)
• Windows 7 XP Mode
• VMWare Workstation 7.x or older
MrGroove
September 21, 2011 at 7:28 am
Thanks Phillip!
Have you tested Windows 8 on Hyper-V yet? How did it run? I’ve heard some ppl were having problems with it which I can’t understand…
Juan
December 2, 2011 at 6:18 pm
Awesome directions…making Microsoft proud!
Steve Krause
June 27, 2012 at 7:50 am
@534985385024a419e05e1bc002b591b5:disqus Thnx and Welcome to groovyPost. Spread the word about my blog :) :)
Greg
January 13, 2012 at 11:10 am
Thanks man, I was getting an error before I changed the settings you recommended. Helped a bunch!
Steve Krause
June 27, 2012 at 7:50 am
@0ee4548c7204def328e9665f7da1a508:disqus Awesome! I’m glad it worked out for ya!
Arturo Araya
February 22, 2012 at 11:15 am
Hi,
Thanks for your instructions, they are very good. Unfortunately I’m hitting a roadblock on this one. I’ve followed each of the steps but no matter what I try the installer hangs while “Expanding Windows files”. I have tried this with 2 separate iso images and the same thing happens. The installer proceeds normally until it reaches 76%, or 77%, occasionally 79%. Then it just sits there indefinitely, hard drive spun down doing nothing. The most recent time I received the error message “Windows cannot install required files. Make sure all files required for installation are available, and restart the installation. Error code: 0x8007045D”.
I’m not sure if you’ve run into this, or know how to fix it but I’ve run out of ideas.
Thanks again!
Steve Krause
June 27, 2012 at 7:50 am
@d7f47c7b3707e2b6b516fced68768bbf:disqus how much drive space do you have? Make sure you have enough disk space for the install.
Also, when you create the Virtual Hard drive files, make sure you’re making it large enough. 40 Gigs (GIGS Not Megs) should be plenty.
Alexander Johansson
March 14, 2012 at 2:01 am
Hello guys.
i did as this guide say. and i got lost of one problem with the VT-x/AMD-v.
but now i get a new problem that tells me this:
64-bit: my computer doesnt have a 64-bit processor, but i have it.
32-bit:
your computer needs to restart
please hold down the power buttom
Error code: 0x0000000A
Parameters:
0xFFFFFFE6
0x0000001F
0x00000000
0x81960E5B
Gilles RIAND
March 15, 2012 at 6:56 am
Alexander, I’ve got the same Error.
Alexander Johansson
March 19, 2012 at 3:19 am
good someone els got it
Steve Krause
June 27, 2012 at 7:48 am
Hi @a9f919dae025a3b4ea60928c67145946:disqus Did you run the Intel VT Tool to check to see if your CPU supports x64 and the Intel VT settings?
BTW – Sorry for the late response….
Alexander Johansson
March 28, 2012 at 11:46 pm
did you solve the problem?