Windows 11 Mail Not Working: 7 Fixes

Email is still an important tool for online communication. If you run into a situation with Windows 11 Mail not working, here are 7 fixes.
Even with texting, social media, and collaboration apps like Slack, email remains an essential tool for communication.
If you’re using the built-in Mail app on Windows 11, you may sometimes experience problems with it. For example, it might not launch, it might not be syncing your mail, and have other issues.
No matter the problem, you might experience Windows 11 Mail not working. If so, here are seven fixes you can use to get it back up and running.
Restart Your PC
One of the troubleshooting steps you should try is restarting Windows 11. It only takes a moment and will clear cache and apps possibly conflicting with Mail.
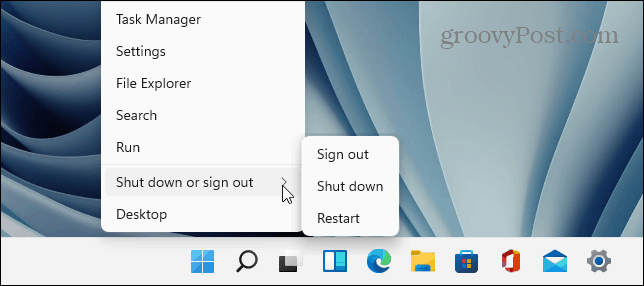
To restart your PC, right-click the Start button and select Shut down or sign out > Restart.
After the restart, launch the Mail app and see if it’s working again. If it isn’t, continue with the steps below.
Run the App Troubleshooter
Microsoft develops the Mail app, and Windows 11 has a troubleshooter you can run to resolve problems.
To run the app troubleshooter, do the following:
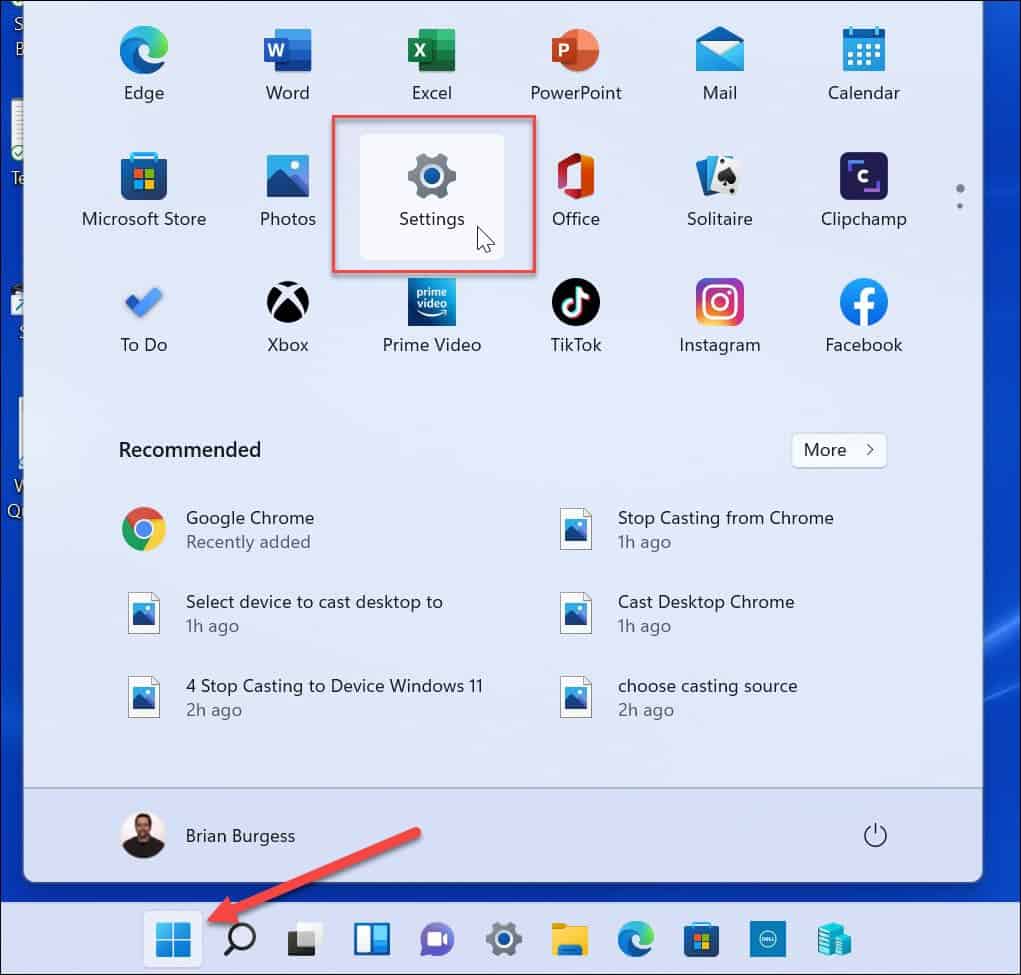
- Click the Start button or hit the Windows key to open the Start menu and click Settings.

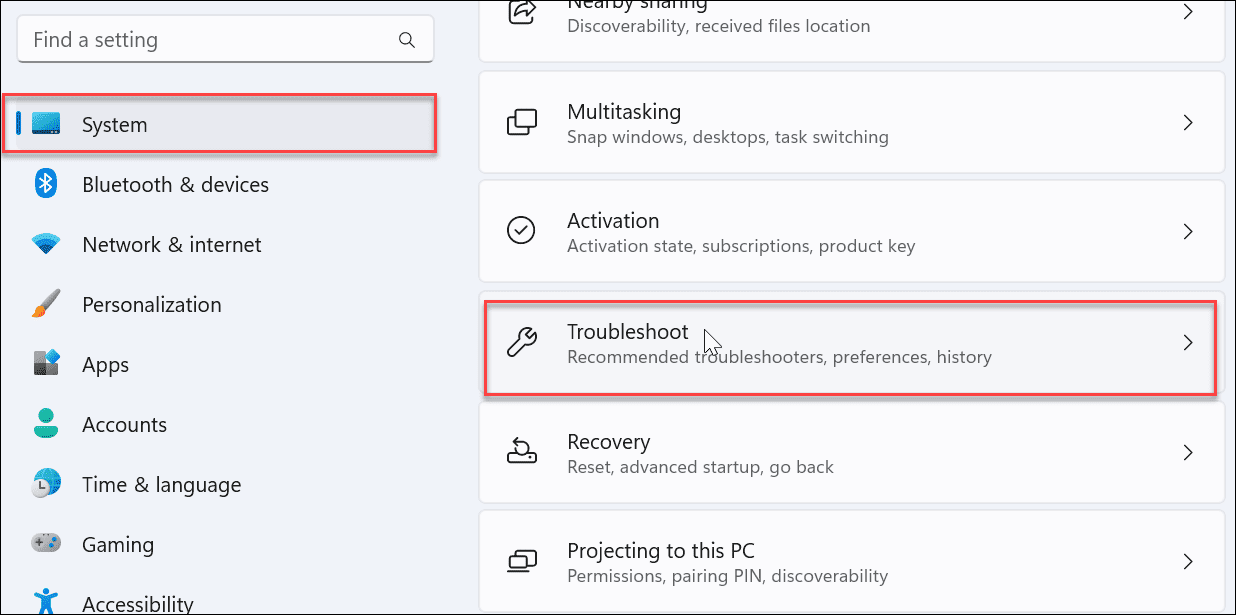
- When Settings opens, click System on the left and the Troubleshoot option on the right.

- Select Other troubleshooters under the Options section.

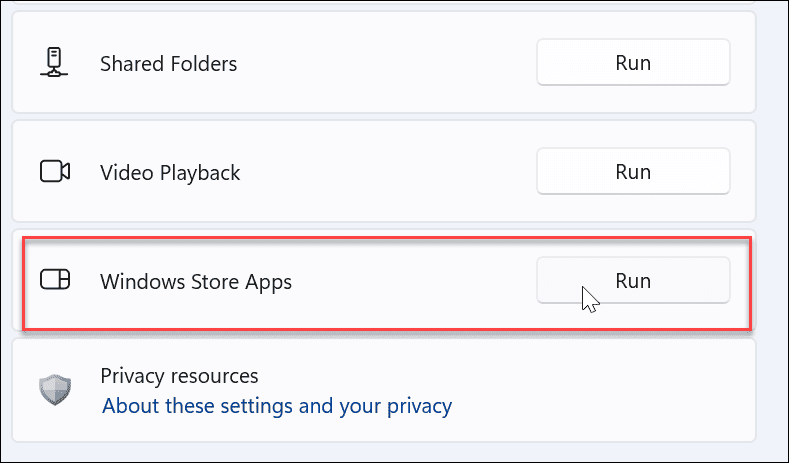
- Click the Run button next to Windows Store Apps and follow the onscreen instructions.


After running the troubleshooter, see if the Mail app works now.
Double-Check Mail Sync Settings
You can check sync settings if the Mail app isn’t giving you new mail notifications or isn’t syncing correctly.
To check Mail sync settings, use the following steps:
- Use the keyboard shortcut Windows key + I to open Settings.
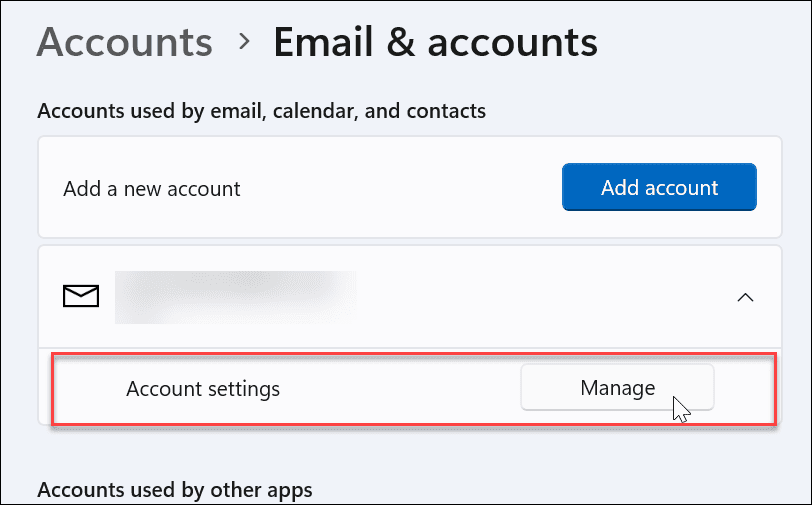
- When Settings opens, click Accounts in the left pane and the Email & accounts option on the right.

- Expand your email account and click the Manage button.

- When the Account Settings window appears, click Change mailbox sync settings.

- Make sure Download new content is set to as items arrive and ensure each sync option is toggled On. When complete, click the Done button at the bottom of the screen.


Verify Email Privacy Settings
If you still have problems with the Mail app, you’ll want to check email privacy settings. You need to ensure the Mail app is accessing emails.
Use the following steps to check email privacy settings:
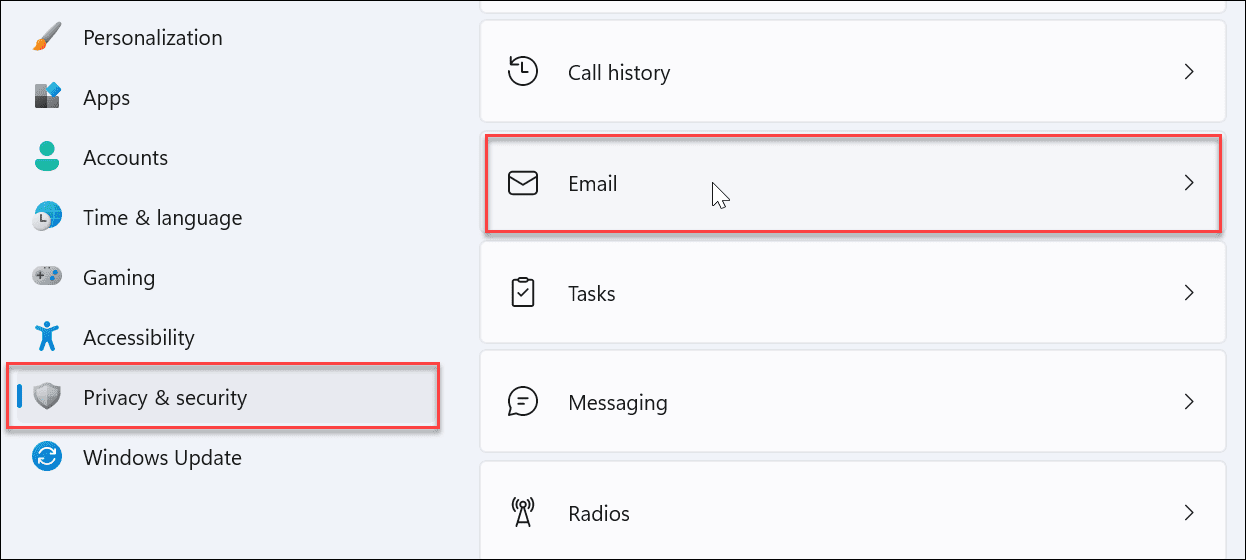
- Use Windows key + I to open Settings.
- When it opens, click Privacy & security from the left pane and select the Email option on the right.

- Make sure to toggle on the switch next to Mail and Calendar.


Repair or Reset Mail App
If the Mail app still isn’t working, you can try to repair and/or reset the app. The first thing you want to try is an app repair. If that doesn’t fix it, you can do a reset. Just keep in mind a reset deletes all data from the app and restore it to the default. You will need to set up your Mail again.
To repair or reset the Mail app, do the following:
- Use Windows key + I to open Settings.
- Select Apps from the left pane and choose Installed apps on the right.

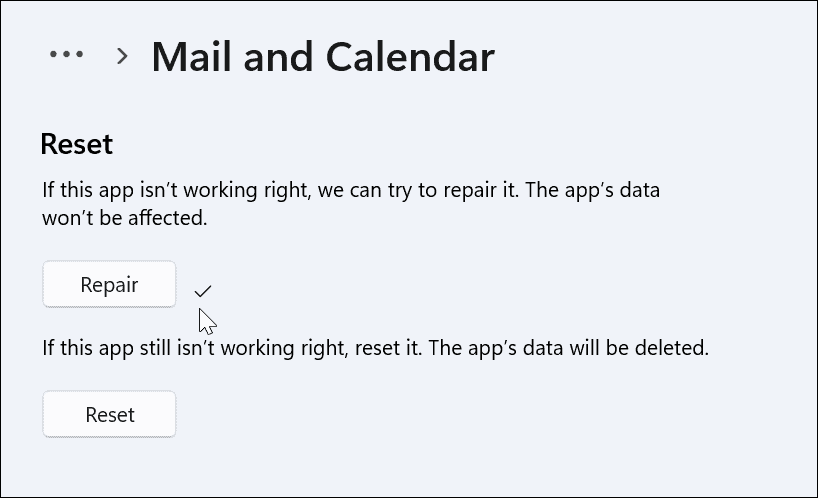
- Type Mail in the search field, click the three-dot button next to Mail and Calendar, and choose Advanced Options.

- Scroll down under the Reset section and click the Repair button. After running the repair, see if Mail works.
- If it still isn’t working, click the Reset button and verify. Again, a reset removes all data from the app.


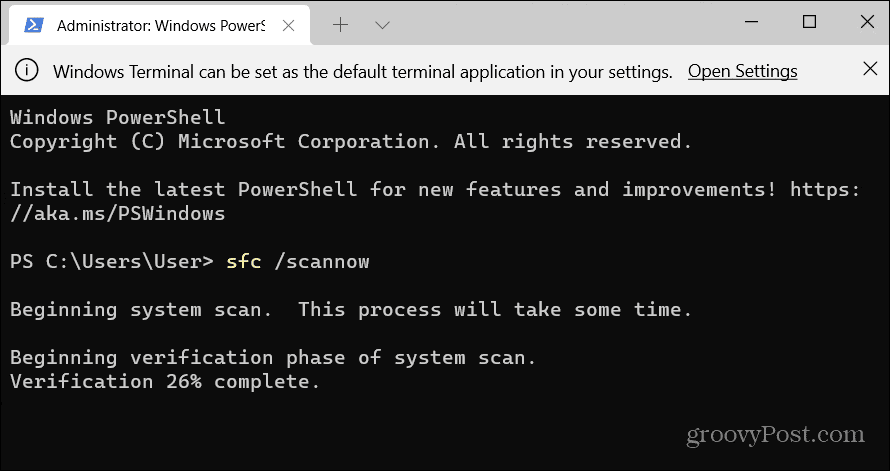
Run SFC and DISM Scans
If the Mail app still isn’t working, it could be a problem within the system. For example, when you run a DISM and SFC scan, it scans for corrupt system files and replaces them with working ones.
To run a DISM and SFC scan, use the following steps:
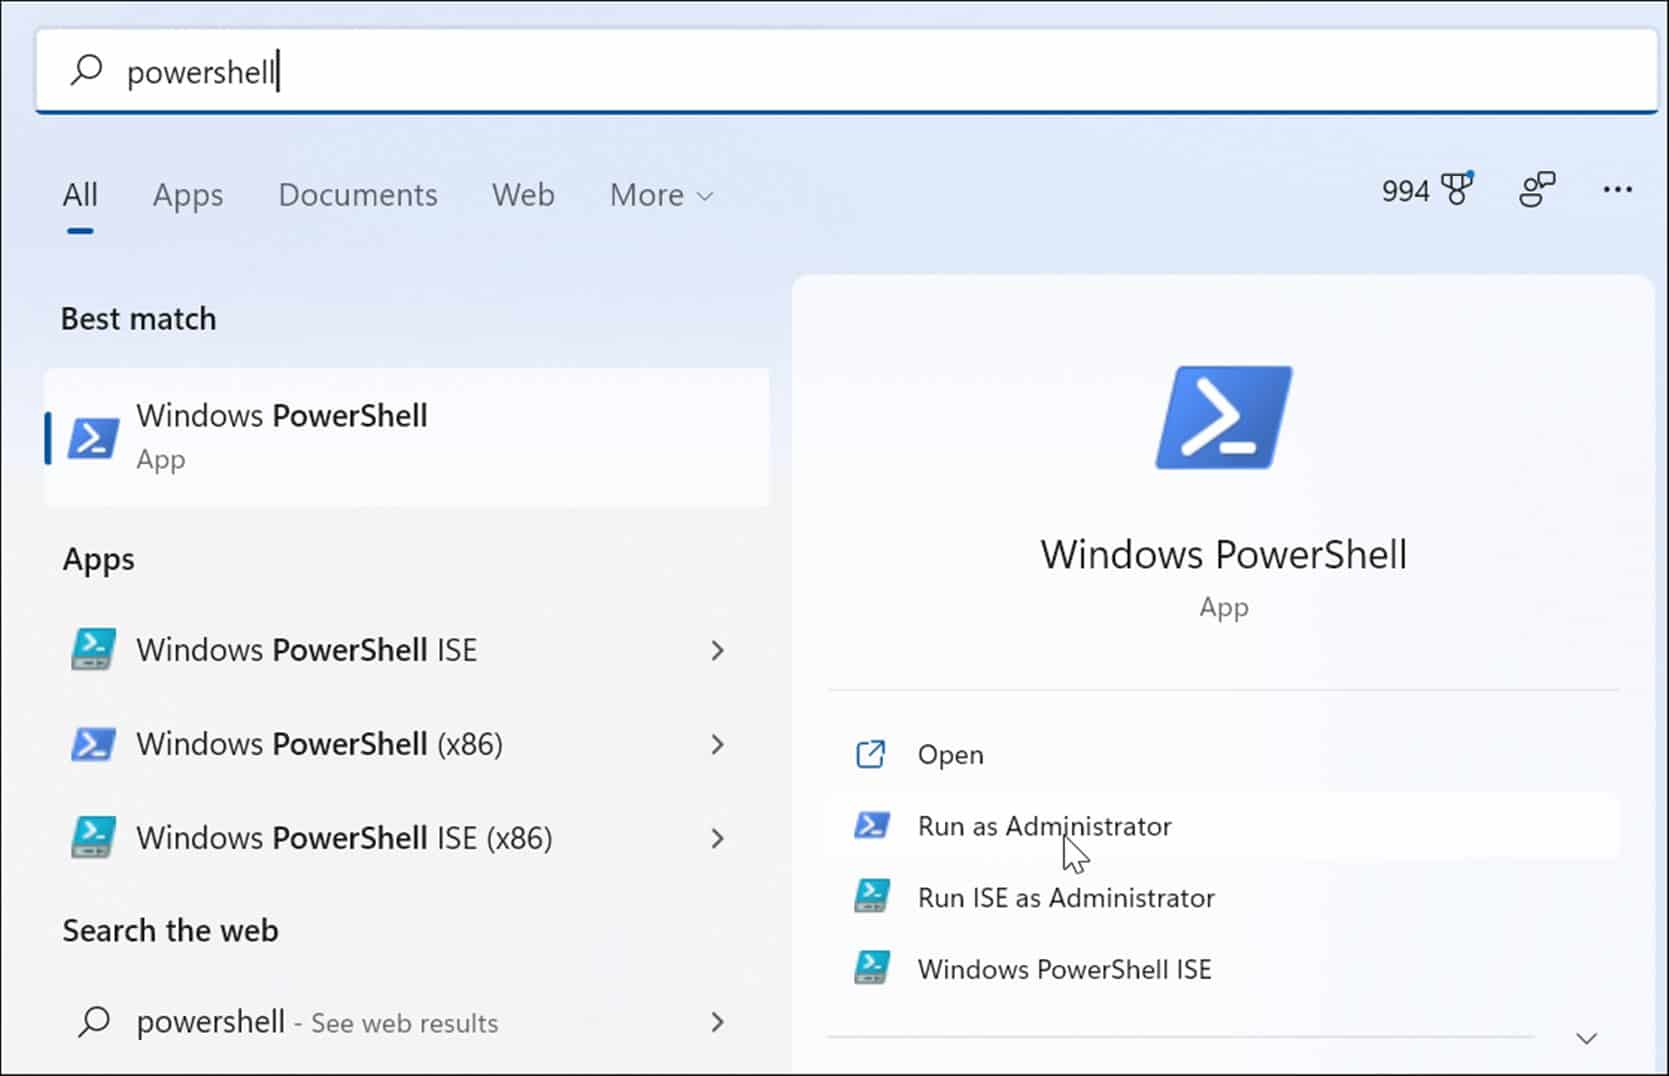
- Click Start or hit the Windows key and type powershell.
- Click the Run as Administrator option on the right.

- When the terminal opens, enter the following command, and hit Enter.
sfc /scannow

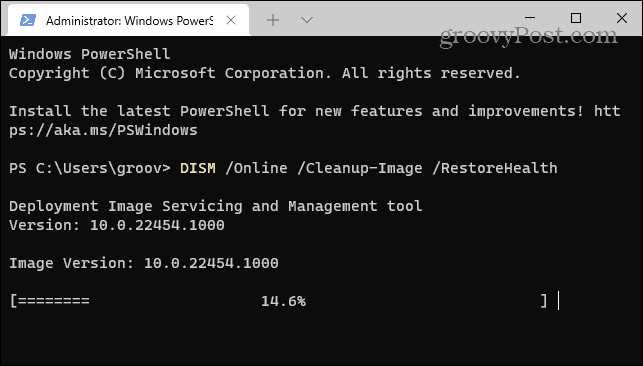
- Once the SFC scan completes, run the DISM scan as it can replace system files missed by the SFC scan with files from Microsoft servers.
- Type the following command and hit Enter.
DISM /Online /Cleanup-Image /RestoreHealth

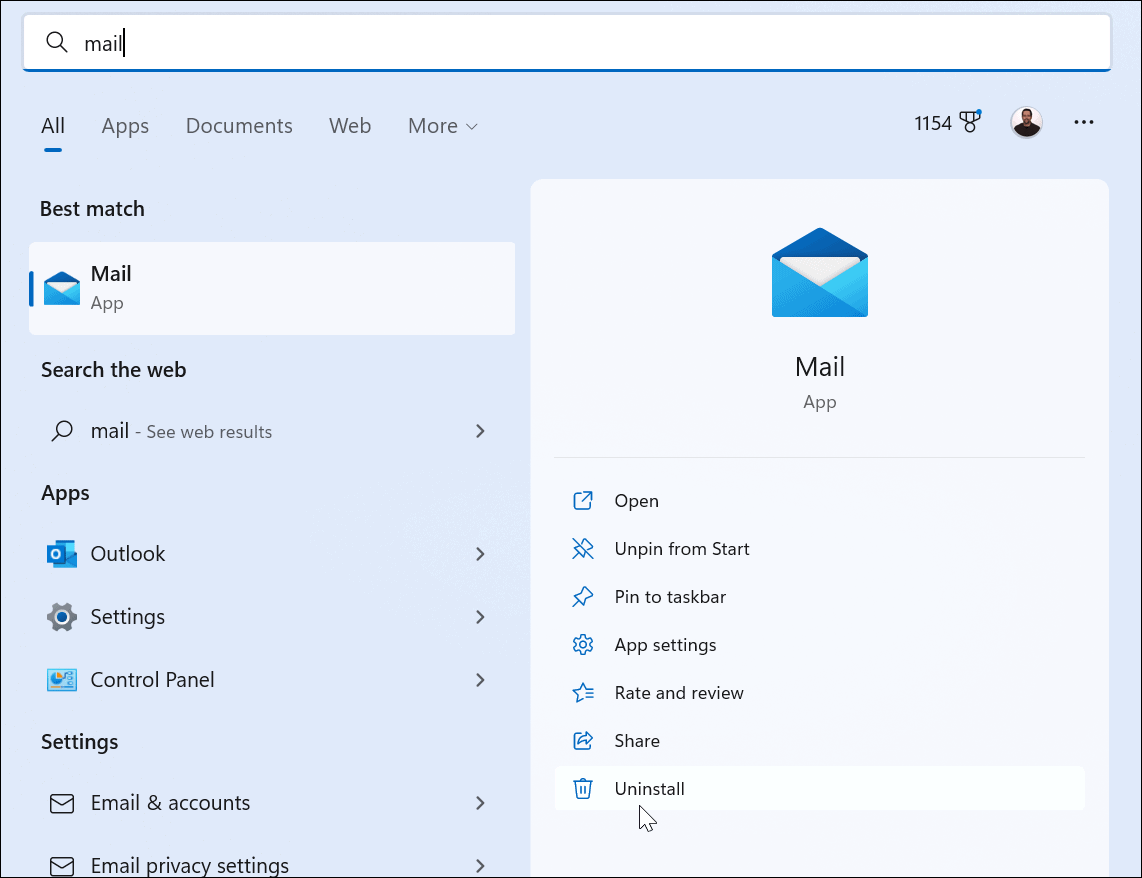
Reinstall the Mail App
The steps above should get your system up to date and the Mail app working. However, if it still isn’t working, you can uninstall and reinstall the app.
To reinstall the Mail app, do the following:
- Hit the Windows key and type Mail.
- When it appears, click the Uninstall link on the right-hand side of the Start menu.

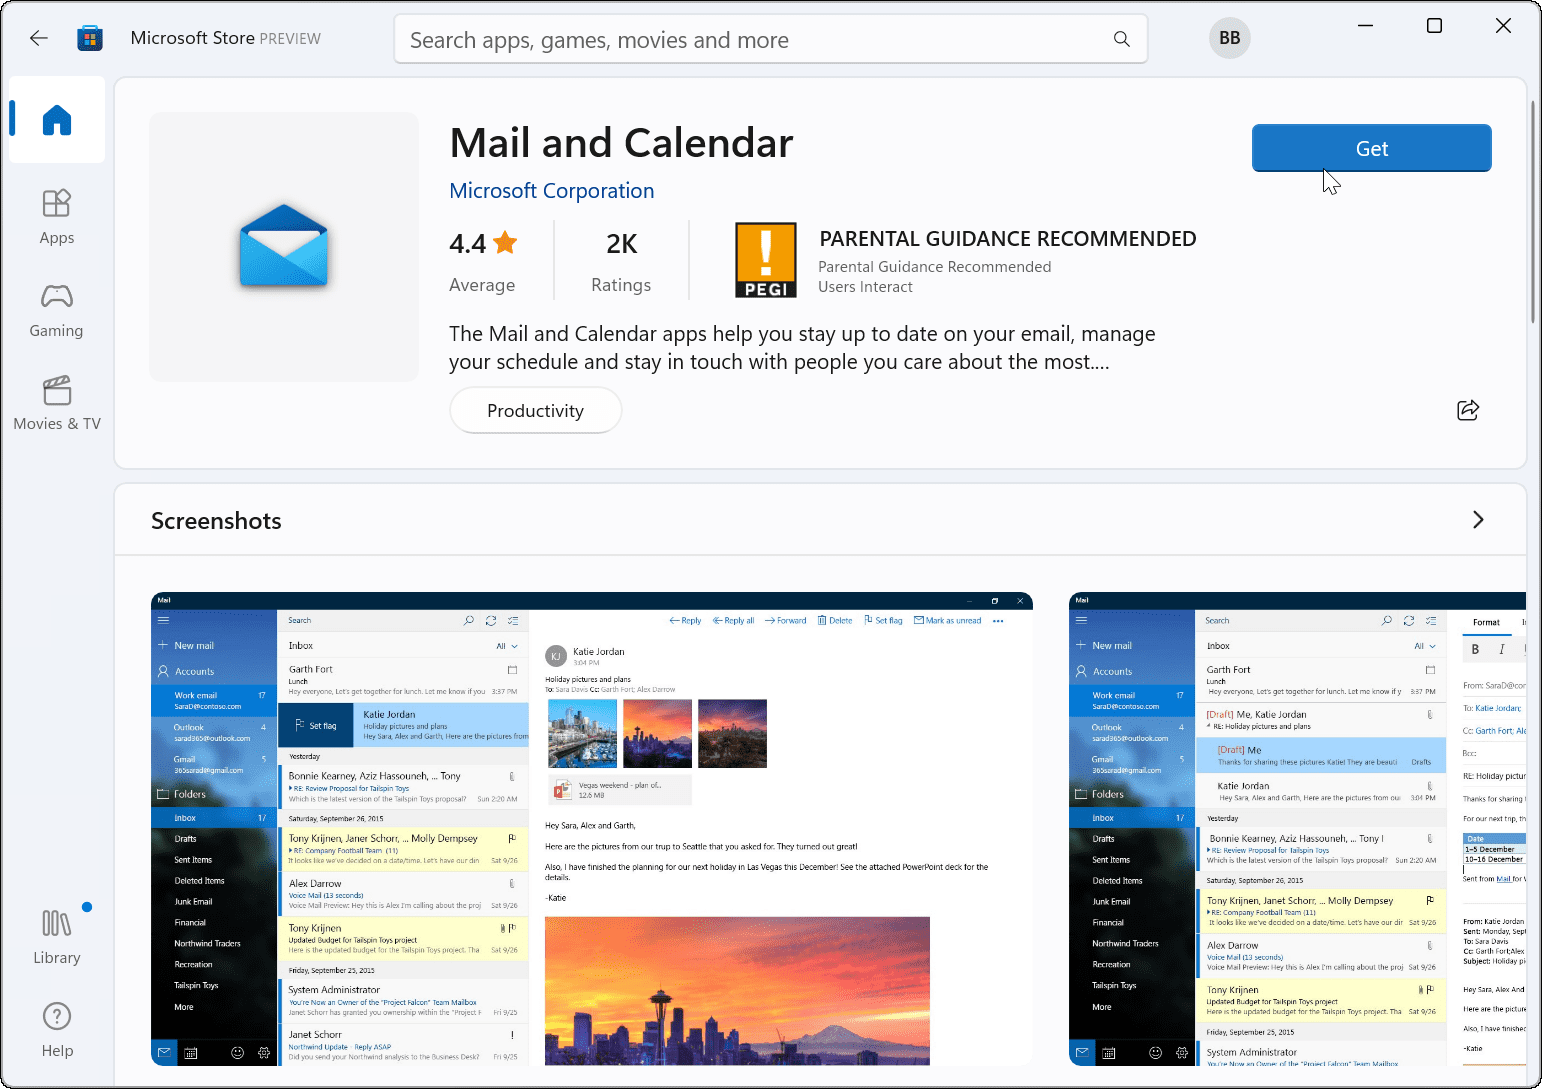
- After it uninstalls, open the Microsoft Store app, search for mail and calendar, and install a fresh copy of the app. You can also download it from Microsoft online.

Fixing Windows 11 Mail App Not Working
After doing an SFC and DISM scan, your system should have the missing files it needs to run the Mail app. Reinstalling it on a freshly updated system should fix the issue. If you’re still having problems with Windows 11 Mail not working for some reason, you can always do a clean install.
Just make sure you’ve done a full system image backup first so you can recover your Windows 11 system instead of completely starting over.
Other things can also go wrong with your system. First, check out how to fix 100 percent disk usage or learn how to fix Windows 11 if it keeps crashing.


Art
February 2, 2023 at 9:08 am
Cannot get hughes.net email to load on windows 11. My gmail account has loaded though.