What Is AssistiveTouch and How to Use It

Struggling with iPhone gestures? AssistiveTouch can help. We’ll explain what AssistiveTouch is and what it can do for iPhone users in this guide.
Do you miss the home button on your iPhone? Do you still find gestures awkward to use or are you unable to use them at all? If so, AssistiveTouch can help. But what is AssistiveTouch, and how do you use it?
Put simply, AssistiveTouch adds a virtual button to your iPhone that can be used to trigger actions, gestures, and more. Even if you don’t have any issues with gestures, it can allow you to access your most used iPhone features in fewer taps.
Read on to learn more about AssistiveTouch and how to use it on your iPhone.
What is AssistiveTouch?
AssistiveTouch is designed as an accessibility feature that offers virtual buttons to replace physical buttons or gestures on your iPhone. If you have difficulty swiping, for example, you can use AssistiveTouch to perform the swipe gesture when you tap.
AssistiveTouch doesn’t just have to be used for accessibility, however. If you miss your old home button or want to add a quick shortcut for opening the camera app, for example, then you can do that with AssistiveTouch, too.
How to Enable AssistiveTouch on an iPhone
Before you can use AssistiveTouch on your iPhone, you’ll need to turn it on. You can do this through the Settings app. If you need to turn it on and off frequently, you might also want to consider using Siri to turn it on and off, or adding a shortcut to the Control Center.
To enable AssistiveTouch in Settings on an iPhone:
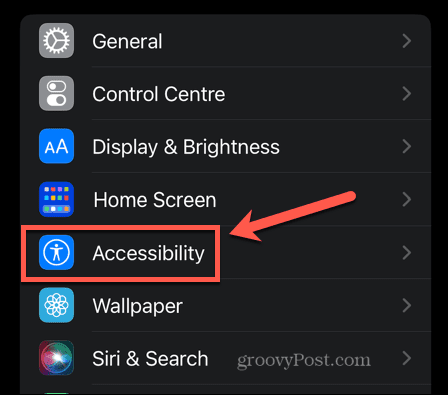
- Open the Settings app.
- Tap Accessibility.

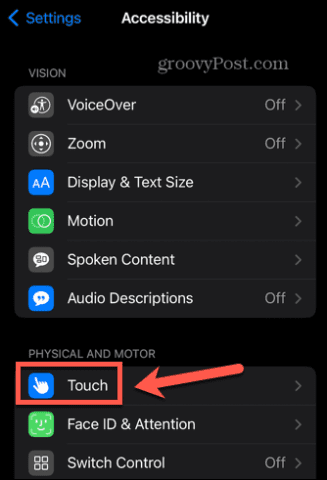
- Under Physical and Motor select Touch.

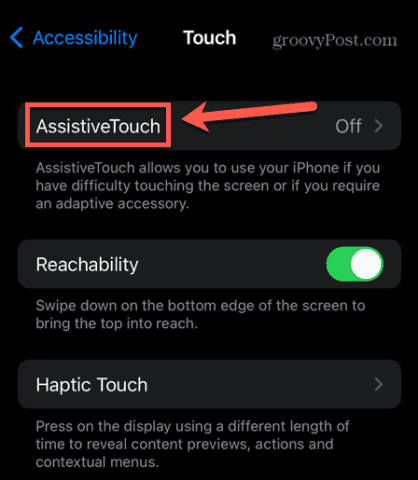
- Tap AssistiveTouch.

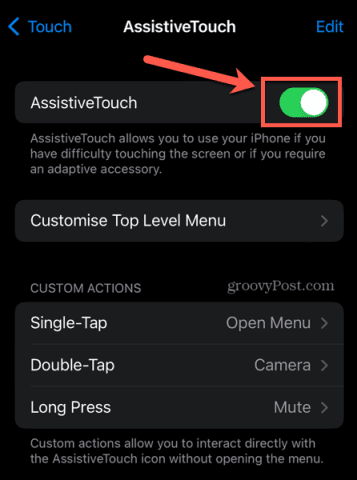
- Toggle AssistiveTouch to On.

- You’ll see the AssistiveTouch button appear on your iPhone screen.
- To turn AssistiveTouch off, repeat the process and toggle the AssistiveTouch switch to Off.
How to Use Assistive Touch
Once AssistiveTouch is turned on, you’ll see a button appear on your screen. This button will remain on your screen at all times, whether you’re on your home screen or using an app. It will even appear on your lock screen.
You can reposition the button by tapping and holding it and moving it into a different position. Tapping this button will bring up the AssistiveTouch menu.
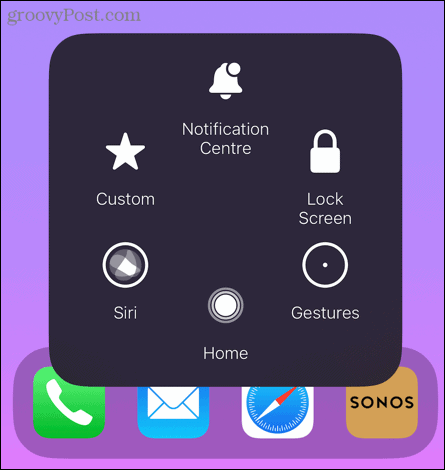
We’ll take a look at the default settings first.
Notification Center
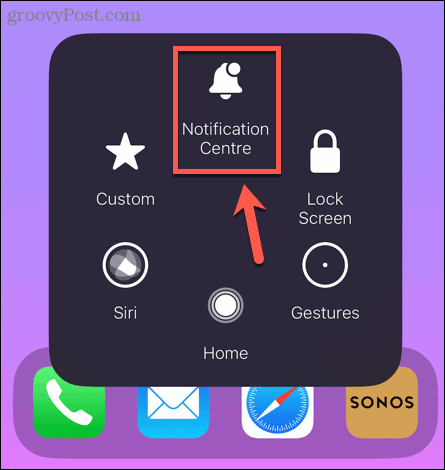
Tapping Notification Center unsurprisingly brings up the Notification Center on your iPhone. Using AssistiveTouch means that you don’t have to swipe down from the top of the screen to access your notifications.
Lock Screen


Tapping Lock Screen will lock your iPhone. This removes the need to press the side button to lock it.
Gestures
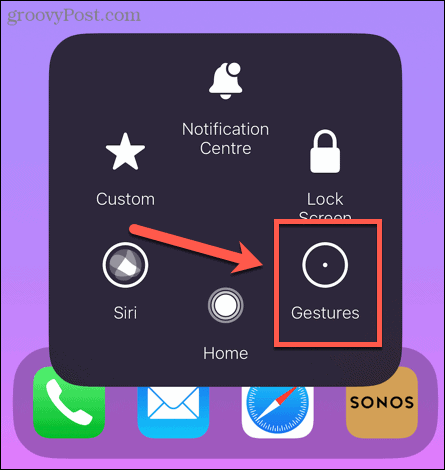
Some gestures on iPhone require multiple fingers. For example, you can select multiple emails in the Mail app by tapping and holding with two fingers on a mail message, and then dragging down with two fingers to select more messages. Tapping Gestures in the AssistiveTouch menu allows you to perform these gestures with just one finger.
To use Gestures in AssistiveTouch:
- Tap the AssistiveTouch button.
- Select Gestures.
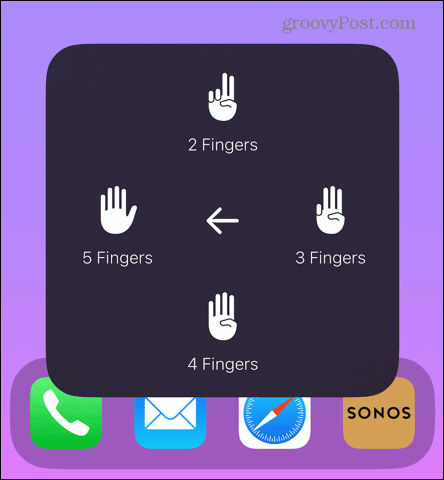
- Select the number of fingers you want to gesture with.

- You’ll see the selected number of dots appear on your screen. When you use a single finger on your iPhone screen, the phone will react as if you are using two, three, four, or five fingers at once.

- To stop using Gestures, tap the AssistiveTouch button again.

Home

Tapping Home works exactly the same way as the home button on older iPhones does. It can be used to exit an app or take you back to your home screen.
Siri
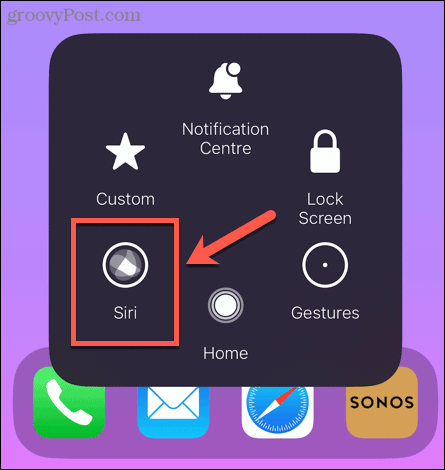
Tapping Siri launches Siri on your iPhone. This removes the need to press the side button to activate Siri.
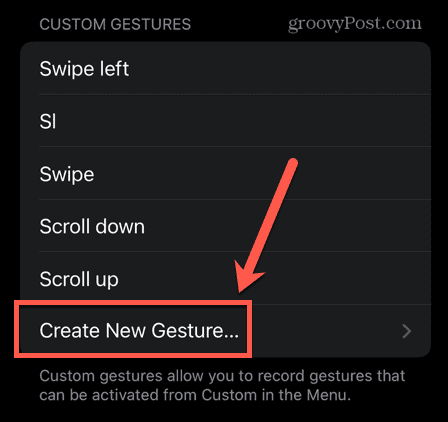
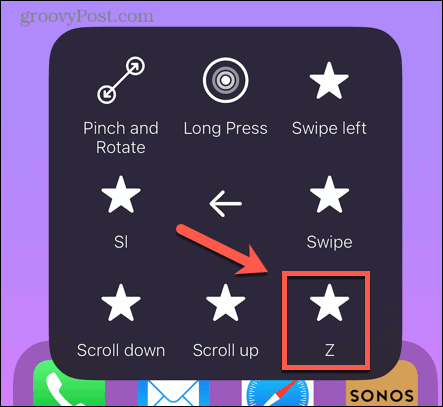
Custom
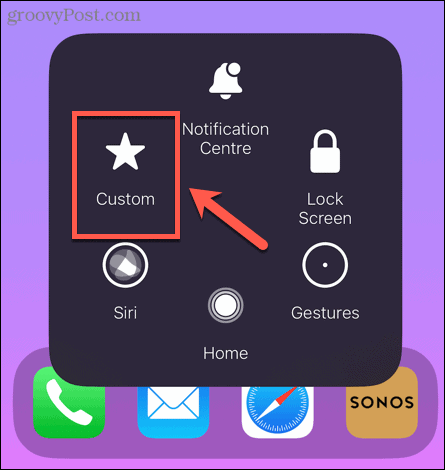
Tapping Custom brings up a selection of gestures that you can perform with a single tap. By default, these include gestures such as Pinch and Rotate, Swipe Left, and Scroll Down. As the name suggests though, it’s possible to add your own custom gestures—we’ll see how later in the article.
How to Customize the AssistiveTouch Menu
If the default AssistiveTouch menu doesn’t include the options that you need, it’s possible to add or remove items to the menu as you wish.
To customize the AssistiveTouch menu:
- Open the Settings app.
- Tap Accessibility.
- In the Physical and Motor section, tap Touch.
- Select AssistiveTouch.
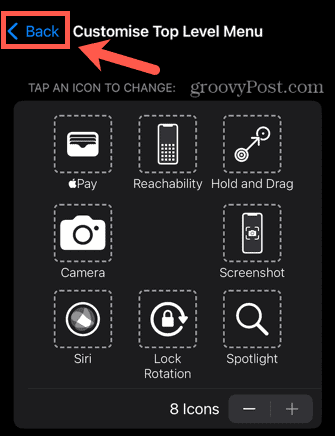
- Tap Customize Top Level Menu.
- You will see the current layout of your AssistiveTouch menu. To change an option, tap on it.

- Select an alternative option from the list.

- To increase or decrease the number of items in the AssistiveTouch menu, tap the Plus (+) or Minus (-) buttons. You can have anywhere from one to eight menu items.
- When you’re happy with your menu, tap Back to exit the customization page.


How to Customize the AssistiveTouch Button
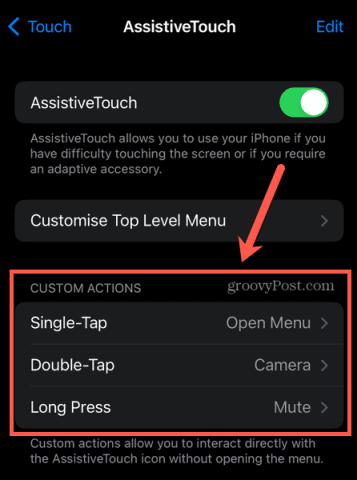
Not only can you customize the AssistiveTouch menu, but you can also customize the button itself. It’s possible to set specific actions for when you tap the AssistiveTouch button, double-tap it, or long-press it. This is a really useful feature for any iPhone user. You can set up the AssistiveTouch button to open the camera app when you double-tap it, for example.
This’ll work whether your iPhone is locked, on the home screen, or in an app. It allows you to quickly access your camera with just a double tap, so you won’t miss the perfect photo opportunity.
To customize your AssistiveTouch button:
- Launch the Settings app.
- Select Accessibility.
- Under Physical and Motor, select Touch.
- Tap AssistiveTouch.
- Under Custom Actions select one of the actions, such as Double-Tap.
- Select the action you want to happen.

- Repeat for the other Custom Actions if you wish.

How to Add New Gestures to AssistiveTouch
If there is a gesture that you need to perform that isn’t in the default list, you can create your own custom gesture.
To create a custom gesture:
- Launch the Settings app.
- Tap Accessibility.
- Under Physical and Motor, select Touch.
- Select AssistiveTouch.
- Scroll down to Custom Gestures and tap Create New Gesture.

- Draw your gesture on the screen and tap Save.

- Give your gesture a name and tap Save.

- Your gesture will now appear when you tap Gestures in the AssistiveTouch menu.


Becoming an iPhone Power User
Hopefully, you now know a lot more about what AssistiveTouch is and how to use it. AssistiveTouch is a very useful iPhone feature and, like many useful iPhone features, it may be something that you were completely unaware of before. There are plenty of other great iPhone features that you might not know about.
For example, did you know that you can unsend an email on your iPhone if you sent one by mistake or to the wrong recipient? Or that you can change the default screen timeout on your iPhone if it keeps locking too quickly. It’s also possible to get your iPhone to automatically delete old messages to stop them from clogging up your device.