How to View Hidden Data in Word Before Sharing Documents

See how to view hidden data in Word using the Document Inspector. This extra step can save you from accidently sharing sensitive data.
We take all sorts of precautions with our digital information these days. But one thing you probably don’t think about is the data attached to documents you create in Microsoft Word.
Without knowing it, you can share a document that contains hidden text, comments, personal information, send-for-review details, and more. Here, we’ll show you how to inspect your document for these types of details in the document itself and in the metadata, and remove them from your Word document.
View Hidden Data in Your Document
First things first, Microsoft recommends that you use the process below on a copy of your document rather than the original. The reason for this is that if you use the tool to remove data, it may not be possible to restore it afterward. So depending on the details, the inspector finds, the intent of your document, and who you plan to share it with, consider this option.
To view that hidden data, open the document you want to check and then follow these steps.
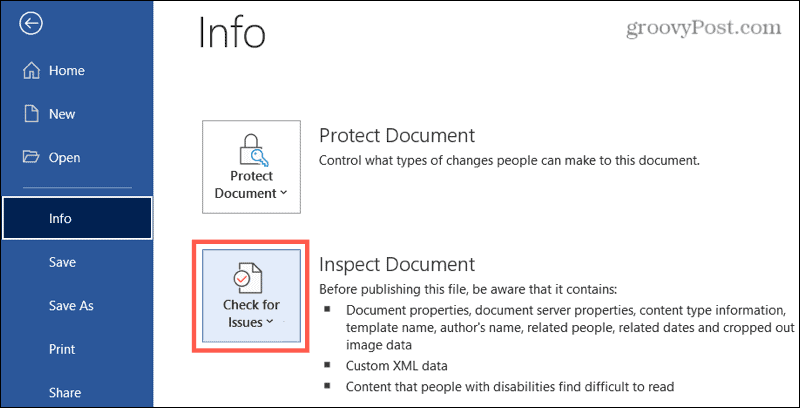
- Click the File tab and select Info on the left side.
- Next to Inspect Document, click Check for Issues. Before you click that button, you may see details next to it with a summary of what’s been found already.

- Select Inspect Document.
- If you have not saved your document yet, you may be prompted to do so. Choose Yes or No per your preference.
- When the Document Inspector displays, check the boxes for all items you want the tool to look for. You have almost a dozen categories from comments and revisions to custom XML and invisible content.
- Click Inspect.

You’ll then see the results of the inspection. The green checkmarks mean no items were found. The red exclamation points indicate items have been found and you’ll see exactly what those items are.
Now the ball is in your court. You can click the Remove All button next to items found to remove them from your document. Or you can Close the tool, make changes yourself, and then reinspect it.

Just note the warning at the bottom of the tool which reiterates the statement from Microsoft: Some changes cannot be undone. So please keep this in mind before hitting that Remove All button.

Obviously, not all items are as important as others, so you may not be concerned if your shared document contains some of them. For instance, if the document includes the name of the template used, you might be fine letting that item remain.
Let’s take a deeper look at the types of items included in the Document Inspector categories.
Word Document Inspector Details
This is not an all-inclusive list of items that can be contained within your Word document. But it does give you a good idea of the categories and items to watch for when using the tool. For a complete list as it evolves, check out the Microsoft Support page for hidden data.

- Comments, Revisions, Versions, and Annotations: Comments, revision marks, document version details, and Ink annotations.
- Document Properties and Personal Information: Document properties (Summary, Statistics, and Document Properties), routing slips, send-for-review details, document server properties, content type information, template name, and user name.
- Hidden Text: Text that you formatted as hidden in your document.
- Invisible Content: Objects that you formatted as invisible in your document.
- Headers, Footers, and Watermarks
- Custom XML Data
- Task Pane Add-ins
- Embedded Documents
- Macros, Forms, and ActiveX Controls
- Collapsed Headings
- Ink
As you can see there are some items that you’d want to keep more private than others. So use your best judgment. And if you’re concerned about not being able to restore something you remove with the Document Inspector, consider saving the original document (before using the tool) and sharing a copy (after using the tool) instead.
Keep Your Data Safe When Sharing Word Documents
The process of running the inspection on your document takes less than one minute. So it’s worth that moment of your time to make sure you’re not sharing something personal or sensitive.
For more on keeping your data safe, take a look at how to protect your Windows computer from ransomware and how to permanently shred files on Windows too.


