How to Troubleshoot Battery Not Charging Issues in Windows 10

If you’re experiencing battery charging issues in Windows 10, try these troubleshooting steps before you buy a new battery.
Your laptop computer is sort of useless without a working battery since its main intended purpose is mobility, even if that means just moving from room to room in your home. We have covered previous tips for managing your battery in Windows 10: adjusting the battery warning level, using a battery saver, generating a battery report, or using some of the new features such as Power Throttling introduced in recent versions of Windows 10. But another common issue in Windows 10 is the battery not charging. There can be a variety of reasons why this happens. So let’s explore them and try some solutions to get you mobile again.
Resolve Issues Preventing Your Battery from Charging in Windows 10
There are a variety of factors why your laptop’s battery might suddenly stop charging or won’t charge to full capacity. These can include age, health, and possible firmware or hardware issues. One of the easiest things you can do is power down your computer, plug it in, and let it charge overnight. If you don’t see any differences, try some of the following suggestions below.
1. Run Windows 10 Battery Diagnostics to Locate Charging Issues
If your battery isn’t fully charging, the first thing you can try is the Battery troubleshooter in Windows 10.
- Open Start > Settings > Update & security > Troubleshoot
- Scroll down then click Power
- Click Run the troubleshooter


- Complete the wizard, then restart your device to see if the problem is resolved.


Most laptop computers include their own factory diagnostics utilities, too. It is recommended you also use those to test your battery. Accessing the diagnostics will vary by manufacturer, so consult the documentation that came with your computer. Before you run a test, you might need to fully charge the device to 99 or 100 percent, disconnect the AC adapter, boot into the diagnostic utility, and then run the test.
2. Check if Your AC Power Supply is Properly Connected
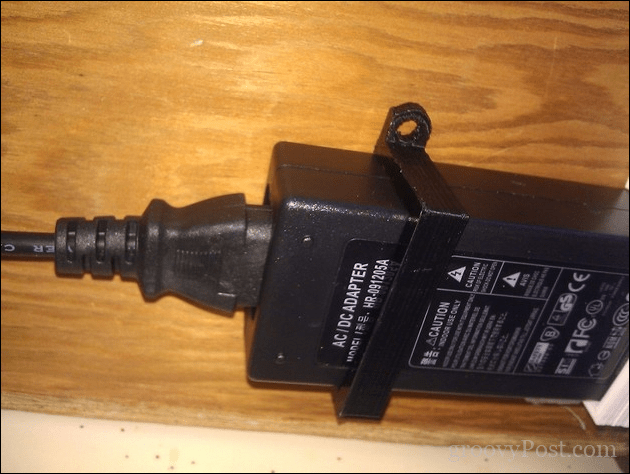
Sometimes the power cable connected to your AC power supply brick might be loose. Check to make sure it is fitted and secured properly.

3. Try a Different Wall Outlet and Check for Low Voltage and Electrical Issues
The other day, my house had some serious electrical issues going on. You would be amazed by how much voltage issues can affect the performance of your system. For example, plugging my laptop into an outlet within my room dimmed the light, while an outlet in the living room caused it to wink.
In another room, it remained constant, but charging was horribly slow. This, of course, meant I had low voltage issues, and with so many appliances competing for the little bit of faulty energy, it made it even worse. Ultimately, I ended up hiring an electrician to sort out the issues. After fixing it up, my laptop started charging normally.


If you want to test your outlets before calling an electrician, consider picking up an outlet tester on Amazon for less than $20.
4. Test with Another Charger
I mentioned the AC power adapter earlier. Your charger might be the culprit. If you have a working spare lying around the home, give it a try to see if it charges. You can also borrow one from your work colleague if you don’t have any. If you don’t have access to another charger, try yours on another laptop to see if it charges the device.
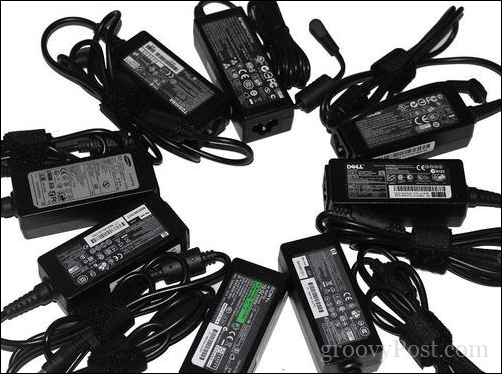

If you are mixing and matching laptop power adapters, make sure you choose the correct power supply. Read the brick and make sure it has the same polarity and voltage as the adapter for your laptop.
5. Remove All External Devices
If you keep external devices such as a smartphone, a USB external drive, a mouse, a printer, and anything else attached to your system while charging, it will take longer for your battery to reach 100%. So make sure you disconnect all of those devices, so your system won’t be competing with all the other electronics.


6. Check Your Connectors for Dirt or Damage
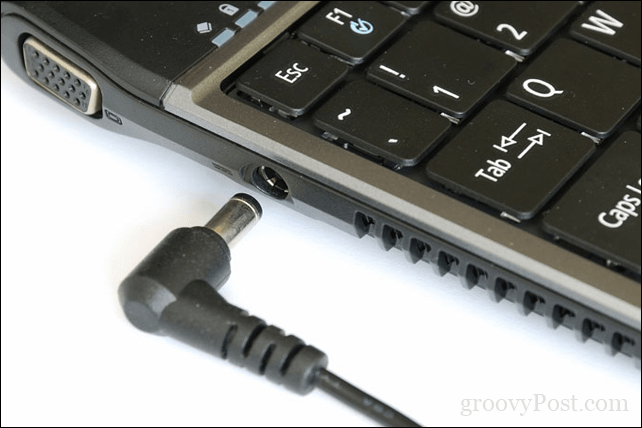
If your laptop has a modular battery, remove it, check for any damage, or see if it needs cleaning around the contacts and inside the battery compartment. Also, check if any dust particles inside the charging port might prevent the battery from charging.

7. Check for BIOS and Chipset Driver Updates
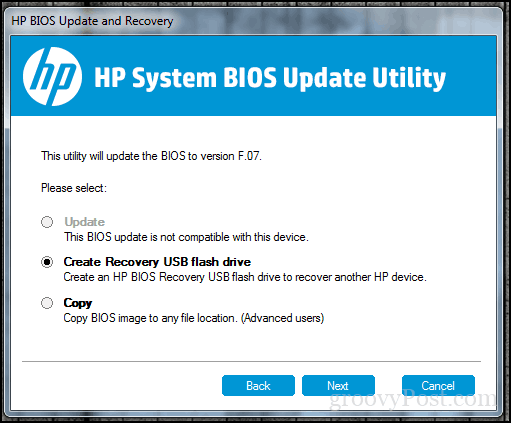
Sometimes your system might be overdue for an update for components such as your BIOS and Chipset. Updates can help resolve bugs that might be preventing the battery from charging efficiently.

8. Press and Release Power Button Reset
Sometimes unknown glitches can prevent the battery from charging. An easy way to fix it is to power down your computer, hold down the power button for 15 to 30 seconds, plug in the AC adapter, and then start the computer.


9. Disable Apps and Check Battery Usage in Windows 10
Going back to Windows 10 a bit, I recently noticed my Surface Pro took an unusually long time to charge, and the fans started to rev up. Little did I notice the culprit was right there on my Taskbar all along. Slack’s Windows client was waiting in an attempt to connect to the Internet. So, checking your apps to determine what’s running in the background can help you not only conserve battery life but limit what prevents it from charging faster.
There are a couple of ways to do that. Open Start > Settings > Privacy > Background apps. Scroll down, then toggle off the apps that might be preventing your device from reaching a full charge.


Still in Settings, open System > Battery > Battery usage by app. This will tell you which apps are using the most battery, and you can decide what to do, whether to let Windows decide if it should run in the background while not sacrificing battery life.


10. Replace Charger or Battery Module
Ultimately, if you don’t see any improvements after trying all the above, it may be best to replace either the charger or the battery itself. This will require contacting your laptop manufacturer and placing an order. Batteries and chargers are not necessarily cheap, especially if it’s an older system. But, if you have no choice, it’s something you will have to do to get your system back in working order.
Hopefully, these simple tricks can get your battery working again. If not, then consider contacting the manufacturer about getting the battery or charger replaced. Merchant sites such as Amazon.com might even have your battery module in stock and at a cheaper and faster rate than going through the manufacturer.
16 Comments
Leave a Reply
Leave a Reply





PL Buckner
June 1, 2019 at 1:37 pm
I had no issues at all until I updated to Windows 10. Even though I appreciate all these tips to check everything else that could be an issue in other situations – it’s obvious with as many people flooding the internet in panic with the same issue that there was something in Windows 10 that caused all of these batteries to malfunction and I think it’s a complete shame and so unprofessional for a company as big as Microsoft to not admit to the mistake and make good for it. Everywhere I look, every article I read – it’s the same thing. Y’all just politely pretend like it’s not your fault as you give out advice that you know wont fix the issue – that wont fix the batteries! :( I no longer have faith or trust in your products, or your company for that matter.
Ghica Ghieorghiu
July 16, 2019 at 2:00 am
I totally agree with PL Buckner. I might just add that I do not buy the author is not aware the real situation. The fix – and anyone knows this – works only temporary: uninstall Microsoft AC Adapter and Microsoft ACPI – Compliant Control Method Battery (Control Pannel/ System/ Device manager) – they will reinstall at next boot – shut down, remove power & battery, press start for 40 – 45 s, put back battery and plug power, restart. It should work – for awhile. It is not BIOS, it is nothing wrong with the computer or accessories – just Microsoft annoying users. I do not understand the reason or if it affects only older computer models.
PL Buckner
July 16, 2019 at 1:42 pm
Thank you Ghica Ghieorghiu,
In reference to your comment “I do not understand the reason or if it affects only older computer models.” I’ve done a great deal of research on this and the simple answer is that Windows 10 was created and released per-maturely with a few more glitches in it than expected. After it ruined hundreds of thousands of various types of computers (old, new, laptop, desktop, ….) by causing the batteries to malfunction – the cost was far too large for them to admit fault and take that kind of financial loss. So they just keep (and will continue to keep) sending people on a wild goose chase thinking there’s a way to fix the problem and not suffer the personal loss, when there is no “fix” and we, the consumer, are stuck with the personal loss. Time will pass, people will eventually give-up and buy a new computer/laptop/whatever, Windows-10 will be improved with the glitch fixed for future installs, the company will have never paid for all of those machines they ruined, and they will have never lost a single penny over any of it. So what did we learn from all of this? Wait for the reviews from real consumers before upgrading.
insert name here
September 2, 2019 at 4:08 am
OMG thx you sooooo much it fixed my problem anddd the problem is kinda stupid too… i just changed my power outlet and it work like a charm XDDDD
Millakatariina64
September 14, 2019 at 11:42 am
Also if you have a Lenovo, screwing around in Lenovo vantage checking and unchecking everything and anything on there multiple times can fix the problem, at least I think it did for me when I had to use an older charger from our other laptop on my gaming laptop and absolutely nothing else seemed to work to fix the problem. Obviously though this is only really a short term fix for times when you like accidentally forget your charger at school over the weekend or something, since you have to do that on lenovo vantage every time you turn on your pc.
PatQuin
October 9, 2019 at 8:16 pm
So in summary, I can only use my laptop if plugged? I kept getting an error message that it did not recognized the AC power adapter, so I purchased a new one. I have plugged it in every outlet I could reach, and still no results. Very frustrating and annoying.
William Baya
December 10, 2019 at 7:03 am
The idea of updating BIOS solved my charging problem so promptly!!
Nancy
June 7, 2020 at 8:14 am
I believe that my AC adapter is fine (it’s relatively new), my battery is new. I did this because I received the error message that my adapter was not recognized, so consulted geeks and battery identified as the problem. Now, I believe that whatever is between the AC adapter/charger and the battery is the problem. What is it called? Is it a module that can be switched out for a new one. I’m using a Dell Inspiron 17 series 5000 laptop.
NOEL CAARLISLE
September 9, 2020 at 3:43 am
New battery not recognised. A/C charger ok. Reading 255% available(plugged in) or “no battery present” Tried all suggestions on Utube with absolutely no success. Please explain.
alain smithee
April 30, 2021 at 8:06 am
If the software that I need for work would run on Windows 7, I would gladly step back to Windows 7 because it is stable and reliable.
I do not want or need forced “updates” that make cosmetic changes to the operating system or add features just for the sake of adding features. I would rather have a fast and stable operating system that is not bloated with “features” that very few people actually find useful and use.
pranshu
July 15, 2021 at 11:28 pm
actually my pc automatically get discharge and turn off and when I am connecting it to the charger it starts charging very fast and automatically stop and start charging by itself. the power light is also showing full charge and after few seconds it starts charging again.
please suggest me to do something. thank you!!
Mick
August 24, 2021 at 10:28 pm
OK so here’s my problem, windows 10 laptop all new, did an automatic update and now it won’t charge when on and in use, when I turn it off/shutdown (charger plugged in all the time), as soon as it shuts down the charging light flashes and it starts charging any ideas?
Mia
February 23, 2022 at 6:45 pm
In my case the culprit is the charger,i’ll have to get a new one today
Steve Krause
February 24, 2022 at 7:28 am
Yes — That will do it. :)
Subhash
May 20, 2022 at 8:58 am
Great.. Working well now for me. Good trouble shoot guide. Thanks a lot :)
James
November 19, 2022 at 4:45 pm
Thanks! Good guide, powered off and restarted just like you recommended. Works fine now.