How to Share a Printer in Windows 11

If you have a printer that’s hardwired into your PC, you might want to share it. Here’s how to share a printer on Windows 11.
You might have a wired printer on a particular PC in your home or office environment and want to share the printer with other users on the network. If you have a wireless printer, it connects to your network and can share itself with different PCs that connect to the same network.
However, you might still have a setup where you need to share a particular printer that’s wired to a PC. In that case, we’ll show you how to share a printer from Windows 11 below.
How to Enable File and Printer Sharing on Windows 11
Before setting up a shared printer, you need to go to the Network and Sharing Center and turn on the file and printer sharing option.
To enable file and printer sharing on Windows 11:
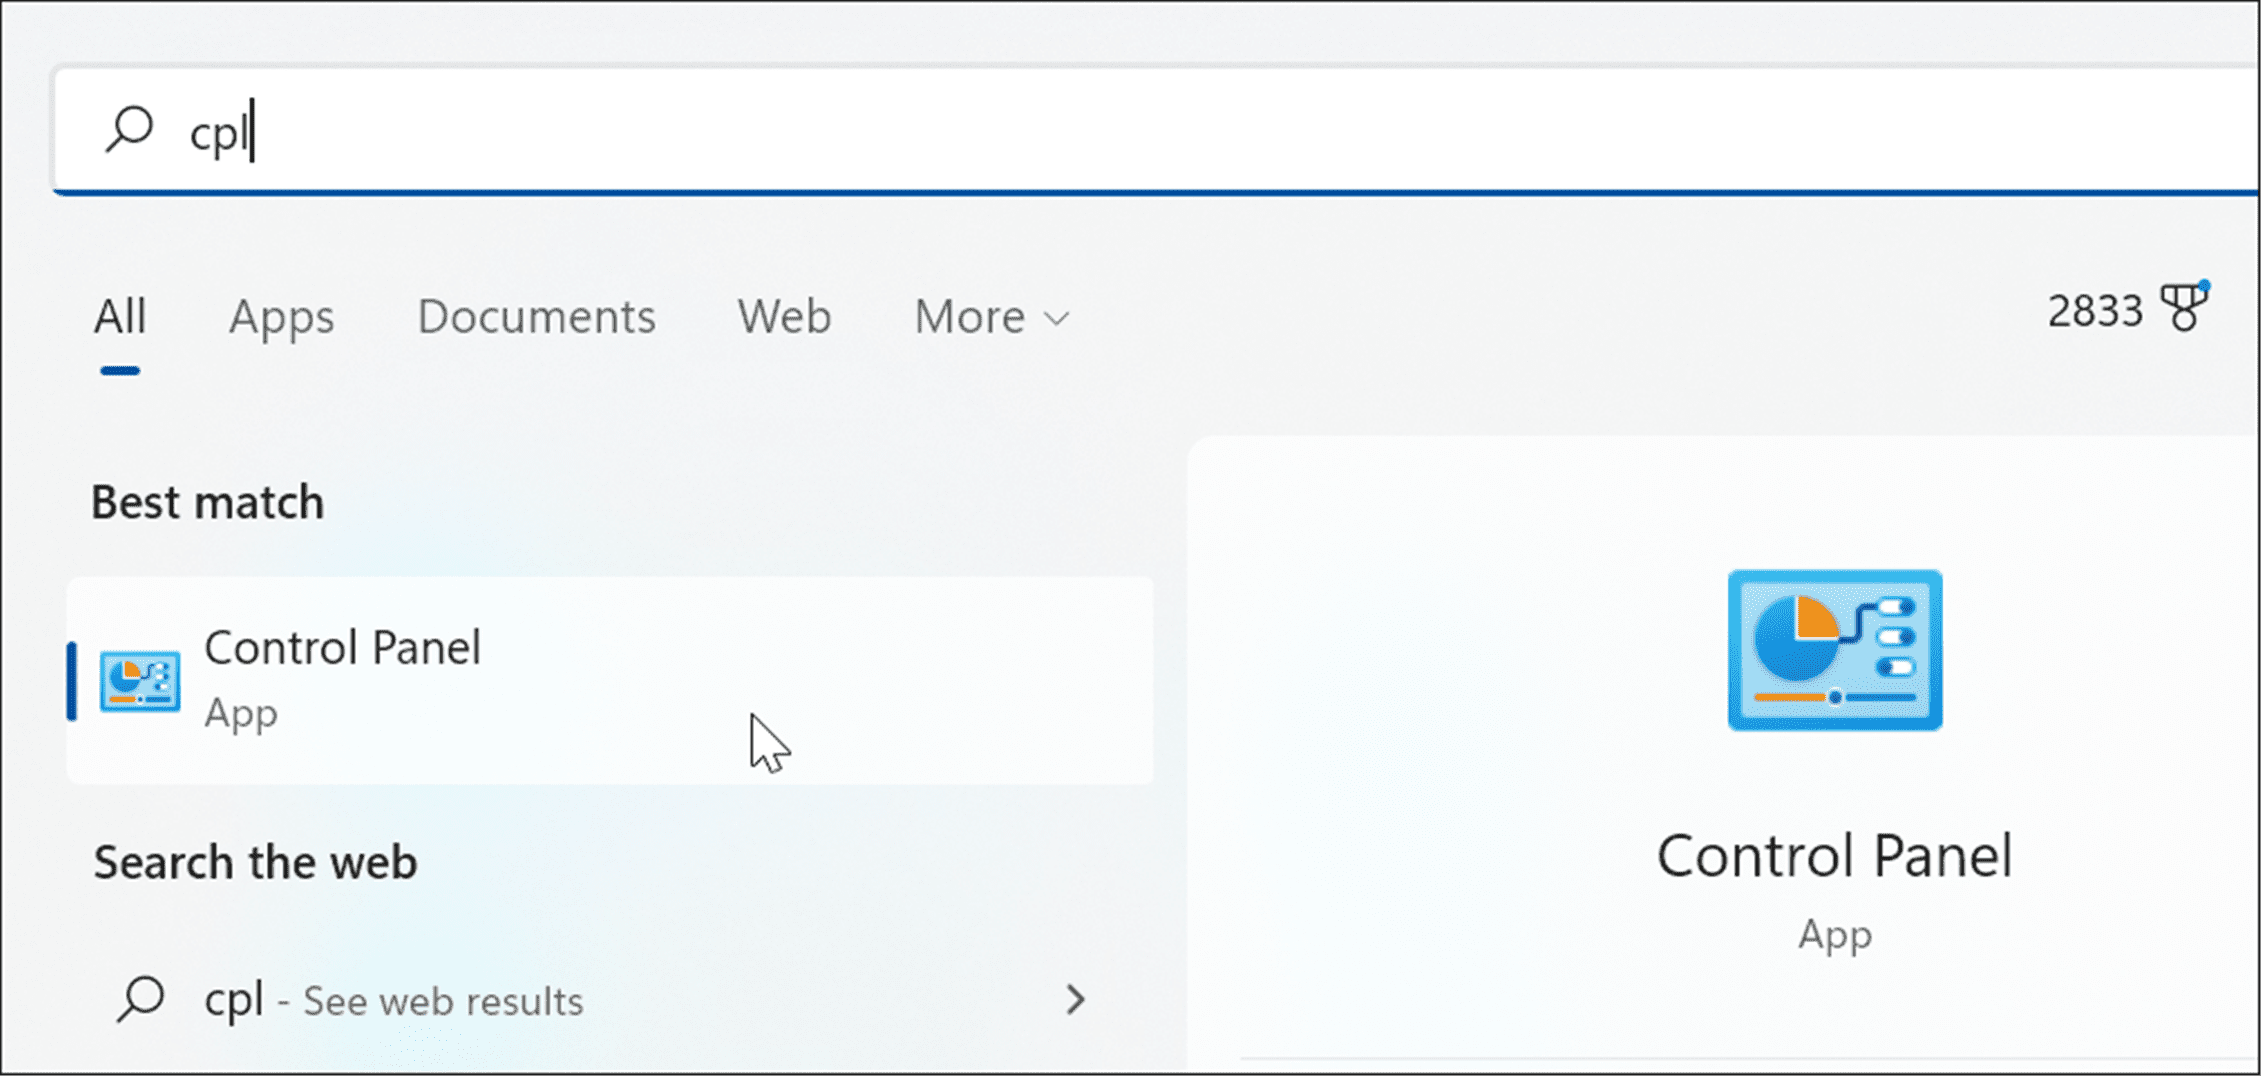
- Open the Start menu and type cpl or control panel.
- Select Control Panel from the Best Match result.

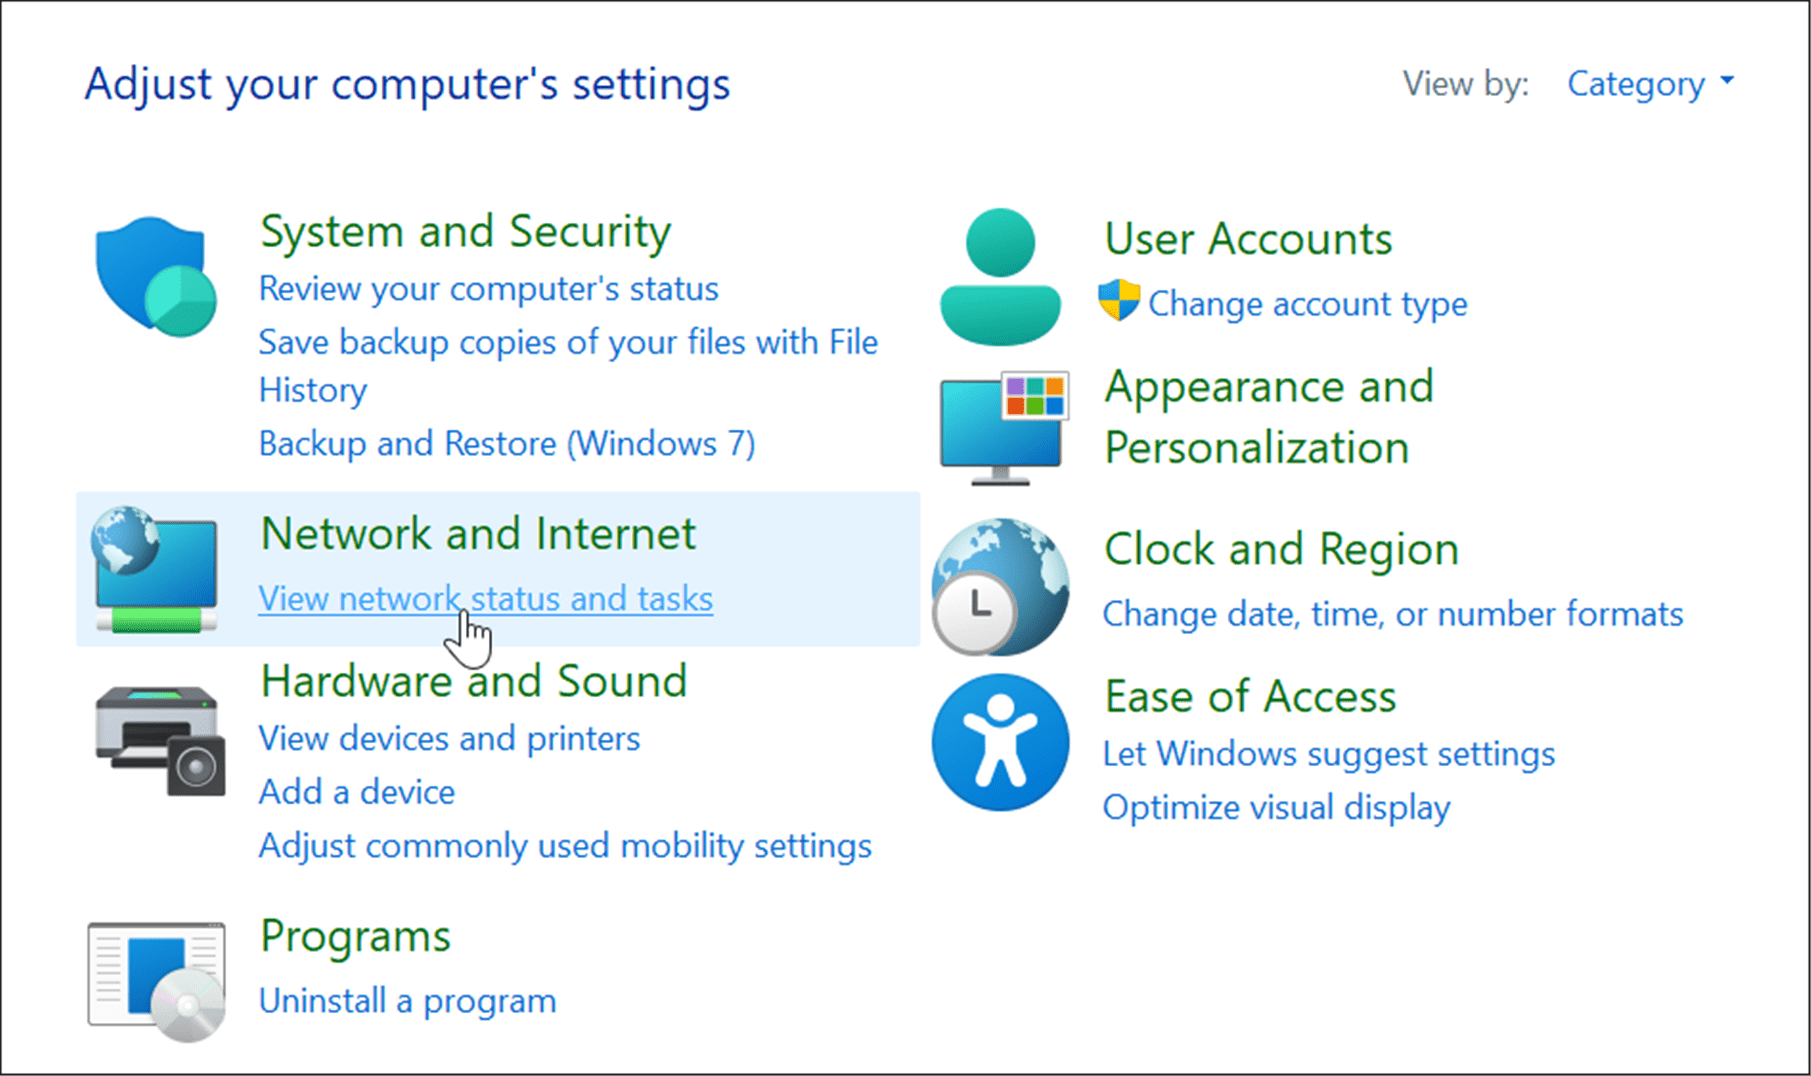
- Make sure the View by option is set to Category and click the View network status and tasks link.

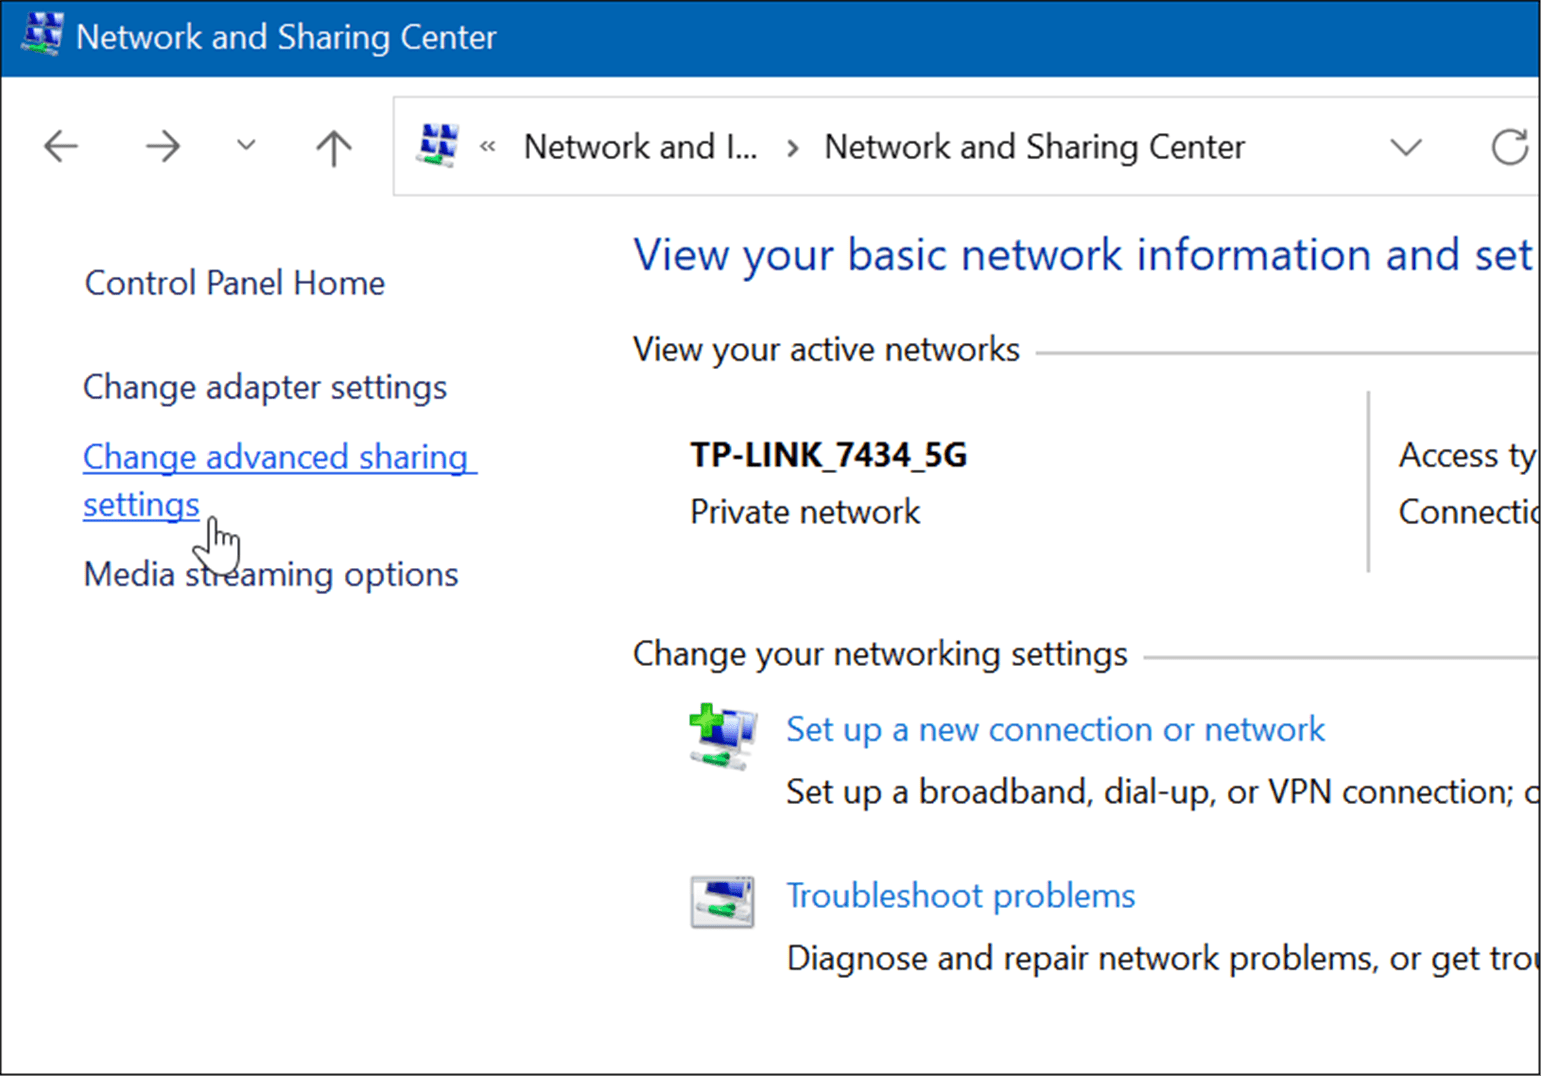
- Next, click the Change advanced sharing settings link on the left.

- Now, you want to expand the Network discovery section and ensure that Turn on Network discovery and Turn on file and printer sharing is enabled.
- Click the Save changes button at the bottom for the settings to take effect.


How to Share a Printer in Windows 11
There are a couple of ways to share your printer from Windows 11. First, we’ll take a look at doing it via the Settings app.
You can share a printer from Windows 11 using the following steps:
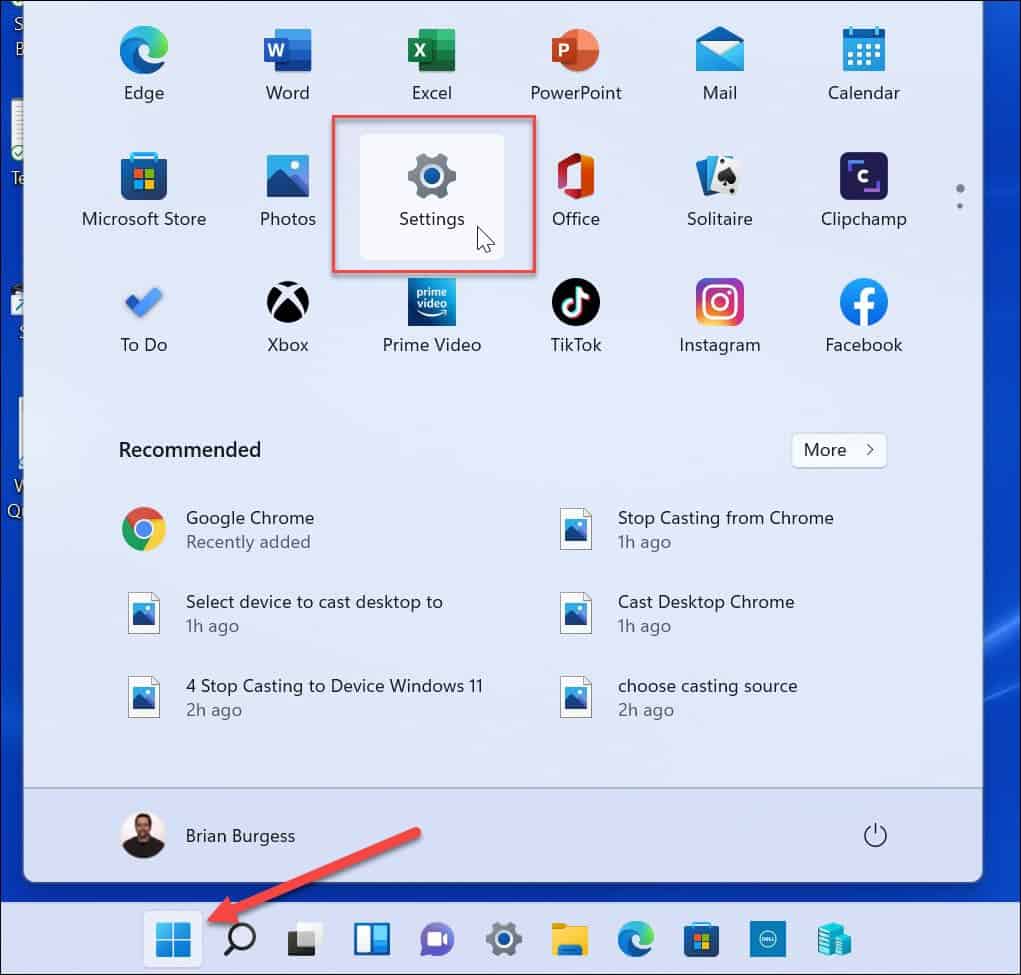
- Click Start or hit the Windows key and open Settings. You can also hit Windows key + I to open it directly.

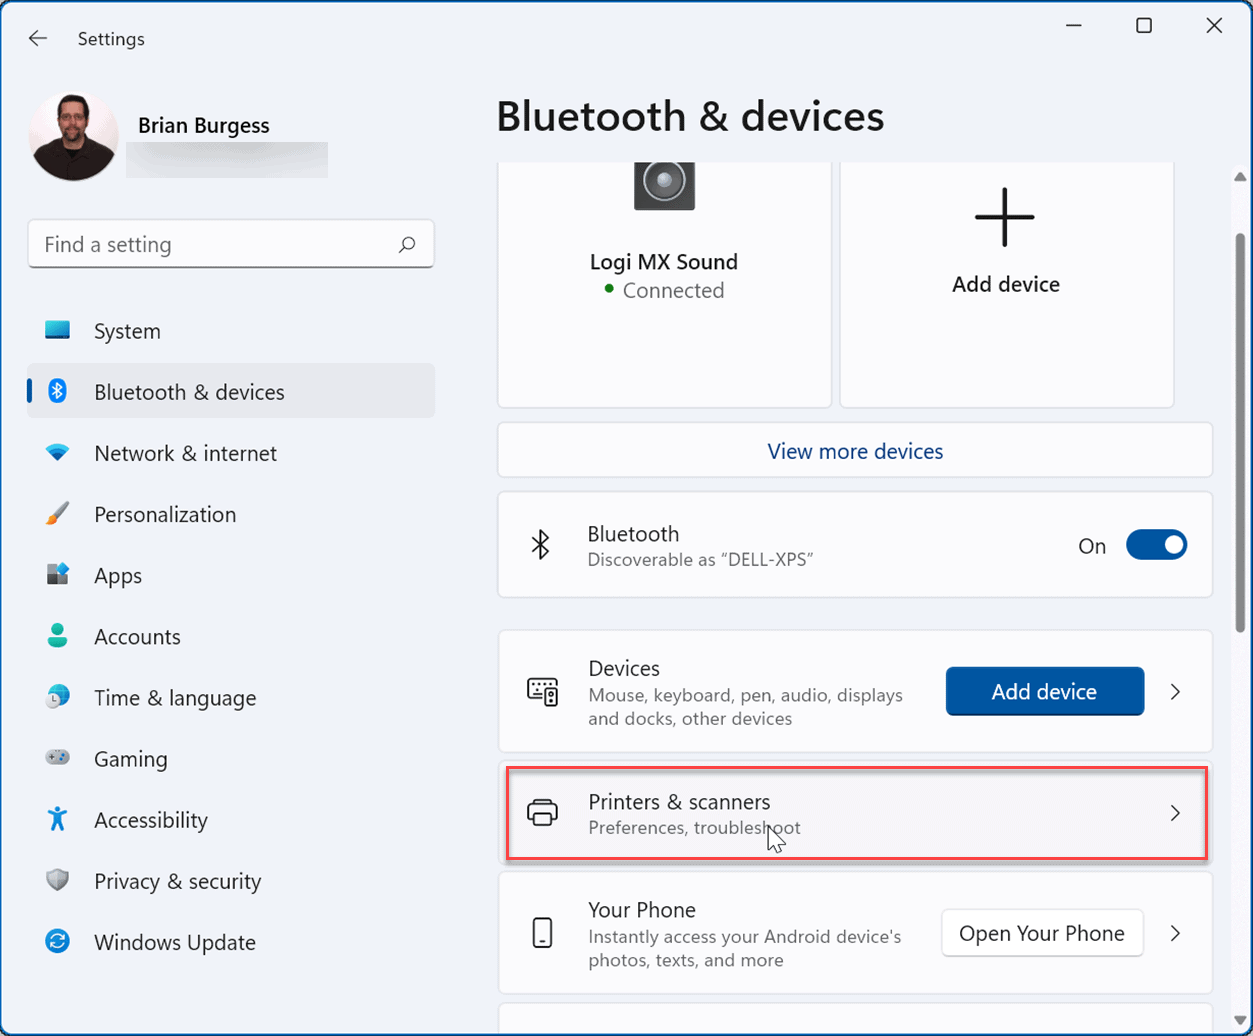
- When the Settings app opens, click on Bluetooth & devices and select the Printers & scanners option on the right.

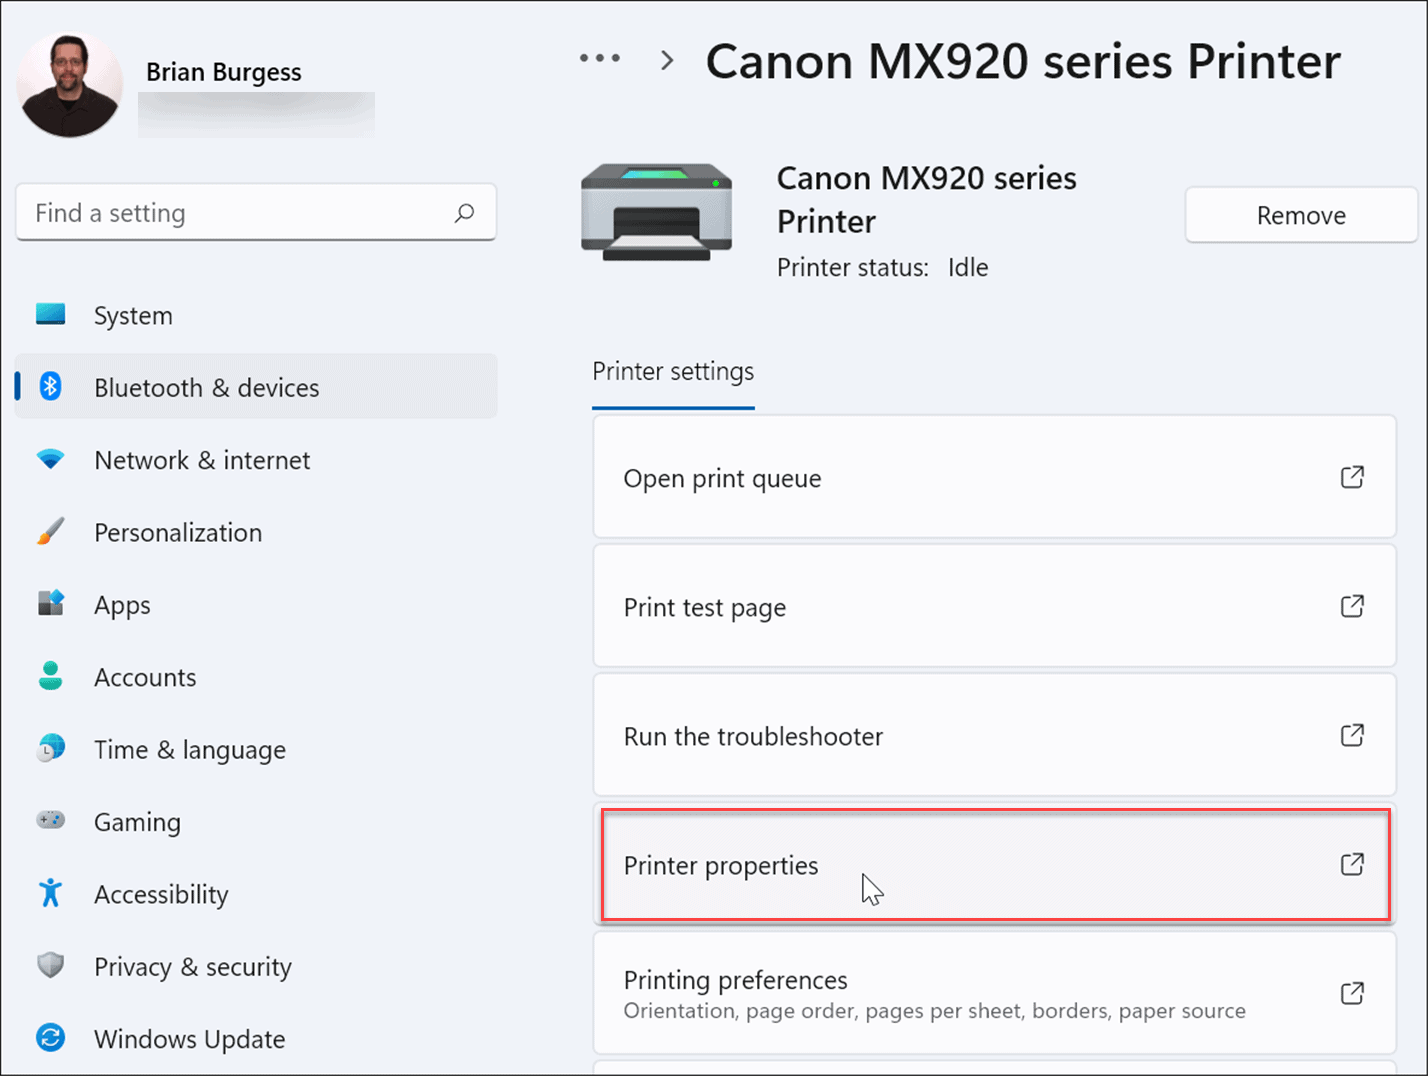
- Next, click on the printer you want to share.
- Next, click on the Printer properties option on the following screen.

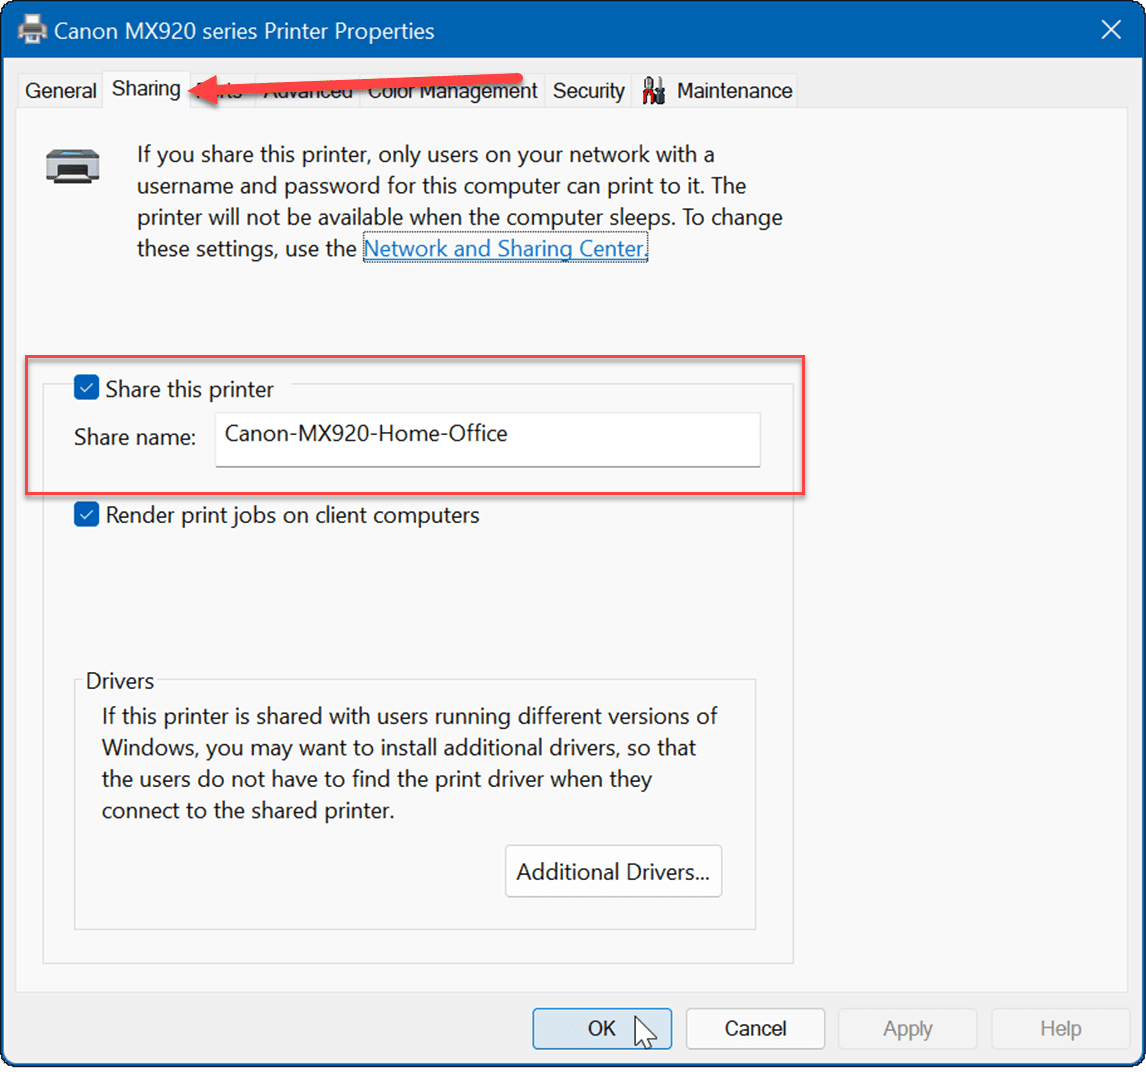
- When the Printer Properties window opens, click the Sharing tab. Check the Share this printer box and give the printer a name that makes it easy to remember and manage in the future. When done, click Apply and OK from the bottom of the screen.


How to Share a Printer via Control Panel on Windows 11
You can also share a printer using the Control Panel in Windows 11 by following these steps:
- Click Start or hit the Windows key, type cpl, and open Control Panel.
- When Control Panel opens, make sure View by is set to Category, and click the View devices and printers link.

- Right-click the printer you want to share and select Printer properties from the menu.

- Select the Sharing tab at the top, check the Share this printer box, and type in a share name. When done, click Apply and OK to share the printer.

- Now that the printer is shared, you can connect to it from other PCs on the network. To do this, open File Explorer and select the Network folder.
- Right-click the shared printer and select Connect from the menu.


Printing on Windows 11
With PDFs, shared documents, and email, printing hard copies aren’t as essential as it used to be. However, Windows 11 still has print capability built-in, and if you need to share a printer, you still can. Not on Windows 11 yet? You can also share a printer from Windows 10.
If you’re having a problem with a printer, you might want to take a look at fixing a printer driver is an unavailable error. Check out the Nearby Sharing option if you need to share a document with someone in the office or another room. It works with Windows 10 and Windows 11 and saves you from printing a hard copy.


