How to Securely Wipe the Free Space on Your Mac

Do you have an older Mac with a regular HDD? Learn how to make sure deleted files cannot be recovered by securely wiping the free space on the drive.
When you delete files on a regular hard drive on your Mac (not an SSD), the files remain on the drive. But they’re no longer accessible by your Mac.
However, anyone who gets a hold of your Mac, and who has intermediate computer skills, might be able to recover deleted files from your drive. Unless you delete them securely first.
If you didn’t already securely delete your files, it’s not too late. If you have a regular spinning hard drive (HDD) in your Mac, you can securely wipe the free space on your Mac, preventing recovery of any files that were not securely deleted. If your Mac has an SSD, you do not need to securely wipe the free space and you shouldn’t.
Today we’ll discuss what happened to the Secure Erase Free Space feature in Disk Utility on your Mac and how to securely wipe the free space on your Mac’s HDD without that feature.
What Happened to Secure Erase Free Space in macOS?
The Secure Erase Free Space feature in Disk Utility on your Mac added a layer of privacy and security to file deletion. The feature allowed you to overwrite the free space on a drive to prevent deleted files from being recovered.
Modern versions of macOS, and later versions of OS X, like El Capitan, don’t include the Secure Erase Free Space feature in Disk Utility. Because most Macs now come with Solid State Drives (SSDs) instead of regular hard disks, Apple feels there is no need for the feature. When you erase files normally on an SSD, it’s difficult to recover that data.
Apple explained that you don’t need to securely erase your Mac’s SSD in their online knowledgebase:
With an SSD drive, Secure Erase and Erasing Free Space are not available in Disk Utility. These options are not needed for an SSD drive because a standard erase makes it difficult to recover data from an SSD.
Whether you have an SSD or an HDD, you should use FileVault to protect your data. FileVault encrypts your whole drive so all your files are protected. You need a password to access anything on the drive. Without it, your data remains encrypted and safe from unauthorized access
Securely Wipe the Free Space on Your Mac Using the Command Line
Before wiping the free space on your Mac using the command line, back up your data.
Once you’ve backed up your data, open the Terminal app from the Applications > Utilities folder.
Then, type the following command at the prompt and press Enter.
diskutil secureErase freespace 4 /Volumes/Macintosh\ HD
Make sure you include “freespace” in the command. This indicates you are only erasing the free space on the drive and not the entire drive.
The number “4” indicates the wipe level performed on the drive’s free space. You can use “4” for the wipe level, or select a different option from the following list:
- 0 – Single-pass zero-fill erase.
- 1 – Single-pass random-fill erase.
- 2 – US DoD 7-pass secure erase.
- 3 – Gutmann algorithm 35-pass secure erase.
- 4 – US DoE algorithm 3-pass secure erase.
The more passes you do when wiping the free space, the longer the process takes.
Replace “Macintosh\ HD” with the name of the volume you want to wipe the free space on. If the name of the volume contains a space, type a backslash in front of the space, like we did in our command. Make sure you include “/Volumes/” before the name of the volume.
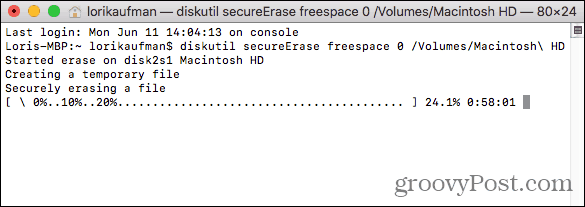
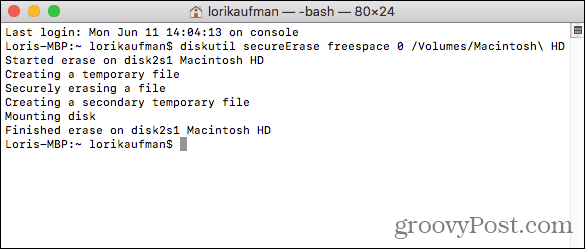
When the wiping process finishes, you’ll see a message and you’re returned to the command prompt.
Securely Wipe the Free Space on Your Mac Using CCleaner
CCleaner for Mac has fewer tools available than CCleaner for Windows. But you can use it to securely wipe the free space on an HDD using the free version of CCleaner. You can pay for the Pro version, but it’s not necessary.
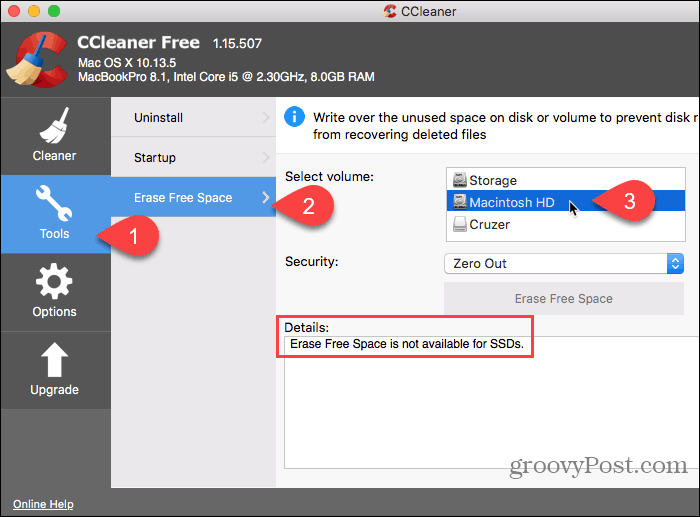
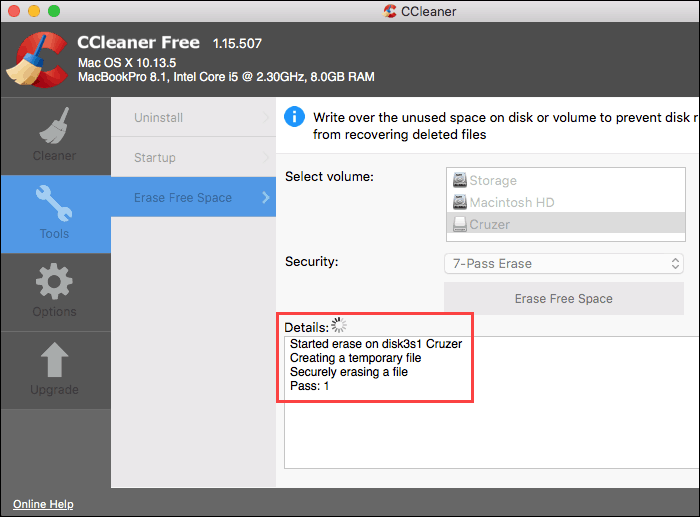
Download and install CCleaner. When you open the program, click Tools on the left pane. Then, click Erase Free Space in the middle pane.
Select a volume you want to erase the free space on. If you select an SSD, a message displays in the Details box saying Erase Free Space is not available for SSDs.
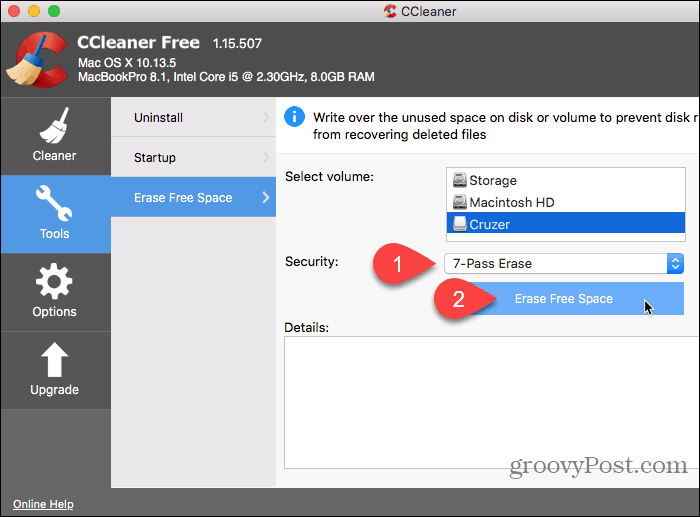
Once you select a regular HDD, choose one of the following options from the Security drop-down list.
- Zero Out
- 7-Pass Erase
- 35-Pass Erase
Then, click Erase Free Space.
CCleaner warns you that the process may take several hours to complete.
To start erasing the free space on the selected drive, click Yes. If you’ve changed your mind, click No.
If you clicked Yes, enter your password if prompted.

The wiping process begins and the progress displays in the Details box.
Prevent Private Data from Being Recovered
Apple devices, including Macs, are known for lasting a long time. So, if you still have an older Mac with a regular HDD, use one of these methods to ensure your sensitive deleted files can’t be recovered.
If you also use a Windows PC, here are a few ways you can securely wipe free space in Windows.
Do you know of any other methods or tools for securely wiping free space on a Mac or other secure data removal options for modern versions of the Mac operating system? Share your thoughts and ideas with us in the comments below!


JamesP
October 16, 2021 at 3:02 pm
The command line way is very handy for using on my external drives! Thank you for this.
Jerry
June 7, 2023 at 1:37 pm
I have a new version of Ccleaner 2.8.xxx. I can not find the tools icon to get into wipe free space. I have an iMac. What advise does anyone have?