How to Take a Screenshot of the Windows 10 Login Screen

Taking a screenshot of the Windows 10 lock screen is just a matter of hitting the PrtScn button, but to get the login screen there’s a bit more work involved.
Windows 10 has a couple of screens to navigate through before getting to the desktop. First is the lock screen and then the login screen. Taking a screenshot of the lock screen is easy. While at the screen, just hit the Print Screen (PrtScr) key and after logging in, open the app you want to use the shot in and hit Ctrl + V to paste it in.

The Windows 10 Lock Screen features the time, date, and other data from the apps you choose.
But, you might have noticed you can’t do the same thing with the login screen where you enter your password or PIN. If you need to take a screenshot of the login screen, you can hack the Registry and use the Snipping Tool.
Take Screenshot Windows 10 Login Screen
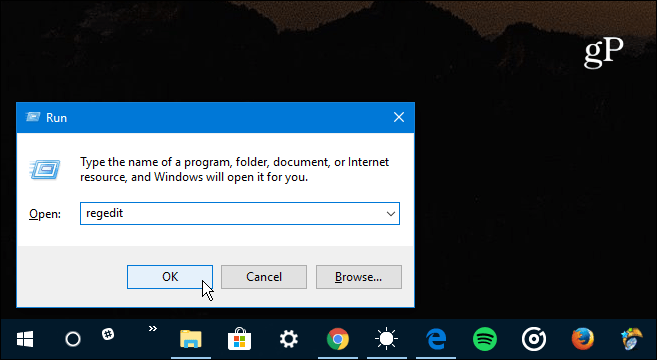
Use the keyboard shortcut Windows Key + R to launch the Run box and type: regedit and click OK or hit Enter.
Next, navigate to the following path:
HKEY_LOCAL_MACHINE\SOFTWARE\Microsoft\Windows NT\CurrentVersion\Image File Execution Options
Then create a new key and name it utilman.exe.

Then within the utilman.exe key that you just made, create a new String Value and name it Debugger and set its value as:
C:\Windows\System32\SnippingTool.exe
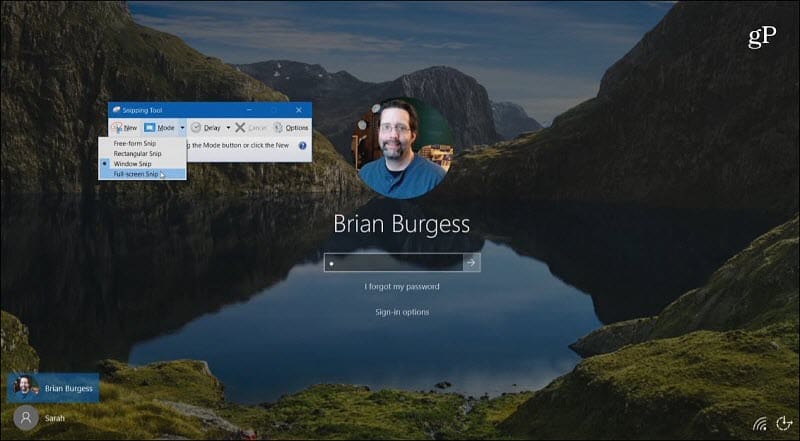
Once you’ve configured the Registry correctly, hit the Windows Key + L to lock your PC. Then hit Enter or swipe up to reach the login screen. From there, select the Ease of Access button in the lower-right corner, and the Snipping Tool will launch. Set it to take a full Windows shot, and after that, make sure to hit the Copy Button or hit Ctrl + C to save it to the Clipboard.
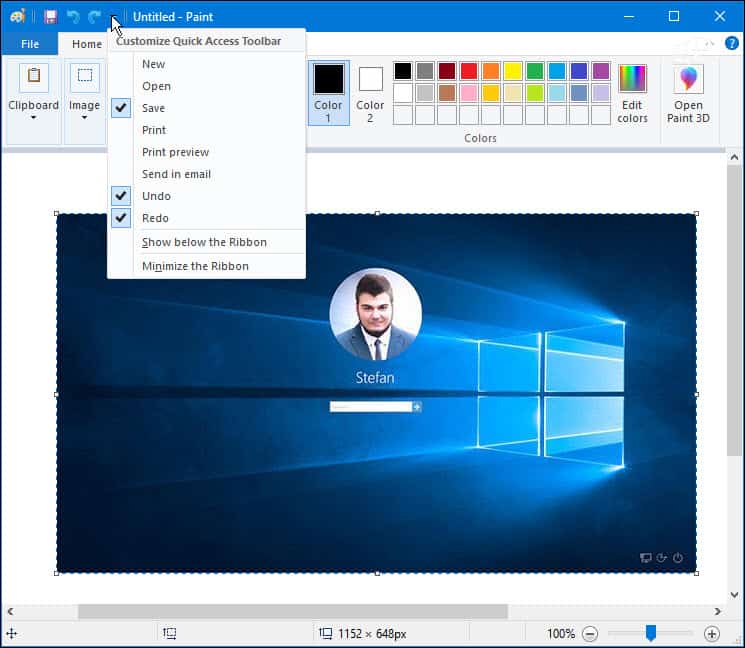
Go ahead and log in, open Paint or another app you want to use, and hit Ctrl + V to paste it in.
Do you use the keyboard shortcuts or built-in utilities like the Snipping Tool for screenshots in Windows 10? Or, do you prefer using a third-party program like TechSmith Snagit? Let us know in the comment section below, or for further discussion on all things Windows and Microsoft, head to our Windows 10 Forums.


Tony
November 10, 2017 at 10:43 am
Hi Brian, I was looking for this workaround, and it worked for my! Thanks
Robert Tillotson
November 10, 2017 at 11:18 am
I have Clipmate installed and since it takes over the clipboard I can’t get this to work without disabling Clipmate. Probably other apps out there interfere too.
Edy M.
November 10, 2017 at 11:36 am
This a very useful tutorial. I’ve always wanted to find an easy way to take a screenshot of the login screen. The only way I knew was to use my tablet’s camera, but the screenshot will always come out slanted no matter what, and on top of that, it’s too much an arduous job.
Now, my frustrations are all gone with this tutorial. By the way, I have started using TechSmith-Snagit about one week-and-half ago and I love it. Making annotations with straight arrows and numbered callouts in a document is now just a breeze.
Charles Brown
November 10, 2017 at 3:08 pm
I use a great little snapshot/screen recorder utility — Faststone Capture — from http://www.FastStone.org.
Inexpensive, shareware with functions galore and a very, very small resource/memory footprint.
Charles
PS I do have the latest version of SnagIt (& Camtasia Studio) but do not have it to auto-start with Windows 10 boot.
Jim Osban
November 13, 2017 at 7:13 pm
I was unable to get this to work. I have win 10 64 bit home. This is what was added [HKEY_LOCAL_MACHINE\SOFTWARE\Microsoft\Windows NT\CurrentVersion\Image File Execution Options\UTILMAN.EXE]
“Debugger”=”C:\Windows\System32\SnippingTool.exe” any ideal
Jim Osban
April 16, 2019 at 6:54 pm
I have disabled my Norton 365, did the registry, now I can pull up snipping tool and even print the login screen but I still can not past from the clipboard. Anything else to try?
r0ckhat
March 22, 2019 at 11:12 pm
This doesn’t seem to work any more.
SnippingTool opens, but is then automatically closed a few seconds later and the registry setting removed.
Heath Larsen
April 16, 2019 at 1:35 pm
Windows Defender has been updated to block this as attackers could exploit this as well.
Windows Defender will remove will close Snipping Tool immediately on opening and remove the registry entry.
If you still want to do this, open ‘Windows Defender Security Center’, go to the ‘Virus & Threat protection’ tab and disable ‘Real-time protection’.
Now the Snipping Tool will remain open and your registry key will persist.
REMEMBER TO REMOVE THE REGISTRY KEY AFTERWARDS AND RE-ENABLE REAL-TIME PROTECTION.
Shawn
May 7, 2019 at 3:21 am
it seems now, you must turn off windows defender real time virus and threat protection, and it works fine. BUT, the real kicker is that windows 10 doesn’t let you copy anything to your clipboard if you’re on your lock screen or login screen. welp, so much for this anymore.
Edy M.
May 7, 2019 at 1:15 pm
Screenshot for the login screen doesn’t work anymore according to this article. After clicking “Enter” and then Ease of Access, the Snipping tool doesn’t show anymore. Something has definitely changed with all the Cumulative or Feature Updates issued since the last time this article was written in 2017.
My understanding is that this article needs to be revised. Sorry to put it so bluntly.