Windows 10 Tip: How to Take a Screenshot Using Keyboard Shortcuts

If you don’t want to install third-party software for screenshots, here’s a look at some keyboard shortcuts in Windows 10 to achieve the results you need.
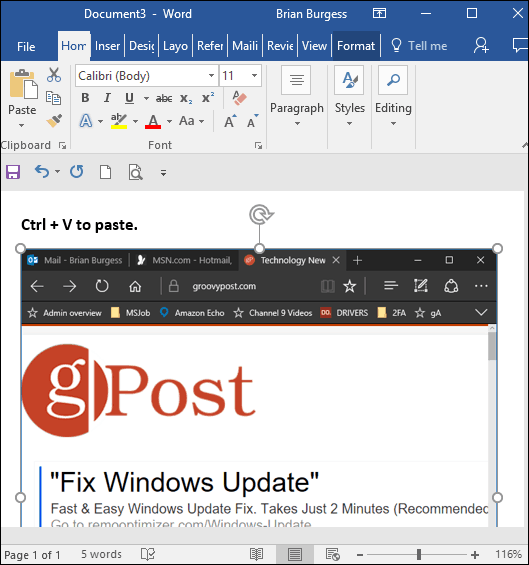
In previous versions of Windows, you can take a screenshot by using the PrtScn key. This option still works in Windows 10, which will take a shot of everything on the screen, copy it to the Clipboard, and then allow you to paste it into a program such as Microsoft Word.
However, if you have a multiple monitor setup, it can be annoying when you just need a specific window or section of your screen.
Windows 10 Screenshot Keyboard Shortcuts
If you don’t care to install third-party software, here’s a look at some different keyboard shortcuts for taking shots in Windows 10 to achieve the results you need.
- Windows Key + PrtScn: Windows 10 will take a screenshot and save it as a PNG file in the default Pictures folder in File Explorer.
- Alt + PrtScn: This is an excellent option if you just want to take a shot of an individual window on your screen.
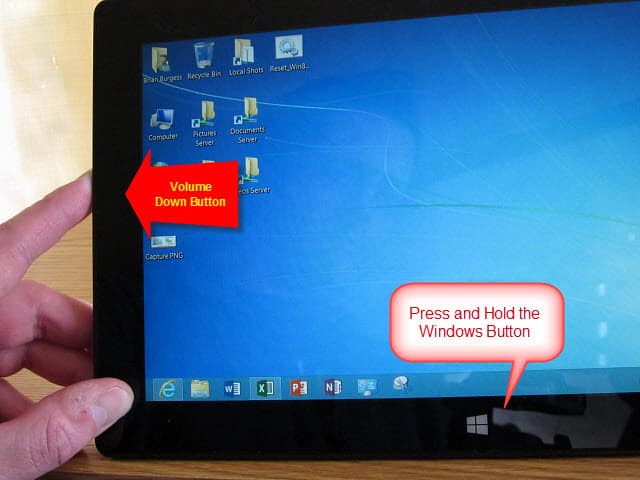
Windows Key + Volume down: This one is meant for tablets running Windows 10, such as the Microsoft Surface.
Other Shortcuts to Try
If you can’t get the ones above to work, some laptops and other devices require a modified key combo. For instance, Windows Key + Ctrl + PrtScn is one. Also, Windows Key + Fn + PrtScn is another one that’s required on some devices. Check the manufacturer’s website or manual to find out which one to use.
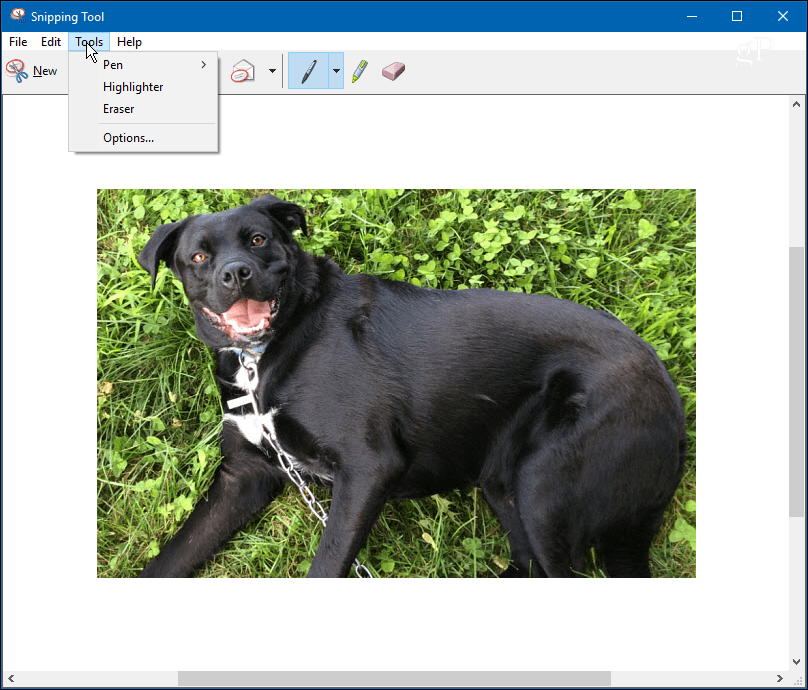
The Snipping Tool
While this isn’t a keyboard shortcut, you might want to take a shot of a specific region of your screen. To do that, enter the Snipping Tool (an often-forgotten tool included since Vista and Windows 7).
To access it, hit the Windows Key and type: snipping tool and select the results from the top. Then choose New from the menu and drag the cursor over the screen area you want to capture. The captured screenshot will appear in the full Snipping Tool program. It has basic editing tools and is a good option for a quick shot if you need one.
If you need to take screenshots on your Windows 10 system and don’t want to install third-party software for the job, the built-in tools will get the job done.
Be sure to check out our complete list of Windows 10 Keyboard Shortcuts. You might be surprised, but the list continues to grow, even in 2019.


Jean-Mi_44
January 8, 2017 at 6:41 am
Good shot ! Indeed !
Thank you Brian
Jean-Michel
krazykat
January 8, 2017 at 8:28 am
I use the Full shot program. Has many options, best one is very easy way to add text or drawings to any screen capture. Different screen captures can also be combined.
campkid3
January 8, 2017 at 11:10 am
In the WINDOWS Accessory group is the Sniping Tool – I put it on my Taskbar for ease when I need to copy something. It has four selections for letting you select exactly how you want to copy a section on your screen. It also has a pen that lets you add some notes if needed; has a highlighting tool which I really like; has a eraser to erase your notes or high lighting; and also a couple of other niffy tools and it has selections for how to save it. Try it out.
PaulH
January 17, 2017 at 1:49 pm
Using a Surface Pro 3 I use the Winows Key + Fn + Space key. Then paste into word, paint etc.