How to Screen Record with Snipping Tool on Windows 11

You may need to record steps on your PC and show them to someone else. Learn how to screen record with Snipping Tool on Windows 11 here.
Microsoft introduced the Snipping Tool on Windows Vista and continues to modernize and update the screenshot utility with each new release. On Windows 11, the Snipping Tool is more useful than ever, thanks to the addition of a screen recording ability.
Instead of only taking screenshots with the Snipping Tool, you can use it to record your screen. Using it is straightforward, and when the screen record is done, you can save it or send it to someone.
While it doesn’t allow cropping or edits, it’s free and convenient. We’ll show you how to screen record with the Snipping Tool on Windows 11 below.
How to Screen Record with Snipping Tool on Windows 11
If needed, you can use the Snipping Tool to record a select app or section of your screen or the entire desktop. Once you have the recording, you can then preview, save, or share it with others. It’s also worth noting that the recording feature doesn’t support audio.
To screen record with Snipping Tool on Windows 11:
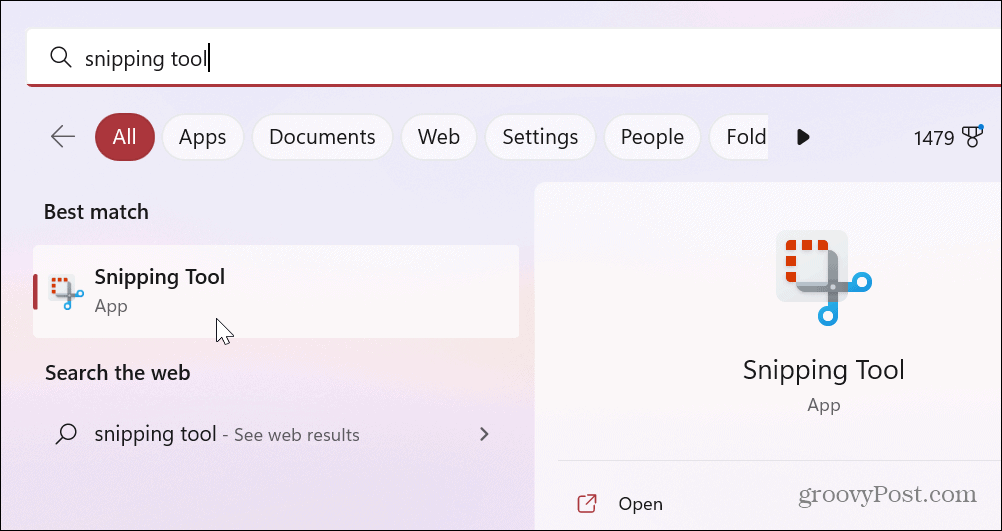
- Open the Start menu.
- Type Snipping Tool and click the Snipping Tool app under the Best match section.

- When the Snipping Tool launches, select the Record button, then click the New button.

- Drag the outline to choose the area you want to record.

- Once you have the section you want to record selected, click the Start button.
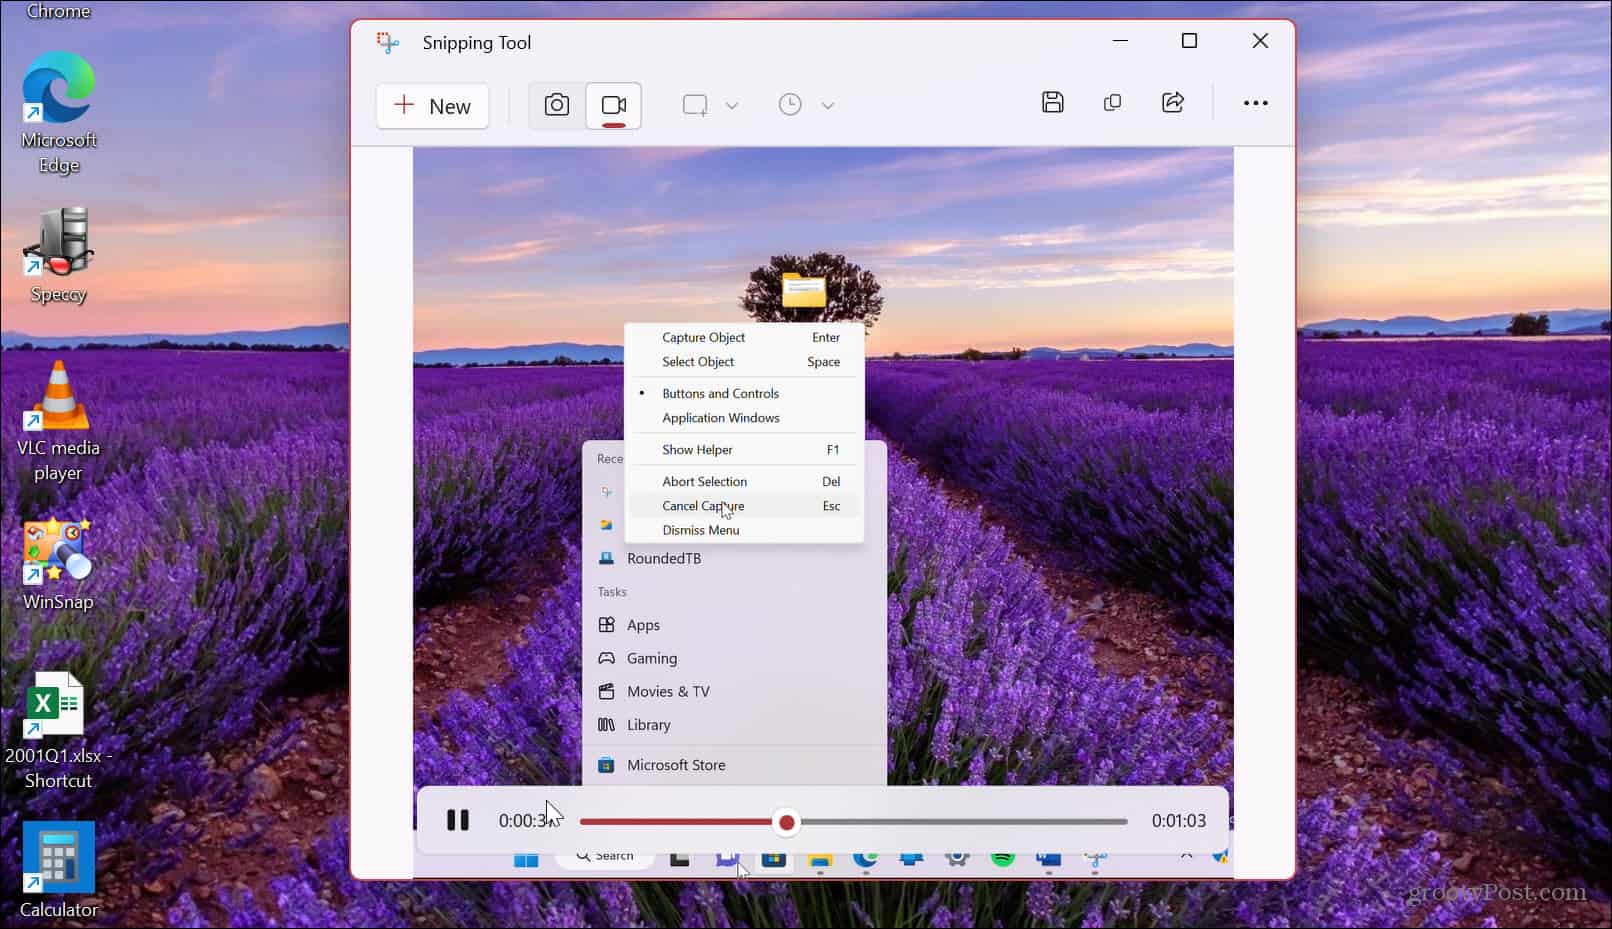
- The Snipping Tool will count down from three, and you can click the items for the steps you want to record. You can see the time of the recording at the top.

- A preview of your recording will be available in the Snipping Tool. You can review what you have using the basic playback controls at the bottom.

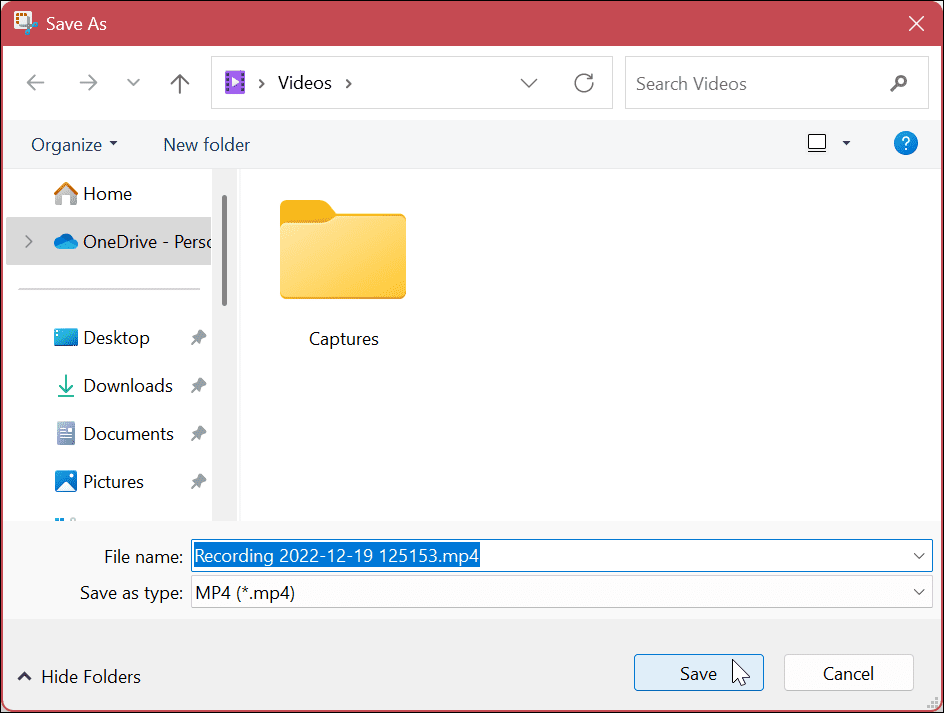
- If you are satisfied with the screen recording, click the Save button in the top right corner.

- Navigate to the location you want to save the screen recording and click Save.

- The video will be saved in MP4 format, and you can use any compatible video player to view it. Having it saved in a standard format allows you to share it with people who don’t have the Snipping Tool installed. You can also send it to Mac users.


If you don’t want to save the recording, you can copy it and paste it into a different app like Paint. You can also share it directly from the app by clicking the Share button in the upper right corner next to the Save button.
Recording Your PC on Windows 11
The ability to record your screen on Windows 11 is helpful in many situations. Perhaps you need to share the video that includes steps the user needs to use for accomplishing a task, or you need to share it with the IT department. Whatever the reason, the Snipping Tool on Windows 11 is built in and, best of all, it’s free.
It doesn’t have the flashy features you get from SnagIt or the professional screen recorder Camtasia, but it’s a straightforward way to explain the steps to friends or colleagues.
The Snipping Tool is a “no frills” screen capture solution. However, it doesn’t always work as expected. If you experience problems, learn how to fix Snipping Tool not working. In addition, you might also be interested in fixing the keyboard shortcut Windows + Shift + S not working.
Your PC isn’t the only thing you can record. For example, check out screen recording on Android or how to screen record on a Chromebook. We’d be remiss if we didn’t mention Apple, too. Learn how to take a screenshot of a Mac or learn how to take a screenshot on iPhone or iPad.


Greg Andrews
January 9, 2023 at 9:33 am
You might want to add that this is only available if you have the Windows 22H2 update.