Windows Snipping Tool Not Working: 5 Fixes

The Snipping Tool is a built-in utility on Windows that sometimes stops working. Here are five fixes in case the Windows Snipping Tool stops working.
The Snipping tool is built into Windows 11 and allows you to create and edit screenshots. However, if you take a lot of screenshots, the Snipping Tool not working puts a damper on your workflow.
The Windows Snipping Tool is a quality screenshot utility that takes up little disk space and is easy on system resources. You can launch it by hitting the Windows key + Shift + S keyboard shortcut. It’s not perfect, though; like any built-in Microsoft utility, it has flaws.
If you experience an issue with the Windows Snipping Tool not working, here are five fixes you can use to get it working.
Fix Windows Snipping Tool Not Working
Several things can go wrong with the Snipping Tool and cause it to malfunction, crash, freeze up, or stop working. Or, you might get a “Snipping tool not working” error on Windows 11. So, use the following steps to get it working again.
1. Disable Focus Assist
The Focus Assist feature is a great way to get things done distraction-free. It blocks notifications and stops apps from launching – including the Snipping Tool.
To stop Focus Assist from blocking the Snipping Tool, do the following:
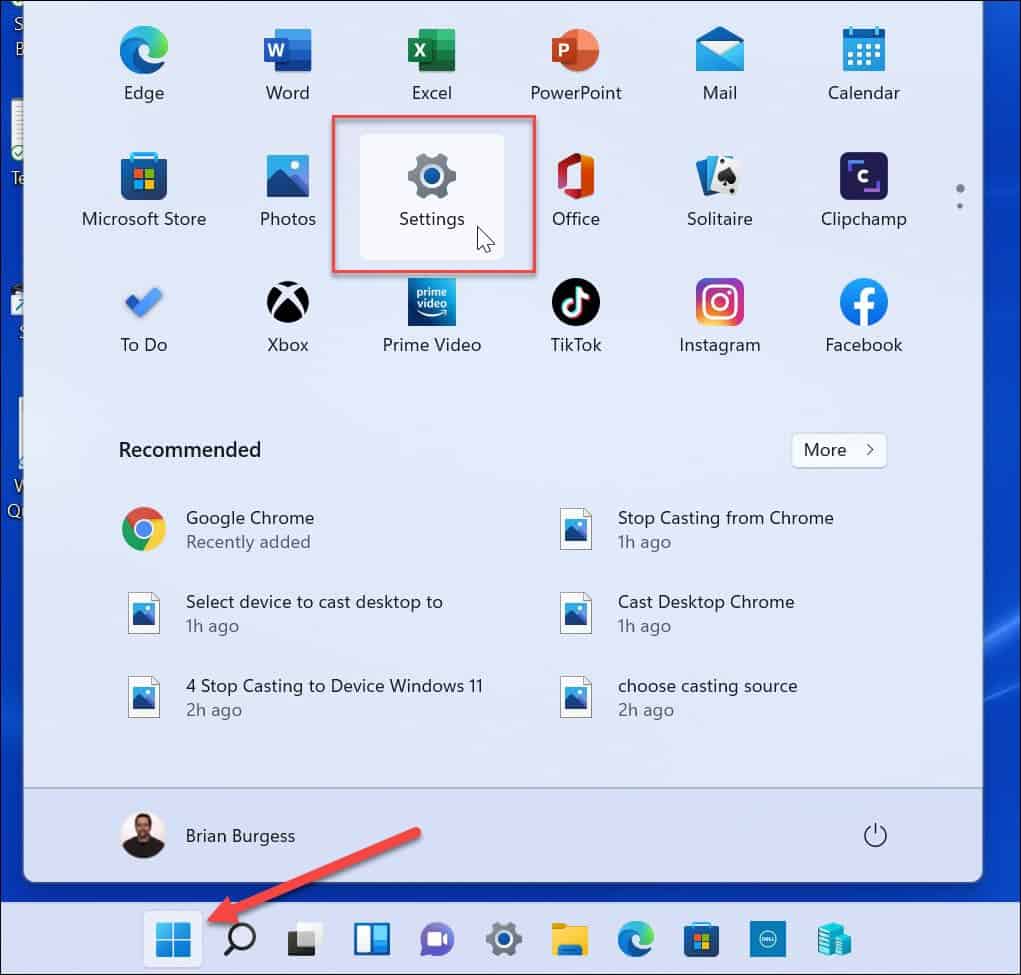
- Click Start or hit the Windows key to launch the Start menu and select Settings.

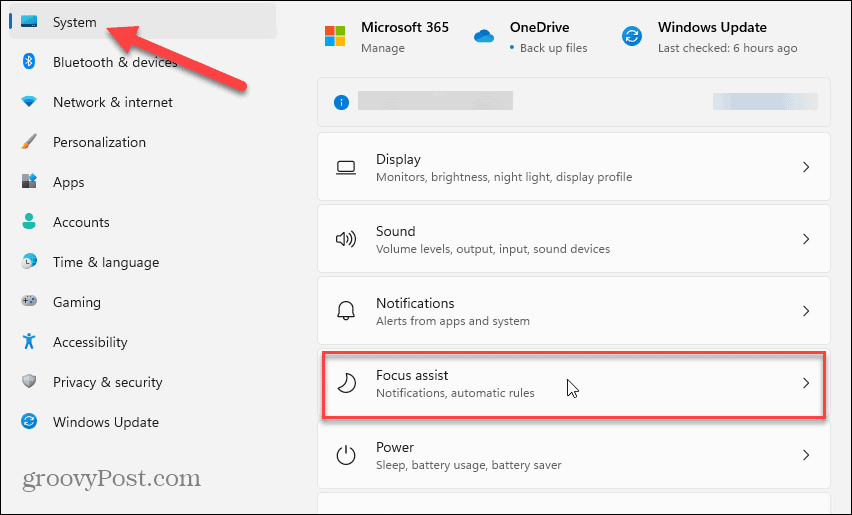
- When Settings opens, click on System > Focus Assist.

- Select the Priority only option and click the Customize priority list link below it.

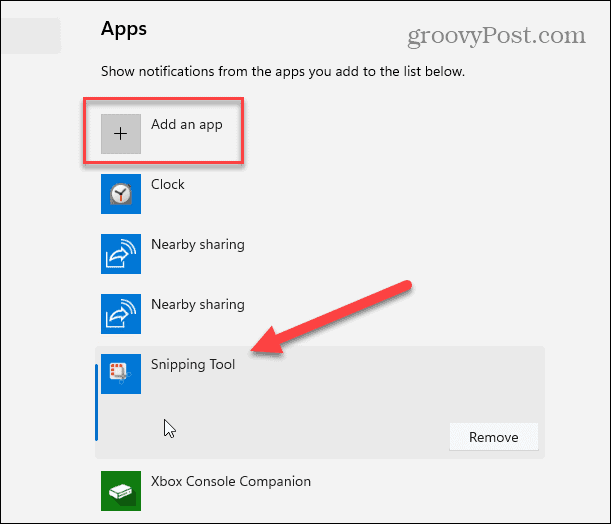
- On the Focus assist page, scroll down to the Apps section and click Add an app.
- Choose the Snipping Tool from the list of apps that appears, which will display in the Priority list.


After adding the Snipping Tool to the Priority list, try opening the Snipping Tool and see if it works.
2. Reset or Repair the Snipping Tool
If you’re still having problems with the Snipping Tool, you can try to repair or reset the app in its App settings.
Use the following steps to repair or reset the Snipping Tool:
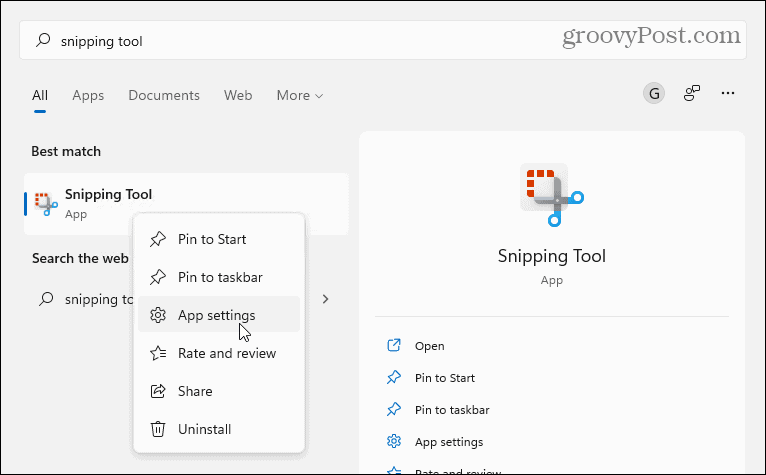
- Hit the Windows key on your keyboard, type snipping tool, and right-click the top result under Best match.
- Select App settings from the context menu that appears.

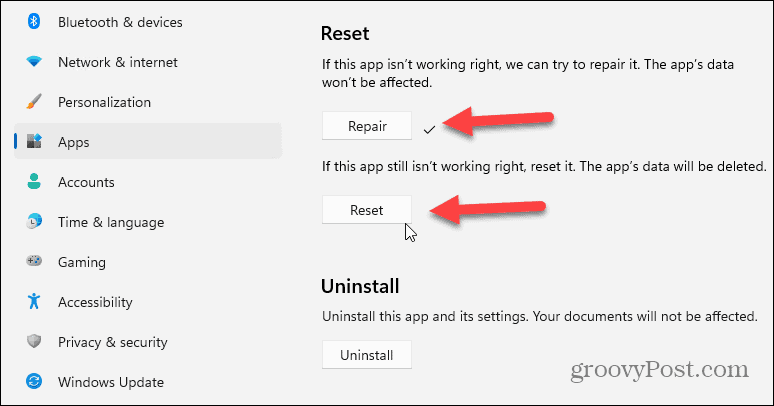
- Scroll down the page to the Reset section and try a repair first — click the Repair button.
- If the Snipping Tool isn’t working after a repair, try resetting the app by clicking the Reset button.

3. Reinstall Snipping Tool
If an app repair or reset doesn’t work, you can always reinstall the Snipping Tool.
To reinstall the Snipping Tool, use the following steps:
- Open Start > Settings > Apps > Installed apps.
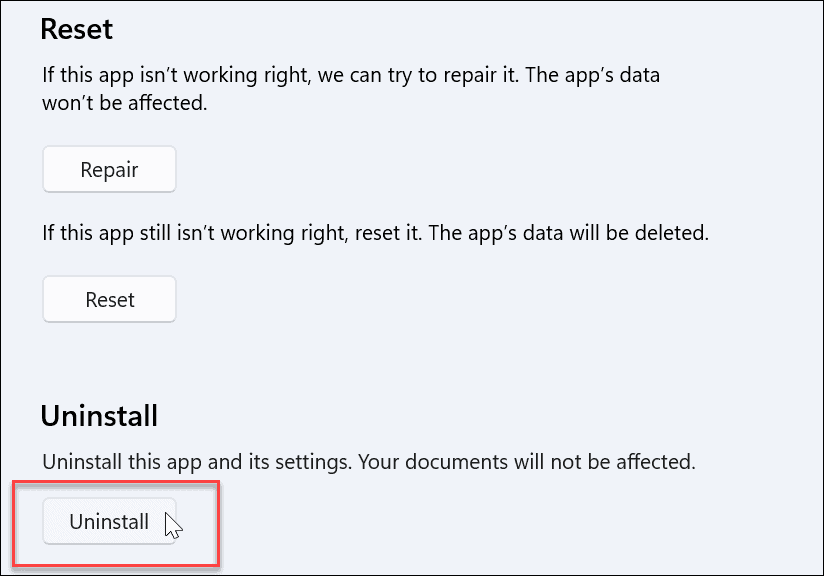
- Type snipping tool into the search apps field, click the three-dot menu and select Advanced options from the menu.

- Scroll down past the Repair and Reset section shown above and click Uninstall twice to verify.

- After the uninstall is complete, open the Microsoft Store app.
- Search for snipping tool and click the Get button next to it to reinstall a fresh and updated version of the Snipping Tool.


After downloading and installing the Snipping Tool, see if it’s working. Installing a fresh and updated version should get it to work.
4. Try a Clean Boot
Another reason the Snipping Tool isn’t working could be interference from third-party apps – including anti-malware software suites. When you clean boot Windows 11, it only uses minimal startup apps and drivers.
To clean boot Windows 11, do the following:
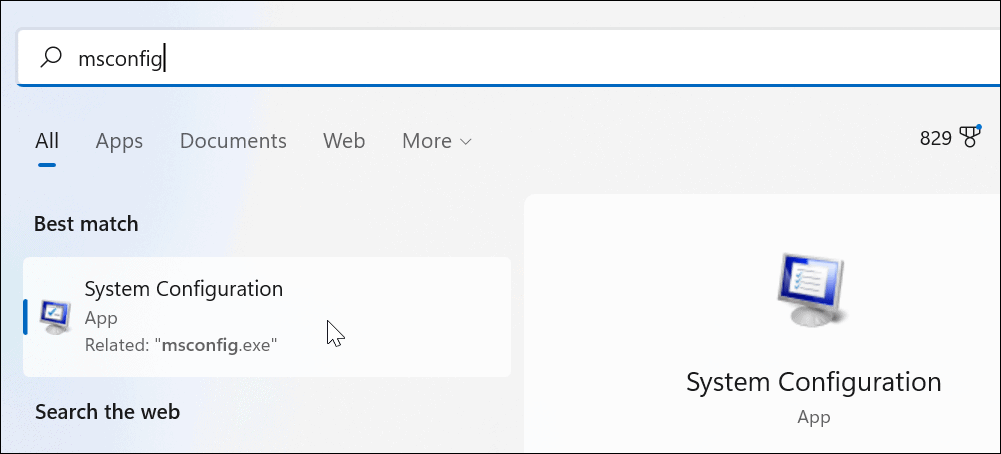
- Click the Start button or press the Windows key to bring up the Start menu.
- Type msconfig and choose the top result under Best match.

- Click the Services tab at the top of the System Configuration window.

- Check the Hide all Microsoft services box and then click the Disable all button.

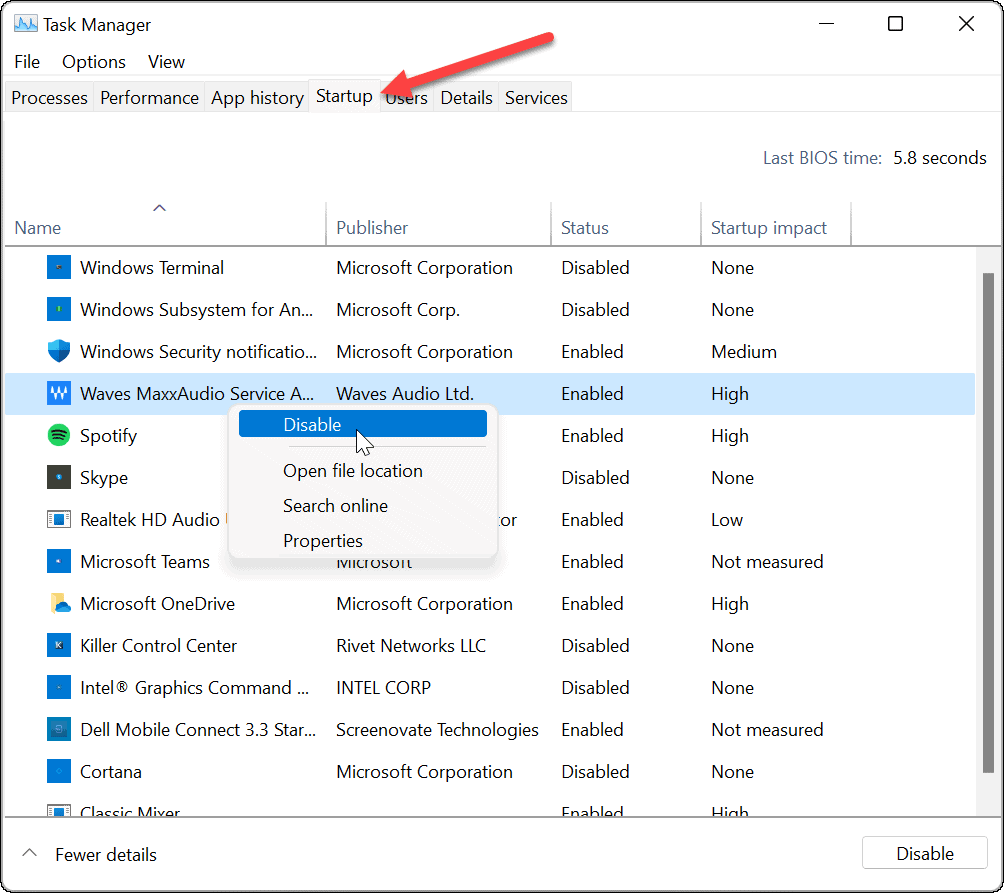
- Click the Startup tab and select the Open Task Manager link.

- Click the Startup tab and Disable every app in the list.


After that’s complete, restart Windows 11 to initiate the clean boot. After logging in, check to see if the Snipping Tool is working.
5. Run a DISM and SFC Scan
Problems with Windows system files could cause the Windows Snipping Tool not working issue. You can run a System File Checker (SFC) scan and Deployment Image Servicing Management (DISM) scan to fix the problem. Each scan will find and replace missing or corrupt system files.
To run an SFC and DISM scan of your drive, follow these steps:
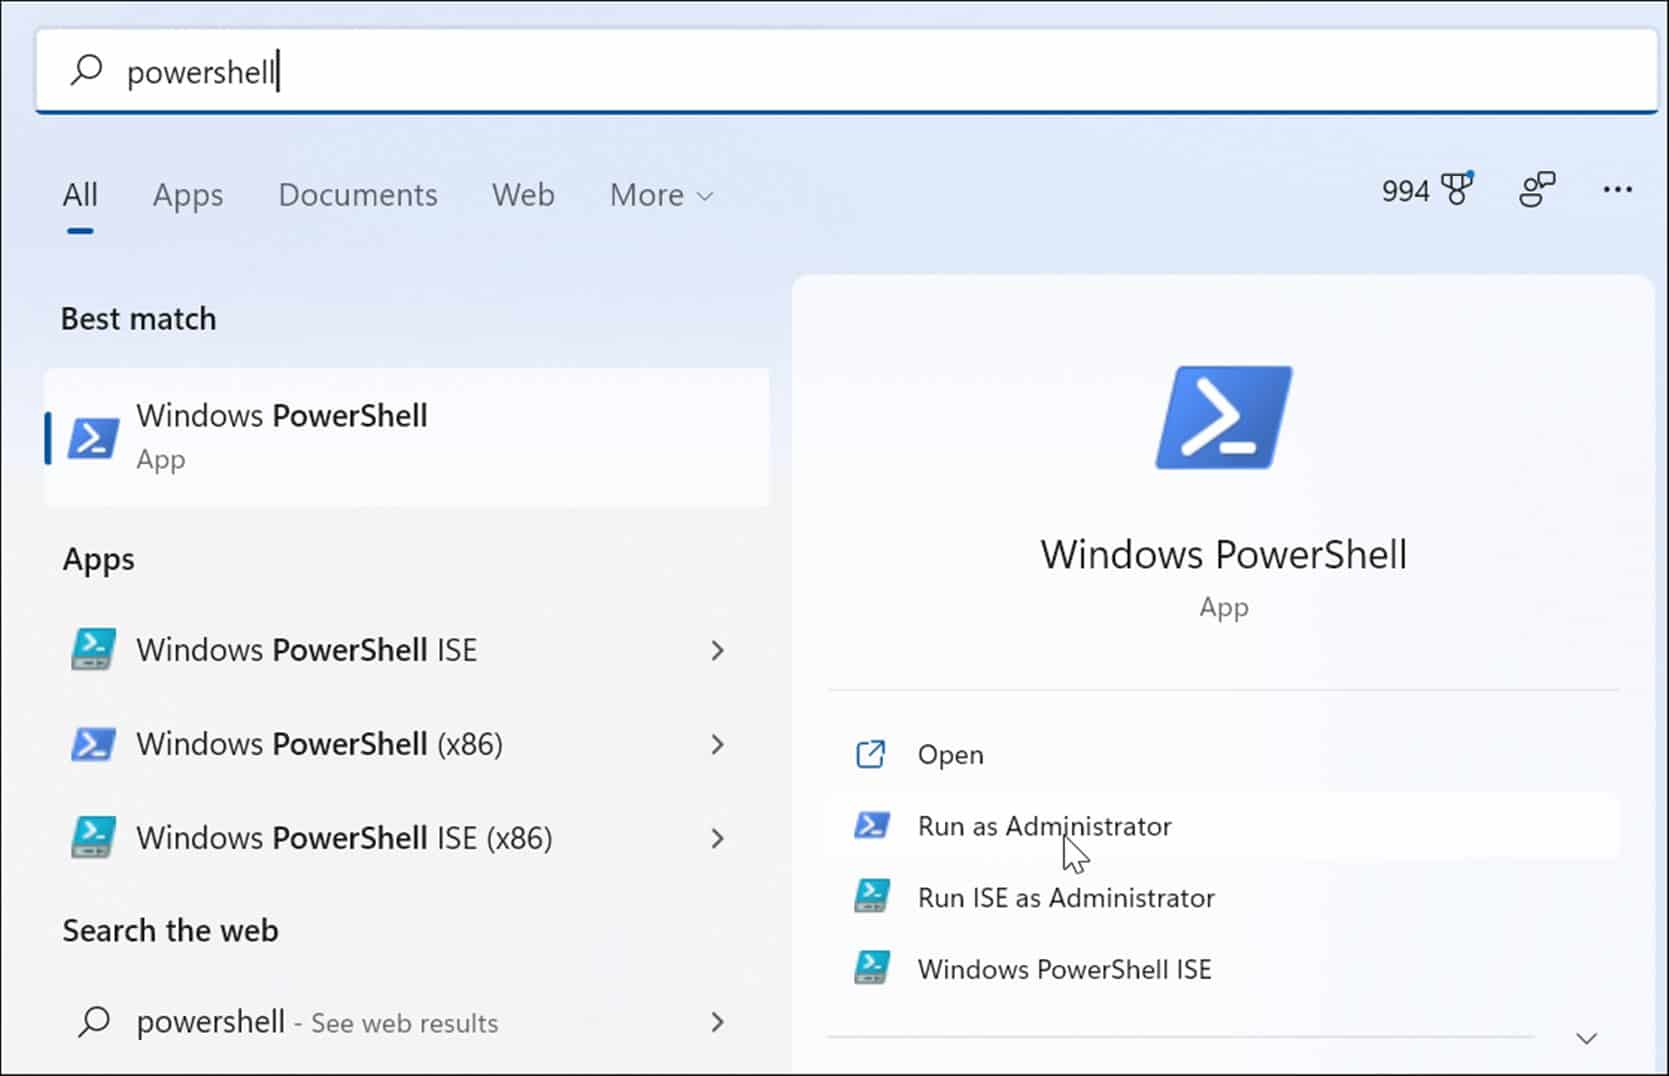
- Click the Start button and search for powershell.
- Select the Run as Administrator option on the right side.

- Run the following command and hit Enter.
sfc /scannow

- After the SFC scan completes, run a DISM scan by running the following command.
DISM /Online /Cleanup-Image /RestoreHealth

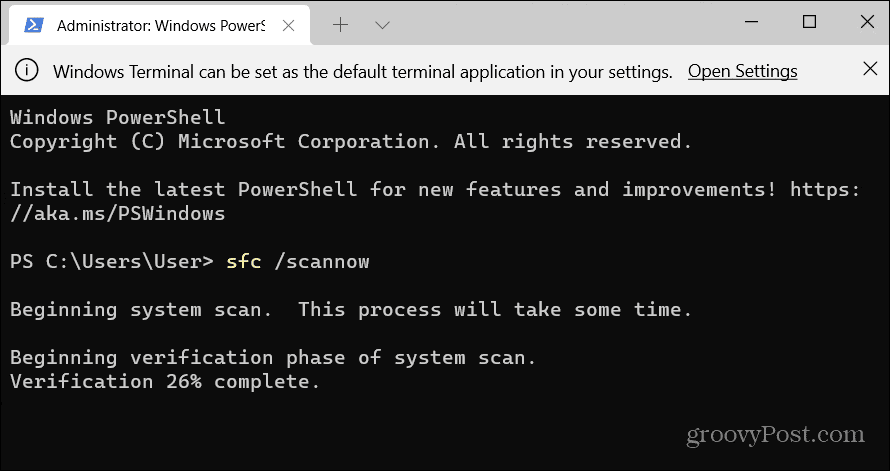
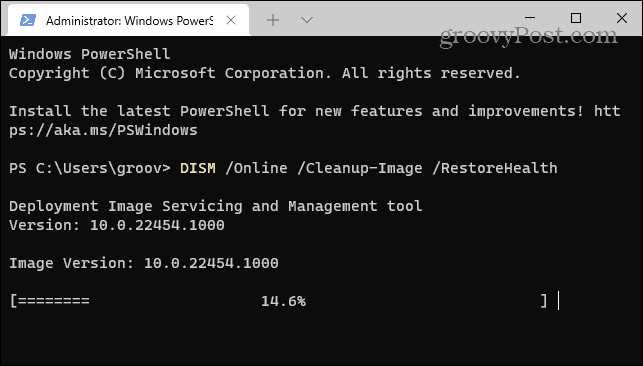
Note that these scans can take a while to run. So don’t close out of the terminal until the scans are complete.
Taking Screenshots on Windows 11
If you’re having issues with the Snipping Tool, the troubleshooting steps above should get it working again. You can reset Windows 11 as a last resort if all else fails. Just make sure to do a complete system backup first. Then you can use the system image to recover your PC.
That’s a lot of work to get the Snipping Tool working, though. Of course, you can always use a third-party screenshot option like Snagit from TechSmith or a free solution like Greenshot for basic screenshot needs.
For more about screenshot options, check out how to take a screenshot on Windows 11.


