Network Sharing Not Working on Windows 11: 6 Fixes

The ability to share files among Windows PCs is essential but may not work. So, here’s how to fix network sharing not working on Windows 11.
Sharing files among other Windows PCs on your network is an essential feature. However, sometimes you’ll experience an issue with network sharing not working on Windows 11.
The good news is there are fixes you can use to regain the function. Typically, you’ll have misconfigured system settings, a lack of permissions, or problems with hardware or with Windows itself.
If you’re unsure where to get started, here are six fixes you can try to get network sharing up and running on your Windows 11 PC.
1. Make Sure Network Sharing is Enabled
The network and sharing feature was first introduced on Windows 7 and has remained a part of Windows since, including Windows 11. And a perfect place to start is ensuring that network discovery is enabled.
Note: If you have several PCs running Windows 11, check the following settings on all computers you want to share with.
To Enable Network Sharing on Windows 11
- Press the Windows key and click Settings from the menu. Alternatively, hit the keyboard shortcut Windows key + I to launch Settings directly.

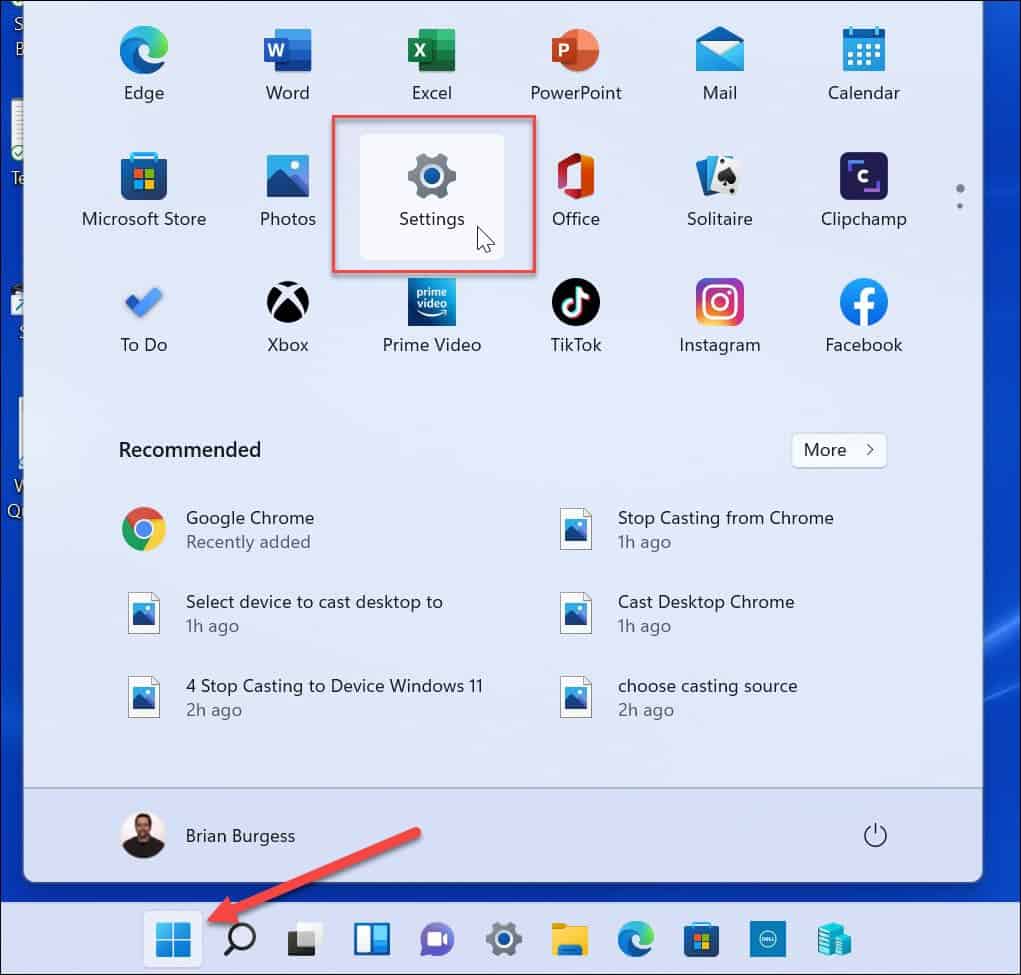
- When the Settings app opens, select Network & internet from the column on the left.
- Click the Wi-Fi or Ethernet option on the right.


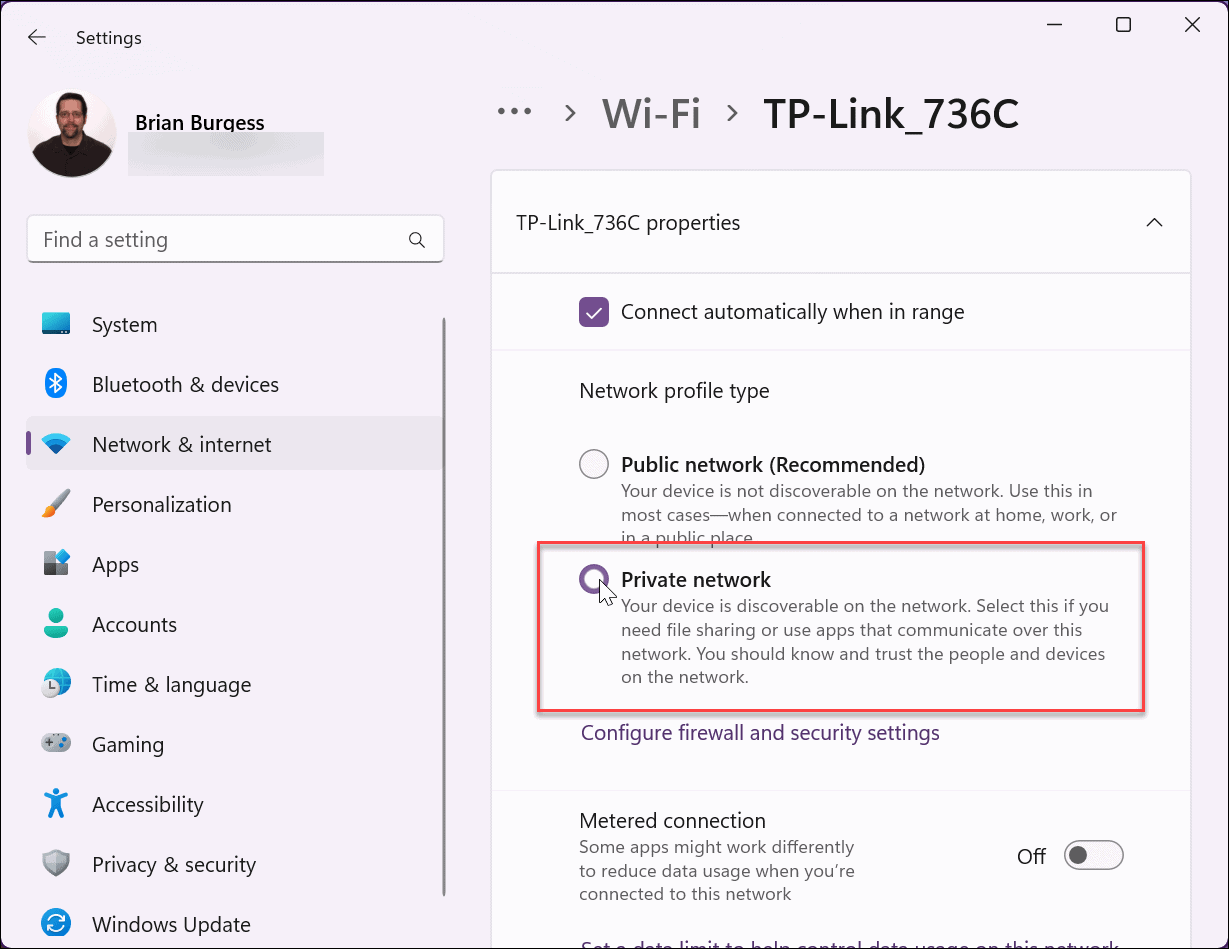
- Select your network properties option on the following screen.


- Next, ensure the Connect automatically when in range box is checked and set to Private network. Following that, you should be able to share files with other devices on that network.

2. Check for Windows Updates
You should always ensure Windows is up to date to get the latest bug fixes, security updates, and features. For example, if a bug in the OS causes the network sharing not to work on Windows 11 issue, a fix from Microsoft might be waiting for you.
While Windows updates in the background, it doesn’t always get everything, and you’ll want to update Windows 11 manually.
- Open Settings > Windows Update and click the Check for updates button.
- Download and install everything it finds.
- You may need to restart your PC to complete the update process.


3. Restart Your PC
Restarting Windows 11 can fix various issues, including network sharing not working. For example, there could be a temporary bug or a problematic app causing the problem.
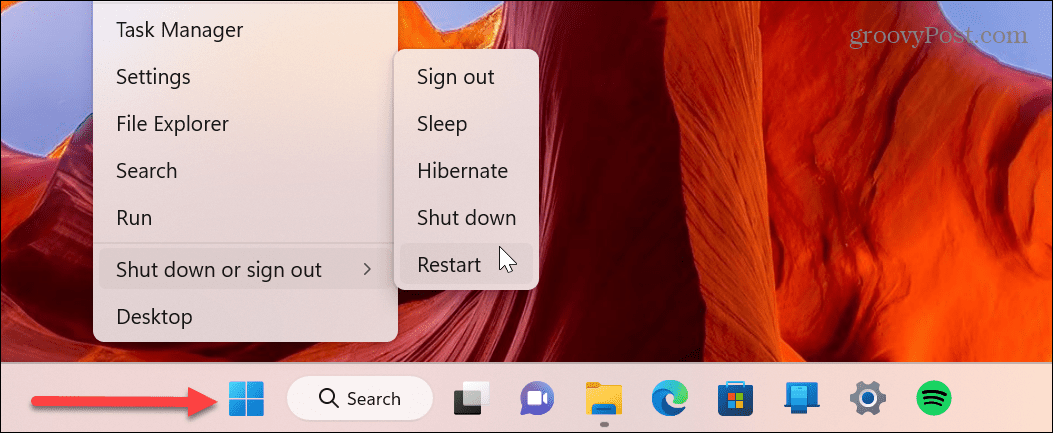
There are different ways to restart Windows 11, but an easy method is to right-click the Start button and select Shut down or sign out > Restart. After the restart, sign in and see if the network and file sharing feature is working.

4. Check and Re-enable Sharing Settings
The network and file sharing feature is enabled by default on Windows 11 for private networks. However, if it’s not working, you can double-check the settings and re-enable them if necessary.
To Verify Network and File Sharing
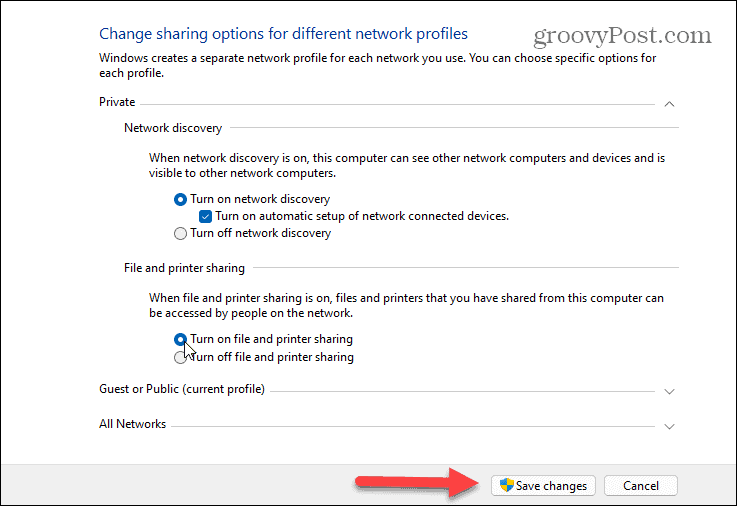
- Press the Windows key, type Advanced Sharing Settings, and click the Manage advanced sharing settings option under the Best match section.


- Expand the Private option and enable Network discovery and File and printer sharing options. You can also turn the setting on and back. After making appropriate settings, click the Save changes button at the bottom.

5. Enable Folder Sharing Option
Another issue you may run into is the folder you want to share doesn’t have the necessary options or permissions.
To Enable Sharing
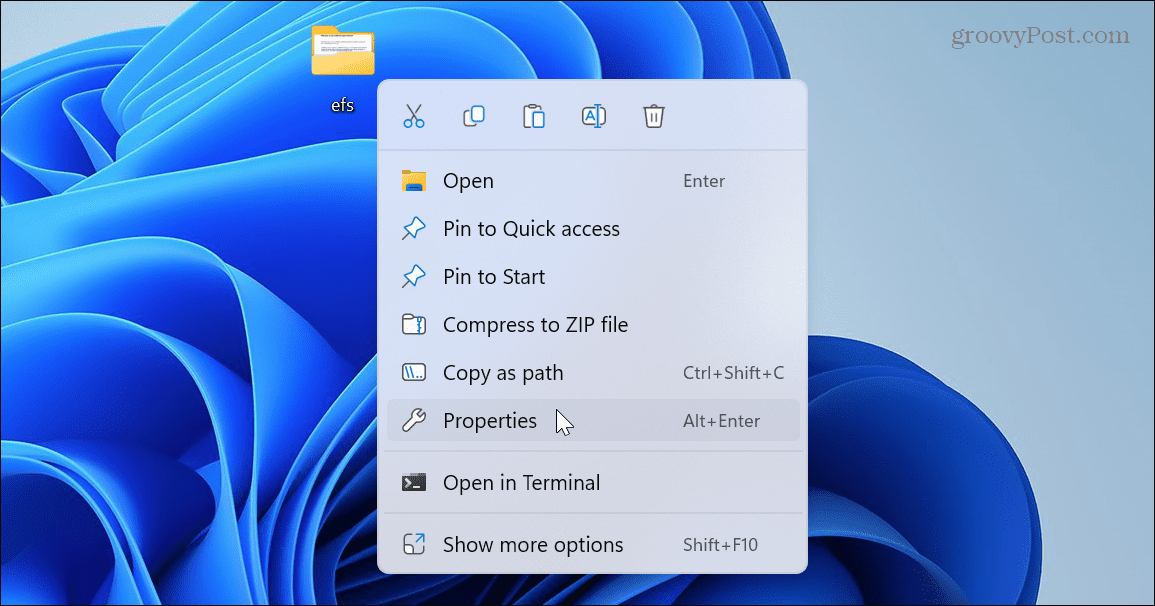
- Right-click the folder with the content you’re sharing and select Properties.

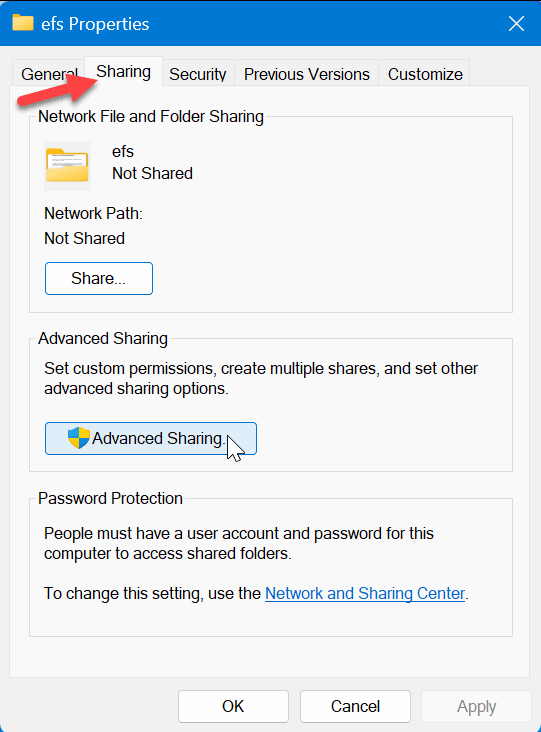
- Choose the Sharing tab at the top and click the Advanced Sharing button.

- Check the Share this folder option and the top and click Apply.


- Click the Permissions button and make sure Everyone has full permission to access it.


- Click the Share button under the Sharing tab on the folder properties screen.


- Select the dropdown menu, choose the Everyone option, and click the Share button.


6. Disable Password Protected Sharing
If password-protected sharing is enabled, the person trying to access a file on the network needs to know the credentials. To avoid that issue, you can disable it.
Using Windows Settings
- Press the Windows key, type advanced sharing settings, and hit Enter.
- The Settings app will open to the Advanced sharing settings section. Ensure Network discovery and File and printer sharing are toggled On.


- Expand the All networks section and turn off the Password protected sharing option.


Using Control Panel
- Navigate to the following path:
Control Panel\All Control Panel Items\Network and Sharing Center\Advanced sharing settings
- Expand the Password protected sharing section, select the Turn off password protected sharing option, and click the Save changes button.


Sharing Files on Windows 11
If you run into a problem with network sharing not working on Windows 11, you can’t share files among Windows PCs. However, you can use one or more of the above steps to get it working again.
1 Comment
Leave a Reply
Leave a Reply


Jason Z
October 21, 2023 at 4:13 am
All of this was informative and entertaining, but it didn’t address the issues that lie beyond the initial setup. What if I had drives shared on my network for movie streaming to my other devices (non-Windows), and the drives stopped showing up on those devices because of usb input changes or whatever? Now my PC shows all the same drives as “shared”, but after rebooting all devices, none of those drives show up on any device other than the PC. How do you reset the shared EVERYTHING to default and start over? The PC seems to only allow for one direction, and when it stops working as i did, you’re SOL….