How to Mount a Disk in Linux
When you insert a USB drive, your Linux PC should mount it automatically. If it doesn’t, use this guide to help you mount drives in Linux.
When you plug a USB drive into your computer, Linux should automatically mount the drive, allowing you to access it. However, there may be times when the disk you want to use isn’t mounted automatically, meaning that you can’t currently use it.
If this happens, the fix isn’t too difficult. You can use your Linux distribution’s terminal app or use GUI tools to fix the problem. By following the steps below, you should have your disk mounted in Linux in no time.
If you have an unmounted disk that you need to use, then here’s how to mount a disk in Linux.
How to Mount a Disk in Linux Using the Disks Utility
If your disk hasn’t been mounted, you can use the GNOME Disks utility to mount or unmount it (if your distribution has it installed). This allows you to see all of the disks connected to your computer.
You can also perform actions on the drive, such as mounting and un-mounting, creating partitions, and repairing the file system. These instructions should work for most Linux distributions with a GUI.
To mount a disk in Linux using the GNOME Disks utility:
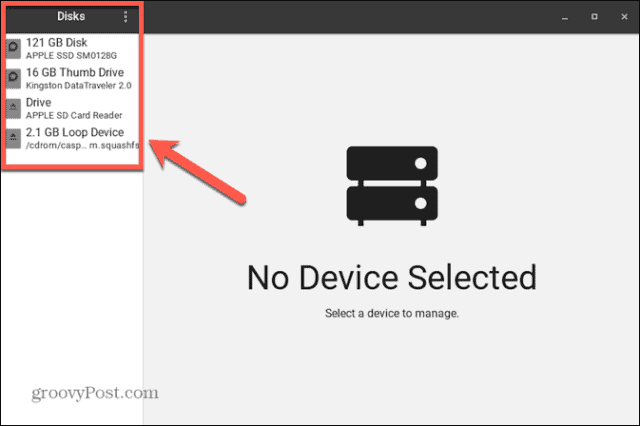
- Open the Disks utility on your Linux PC.

- Select the disk you want to mount from the list of connected disks in the left-hand pane.

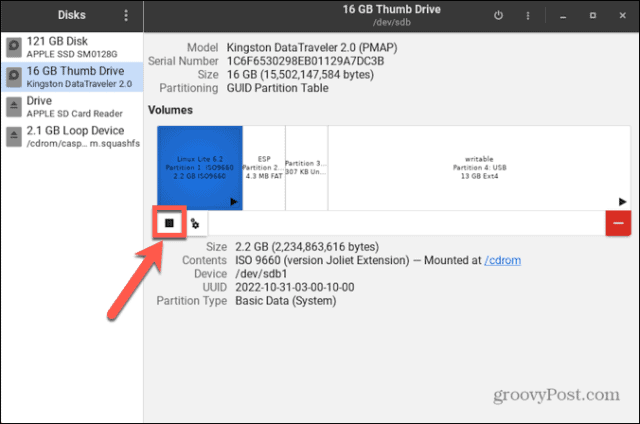
- If the disk or partition is already mounted, you’ll see a Square icon at the bottom of the Volumes information.

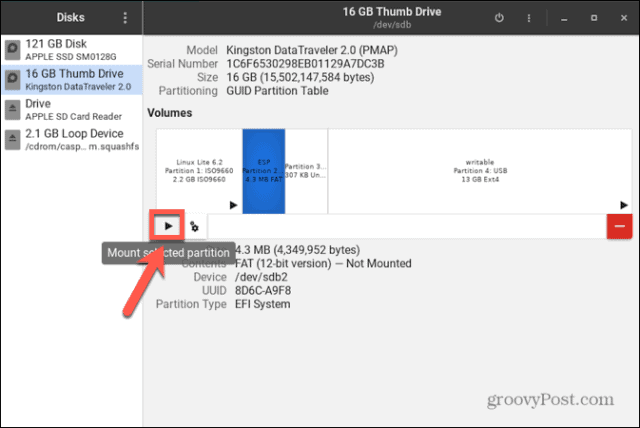
- If the disk or partition is unmounted, you will see a Triangle icon at the bottom of the Volumes information.

- To mount an unmounted disk or partition, click the Triangle icon.
- You’ll see a message that the disk is mounting.
- Once the disk has mounted, the Triangle icon will change into the Square
- To unmount a mounted disk or partition, click the Square icon and the disk will unmount.


How to Mount a Disk in Linux using Terminal
It’s also possible to use the Linux terminal to mount a disk in Linux. In order to do so you’ll first need to identify the disk you want to mount, then create a directory for the disk to mount to. You’ll then be able to mount the disk using the Mount command.
How to Identify the Disk in Terminal
In the terminal, you can use a command to list all available block devices. These represent devices connected to your computer, including any disks. With a little detective work, you can find the block device that represents the disk you want to mount.
To identify your disk in the Linux terminal:
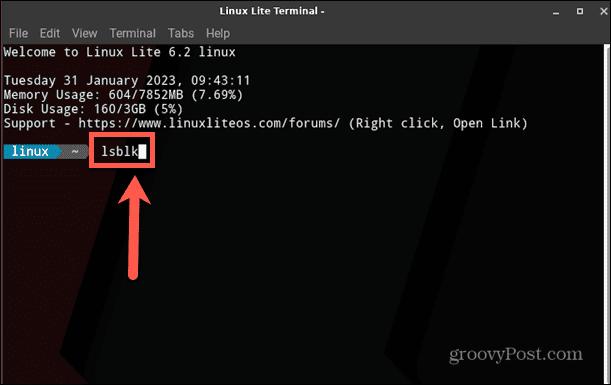
- Open your Linux distribution’s terminal app.
- In the Terminal window, type
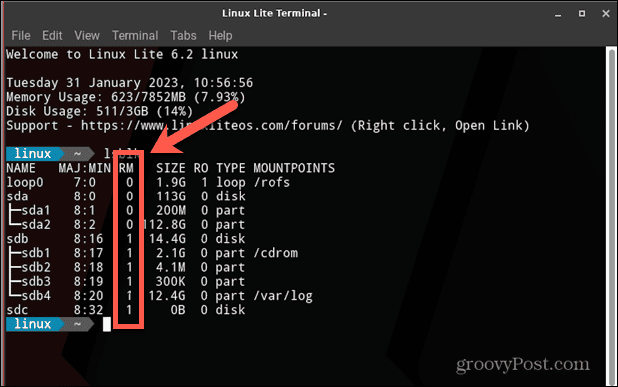
lsblk

- Press Enter.
- You will see a list of block devices.
- The RM column tells you if a device is removable or not. If you’re looking for a removable disk such as a USB stick, the block device will have a 1 in this column. If the disk is not removable, the block device will have a 0 in this column.

- The size is also a good clue as to which block device relates to which drive. If you know the size of your drive, you can use this column to identify which drive is which.
- Make a note of the NAME of your drive; you’ll need this for the next stages.


How to Create a Specific Directory to Mount the Disk
When you plug in a new USB drive, it will usually be mounted in the Media directory. If you would prefer to mount your drive to a specific directory, you can create one in Terminal.
To create a directory in the Linux terminal:
- In the Terminal window, type
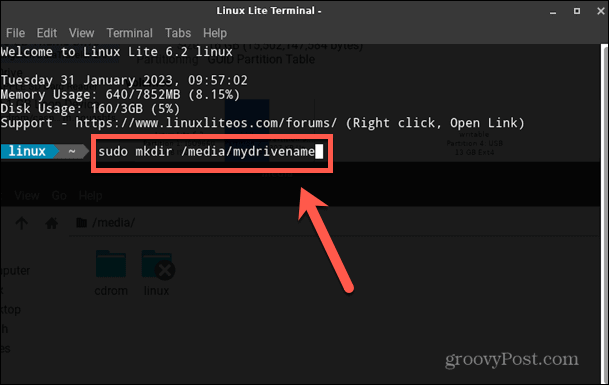
sudo mkdir /media/
- Now type the name you want to give your new directory (for example: mydrivename).
- The full command would now be
sudo mkdir /media/mydrivename

- Press Enter and the directory will be created.
How to Mount the Disk Using the Mount Command
Once you know the block device name for your drive and have created the directory you want to mount it to, you’re ready to mount your disk. You can use the Mount command to do so.
To mount a disk using the Mount command:
- In the Terminal window, type
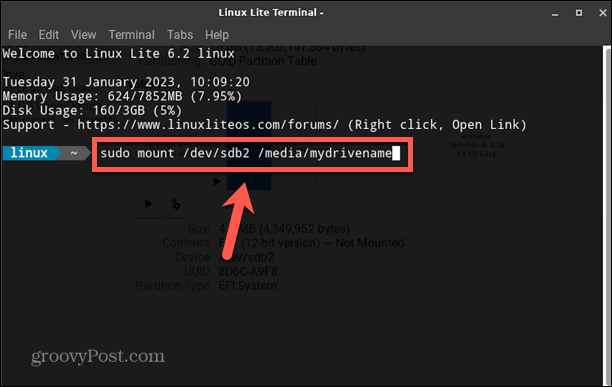
sudo mount /dev/
- Type the name of your drive that you noted down earlier.
- Press Space and type
/media/
- Type the name of the directory you created above.
- Your full command should now look something like this:
sudo mount dev/sdb2 /media/mydrivename

- Press Enter and your drive should mount.
- To check your drive has mounted, type
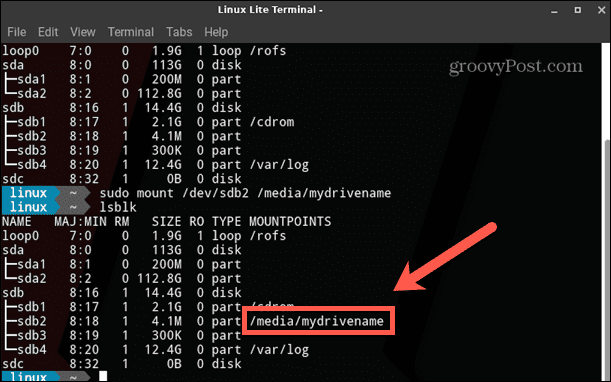
lsblk
- Press Enter and you should see the directory you created listed under Mountpoints for your device. This shows that the drive is now mounted.

- You should also see the drive showing as mounted in the file explorer.


Becoming a Linux Power User
Learning how to mount a disk in Linux is just one way to take more control of your Linux system. There are plenty of other tips and techniques that can help you on your way to becoming a Linux power user.
For example, you can learn how to securely delete files in Linux to ensure that all of the data is completely removed from your system. You can also learn how to empty a file in Linux if you have large files that are taking up a lot of space. And if you want to configure your system, you can learn how to set environmental variables in Linux.