How to Manage Optional Features on Windows 11

Windows 11 comes with a number of optional features for added functionality. If you want to manage optional features on Windows 11, follow this guide.
Windows 11 includes several optional features you can enable to improve your system’s functionality. These include the Windows Subsystem for Linux, Hyper-V, and old .NET Frameworks. Luckily, it’s easy to manage optional features on Windows 11 like these.
However, you’ll note that some features can be enabled directly using the Windows Features page, or by downloading (or configuring) them manually in Settings or the Control Panel.
If you want to manage optional features on Windows 11, here’s what you’ll need to do.
How to Manage Optional Features on Windows 11
To use certain features on Windows 11, like Windows Sandbox, you’ll need to enable some optional features.
To manage optional features through Settings, follow these steps:
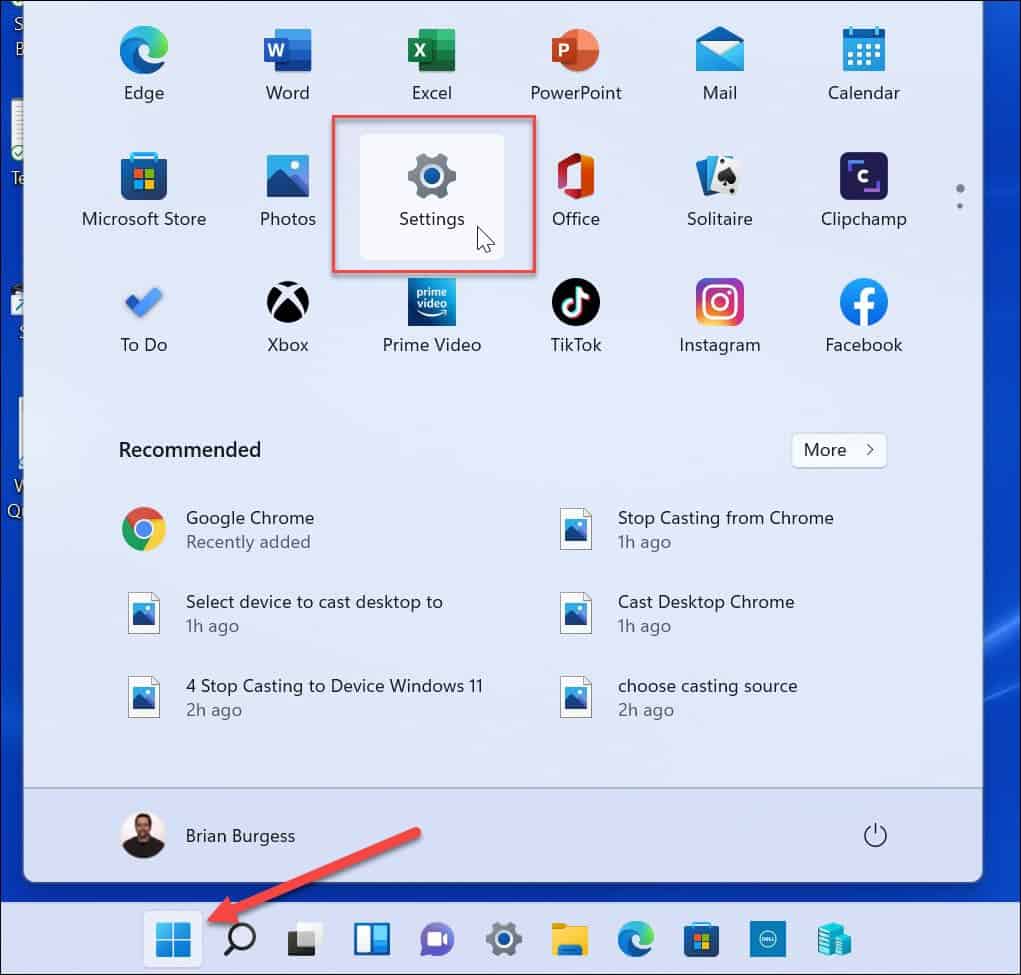
- Open the Start menu and click Settings. Alternately, you can use the keyboard shortcut Windows key + I to open Settings directly.

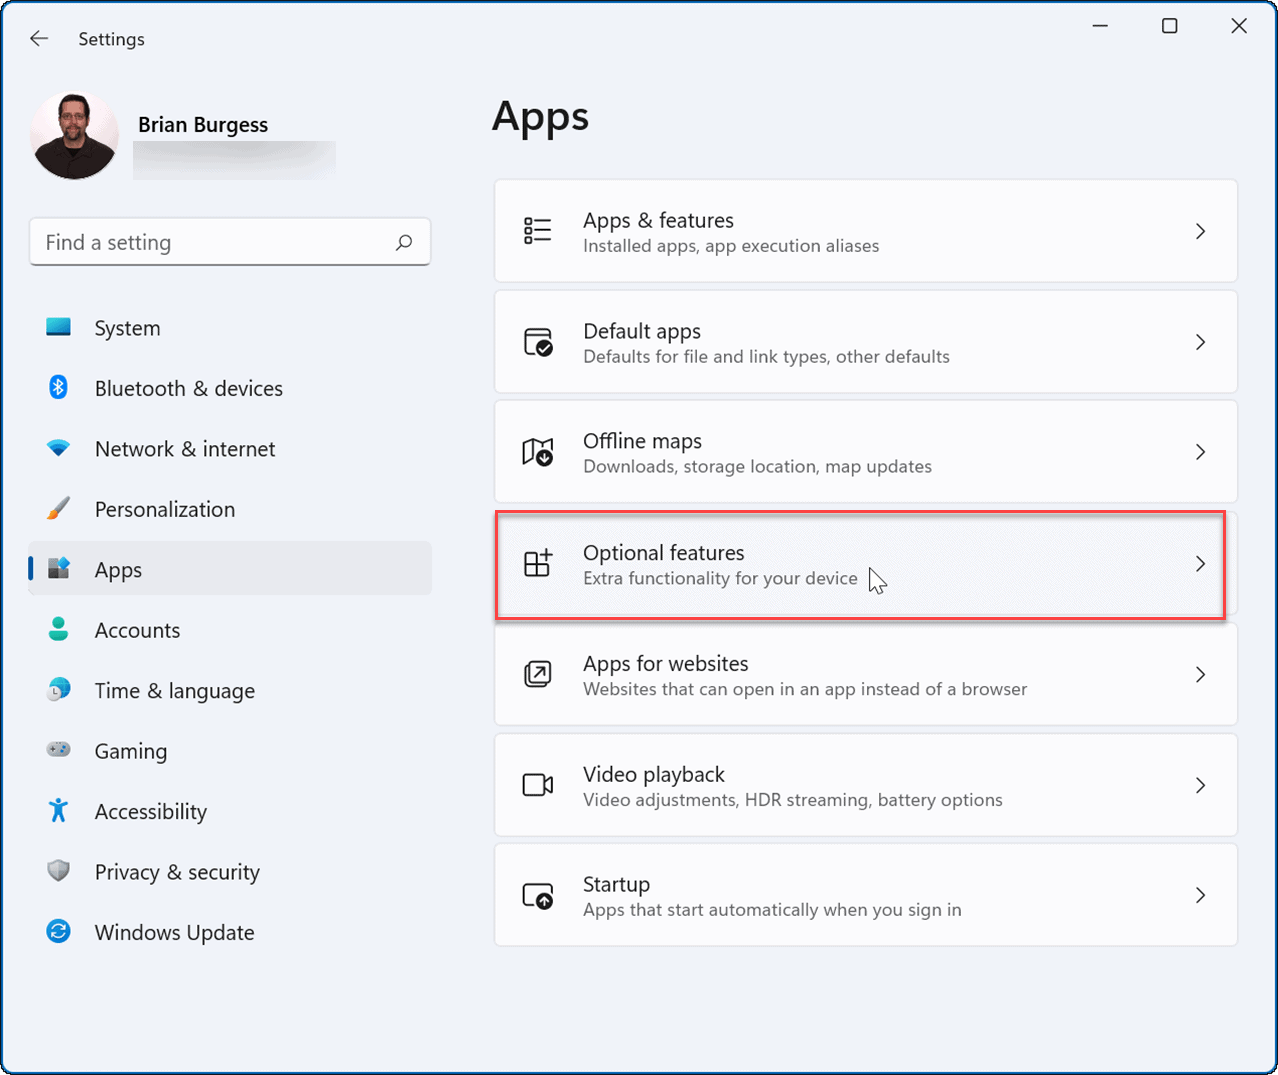
- Click Apps from the lefthand menu.
- On the right, press Optional features.

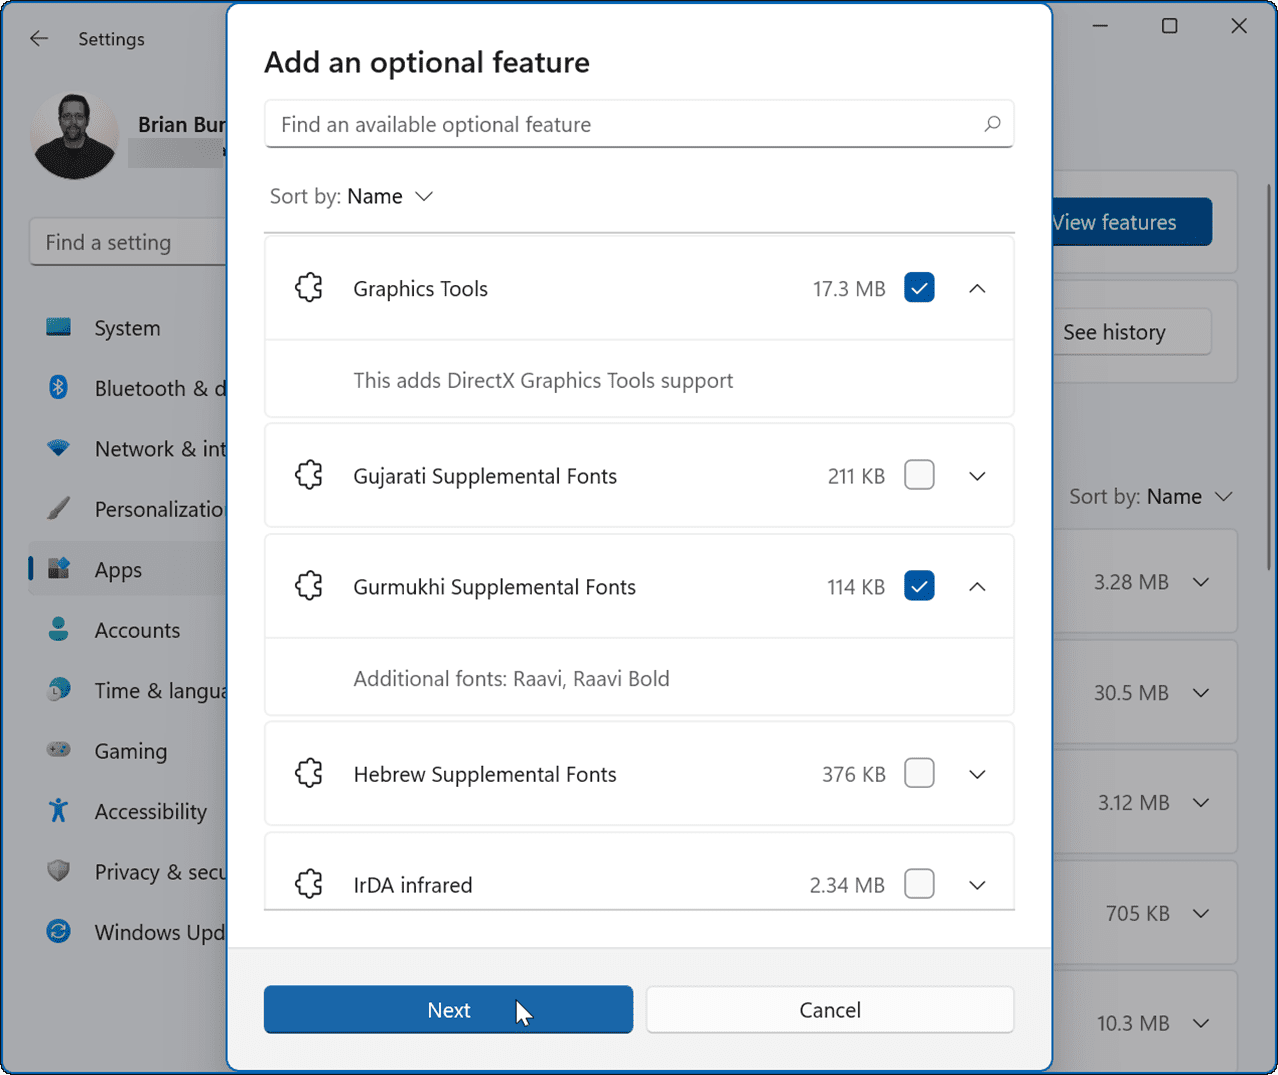
- To install an optional feature, click the View features button next to the Add an optional feature option.

- A list of available optional features you can install appears — check the one(s) you want to add. To view more about a feature, click the down arrow for additional details.
- After selecting the optional feature(s) to add, click the Next button at the bottom.

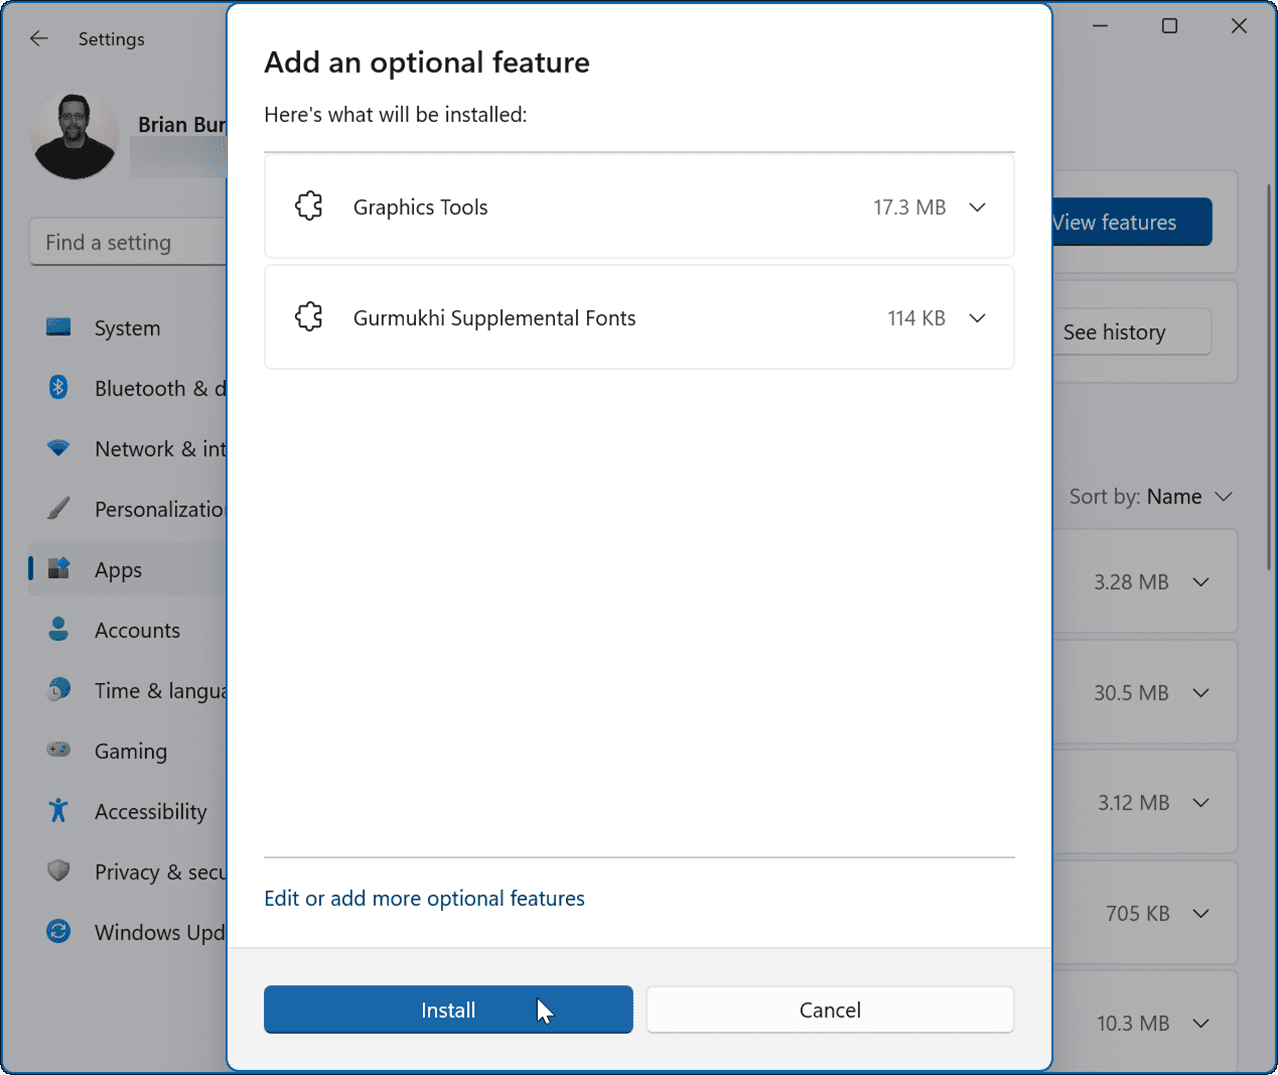
- Verify the feature you want to add and click the Install button.
- If you need to select others, click the Edit or add more optional features button to go back to the previous page and add or remove items.
- You’ll see a progress bar while the feature installs—wait for this to complete.


Note that most optional features added via Settings won’t require a system restart. However, sometimes a Windows 11 restart is required to complete installation.
Managing Optional Features on Windows 11 with Control Panel
While Microsoft is moving a lot of system features from Control Panel to the Settings app, you can still install optional features using it.
To enable optional features via Control Panel, use these steps:
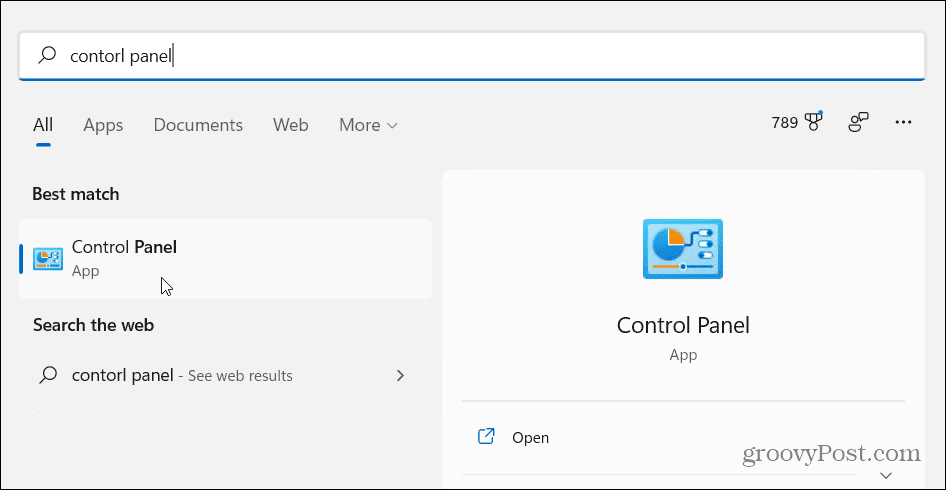
- Click Start or hit the Windows key to open the Start menu.
- Type control panel and click the top result.
- When Control Panel opens, click on the Programs and Features option.
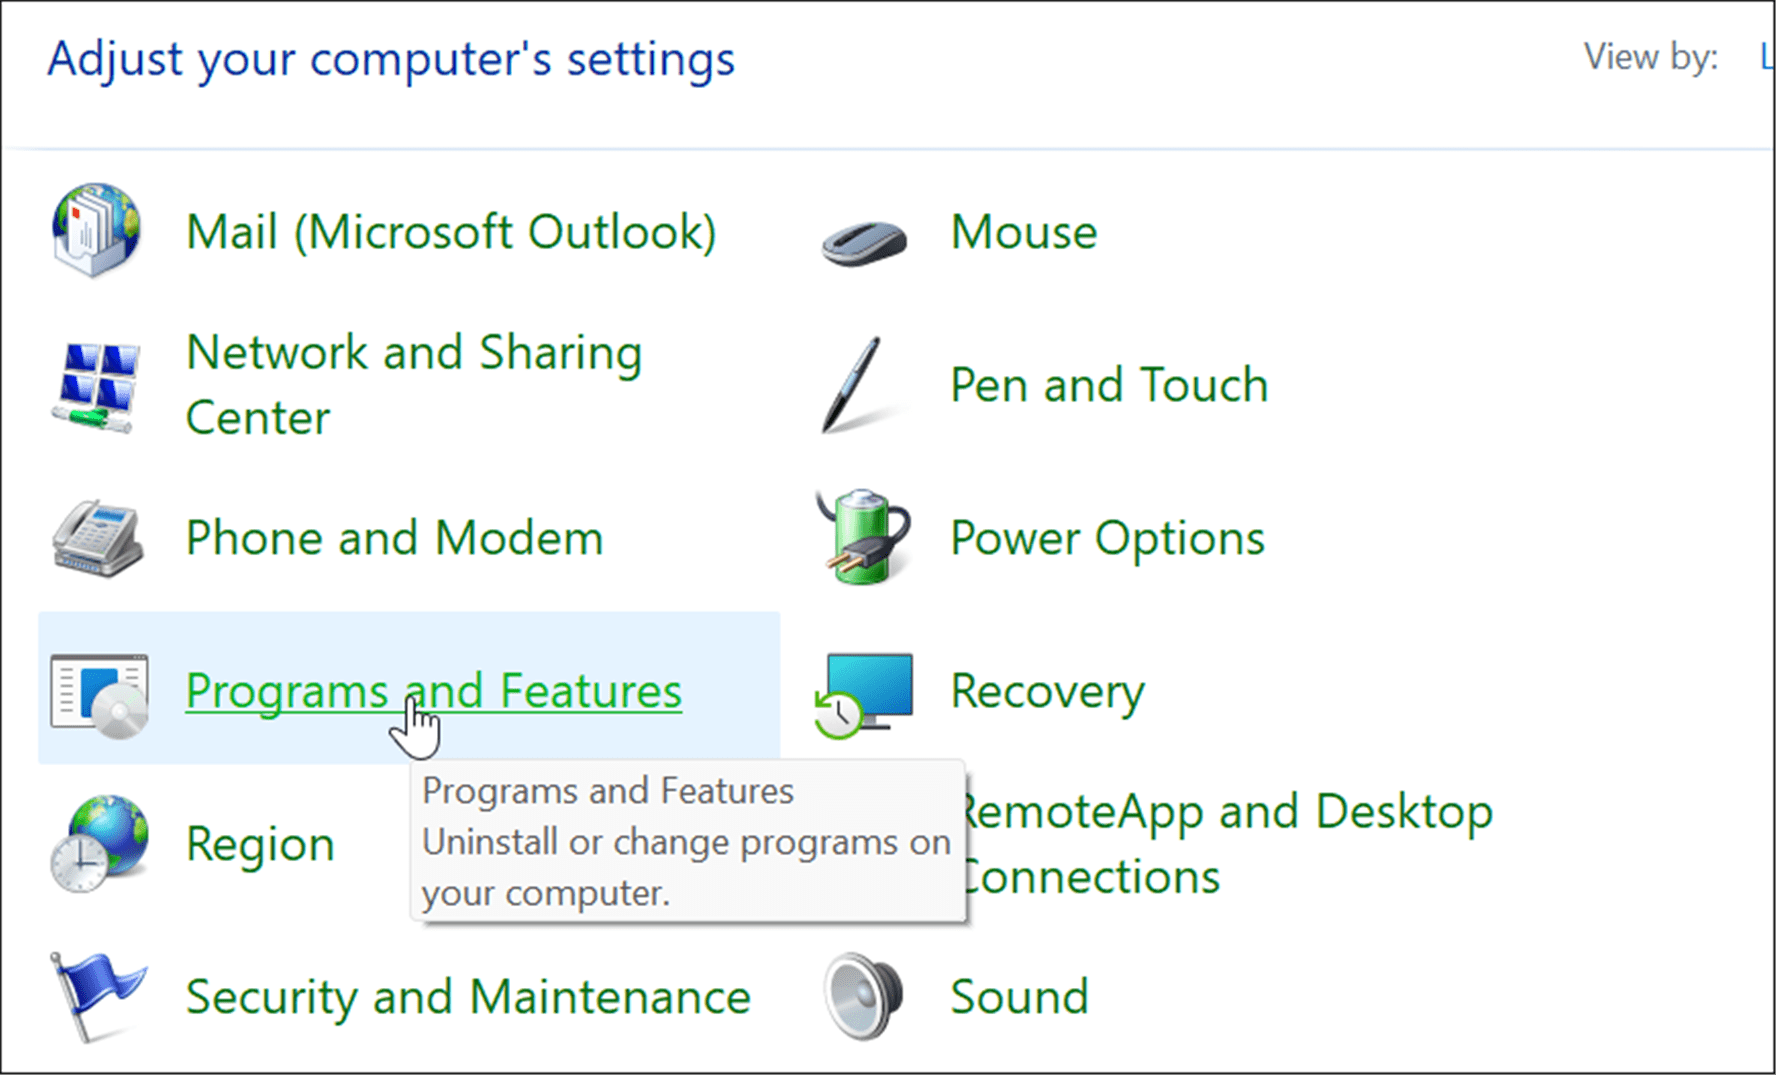
- Next, click the Turn Windows features on or off link on the upper-left corner of the window.

- The Windows Features window comes up where you can check features to turn on or off.
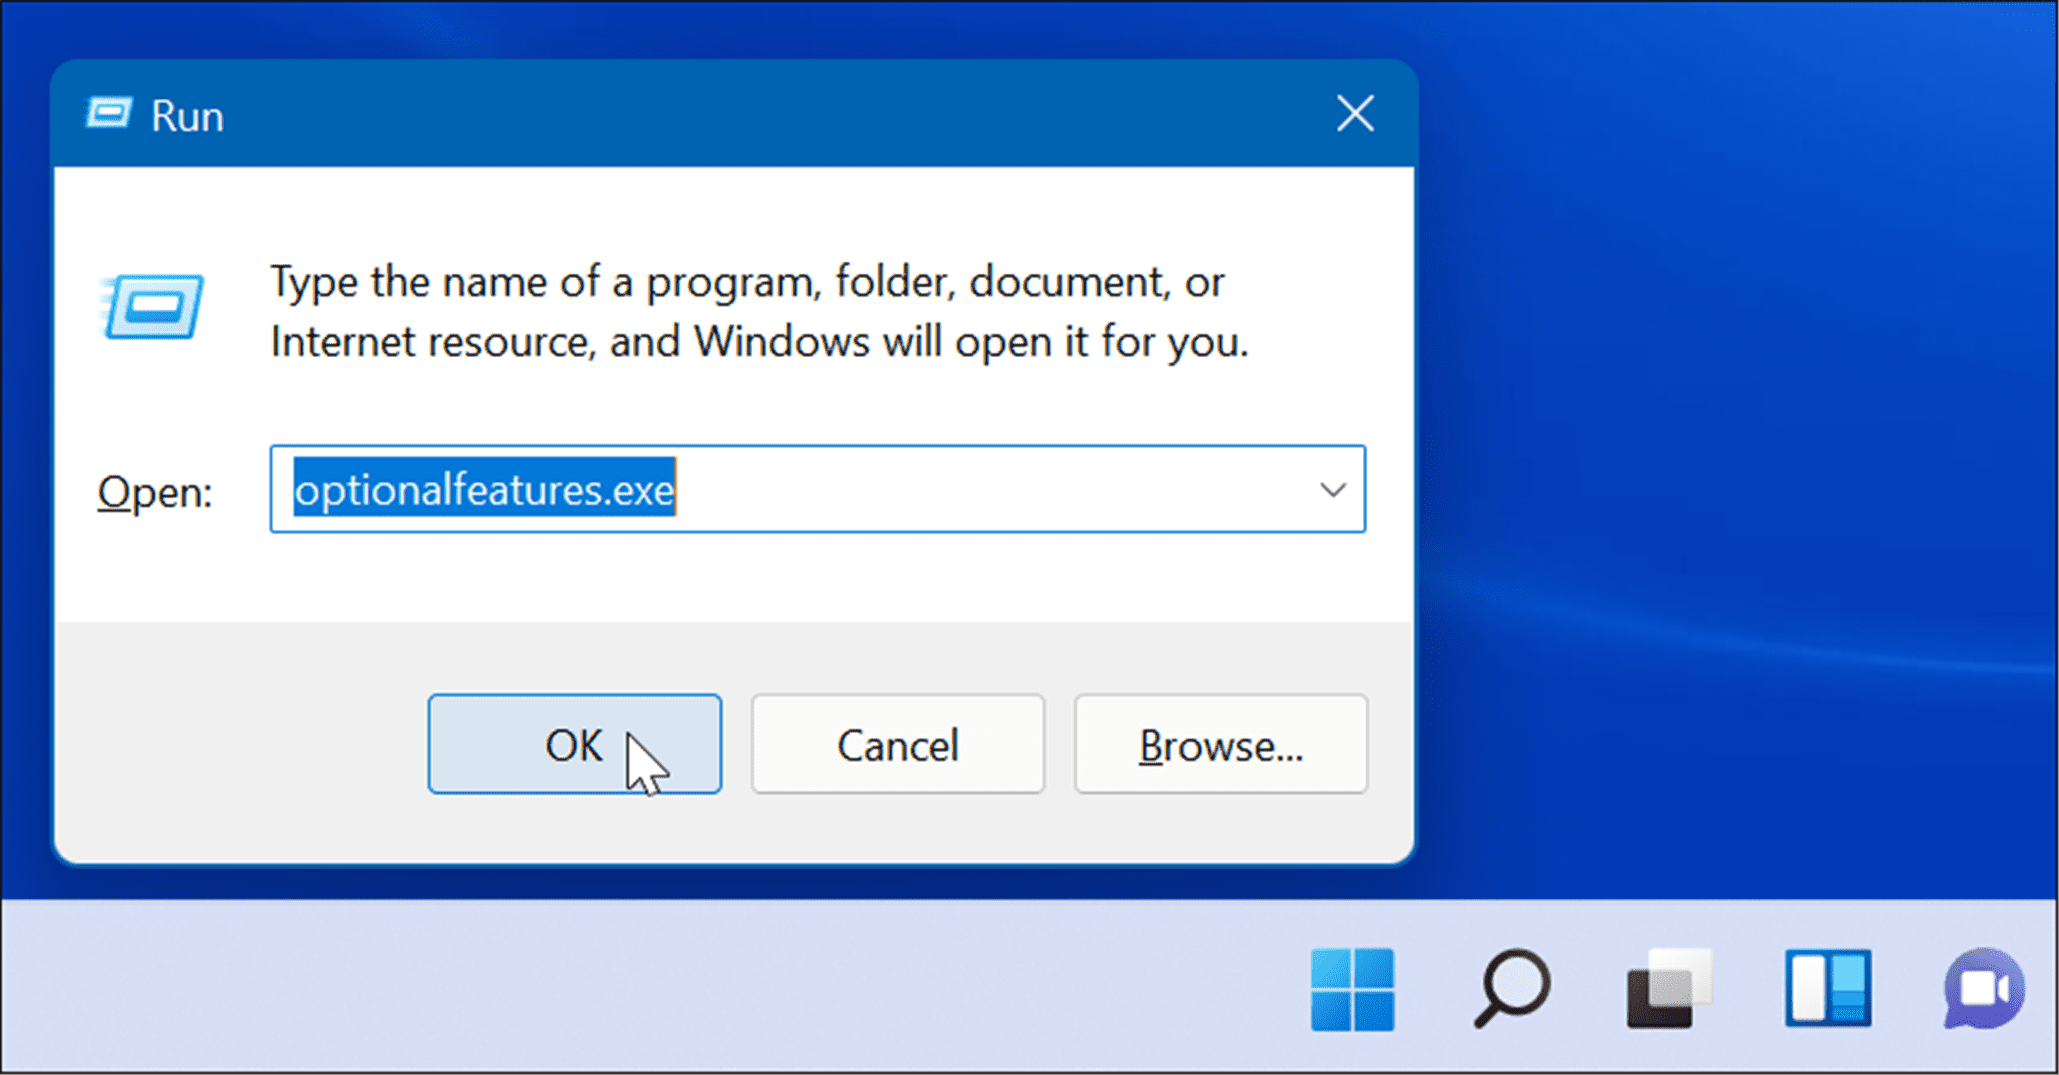
Note: You can also use the keyboard shortcut Windows key + R to open the run dialog and type optionalfeatures.exe and hit Enter or click OK to get to the Windows Features window.

- After checking the features to install, click the OK button. The optional feature will install on your system, and a restart may be required to complete the process.
Uninstall Optional Features on Windows 11
There might be times when you no longer need or want an optional feature installed on your PC. Thankfully, removing them is a straightforward process.
To remove optional features from your Windows 11 PC:
- Click Start and choose Settings.
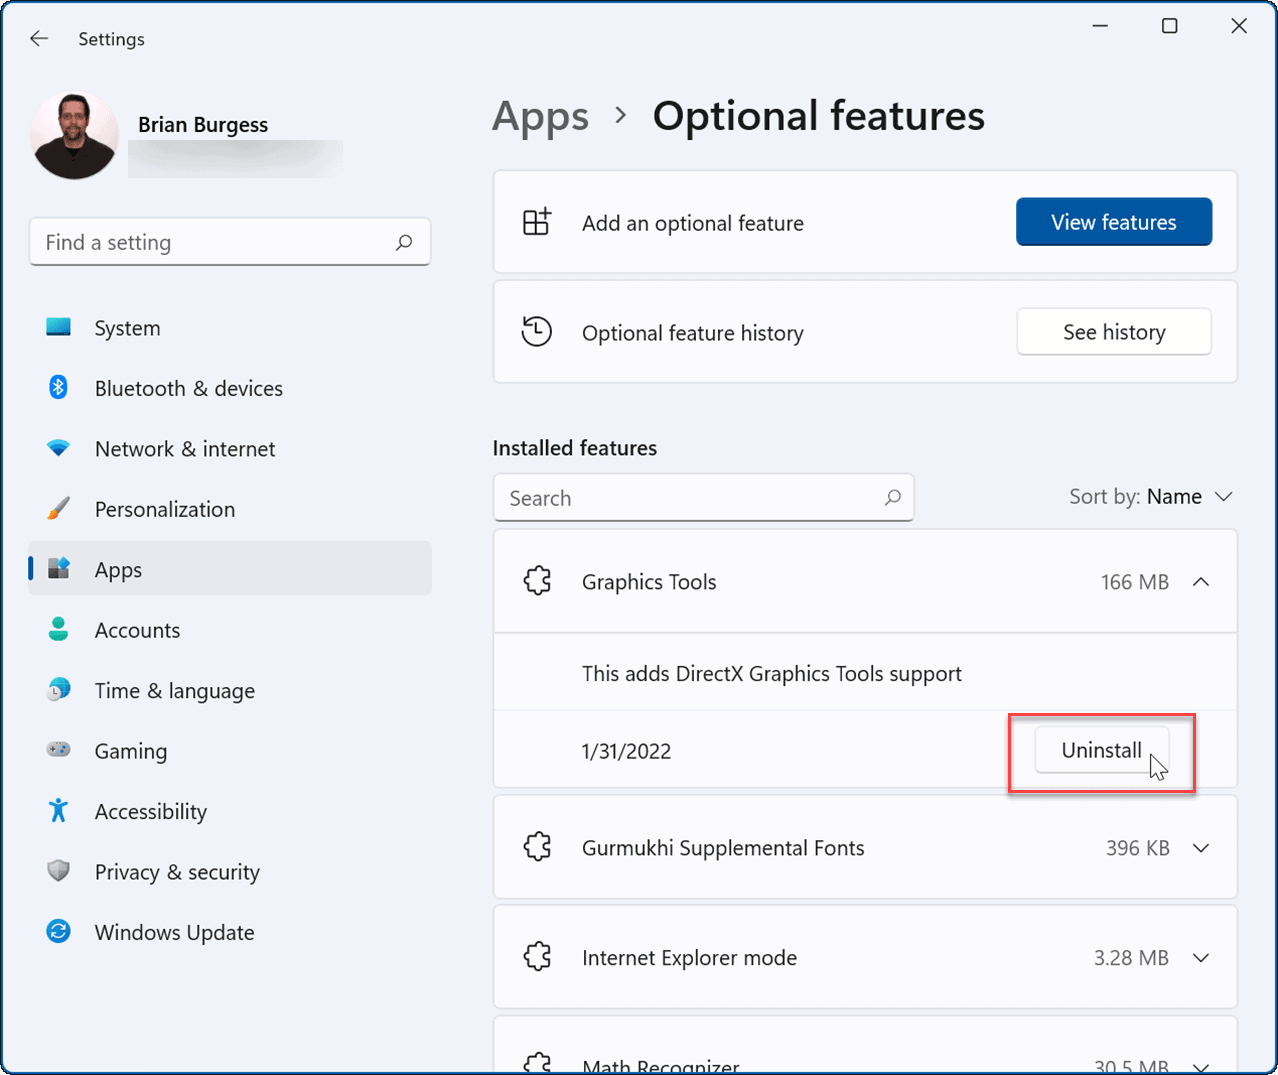
- When Settings opens, select Apps > Optional features.

- Under the Installed features section, click to expand the feature you want to remove and click the Uninstall button.
- The feature will be removed from your system.
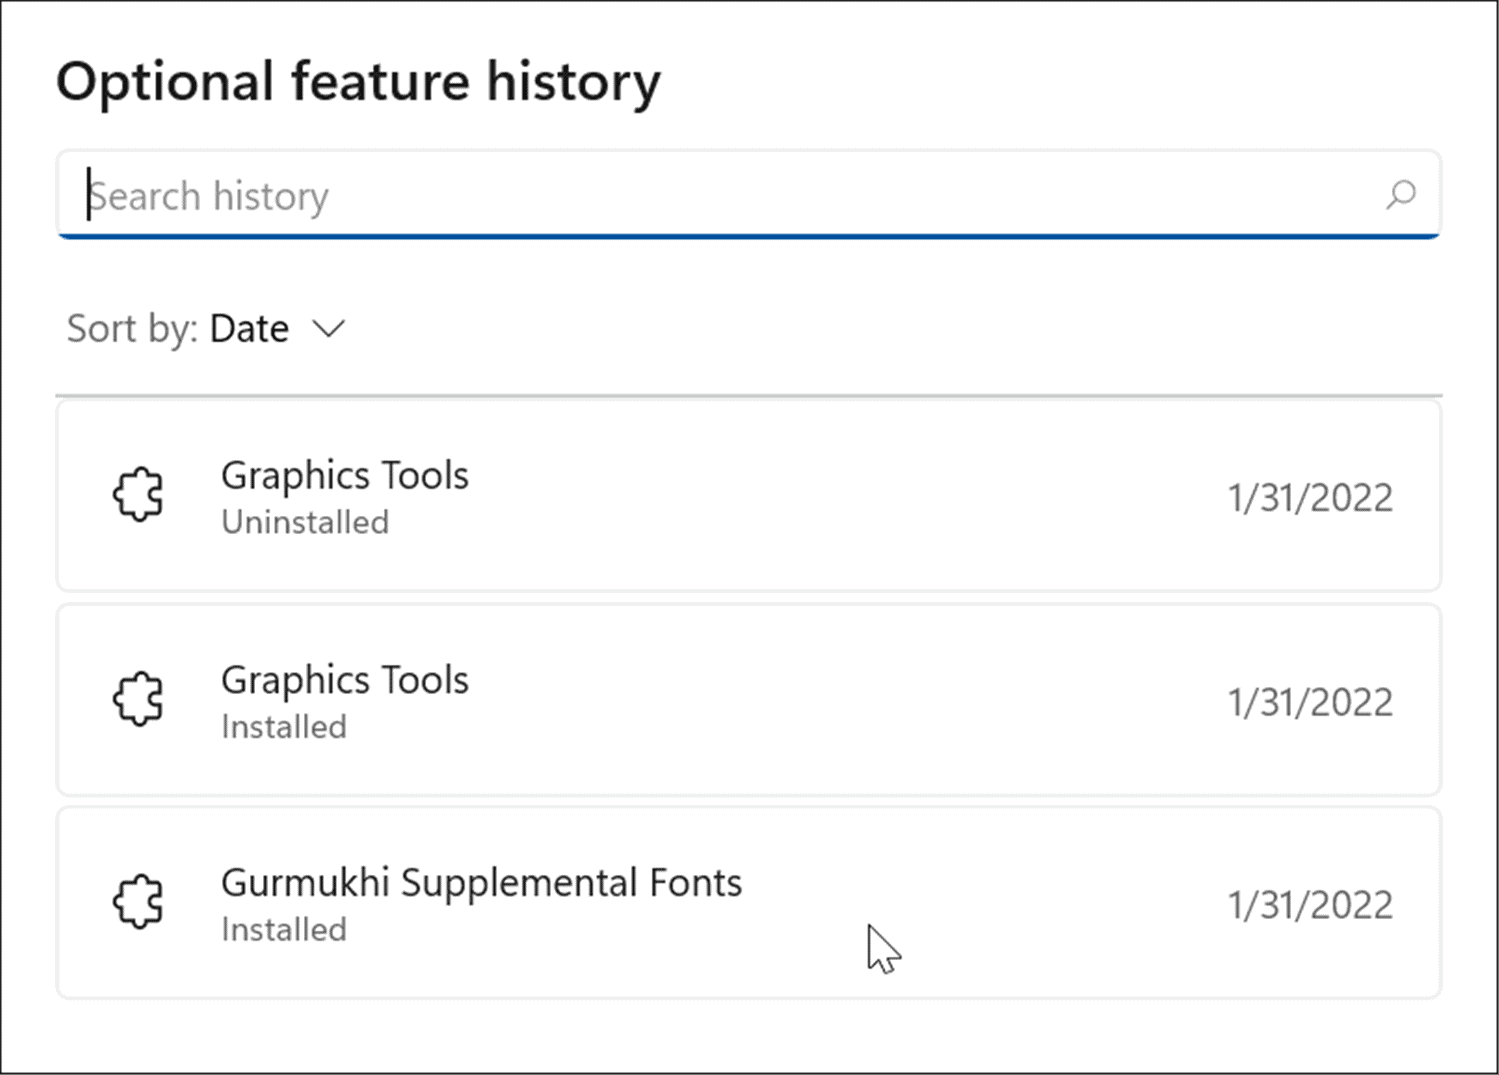
- Click the See history button next to the Optional feature history option to keep track of your optional features.
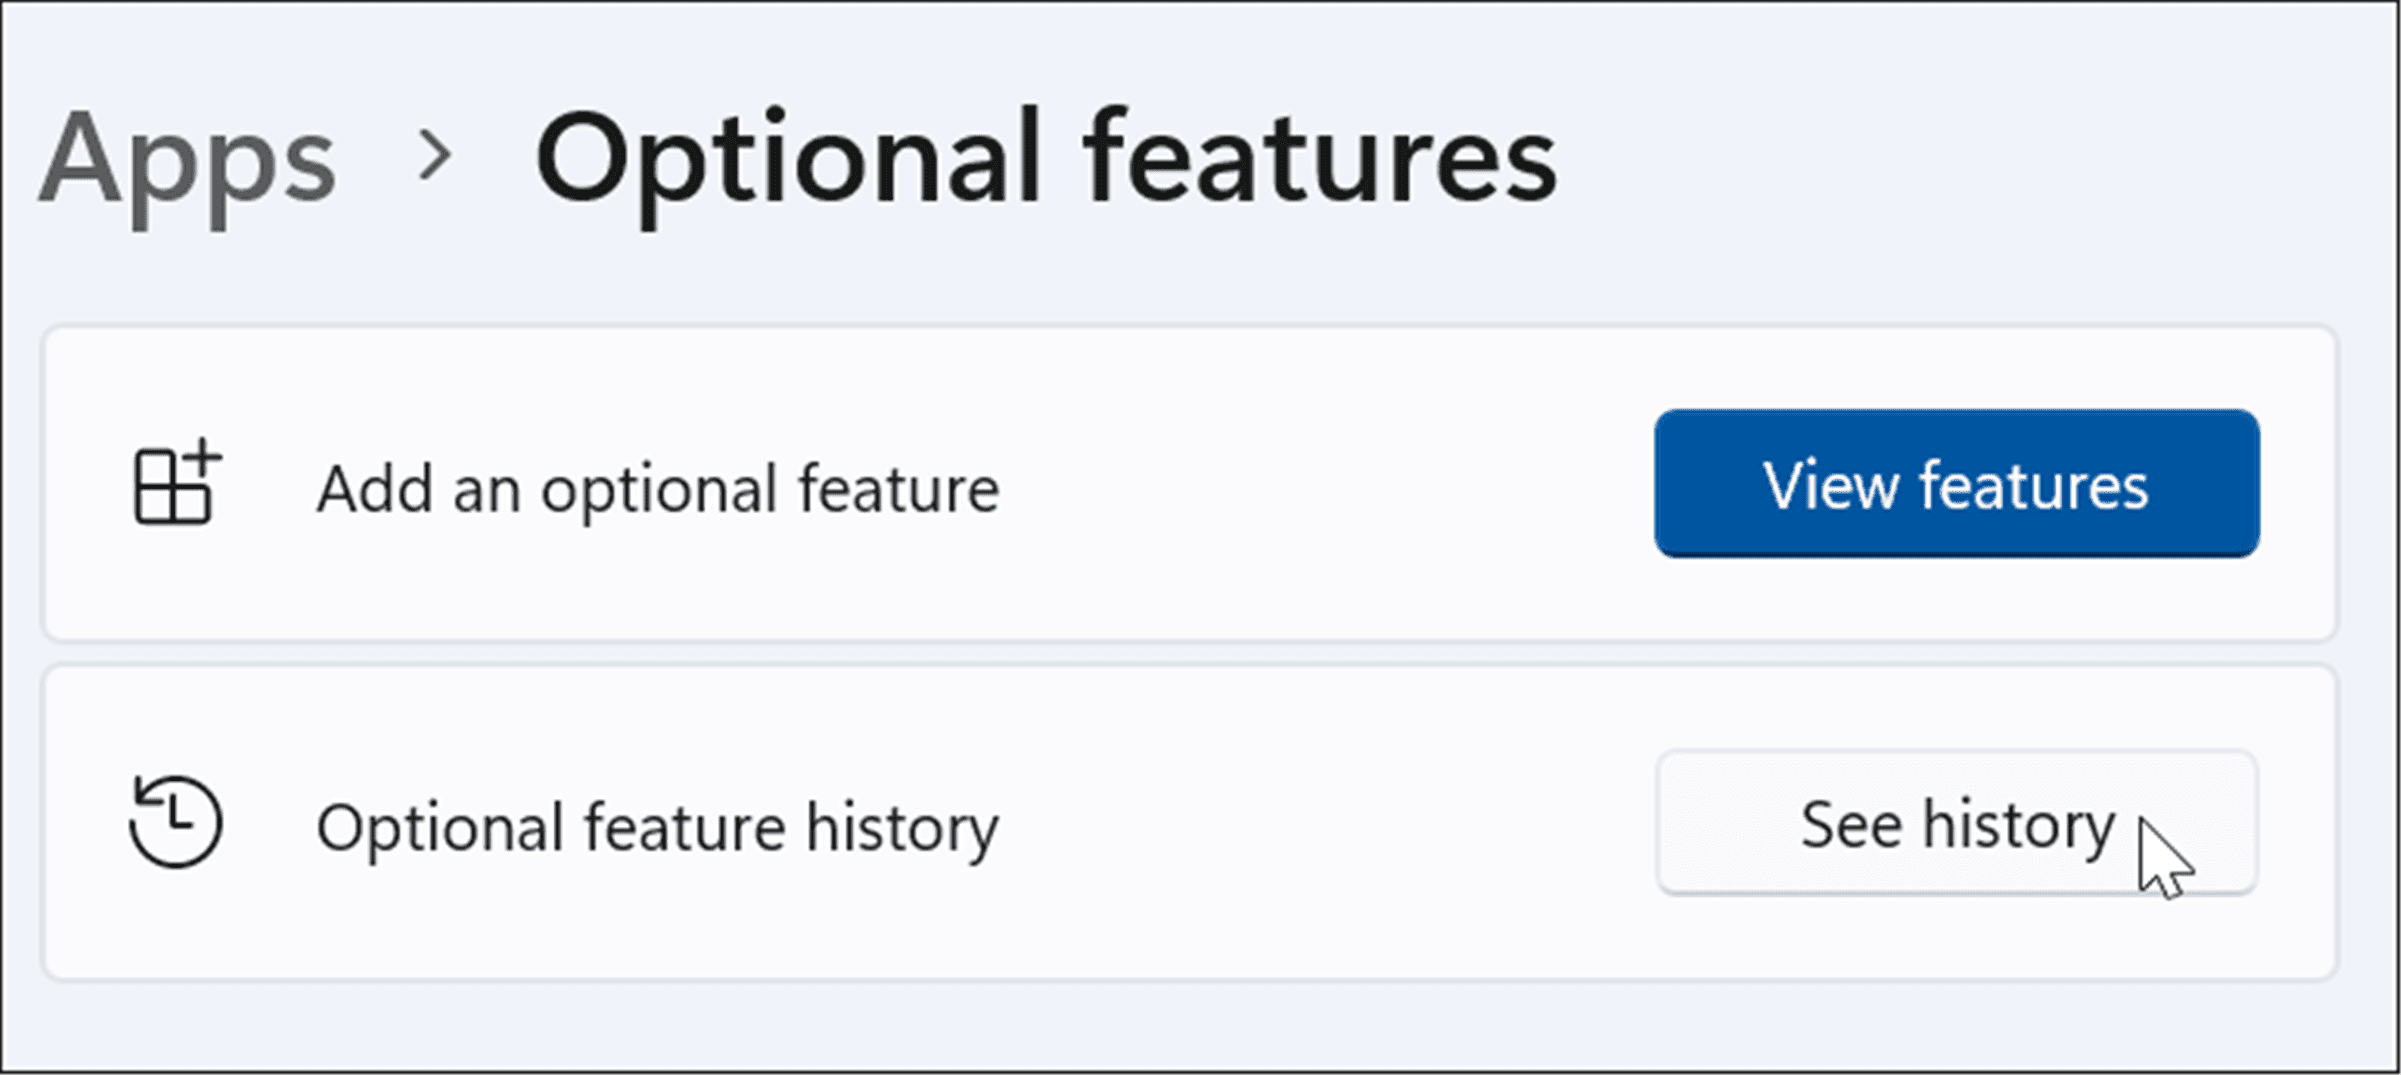
- A list of features you install or uninstall will be included in the list.
- You can also remove optional features through Control Panel. Launch the Run dialog (Windows key + I), type optionalupdates.exe, and then click OK.
- When the Windows Features screen comes up, uncheck the features you no longer want and click OK.
Using Optional Features on Windows 11
There are several reasons why you’ll want to enable optional features. For instance, you might want to enable older .NET Frameworks to run legacy apps or games. If you’re going to run a virtual machine, you need to turn on virtualization and Hyper-V.
Windows 11 works with other platforms, too. For example, take a look at installing Linux on Windows 11 or read about installing Android apps on Windows 11.


