How to Install Windows Subsystem for Linux in Windows 11

Windows Subsystem for Linux (WSL) allows you to run Linux apps and services in a lightweight virtual environment on Windows 11. Here’s how to use it.
Windows Subsystem for Linux (WSL) allows you to run Linux software on a Windows 11 PC. With WSL enabled, Windows can run a distribution of Linux at the same time.
Microsoft allows you to enable WSL on all major versions of Windows 11, meaning you don’t need to upgrade from Windows 11 Home to Pro to use it. Windows 11 uses WSL 2.0, an upgraded version of WSL designed to run a full Linux kernel in a Hyper-V environment.
Once you have WSL running, you’ll have access to the Linux shell from the new Windows terminal. From there, you can use commands to install and run Linux apps alongside Windows software. Windows 11 includes support for Linux apps running with GPU access, making it a versatile tool for different types of users.
Here’s how to get Windows Subsystem for Linux running on your Windows 11 PC.
How to Install Windows Subsystem for Linux on Windows 11
The quickest way to install WSL on Windows 11 is via the Command Prompt or PowerShell. You can use either tool to do this—pick whichever environment you’re most comfortable in.
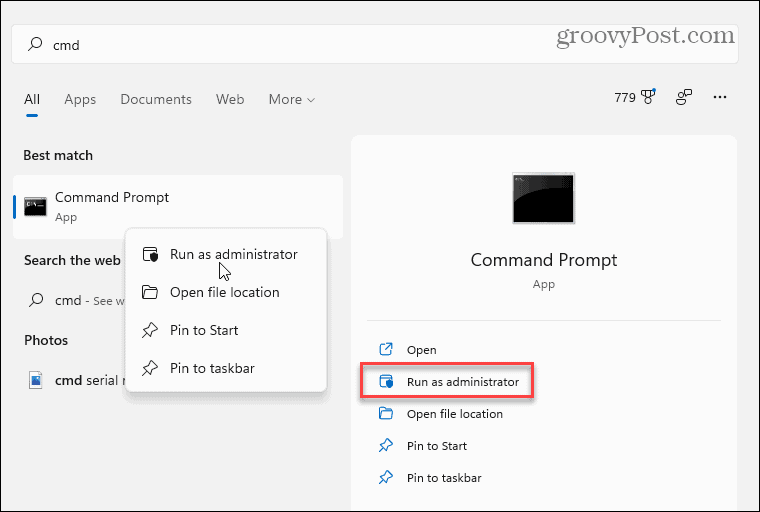
To do this, open the Start menu (or press the Windows key) and type cmd to search for the Command Prompt or powershell to open a new PowerShell window. Hover over the Best match result, then select Run as administrator on the right.
If the UAC prompt appears, make sure to allow your chosen app to run.
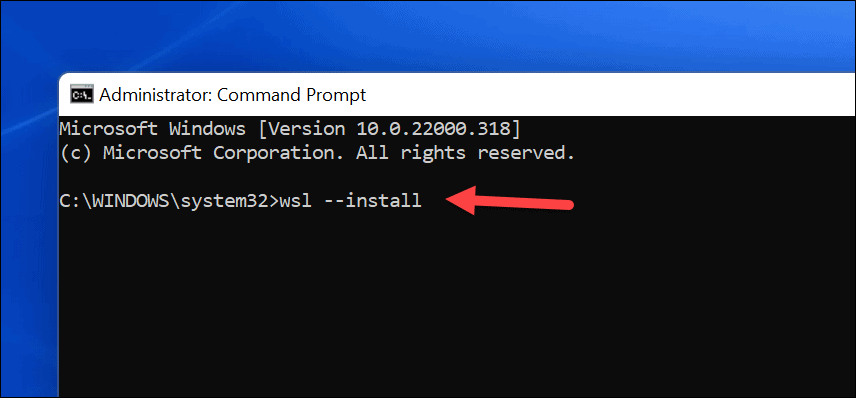
In your admin-level PowerShell or Command Prompt window, you’re able to install and enable WSL with a single command. To do this, type the following command and hit Enter:
wsl --install
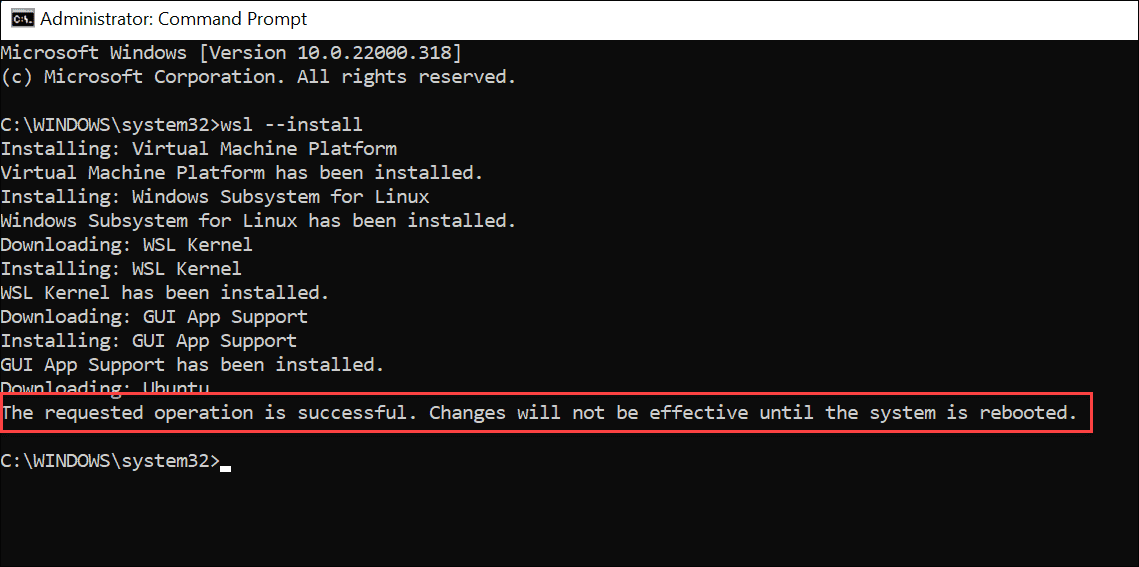
You’ll need to wait while Windows 11 enables WSL, activates GUI app support, and installs the default Linux distribution (Ubuntu) on your PC. You can monitor the progress of the installation in the window.

When it’s complete, you’ll see a message prompting you to restart your Windows 11 PC to complete the installation.
After your PC reboots, sign in to Windows, and you should find you’re able to use your Linux system.
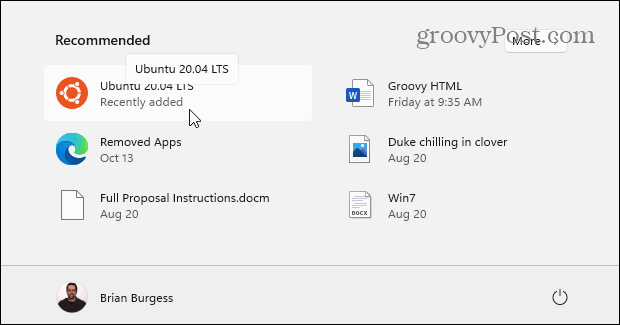
To launch WSL, open the Start menu—you should discover Ubuntu under the “Recently Installed” section. You can also find it manually under its first letter in the app list.

How to Install Alternative Linux WSL Distributions
It’s also worth noting that you don’t have to use Ubuntu with WSL—you can install other versions of Linux. To find available distributions of Linux on your PC, enter the following in your Command Prompt, PowerShell, or Windows Terminal window:
wsl -l -o

Next, type the following, replacing distro with the name of the Linux distribution you wish to install:
wsl --install -d distro
For example, if you want to install openSUSE, you would type the following:
wsl --install -d openSUSE

As with Ubuntu, allow time for the wsl command to install your preferred distribution.
How to Install Linux Distributions from the Microsoft Store
If you’re not comfortable using a command-line tool, you can install Linux via the Microsoft Store. Installing Linux from the Store is like installing any other Store app. First, you’ll want to verify WSL is enabled.
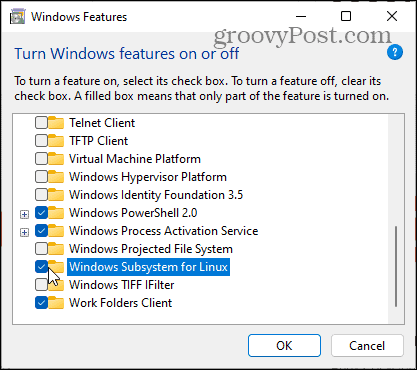
To do this, press Start (or hit the Windows key) and type optionalfeatures.exe. Select the Best match result at the top.

In the “Windows Features” box, select the Windows Subsystem for Linux checkbox and click OK.
Allow some time for the changes to complete, then restart your PC.

Once you restart your PC, open the Microsoft Store app from the taskbar or Start menu and search for “Linux.”
You should see several distributions available to you, including Kali Linux, Debian, Ubuntu, etc. Choose the Linux distribution you want to use, then click Get to begin installing it.
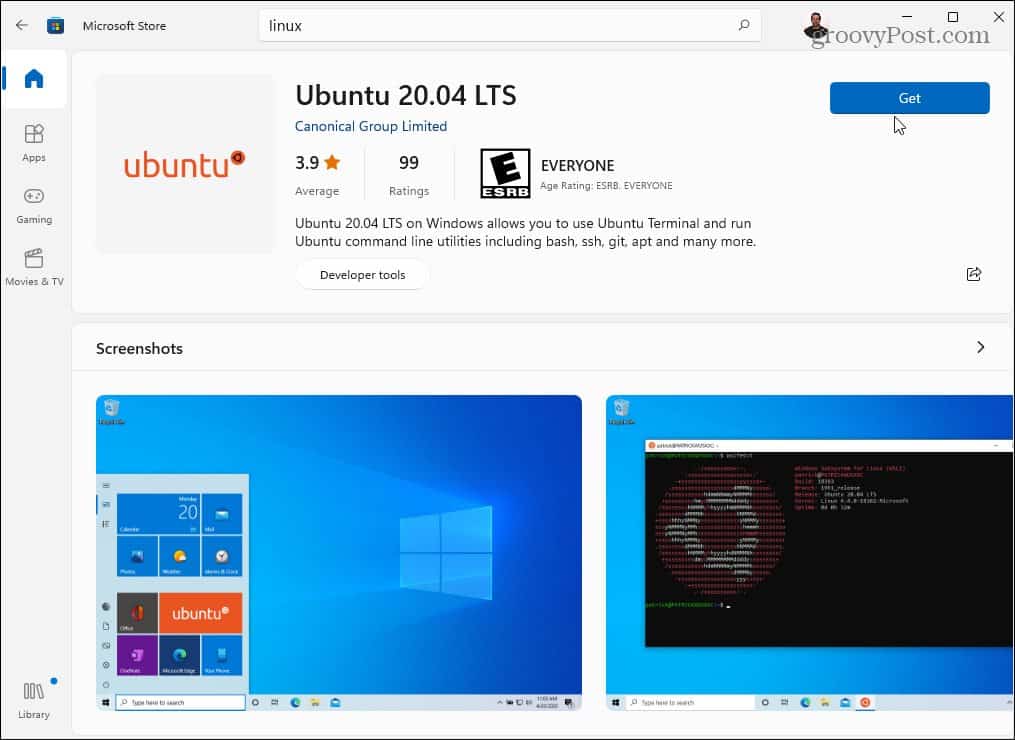
The Microsoft Store will download and install your Linux distribution at this point—allow some time for this to complete. As with the command prompt method above, you’ll find it in the Start menu after installation is complete.
How to Access the Linux Shell on Windows 11
Windows 11 includes a new terminal app (called Windows Terminal) that allows you to switch between PowerShell, Command Prompt, and other types of administrative windows. If you install and enable Windows Subsystem for Linux on Windows 11, you can use the new Windows Terminal to control your Linux shell.
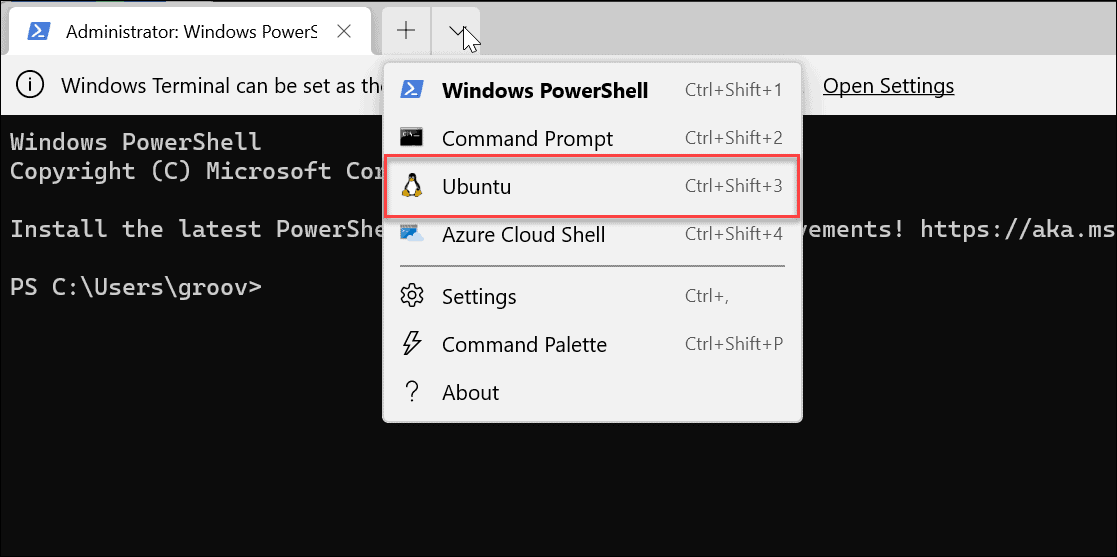
To do this, right-click the Start menu and select Windows Terminal (Admin). Next, select the + (plus) icon in the tabbed bar at the top, then choose your Linux distribution (e.g., Ubuntu) from the list.
If you don’t see it, launch Ubuntu from the Start menu first, then open the terminal—it will then appear in the dropdown.
You now have access to the Linux shell, just as if you were using a Linux PC. You can start learning and practicing Linux commands to operate it here, or you can use it to modify your Ubuntu settings.
How to Test Windows Subsystem for Linux on Windows 11
If you’re unsure how to test whether WSL is working, you can use the Windows Terminal to do so.
First, open a new terminal by right-clicking the Start menu and selecting Windows Terminal (Admin). In the terminal window, press + (plus), then select Ubuntu. Alternatively, launch Ubuntu from the Start menu.
Once you’re ready to use WSL, you can use a Linux game called Tux Racer to see if WSL is working correctly. These steps will only work if you’re using WSL with Ubuntu, Debian, or related distributions.
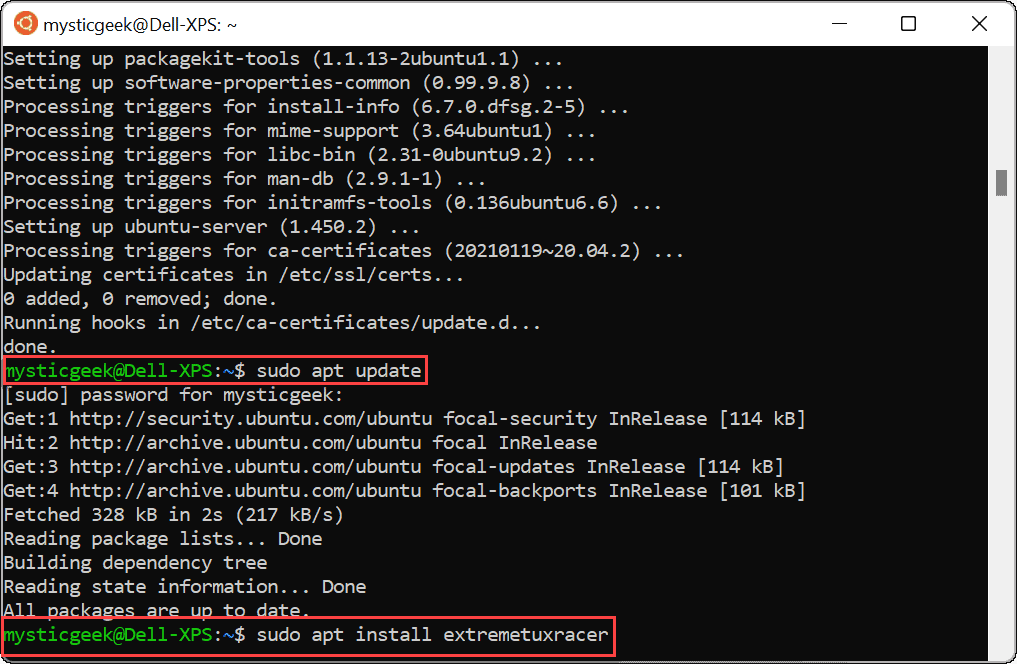
To do this, type the following commands in your Linux WSL terminal, one after another:
sudo apt update
sudo apt upgrade
You can also run them together (sudo apt update && sudo apt upgrade). Once these commands finish checking for updates, type the following command to install the game:
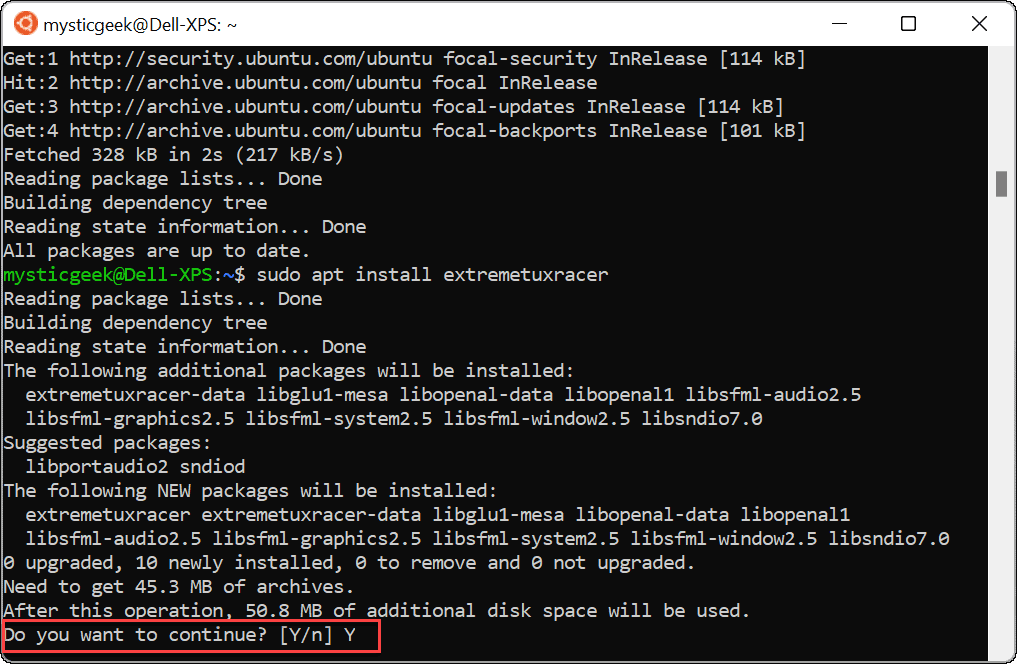
sudo apt install extremetuxracer
When the prompt asks if you want to continue, type Y and hit Enter.
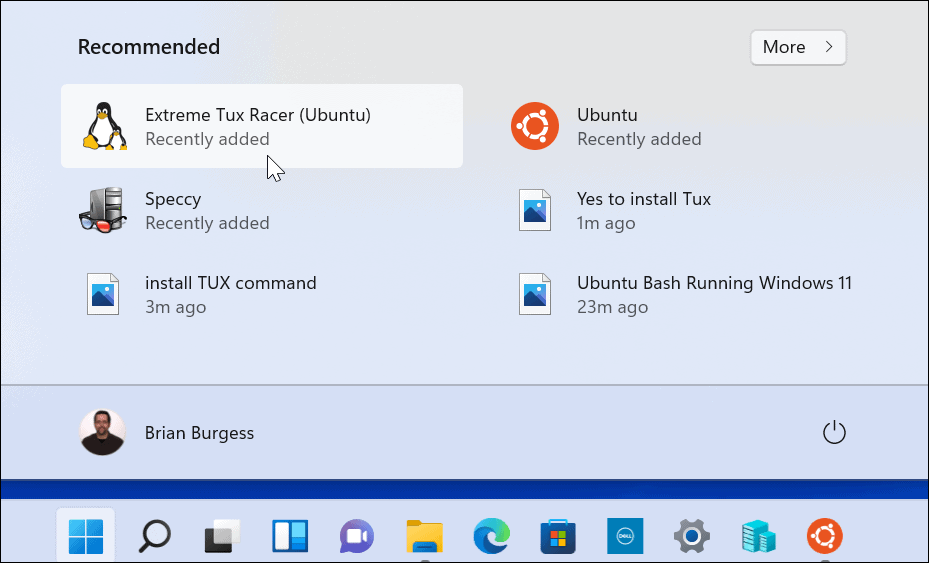
Tux Racer takes a few seconds to install. Once it does, you’ll find the Linux app in the Start menu—press on it to run it like you would any other Windows app.
There you go! You’re now running your first Linux app on Windows 11. Have fun!

Using Windows Subsystem for Linux on Windows 11
Using the Windows Subsystem for Linux on Windows 11 gives you complete access to Linux apps and services without needing to reinstall or dual-boot your system. WSL is the best way to access Linux apps on a Windows PC—if you don’t like the distribution you’re using, you can always switch to another via the Microsoft Store or the new Windows Terminal app.
If you’re new to Windows 11, take a look at other optional features, such as enabling older .NET Frameworks to run retro games and apps.


jim longmuir
July 7, 2022 at 12:58 am
Can you run other linux distro’s not mentioned in your article