Windows 8 has several keyboard shortcuts that are vital for getting the most out of the new OS. In fact, practicing up on your Keyboard kung fu makes any version of Windows easier to use.
Having to memorize all keyboard shortcuts is a daunting task, but Windows can make it easier by underlining shortcut keys on menu items. The underlined keys are disabled by default, but it’s easy to make them show up.
Open Control Panel and select Ease of Access Center.


Scroll down the list and click “Make the Keyboard Easier to Use.”


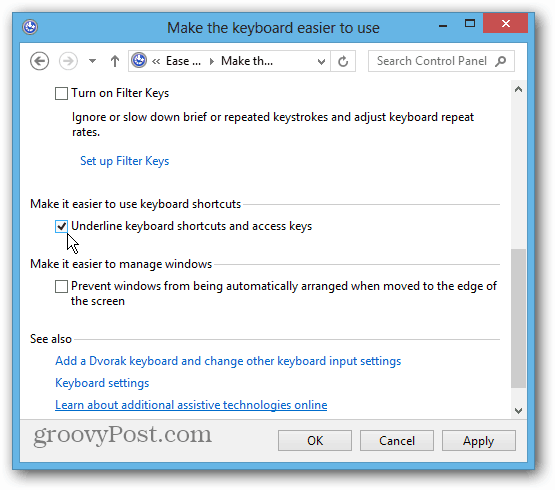
Scroll down on the next screen and check “Underline Keyboard Shortcuts and Access Keys.”


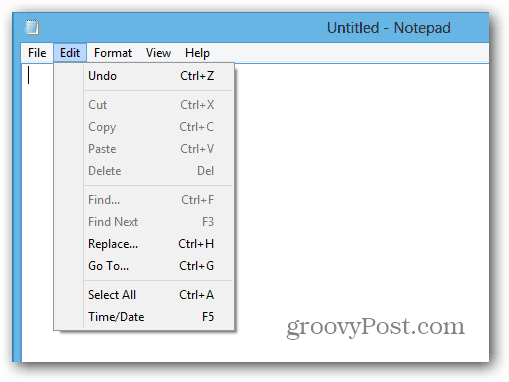
Now when you open menu items, you’ll see the shortcut keys are underlined. Here’s an example of Notepad menus before without the underlined shortcut keys.


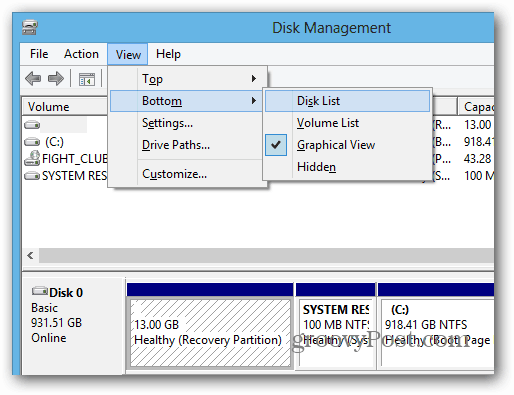
And here it is after, with shortcut keys enabled. The shortcut keys you can press while navigating the menu system are underlined.


This is a subtle enhancement, but sometimes the little things are what make a big difference in being more productive.


1 Comment
Leave a Reply
Leave a Reply


Necco
August 31, 2016 at 6:07 am
I’ve clicked the “Underline keyboard shortcuts and access keys”. Then my Notepad’s menu certainly shows the underline of shortcuts. But for the Desktop and File Explorer don’t show eternally that they may show but sometime later won’t. How to deal with it?