
Keeping your data backed up is a fundamental part of computer use. Unfortunately, it’s also the one thing most computer users either don’t know how to do or forget to do. Well, all the excuses are gone now that Windows 7 has taken the complexity out of the process and will bug you until you setup a backup process on your system. Let’s jump right into it.
How to Create a Windows 7 Backup
1. From windows browser, go to My Computer. Next, Right-Click your local hard-drive (by default C:) and Click Properties.
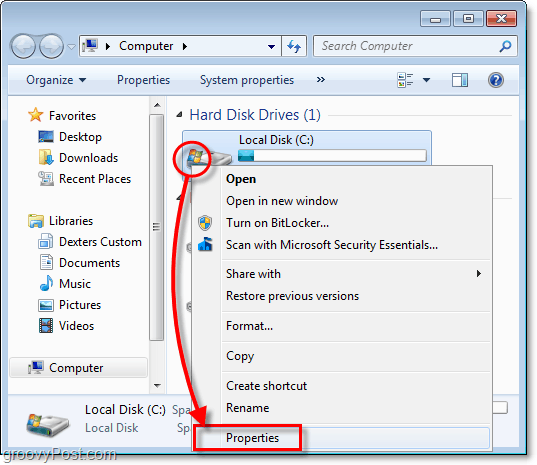
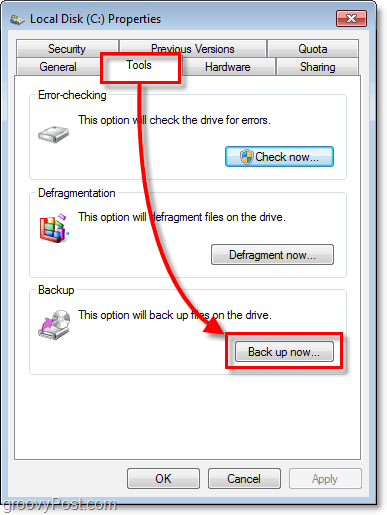
2. In the properties for your local disk, Click the Tools tab and then Click Backup now.
3. On the backup utility, Click Set up backup.

4. On the window which may take a moment to appear, Select which destination location where you would like to save your backups. I suggest an external hard-drive, as shown in my example.

Nowadays, you can pick up an external hard drive from Costco for under $100 which should be able to backup ALL your data and photos, etc. Another option is saving your backups to the network. Either way, just don’t store the backup on the same drive as your source data! That’s just a disaster waiting to happen, and it pretty much defeats the whole purpose of a backup.
5. Now decide whether you would like to use default backup folders, or backup your folders by handpicking them yourself.

6. If you chose to select the folders and files yourself, this next part is where you get to do it. Notice the system image checkbox and Check the box for Include a system image of your drives: System Reserved, (C:). I suggest this box just in case the failure is worse than just lost data.

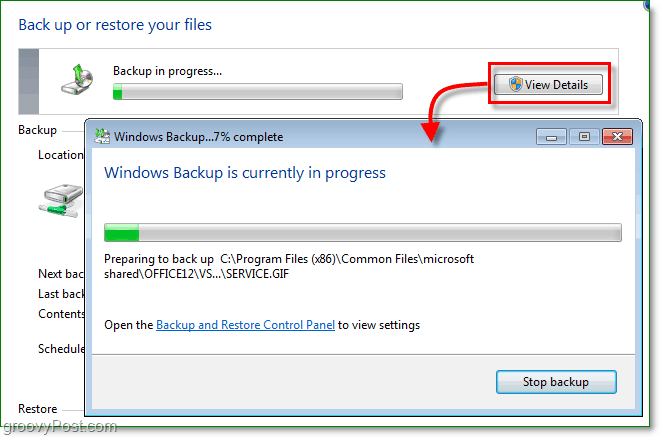
7. After moving onto the next step, you’ll be required to wait for the backup to finish. You can Click View Details if you want the specifics of what exactly is going on.
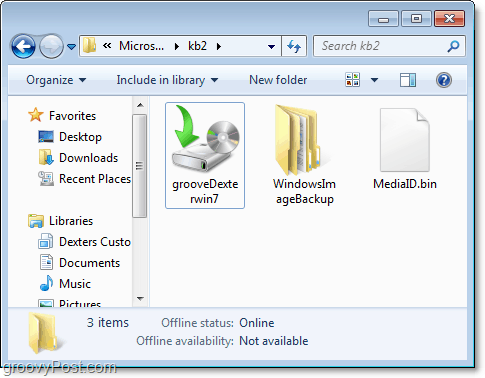
Backup Complete
Now you should have a backup file saved and ready just when you need it most.
So I have my data backed up, and now I need to restore something because I accidently deleted it or some data became corrupted. How do I do it?
How To Restore Files From Backup
8. Return to the backup utility tool, but, this time, Click Restore my files.
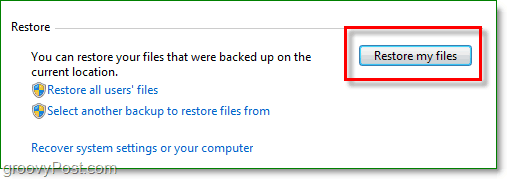
9. On the right-side of Restore Files Select your Files or Folders that you would like to restore from your backup copy.
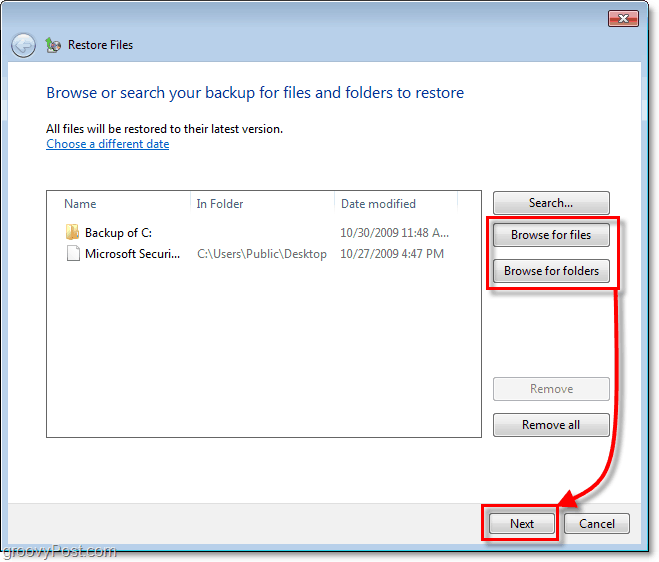
10. On the next window, depending on your files and circumstances you’ll need to decide whether to restore your files in the original location (replace) or if you want to save the restorations as copies to another folder.

That was easy. But what about disk space, don’t backups use a lot? The answer is yes; backups can take up a lot of room on your hard-drive, but we can fix that problem too.
Adjust Backup Size Settings
11. Back on the backup utility screen, Click Manage Space under your backup.

12. From here you can delete old backups by Clicking View backups. You can also Click Change settings if you would like to keep only the latest image set on your automatic backup. I recommend doing both.

All Done
With Windows 7, Microsoft stepped up their game in the area of computer Backup or Disaster Recovery as I call it. We’ve already touched on a few different ways of protecting your PC and Data from a system crash using a system restore point as well as a system image, As you can see with Windows Backup, you should have all the tools you need to protect your data all without spending a penny.


Bill Clisham
January 4, 2012 at 6:30 pm
Excellent. Very clear and precise. Screen shots helped a lot.
roy DARLING
May 7, 2014 at 10:56 am
hI AUSTIN, VERY CLEAR.
I have 2 computers backed up on WD external HD. 1 is windows 7 and 2 is Windows XP.
I forgot to label the partitions. How can I tell which backup location has the XP which I need
to restore since the control panel and network connections are empty. I ran Malwarebytes
and Adw cleaner and Xp now clean.I used EXHD 300gb(X) for one of partitions. PLEASE HELP.
Roy
Aaron
August 5, 2014 at 10:27 am
I was curious, will these backed-up files be able to reopen in across windows platforms?
e.g. I back-up my hard drive in Windows 7 and Upgrade my system to Windows 8. Will the hard drive backed in Win7 be able to open on the windows 8 computer?
Also,
Is there a good program to use to encrypt the backup file before I upload and store on the cloud?
Holly
August 5, 2016 at 11:16 am
Well done. My question is about the D drive in my HP TouchSmart420 PC which ‘seems’ to be inaccessible to me, the Administrator (right, tell my PC that I have full access to everything, it disagrees) and only person here, i.e. no one else uses this PC nor comes into my office. That said, I have a nearly full D drive, internal backup and I have no idea what is on that drive. I assume it’s backed up Win 7info. I also have Hard disks for Win 7 which came w/ PC but of course they are outdated. Is this D drive what was once called “Shadow” or “Partition” ? An obsessive backer-upper: Norton OBU, Seagate external backup 1000 GB that is getting close to capacity w/ so many dup files it’s overwhelming (most from older network & business shared files), another usb thumb drive w/crucial financial and day2day word files, PictureKeeper w/all phone, camera and I hope photos from this PC. Then there is the drawer full of thumb drive bu from old PCs. Obviously, I’ve had enough crashes in the past to be like this, LOL. My question is about D:drive what’s on it, how do I get into it , will it disappear if I install W10 , or will it be available ? ugh, very impt. the motherboard on this PC is “questionable”. Thanks for nuthin, HP.