How to Hide Files and Folders on Windows 11

Got an important file (or two) that you want to keep hidden? If you want to hide files and folders on Windows 11, use this guide to help you.
If you want to keep certain files and folders private and away from prying eyes, hiding them from view is a must. No matter the type of data on your PC, there is likely at least one item that you would prefer to keep hidden. You might also wonder how to make a folder icon invisible.
Perhaps you have sensitive documents, photos, or videos that you want to keep private and prevent others from viewing when they’re near your computer. There might be other reasons why you want to hide them from view, such as to avoid accidental deletion.
Whatever your motivations are, you can hide files and folders on Windows 11 using File Explorer or a PowerShell terminal. We’ll explain how below.
Hide Files and Folders via File Explorer
Windows 11 provides different ways to hide files and folders. For example, you can hide files and folders from Windows Search. That prevents unwanted items from showing up in local search results.
Hiding files and folders on Windows 11 may seem like a daunting task. Thankfully, it’s actually quite simple with the help of the built-in File Explorer settings or by executing a few simple commands in PowerShell.
To Hide Files and Folders on Windows 11
- Launch File Explorer from the taskbar icon.


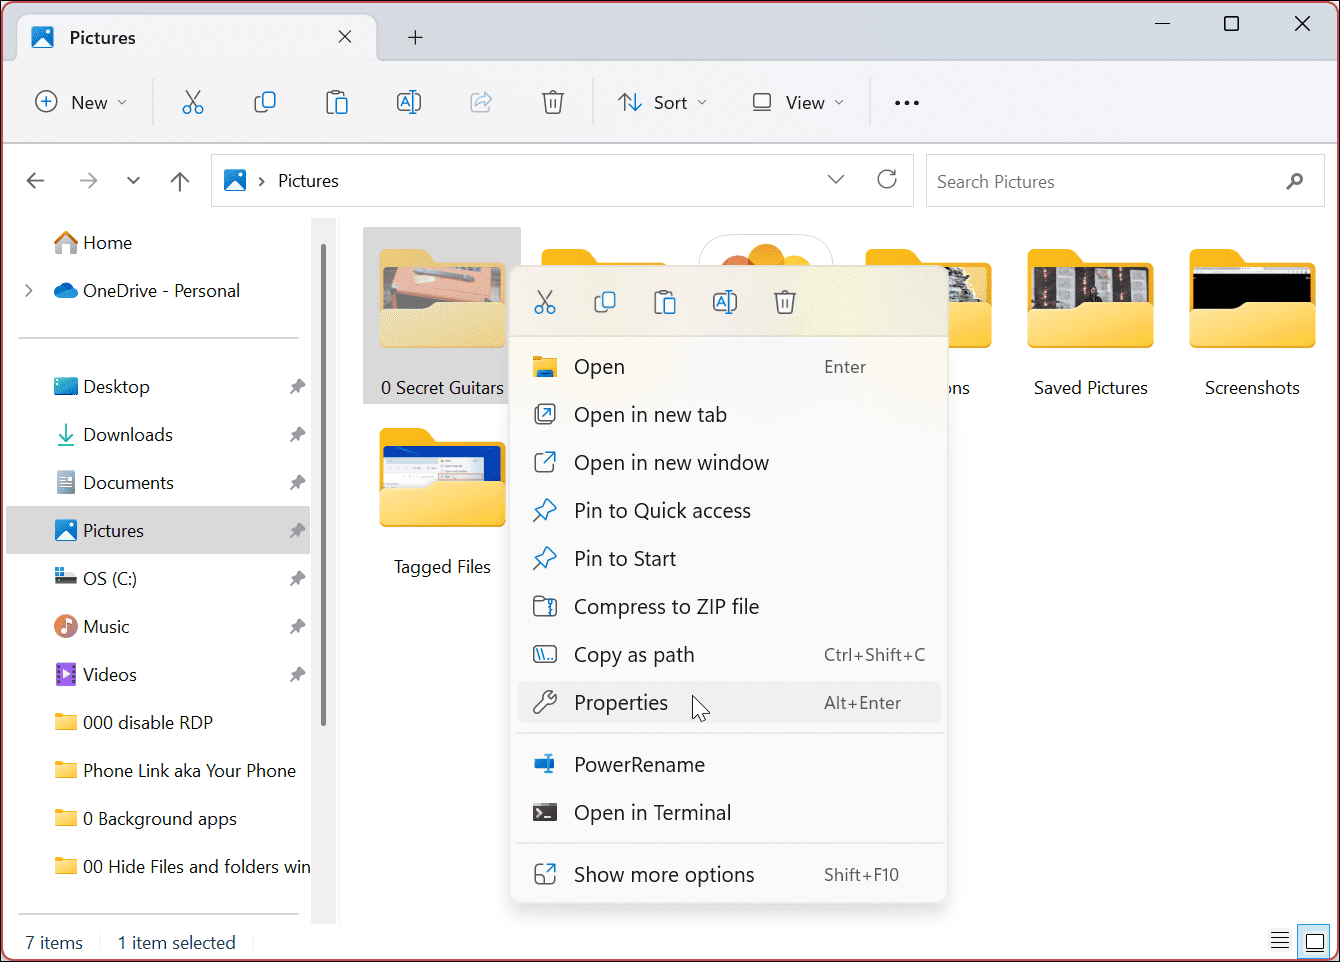
- Navigate to the file or folder you want to hide, right-click it, and choose the Properties option from the menu.


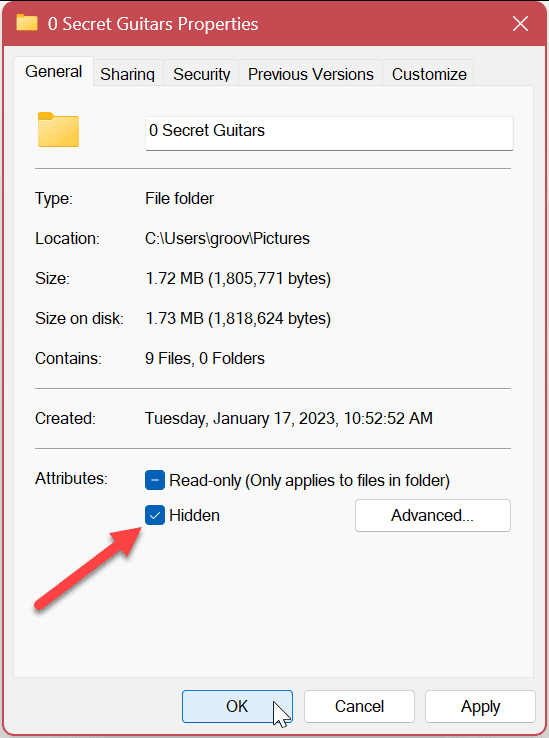
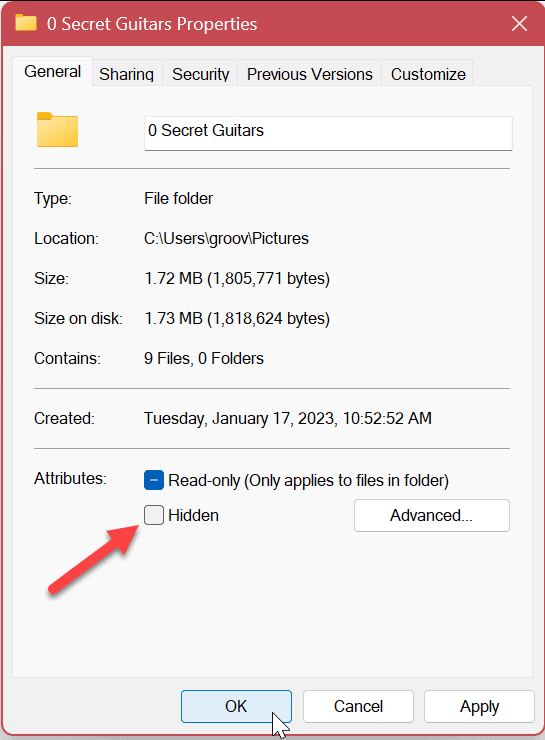
- Under the General tab, check the Hidden box and click OK.

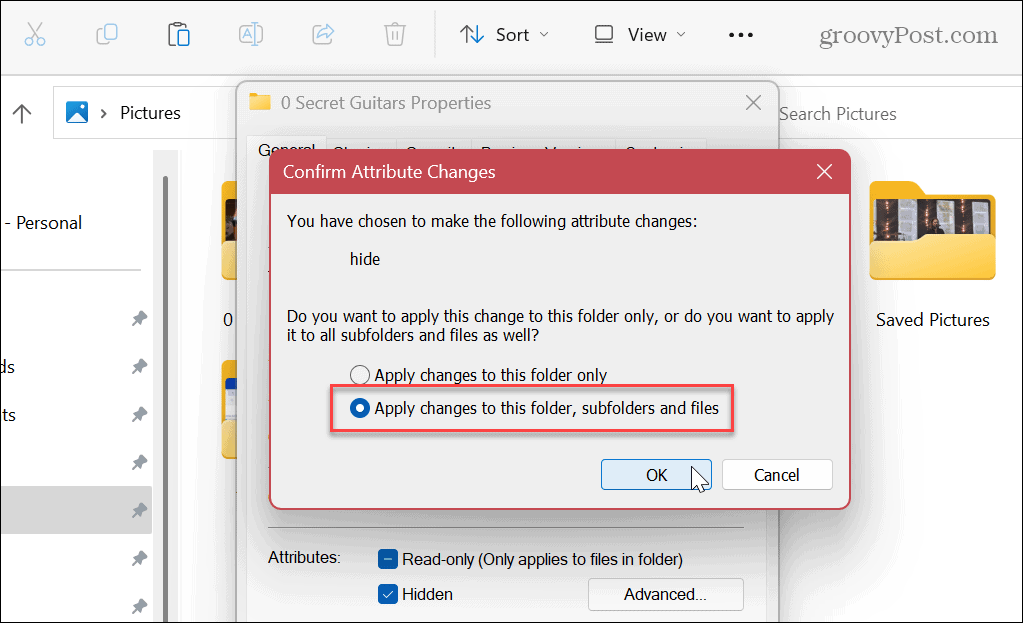
- When the confirmation message appears, select the Apply changes to this folder, subfolders and files option to hide the folder and its content.
- Click OK to confirm.

- Since Windows will not show hidden items by default, the folder and contents will be hidden from view.
- If you have the show hidden files option enabled, the file or folder you selected will be grayed out, but it’ll remain visible.


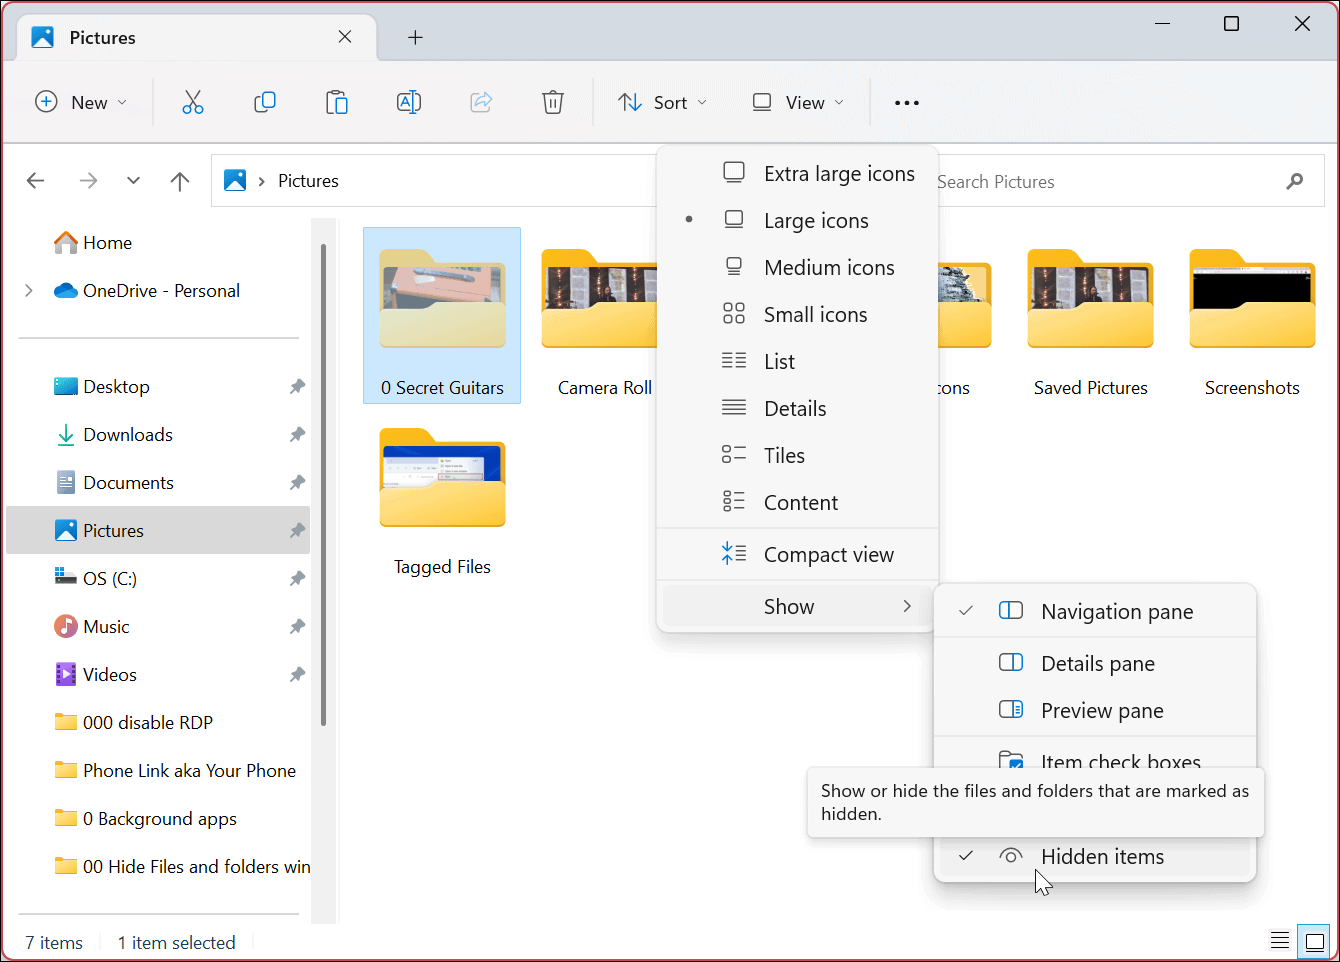
- You can toggle the hidden item’s view on or off. To do this, click the View button from the File Explorer toolbar and select Show > Hidden items to make it visible or not.

How to Unhide a File or Folder on Windows 11
If you no longer need a file or folder hidden, you can set the item to be visible again. Unhiding a file or folder will make it accessible like other files and folders on your system.
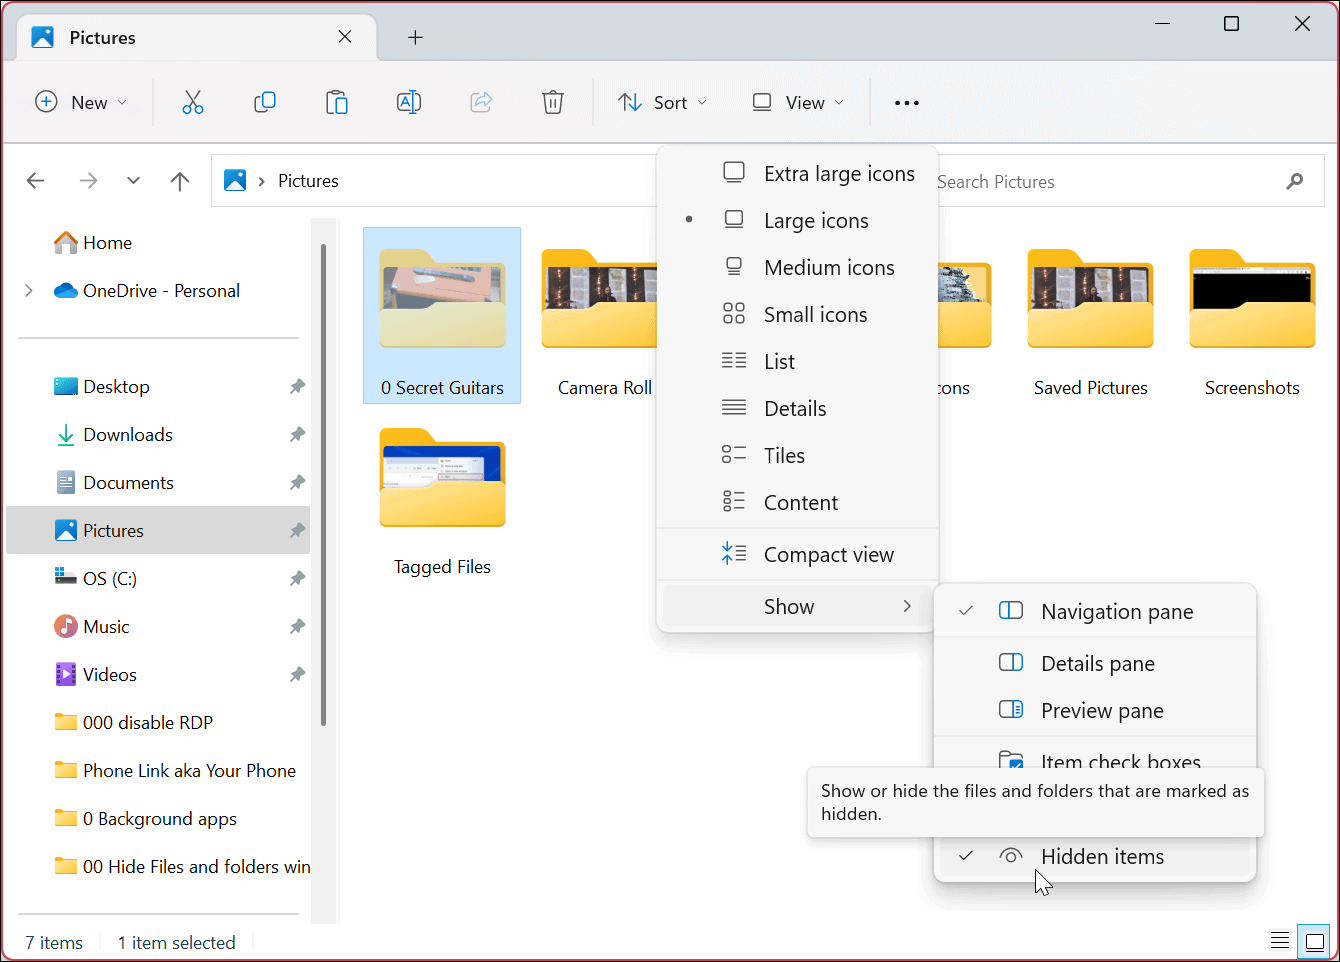
- Set File explorer to show hidden files and folders again by going to View > Show > Hidden items from the toolbar.

- Right-click the hidden file or folder (it will be grayed out) and select Properties.

- When the item’s properties window comes up, select the General tab, uncheck the Hidden tab, and click OK.

- When the confirmation screen appears, ensure the Apply changes to this folder, subfolder and files option is selected, and click OK.


After following the steps above, the file will reappear and be accessible like other files and folders. It will no longer be grayed out, and you can access its content too.
How to Use PowerShell to Hide Files and Folders on Windows 11
You can also use Windows PowerShell to hide files and folders on Windows 11. Hiding a file or folder only requires running a few commands.
If you prefer to use the newer Windows Terminal, you can use that instead by following the same commands below.
To Use Terminal Commands to Hide Files and Folders
- Press the Windows key or click the Start button.
- Search for PowerShell and select Run as Administrator from the right-hand column.

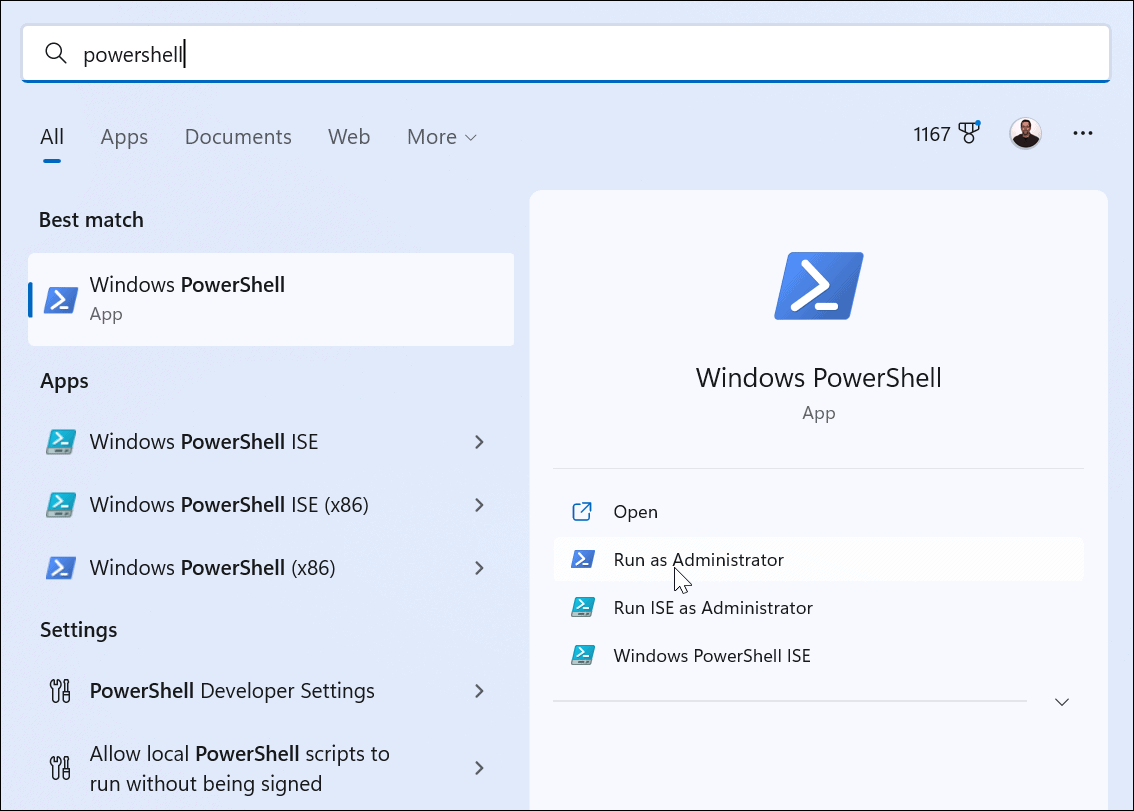
- When PowerShell launches, run the following commands in order and press Enter after each. Note that “path to folder” is the actual folder or file’s path on your system.
$FILE=Get-Item ”path to folder” -Force
$FILE.Attributes=”Hidden”


- The command above will hide the folder. However, if you want to hide the folder’s content, too, run the following command:
Get-ChildItem -path “path to folder” -Recurse -Force | foreach {$_.attributes = "Hidden"}

Note: If you cannot hide the folder via PowerShell because it errors out, ensure Controlled Folder Access in the Windows Security app is disabled. Also, remember that the terminal won’t pop up any verification messages. You’ll need to check the item to verify if it was hidden correctly in File Explorer.


Managing Files and Folder on Windows 11
Whether you want to hide files and folders on your Windows system from prying eyes on your PC via File Explorer or the terminal, following the steps above will accomplish the task.
Various ways exist to manage files and folders on Windows 11. For instance, the operating system automatically hides certain system files and directories, but if you need access to one of these files, you can simply reveal them by enabling the option to show hidden files and folders.
Leave a Reply
Leave a Reply


