How to Find the Wi-Fi Password in Windows 11

If you need to connect a new device to your network, you’ll need to find the Wi-Fi password in Windows 11.
After connecting your laptop to a Wi-Fi network, you probably forget the password. But what happens if you need to get the password to connect a new device or share the Wi-Fi password with a family member, friend, or colleague? Perhaps you get a new phone and want to add it to your home network. Luckily, there are a couple of ways to find the Wi-Fi password in Windows 11.
If you’re running Windows 11, use the following guide to find the Wi-Fi password. Here we cover how to do it through Settings or the command line for more experienced users.
Find the Wi-Fi Password in Windows 11 Through Settings
To locate the Wi-Fi password in Windows 11 via Settings, follow these steps:
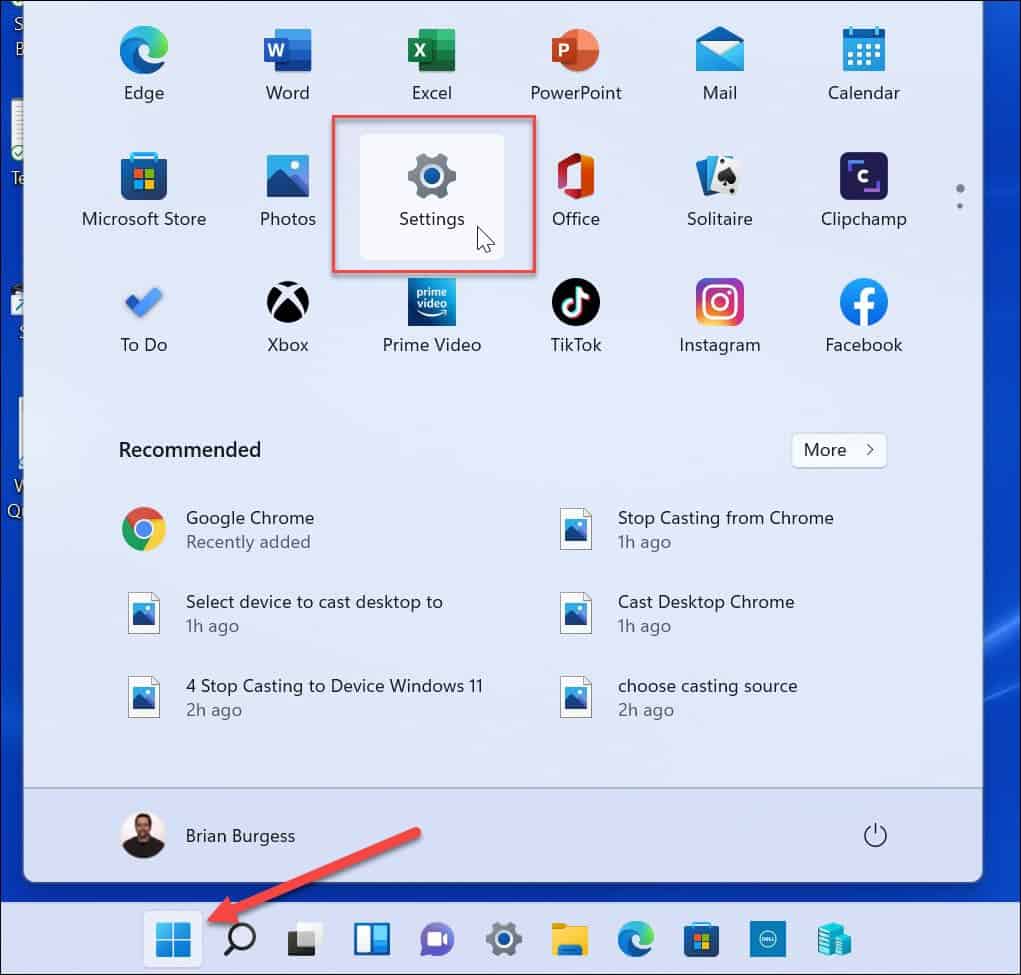
- Click the Start button and then click the Settings icon. Alternately, you can use the keyboard shortcut Windows key + I to open Settings directly.
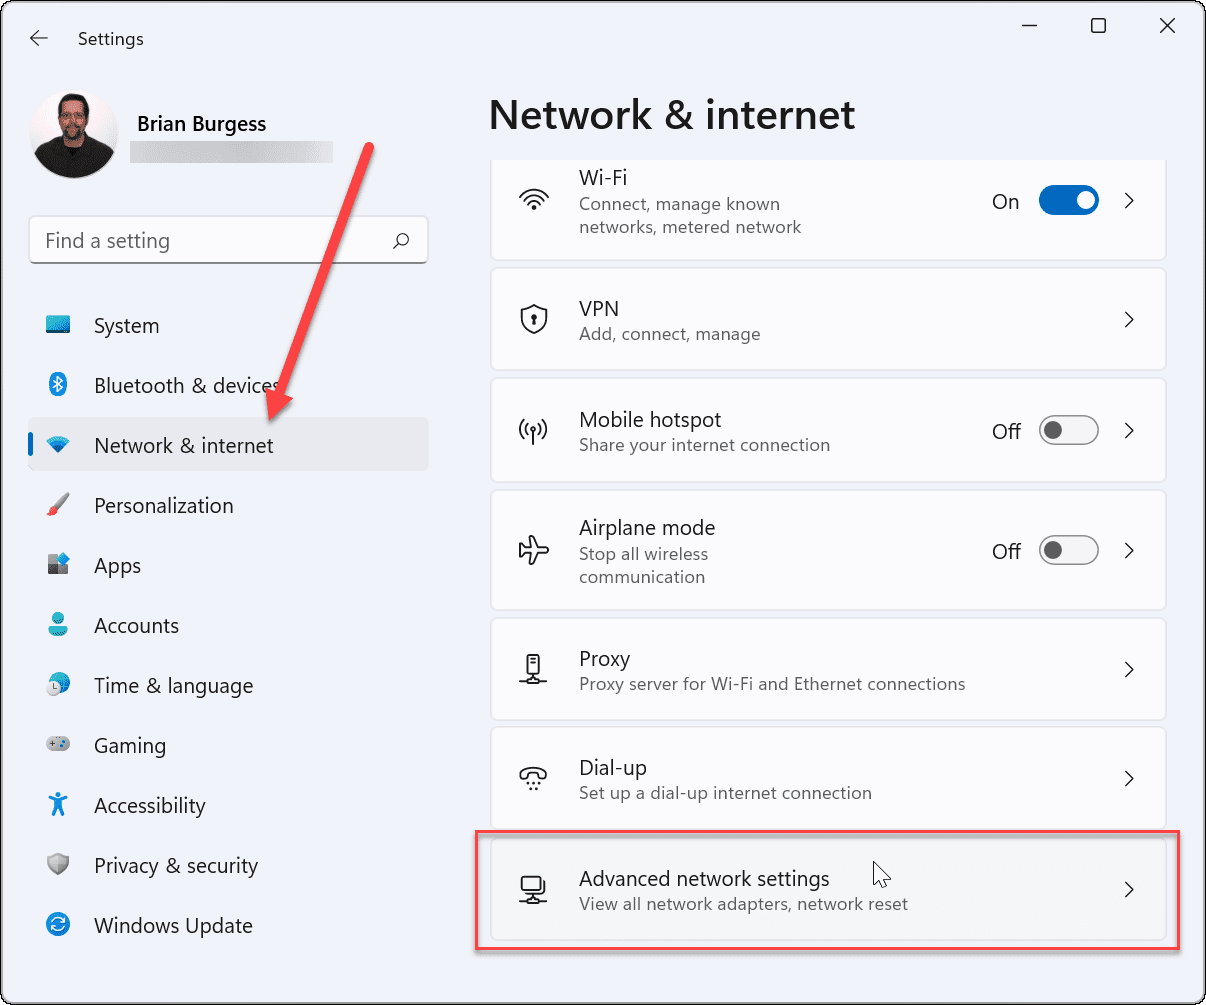
- Once Settings is open, click Network & internet from the right column and Advanced network settings on the right.
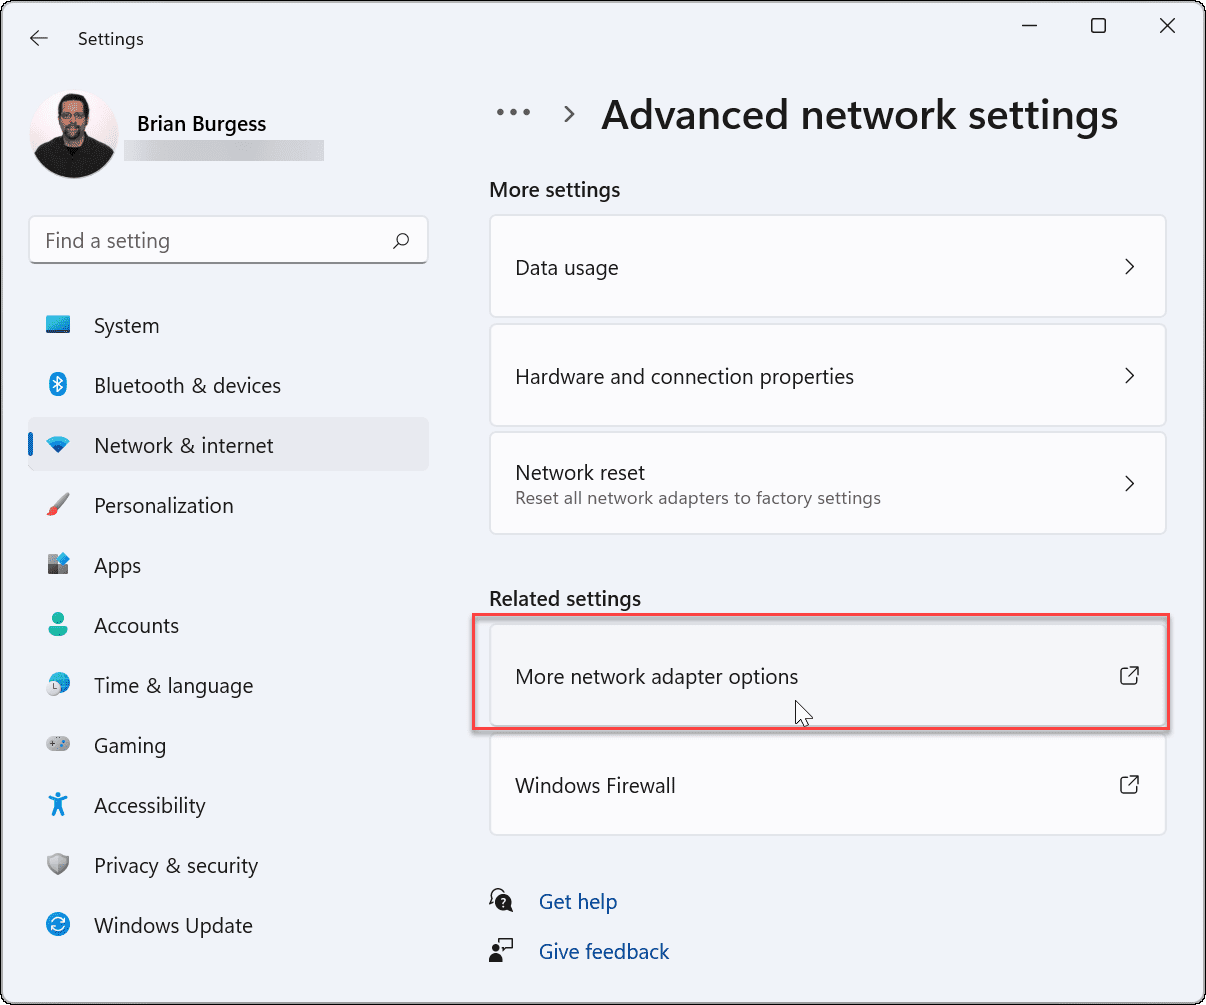
- Next, scroll down to the Related settings section and click on More network adapter options.
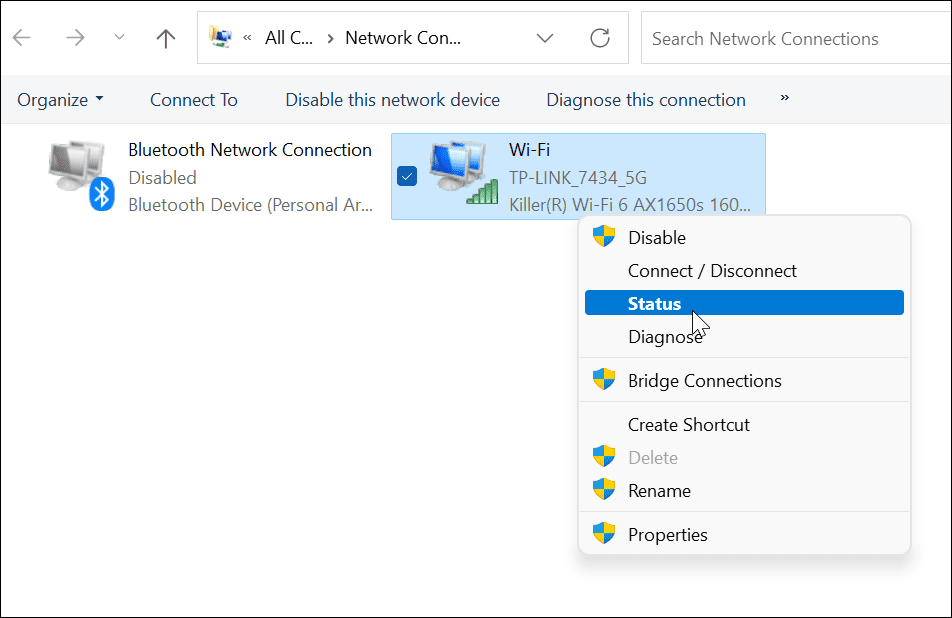
- Right-click on the wireless adapter you’re connected to and click Status from the menu that appears.
Displaying the Wi-Fi Password on Windows 11
- Now, on the Wi-Fi Status screen, click the Wireless Properties button.
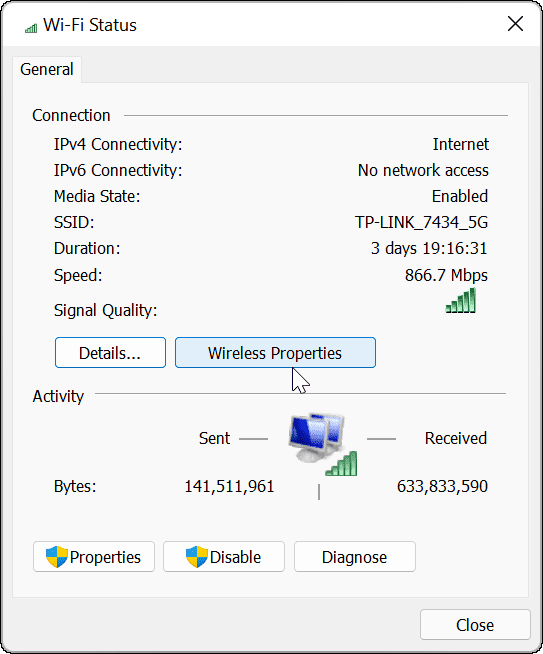
- On the following screen, click the Security tab at the top. Under the Network security key field, check the Show characters box.

Now you have the password for the Wi-Fi network you’re connected to on your device. Now you can use the password to connect other devices or store it in a safe location for use in the future.
Find Wi-Fi Password with PowerShell
If you’re an advanced user and would prefer to find a Wi-Fi password in Windows 11 with PowerShell, you can. Using the command line will show you active networks and saved Wi-Fi networks.
Use the following steps to find Wi-Fi password in Windows 11 with PowerShell:
- Right-click the Start button and click Windows Terminal (Admin) from the menu.

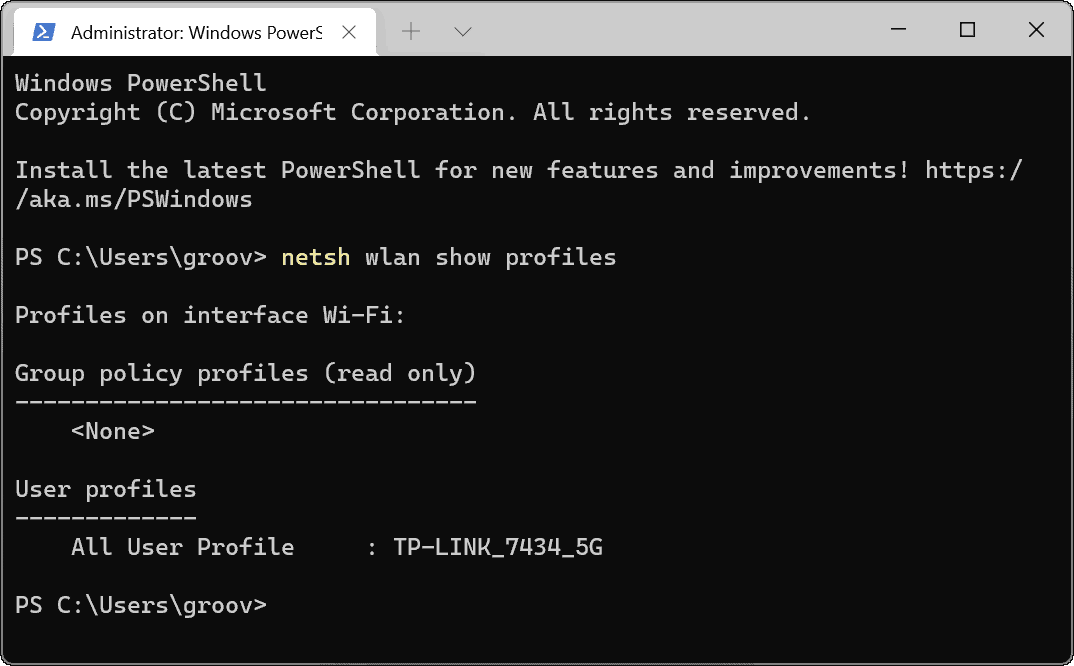
- Once PowerShell is open, run the following command to view a list of the Wi-Fi networks your PC has connected to.
netsh wlan show profiles
- Next, run the following command to determine the Wi-Fi password for a specific network. Note that “WiFi-Profile” is where you put in the network’s name you want the password for. The profile names were displayed using the first command.
netsh wlan show profile name="WiFi-Profile" key=clear
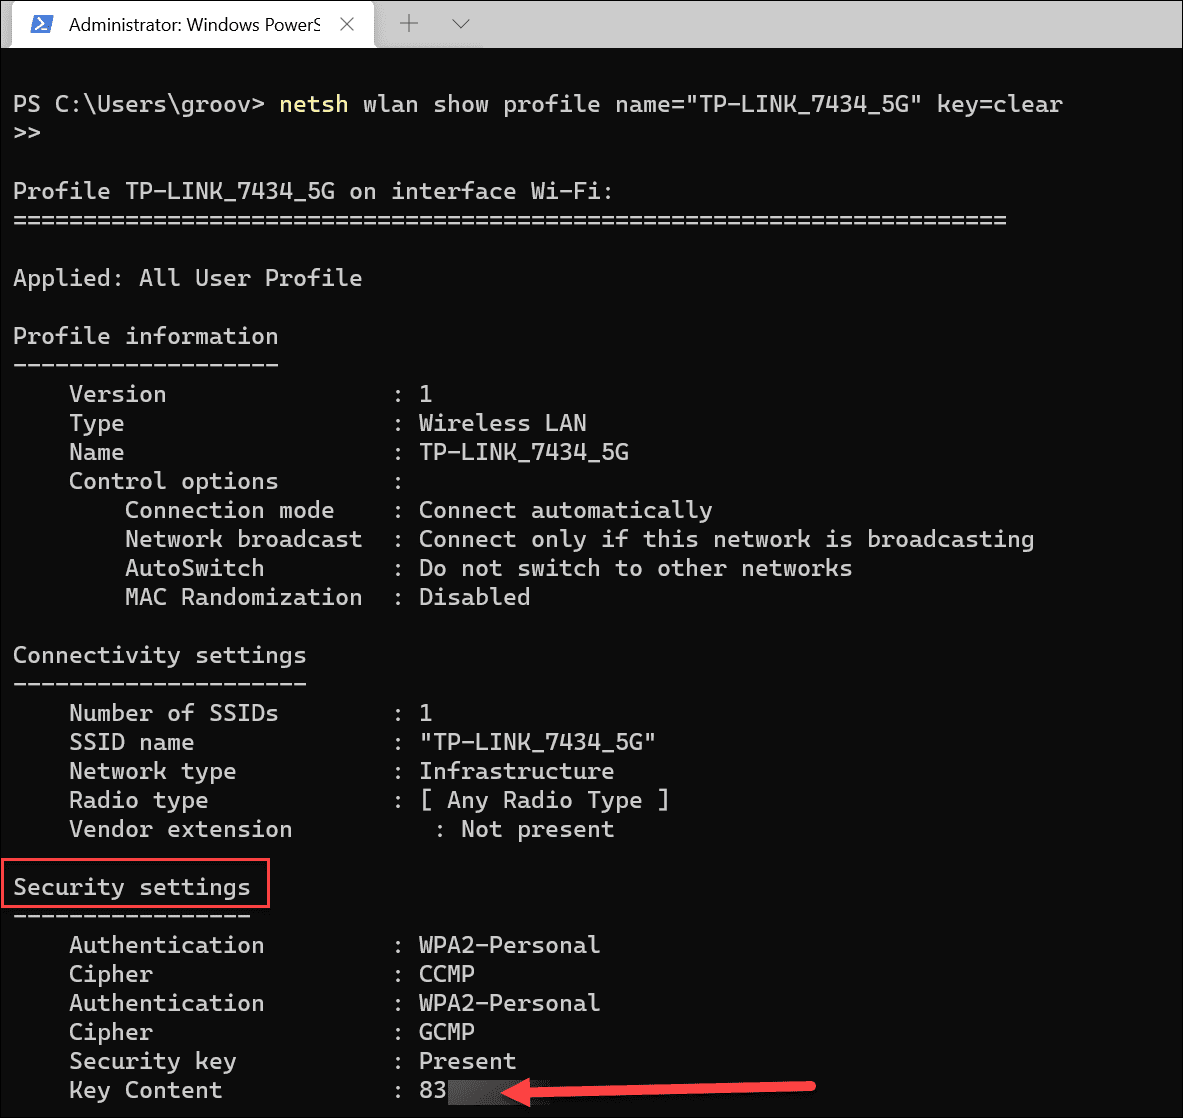
- After running the commands, you’ll find the Wi-Fi password listed under Security settings. The Key Content field will display the Wi-Fi password.
If you need to get the Wi-Fi password for the network you’re connected to or previous networks your PC was connected to, the steps above should work for you. Now you can share the password with other users on the Wi-Fi network, connect a different device, or keep them in a secure location.
You can also find Wi-Fi passwords on other devices. For example, you can find a Wi-Fi password on Android. Or, if you’re a Mac user, you can recover Wi-Fi passwords in macOS.


Robin Window
December 28, 2021 at 8:30 am
Isn’t it easier just to look on the back of your router for your wireless password or am i missing something here?