How to Draw Cell Borders in Microsoft Excel

If you want a cell border in your sheet that’s outside of the predefined options, you can easily draw borders in Excel any way you like.
Microsoft Excel provides a good selection of premade cell borders. You can pick from the top, bottom, left, right, thick, double, and more. But recently, Microsoft allowed Excel users to draw their own borders too.
With the Draw Border tools, you can choose a line style and color, apply a border grid to a block of cells, and easily erase individual lines.
If you want to create a cell border outside the predefined options, here’s how to draw borders in Microsoft Excel.
How to Draw a Cell Border in Excel
Start by selecting the cell where you want to add a border. Then, go to the Home tab, click the Borders drop-down list, and view the Draw Borders section at the bottom.
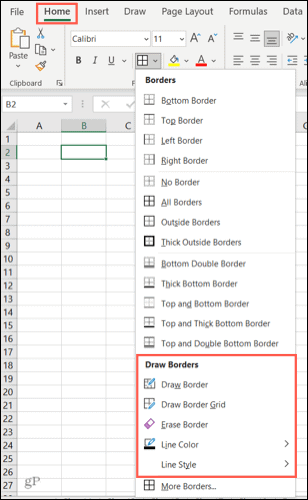

Before you use the drawing tool, you can select a style and color for your border if you like.
Choose a Line Color and Style
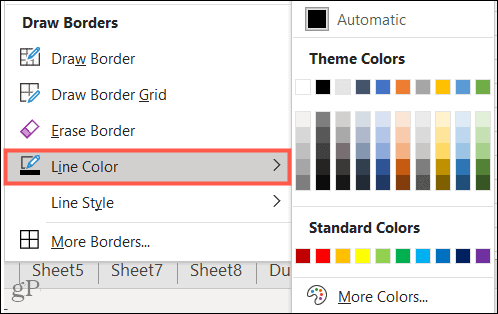
Hover over Line Color and then select a nice shade from the palette in the pop-out menu. Alternatively, you can choose More Colors to use a custom color.

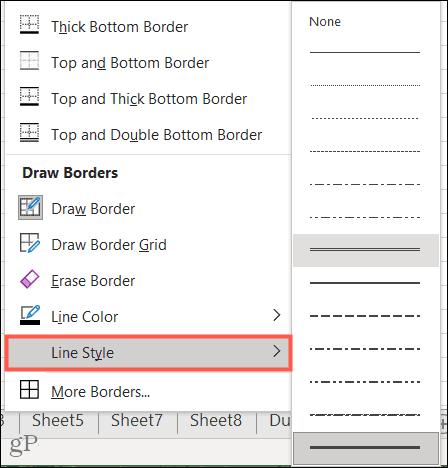
Go to Line Style to use a thin, thick, dotted, or dashed line from the pop-out menu.

Draw a Border or Border Grid
When you’re ready to create your border, select either Draw Border to apply one line at a time or Draw Border Grid to add all sides to a group of cells.
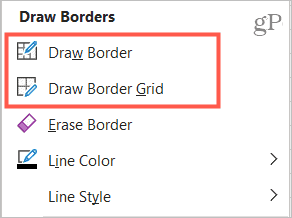

To use Draw Border, click each line to create a border for a single cell. This lets you add whichever parts of the border you want or mix and match colors and styles.


To use Draw Border Grid, click the first cell in the group and then drag through the rest. This places a full four-sided border on each cell in the range.


Erase a Line or Border
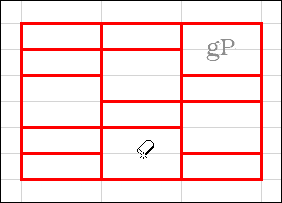
In the list of Draw Borders tools, you’ll also see an Erase Border option. You can use this to erase single lines for a cell by clicking each line you want to remove.


For a border grid, you can do the same by clicking to erase one line at a time or drag through sections of the grid to remove multiple lines.

Using Predefined Borders After Drawing
After you use customizations like line color and style to draw a border, you can certainly go back to using the premade borders at the top of the Borders drop-down menu any time.
However, one thing to keep in mind is that when you do this, the line color and style you selected will remain as the choices for those predefined borders. While this may be exactly what you want, it also may not be.
To revert to the default border styles, select Line Color and choose Automatic and then select Line Style and choose the thin line at the top of the list (below None).


Create Cell Borders Your Way in Excel
The Draw Border feature is a great addition to Excel. With it, you pop a line here or there or create a border grid with less work and fewer clicks than before. What do you think of this feature?
To do more with Microsoft Excel, take a look at how to merge and unmerge cells or how to find and replace formatting.
Leave a Reply
Leave a Reply


