How to Delete Your Siri History from iPhone, iPad, Mac and Apple TV
Apple keeps track of your Siri voice interactions. But the company has put new privacy policies in place and here we show you how to delete your Siri history.
One of the ways voice assistants such as Apple’s Siri and Amazon Alexa get better is by keeping historical data from users for testing purposes. With the demand for privacy growing, companies have been forced to make it easier for users to block this data from being maintained. Recently Apple has implemented a new policy that lets you delete Siri and Dictation data by device and also opt-out of sending this type of personal data to the company. Note that deleting data is a manual process, and you need to opt-out on a device-to-device basis. Here’s how to do it.
What Data Does Apple Collect and Why?
Before going further, it’s essential to understand that even when collected, your Siri content is not tied to your Apple ID. Instead, Apple uses it with a random identifier. When received, Apple doesn’t know which content is coming from which user(s).
According to Apple, this content is collected to “more accurately complete personalized tasks. In doing so, “it collects and stores certain information from your device. For instance, when Siri encounters an uncommon name, it may use names from your Contacts to make sure it recognizes the name correctly.”
It also notes:
Siri also relies on data from your interactions with it. This includes the audio of your request and a computer-generated transcription of it. Apple sometimes uses the audio recording of a request, as well as the transcript, in a machine learning process that “trains” Siri to improve.Before we suspended grading, our process involved reviewing a small sample of audio from Siri requests — less than 0.2 percent — and their computer-generated transcripts, to measure how well Siri was responding and to improve its reliability. For example, did the user intend to wake Siri? Did Siri hear the request accurately? And did Siri respond appropriately to the request?
With that being said, Apple has made it somewhat easier to either delete this content or op-out of sending the data moving forward using the new tools.
Requirements
The new privacy tools for users have arrived with new software updates for iPhone, iPad, Apple Watch, Apple TV, and Mac. The tools are located in iOS 13.2, iPadOS 13.2, watchOS 6.1, tvOS 13.2, and macOS Catalina 10.15.1, respectively. With each, you can no delete Siri history and elect to opt-out of sending Siri content to Apple.
Deleting Your Siri History
You can remove your Siri history across each type of Apple device mentioned above. In doing so, you’re eliminating all data up until the point of deletion. After your deletion, Siri history is again collected and stored on your devices and must again get removed manually from time to time going forward.
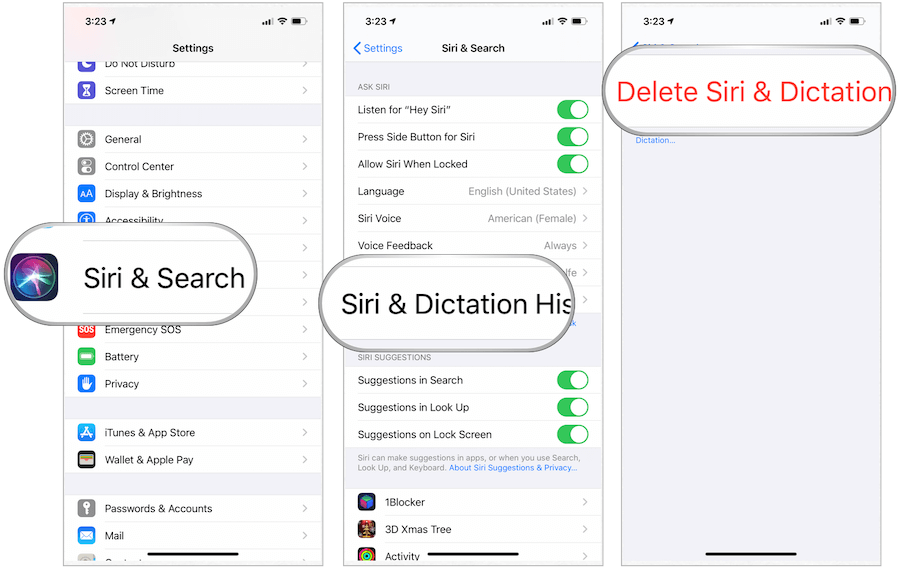
On iPhone, iPad, and iPod touch:
- Use the Settings app on your device.
- Choose Siri & Search.
- Tap Siri & Dictation History.
- Selection Delete Siri & Dictation History.
- Tap Delete Siri & Dictation History again.
- Select Dismiss on the Your Request Was Received message.
After following these steps, your Siri history also gets deleted on your iPhone-connected Apple Watch.
To perform the same steps on macOS:
- Go into System Preferences.
- Click Siri.
- Choose Delete Siri & Dictation History.
- Confirm the deletion.

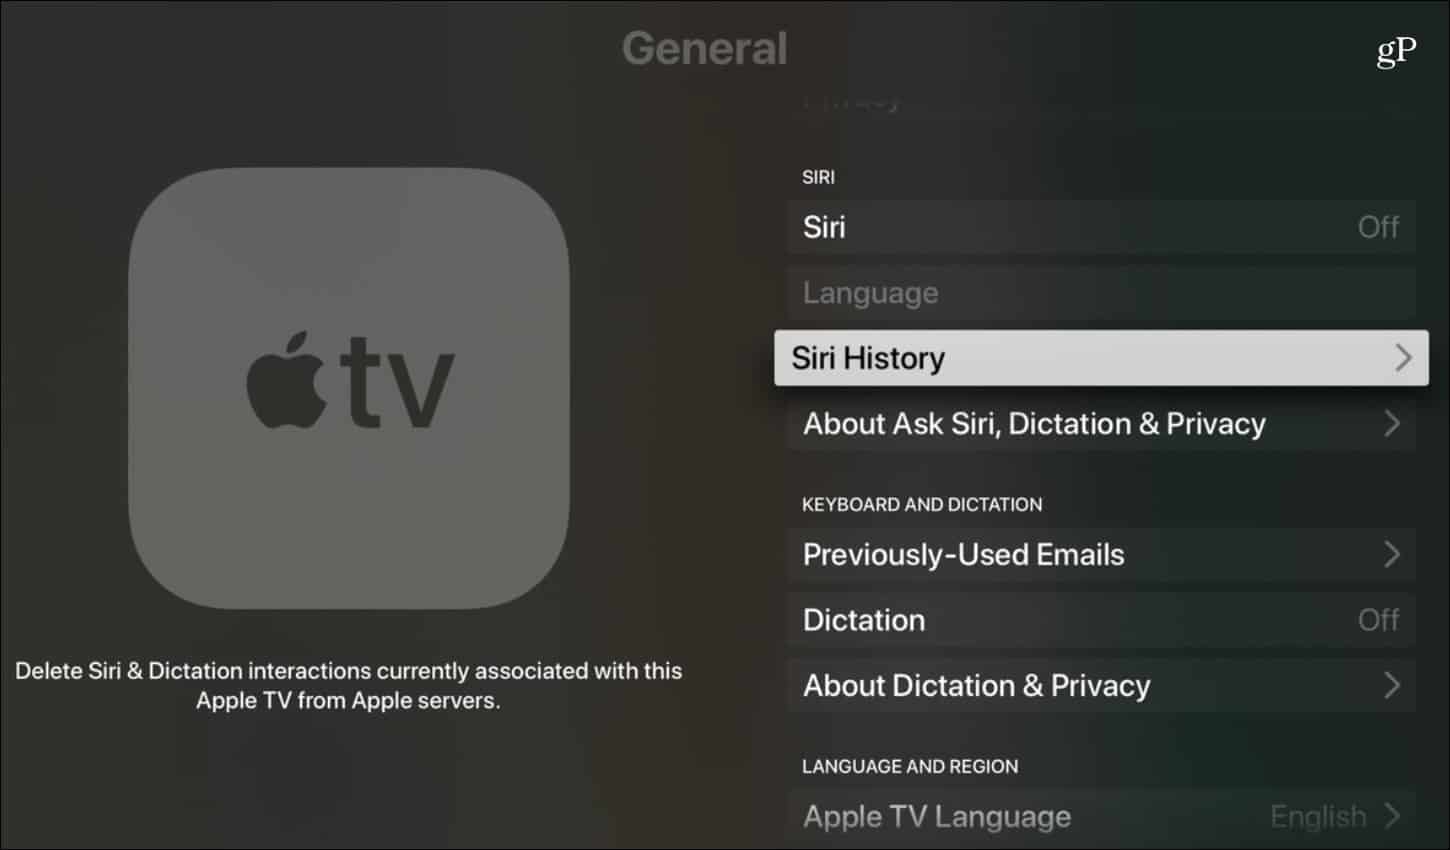
Finally, to delete Siri & Dictation history on Apple TV:
- Click on the Settings app on your Apple TV Home Page.
- Choose General.
- Click Siri History.
- Select Delete.
- Confirm the deletion.
Opting-Out of Siri & Dictation Data
On a device basis, you can also opt-out of letting Apple use your Siri & Dictation data.
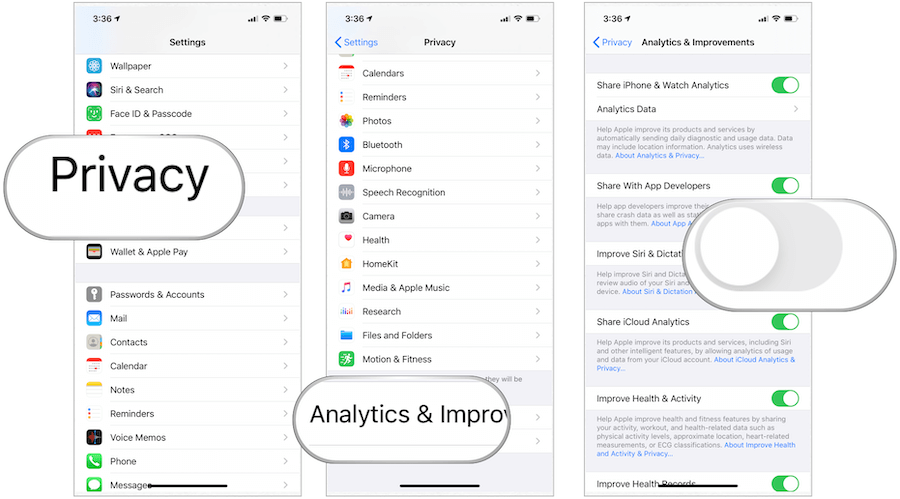
On iPhone, iPad, and iPod touch:
- Choose Privacy in the Settings app.
- Select Analytics & Improvements.
- Toggle off Improve & Dictation.
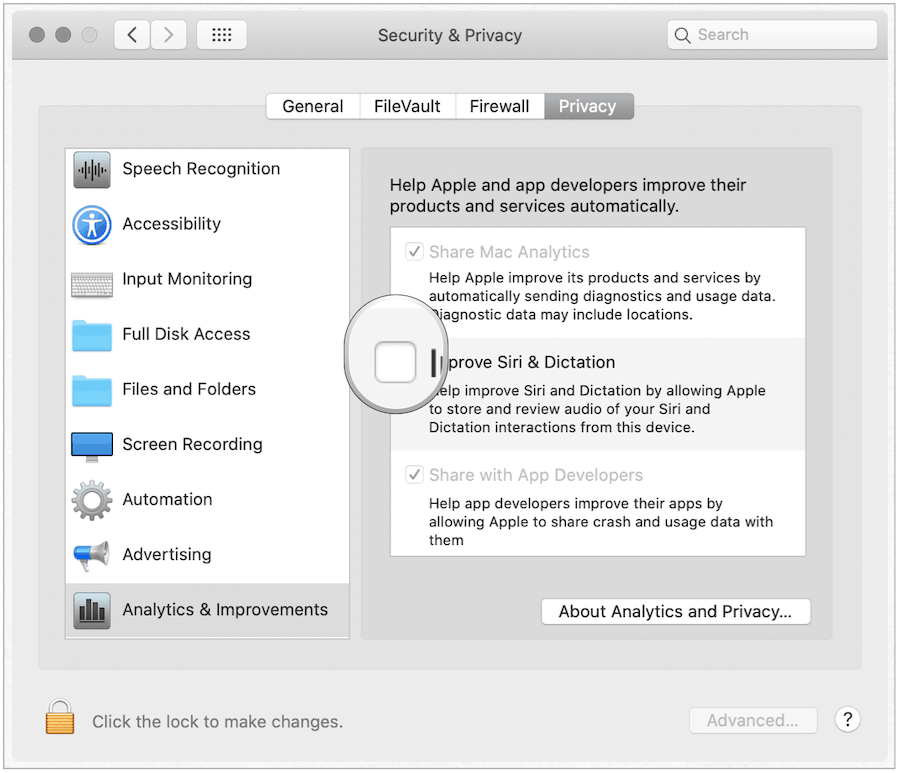
On Mac, you’ll follow similar steps to opt-out:
- In System Preferences, choose Security & Privacy.
- Choose the Privacy tab.
- On the left side, select Analytics & Improvements.
- Uncheck Improve Siri & Dictation.
And finally on Apple TV:
- Choose Settings from the main Apple TV screen.
- Select General.
- Pick Privacy.
- Click Improve Siri & Dictation.
- On the next page, select Improve Siri & Dictation. In doing so, Improve Sir & Dictation will switch from On to Off.

As a long-term Siri user, I expect the voice assistant to get better each year. If this means it is possibly collecting my personal information without actually tying it to my Apple ID, so be it. Because of this, I have decided not to opt-out of sending Apple my Siri and Dictation data. However, the choice is yours. If you don’t want Apple to grab your data or you want to delete your content, now you can by using the steps above.
And for more on deleting your voice data from other digital assistants check out our article on how to delete your voice recordings from Alexa, Siri, Cortana, and Google Assistant.


