How to Connect and Set Up Your New Apple AirTag

If you just received a brand new AirTag, it’s time to connect it to your Apple ID. Here’s how to set up an AirTag and name it.
If you’ve opted to purchase an AirTag or two to keep better track of an item you misplace often, you’ll need to connect that AirTag and set it up. The AirTag will be associated with your Apple ID, and you can name it whatever you like.
Here, we’ll walk you through making sure your mobile device is ready, connecting the AirTag to your account, and giving it a name.
Device Requirements for Using AirTags
- You can connect an AirTag using your iPhone, iPad, or iPod touch running iOS 14.5 or iPadOS 14.5 or later.
- You should have a good Wi-Fi or cell connection.
- You’ll need Find My, Bluetooth, and Location Services turned on.
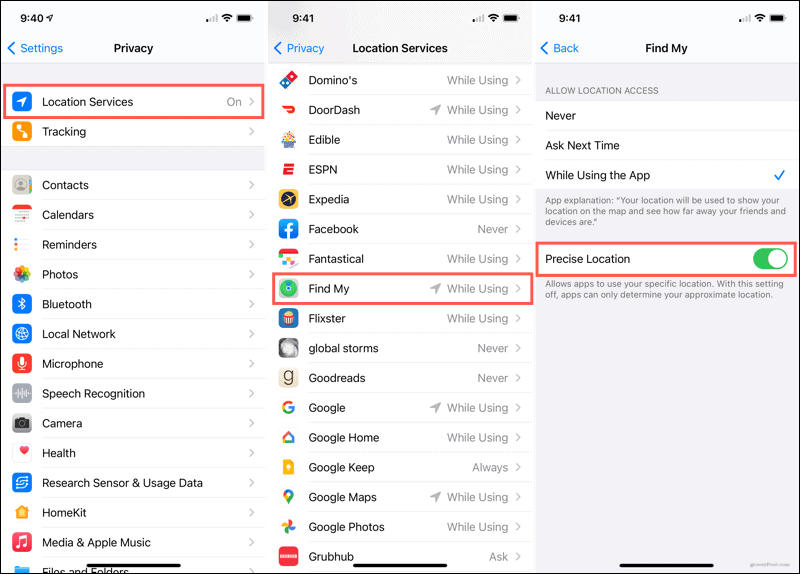
- It’s recommended that you use Precision Finding for your Location Services. This will provide you with the most accurate location when you use Find My to locate your item. You can enable this in Settings > Privacy > Location Services > Find My.
How to Connect and Set Up an AirTag
If you just received your AirTag from Apple, remove the wrapper and pull out the tab to activate the battery. Your AirTag will play a sound.
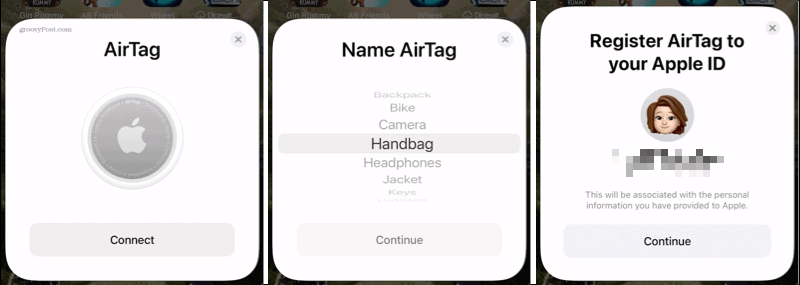
- Hold your device near the AirTag.
- When you see the AirTag screen display on your device, tap Connect.
- Choose a name for your AirTag using the scroll wheel and tap Continue. You’ll be able to change this name later if you like.
- Confirm your Apple ID that the AirTag will be associated with and tap Continue.
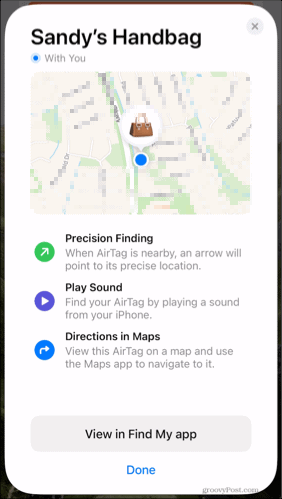
After a few seconds, the setup will be complete. You can then tap to View in the Find My App or tap Done.
How to Rename Your AirTag
You choose a name when you first connect and set up your AirTag, but you can change it later. You can pick a different one from the list of common items or use a custom name and even include an emoji if you like.
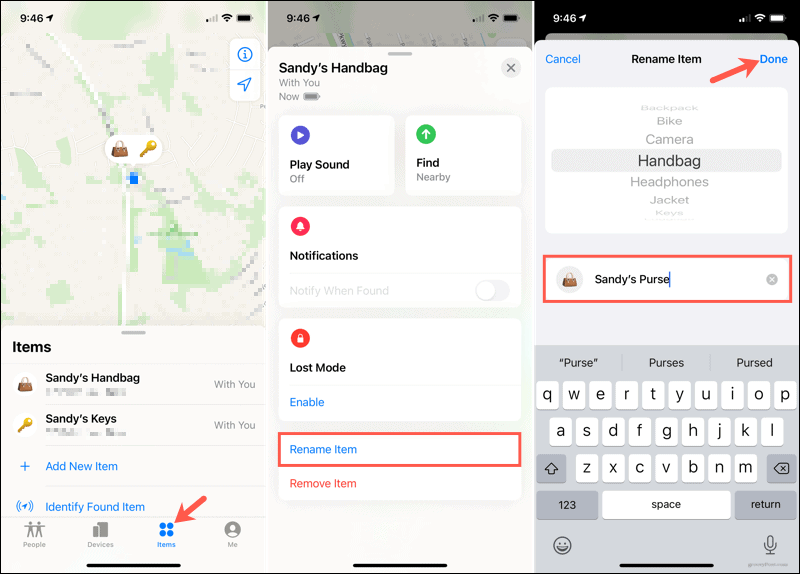
- Open the Find My app on your device.
- Select the Items tab at the bottom and choose your AirTag.
- Swipe up to display the details for your AirTag and tap Rename Item.
- Use the scroll wheel to pick a new item name or tap inside the name box to type a name.
- Tap Done.
Simple Setup, Handy Device
Connecting and setting up your AirTag is an easy task, and once you do, you’ll be able to find your keys, handbag, or whatever it is that you’ve misplaced.
Be sure to check back with groovyPost for more tips and tricks for using AirTags!


Janis Thompson
February 8, 2023 at 5:13 pm
Wow! Saw this demonstrated on CBCNN after xmas and was sold. Off to Mexico we go!❤️