How to Clip on Twitch

If you want to save a portion of a Twitch stream or recording to share online or with friends, you can use clips. Here’s how to make them.
Are you a big Twitch fan? You’ll already know that each stream is unique, and often filled with wondrous moments that shouldn’t be forgotten. You don’t need to forget those moments if you’re using Twitch clips.
Twitch viewers can save small sections of streams they’re watching as clips that last less than a minute long. Twitch viewers (and streamers) can share these clips, sharing the moment on social media and elsewhere.
If you don’t know how to clip on Twitch already, get started by following our guide below.
How to Clip on Twitch in a Web Browser
You can create Twitch clips in your web browser. Not every Twitch streamer allows you to do this, so if you can’t create a clip, that could be why. Some Twitch channels require you to subscribe to enable Twitch clipping.
To clip on Twitch using a PC or Mac:
- Open the Twitch website and sign in.
- Load a live or recorded Twitch stream.
- On recorded Twitch streams, move to the point in the video you wish to record.
- Hover over the video player in the centre.
- Click the Clip button (bottom right) or press Alt + X (Windows) or Option + X (Mac).

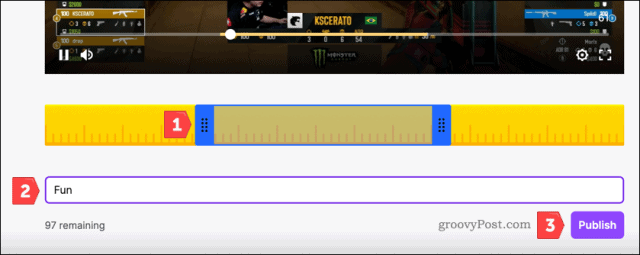
- Move the blue controls on the slider to select between 5 and 60 seconds to record (step 1).
- Type a title for your clip in the box (2).
- Click Publish to save the clip (3).

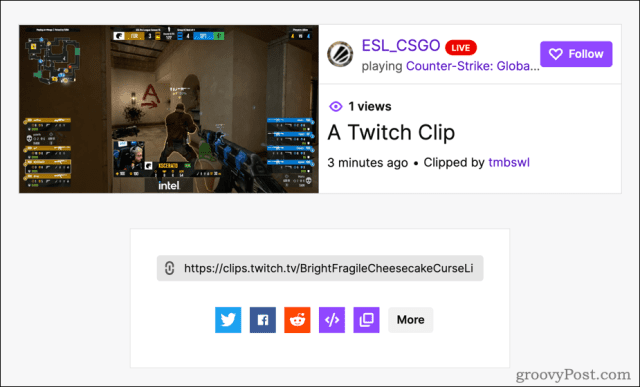
- To share the clip, copy the clip URL or click one of the social media icons.

How to Create Twitch Clips on Android, iPhone or iPad
If you prefer to watch Twitch streams on a mobile device, you can create a new Twitch clip using the Twitch app.
You can watch Twitch on Android, iPhone, and iPad. You will need to install the app first and sign in to clip on Twitch. The same limitations apply, so if you can’t create a Twitch clip, double-check that the Twitch streamer allows you to do it.
To create a Twitch clip on Android, iPhone, or iPad:
- Open the Twitch app on your device.
- Tap a live Twitch stream or recorded stream video.
- On recorded streams, move the playback to the section of the video you wish to clip.
- Tap the video player once to view the player options.
- Tap the clip button (top right).

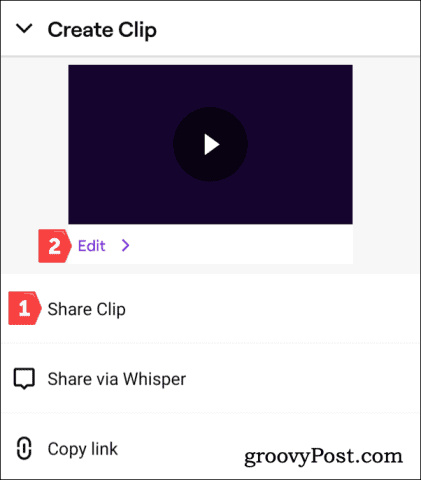
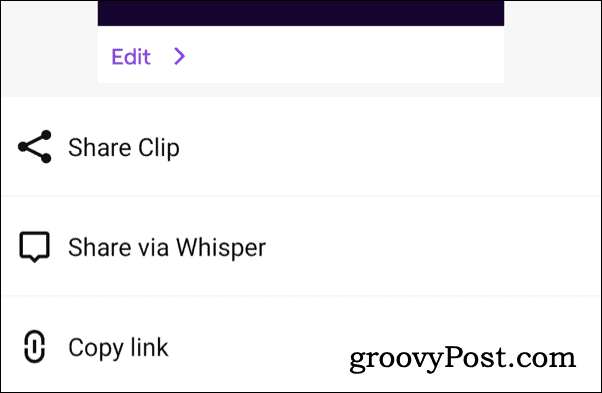
- To share 30 seconds from the stream, tap Share clip or Copy link (1).
- To trim the clip, tap Edit (2).

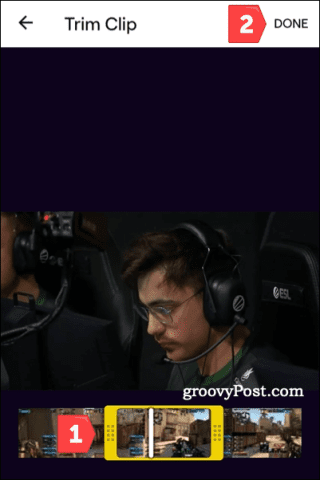
- Tap Trim Clip.
- Move the video slider to choose a new clip length (1) and then tap Done to save it (2).

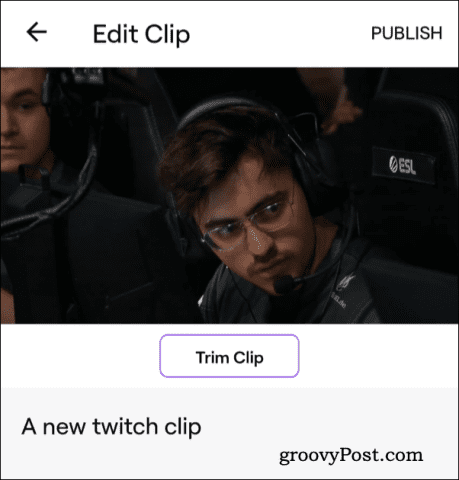
- Type a name for your clip and tap Publish.

- If you’ve edited the clip, tap Share clip or Copy link.

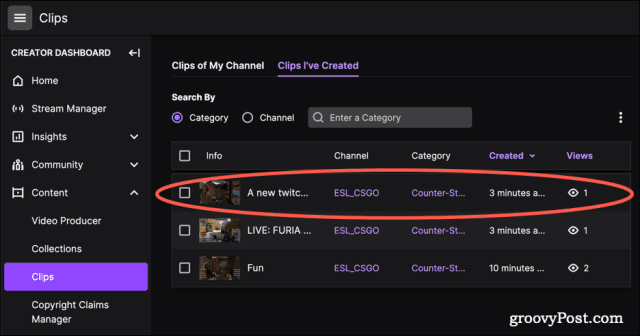
How to Manage Saved Twitch Clips
When you create a clip, Twitch makes it publicly available for others to view it. You’ll see the clip in the Clips area on a Twitch channel’s page.
If you want to manage your Twitch clips, you can use the Clips Manager on the Twitch website to do it. You can share a clip, download a clip file to your PC or Mac, rename it, or delete it from the Clips Manager.
To manage Twitch clips:
- Open the Twitch Creator Dashboard in your browser and sign in.
- Click Content > Clips.
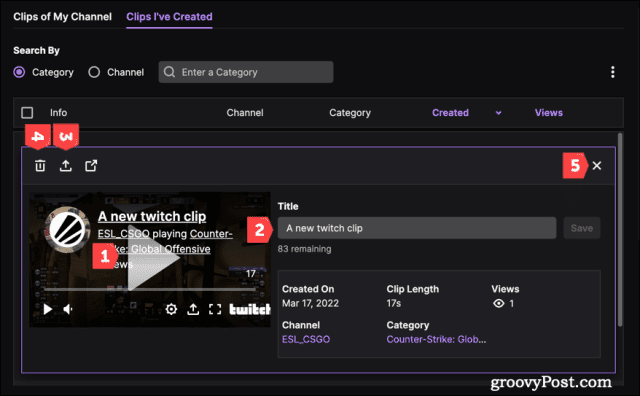
- Click on a saved clip in the Clips I’ve created tab.

- Use the options to play the Twitch clip (step 1), rename it (2), share it (3), or delete it (4).
- Click Close (5) to exit.

Twitch Streaming Explained
You should now be able to quickly clip on Twitch, letting you save small sections of streams for enjoyment later.
If you’re looking to stream on Twitch yourself, you can use OBS for free to get started.