How to Clear, Delete or Disable Windows 10 File Explorer Search History

If you’re on a shared computer or want a fresh start while searching in File Explorer you can clear search history and disable it completely.
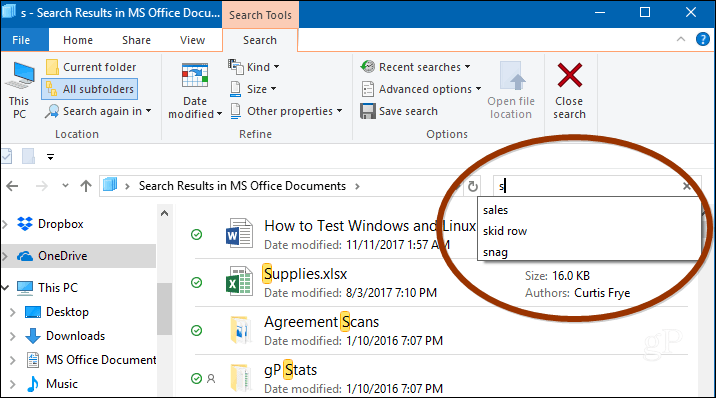
Windows will keep a history of the items you have searched for over time. So, each time you type in a search query, you will see a list of recently searched items. You might want to clear this from time to time, especially if you’re on a shared PC or want a fresh start. We already showed you how to turn off autocomplete in File Explorer. And for even more control over file navigation, here is a look at how to clear recent File Explorer search history or disable it altogether.
Clear File Explorer Search History
You can clear your recent search history by selecting the Search tab in File Explorer and going to Recent Searches > Clear search History.
![]()
Disable File Explorer Search History
If you don’t want to clear your history all the time, you can completely disable it from keeping track of your searches. On Windows 10 Pro, you can turn off search history in Group Policy, but for Windows 10 Home, you need to do a bit of tweaking in the Registry.
On Windows 10 Pro
If you’re running Windows 10 Professional, you can turn it off via Group Policy. Hit the keyboard combo Windows Key + R and type: gpedit.msc in the Run dialog and hit Enter or click OK.

Then navigate to the following path:
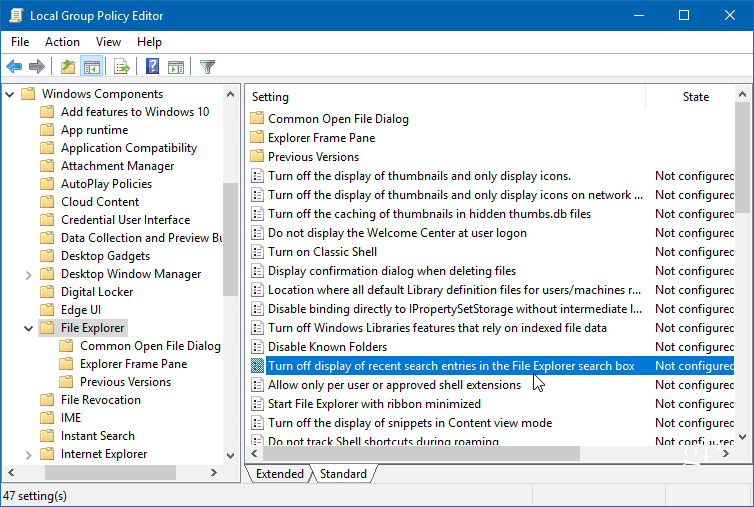
User Configuration\Administrative Templates\Windows Components\File Explorer
Double-click on the “Turn off display of recent search entries in the File Explorer search box” policy in the right pane and set it to Enabled, click OK, and closeout of Group Policy Editor.
In Windows 10 Home
Hit Windows Key + R and type: regedit in the Run line and hit Enter or click OK.

Then head to the following location:
HKEY_CURRENT_USER\Software\Policies\Microsoft\Windows\Explorer
Right-click in the right pane and create a new DWORD (32-bit) Value and name it DisableSearchBoxSuggestions and give it a value of 1.
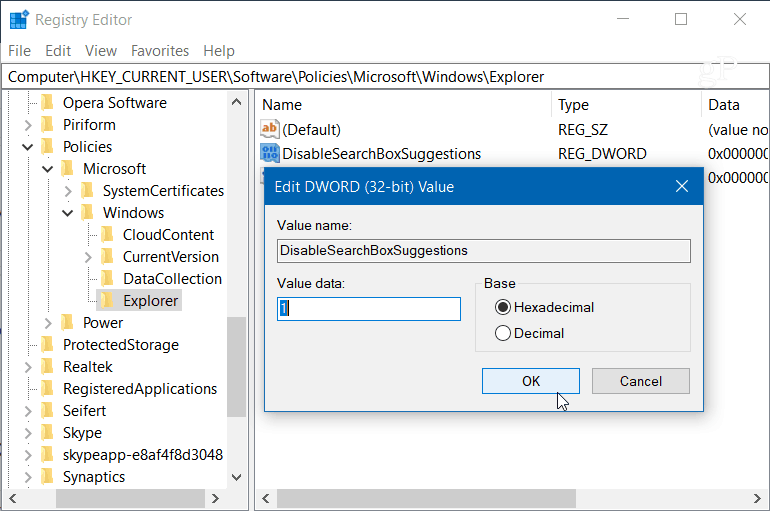
After you’re done, close out of the Registry, and you will need to log off or restart your system before you see the change. You will no longer see the history of past searches in File Explorer. If you want to enable it later, go back and change the value of DisableSearchBoxSuggestions to 0.
What are some of the ways you tweak File Explorer in Windows 10? Leave a comment below or join our Windows 10 Forums for more discussion and troubleshooting help.


Guilain
February 6, 2021 at 12:29 pm
this is amazing. thank you so much!
Rob
October 25, 2021 at 2:23 pm
“Explorer” does not appear after Microsoft/Windows. i only have CloudContent, CurrentVersion and DataCollection. I’m running Win 10 Home 21H1 and I simply cannot turn off or clear autofill suggestions in search. Quite embaressing!
Robert Childers
February 14, 2023 at 5:46 am
I did this some time ago and it worked. The registry changes are still there but this evil pile of microcrap garbage just started displaying previous searches again anyway.